Choosing the Right Concrete for Your Project
When I first ventured into the world of DIY decorative concrete floors, one of the most important lessons I learned was that not all concrete is created equal. Choosing the right type of concrete for your project is crucial to achieving the desired look and durability. Here’s what I discovered about selecting the best concrete for my decorative flooring projects:
- Understanding Concrete Basics At its core, concrete is a mixture of cement, water, and aggregates like sand and gravel. The proportions of these ingredients can vary, resulting in different types of concrete with varying strengths and characteristics. For decorative concrete floors, it’s essential to choose a mix that balances strength with workability, ensuring a smooth application and long-lasting results.
- Deciding on the Concrete Mix The first step in choosing the right concrete is deciding on the mix. For most decorative concrete projects, a standard mix with a compressive strength of around 3000-4000 psi is sufficient. I opted for a mix that included a fine aggregate for a smoother finish, which is easier to work with and better for achieving detailed decorative effects. Additionally, you can choose between ready-mix concrete and mixing your own, depending on the scale of your project and your comfort level.
- Considering Additives and Admixtures Additives and admixtures can significantly enhance the performance and appearance of your concrete. For my project, I used a plasticizer to improve the workability of the mix, making it easier to apply and shape. Other common additives include retarders, which slow down the curing process, and accelerators, which speed it up. Pigments can be added to color the concrete, offering a range of design possibilities. Understanding these options allows you to customize your concrete mix to suit your specific needs.
- Choosing the Right Concrete for Outdoor vs. Indoor Projects The location of your project also influences your choice of concrete. For outdoor decorative concrete floors, it’s important to select a mix that can withstand exposure to the elements. I chose a mix with air-entraining agents to improve freeze-thaw resistance, which is essential for outdoor applications in colder climates. For indoor projects, you can focus more on aesthetics and ease of maintenance, choosing a mix that allows for a smooth, polished finish.
- Pre-Mixed vs. Site-Mixed Concrete Another decision to make is whether to use pre-mixed or site-mixed concrete. Pre-mixed concrete offers consistency and convenience, as it’s prepared in controlled conditions and delivered ready to pour. For my project, I opted for site-mixed concrete, allowing me to adjust the mix on-site and incorporate custom additives. However, this requires more skill and precision to ensure a consistent mix throughout the project.
- Consulting with Professionals While DIY projects can be incredibly rewarding, consulting with professionals can provide valuable insights and help you avoid common pitfalls. I reached out to a local concrete supplier for advice on the best mix for my decorative flooring project. Their expertise helped me choose the right concrete and understand the nuances of working with it. Don’t hesitate to seek professional guidance, especially if you’re new to decorative concrete work.

Surface Preparation Techniques
Preparing the surface properly is one of the most critical steps in achieving a beautiful and durable decorative concrete floor. Through my DIY journey, I learned that taking the time to prep the surface correctly can make all the difference. Here are the techniques I found most effective:
Thorough Cleaning The first step in surface preparation is thorough cleaning. Any dirt, grease, or debris on the existing floor can prevent the new concrete from adhering properly. I used a heavy-duty degreaser and a stiff-bristle brush to scrub the floor clean. After scrubbing, I rinsed the area with a pressure washer to remove any remaining residue. Ensuring the surface is clean and free of contaminants is crucial for a successful concrete application.
Repairing Cracks and Damage Before applying decorative concrete, it’s important to repair any cracks or damage in the existing surface. Small cracks can be filled with a concrete patching compound, which I applied with a trowel and smoothed out. For larger cracks or damaged areas, I used a more robust repair product designed for structural repairs. Allowing these repairs to fully cure before proceeding ensures a solid foundation for your decorative concrete.
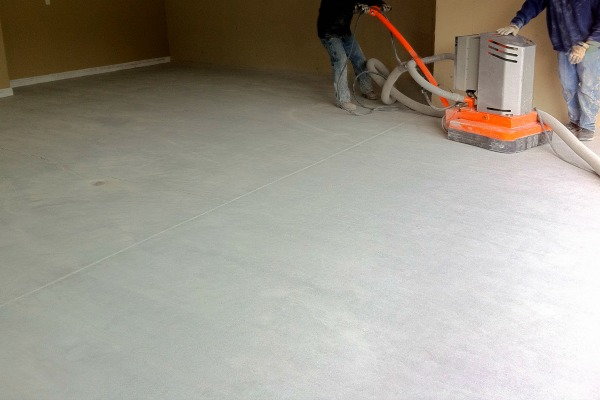
Profiling the Surface Profiling the surface, or creating a rough texture, helps the new concrete adhere better. This process, also known as mechanical abrasion, can be done using a concrete grinder or shot blaster. I rented a concrete grinder and used it to roughen up the surface, creating a texture that the new concrete could grip onto. This step is especially important if you’re applying a thin overlay or microtopping, as it ensures a strong bond between the old and new concrete.
Applying a Bonding Agent To further enhance adhesion, applying a bonding agent can be highly effective. I used a liquid bonding agent that I brushed onto the prepared surface. This product helps create a chemical bond between the existing floor and the new decorative concrete. Following the manufacturer’s instructions for drying times and application methods is crucial to ensure the bonding agent works effectively.
Leveling the Surface Ensuring the surface is level is another important preparation step. Any high spots or uneven areas can affect the final appearance of your decorative floor. I used a self-leveling compound to address minor unevenness, spreading it across the floor with a trowel. For larger areas, a floor leveler tool can help achieve a consistent, level surface. Taking the time to level the surface ensures a smooth and professional-looking finish.
Testing for Moisture Moisture can be a hidden enemy when working with concrete. Excess moisture in the existing floor can lead to issues like bubbling or poor adhesion. I conducted a moisture test using a plastic sheet taped to the floor. After 24 hours, I checked for condensation under the plastic. If moisture was present, I took steps to address it, such as using a moisture barrier or allowing the floor to dry completely. Ensuring the surface is dry is critical for a successful decorative concrete application.
Popular Decorative Techniques and Finishes
Exploring the various decorative techniques and finishes for concrete floors opened up a world of creative possibilities for me. The ability to transform plain concrete into a stunning and unique surface is one of the main attractions of DIY decorative concrete projects. Here are some of the most popular techniques and finishes I discovered and experimented with:
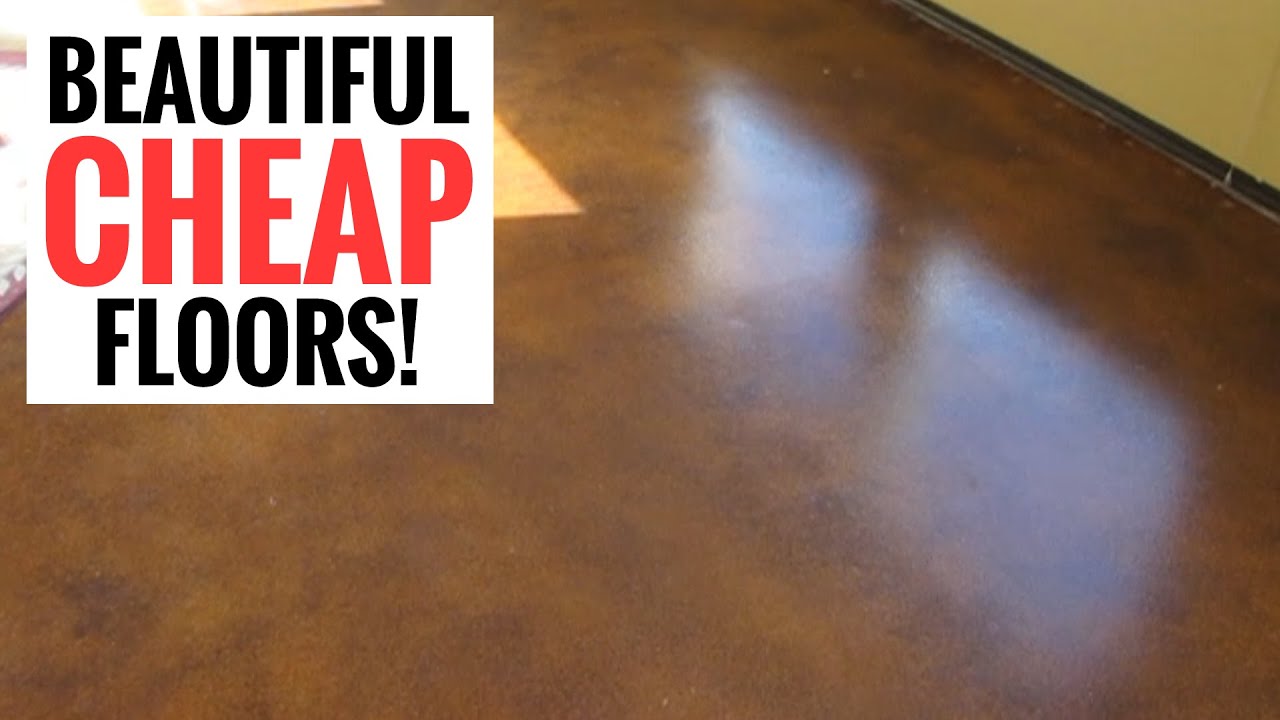
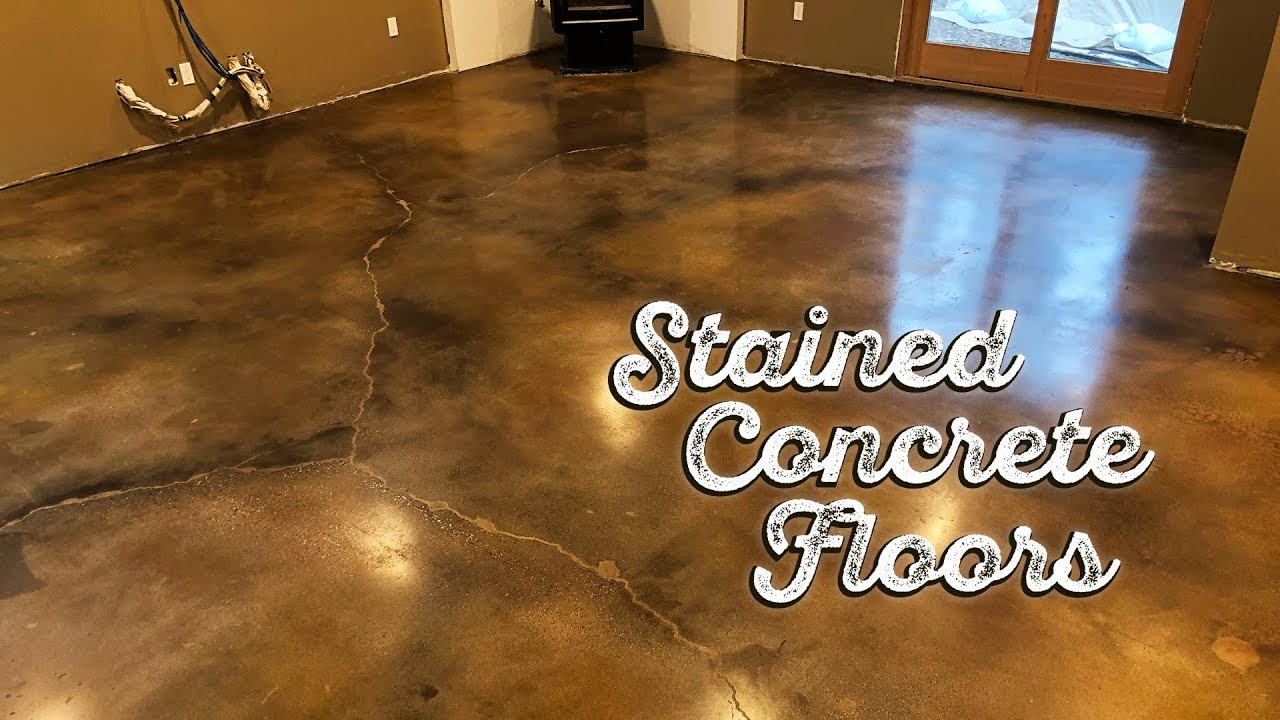
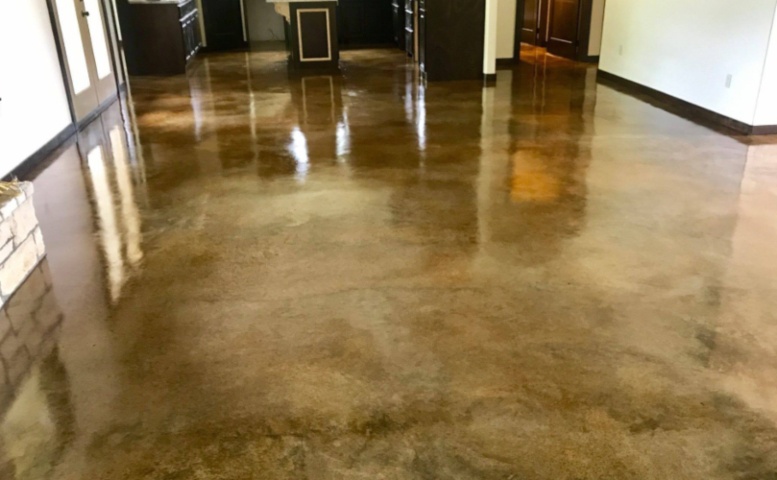
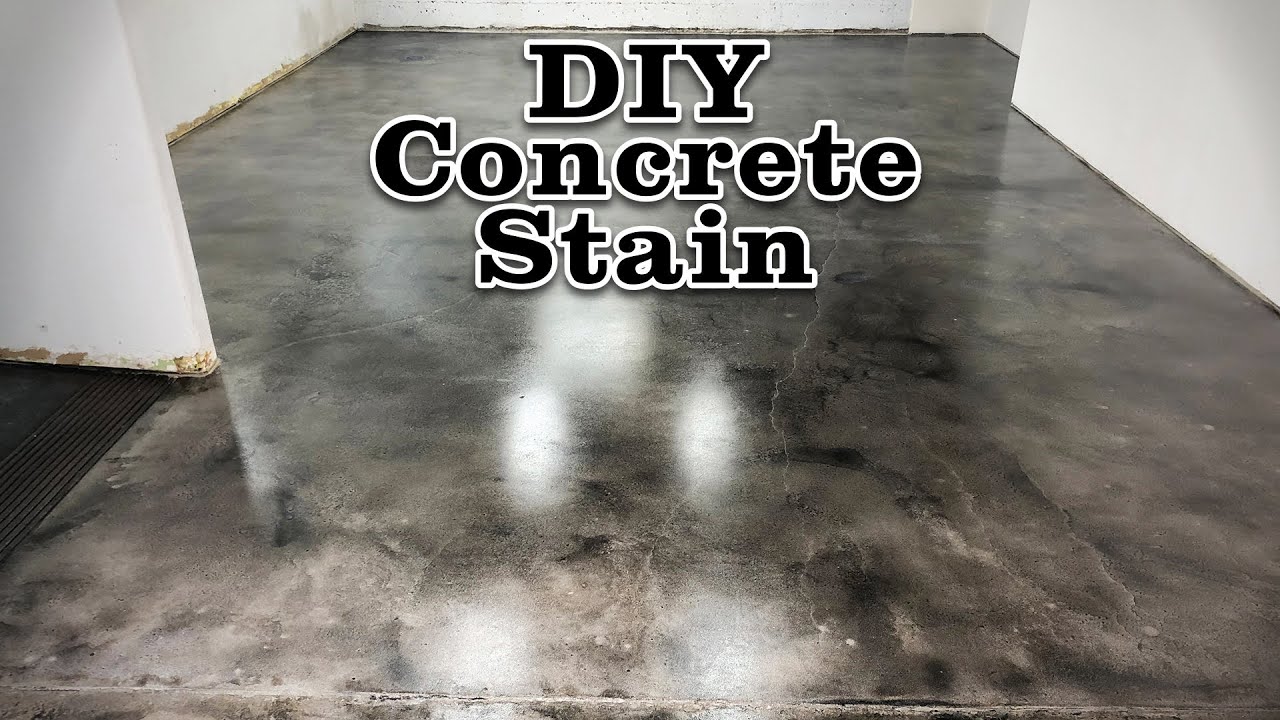
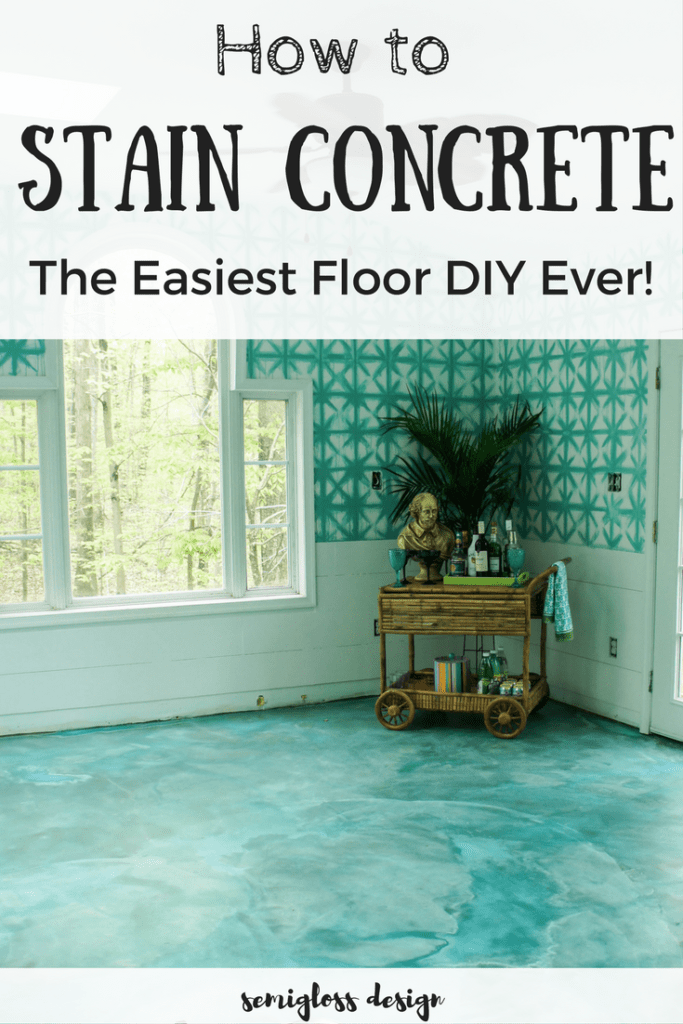
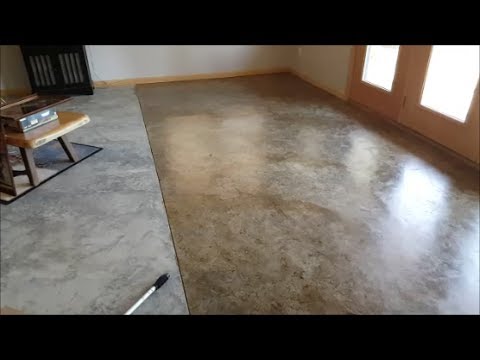
Stained Concrete Staining concrete is a popular method for adding color and depth to your floor. There are two main types of stains: acid-based and water-based. Acid-based stains react with the minerals in the concrete to create natural, variegated colors, giving a more organic look. I used a water-based stain for my project, which offered a wider range of colors and a more consistent finish. Applying the stain with a sprayer or roller and then sealing it resulted in a beautiful, colorful floor with a rich finish.
Stamped Concrete Stamped concrete is another fantastic technique that mimics the appearance of other materials, such as stone, brick, or wood. This process involves pressing a pattern or texture into the concrete while it’s still wet. I rented stamping mats and used them to create a cobblestone effect on my patio. The result was a realistic, textured surface that looked like genuine cobblestones. Stamping concrete can add a lot of character and visual interest to your floors.
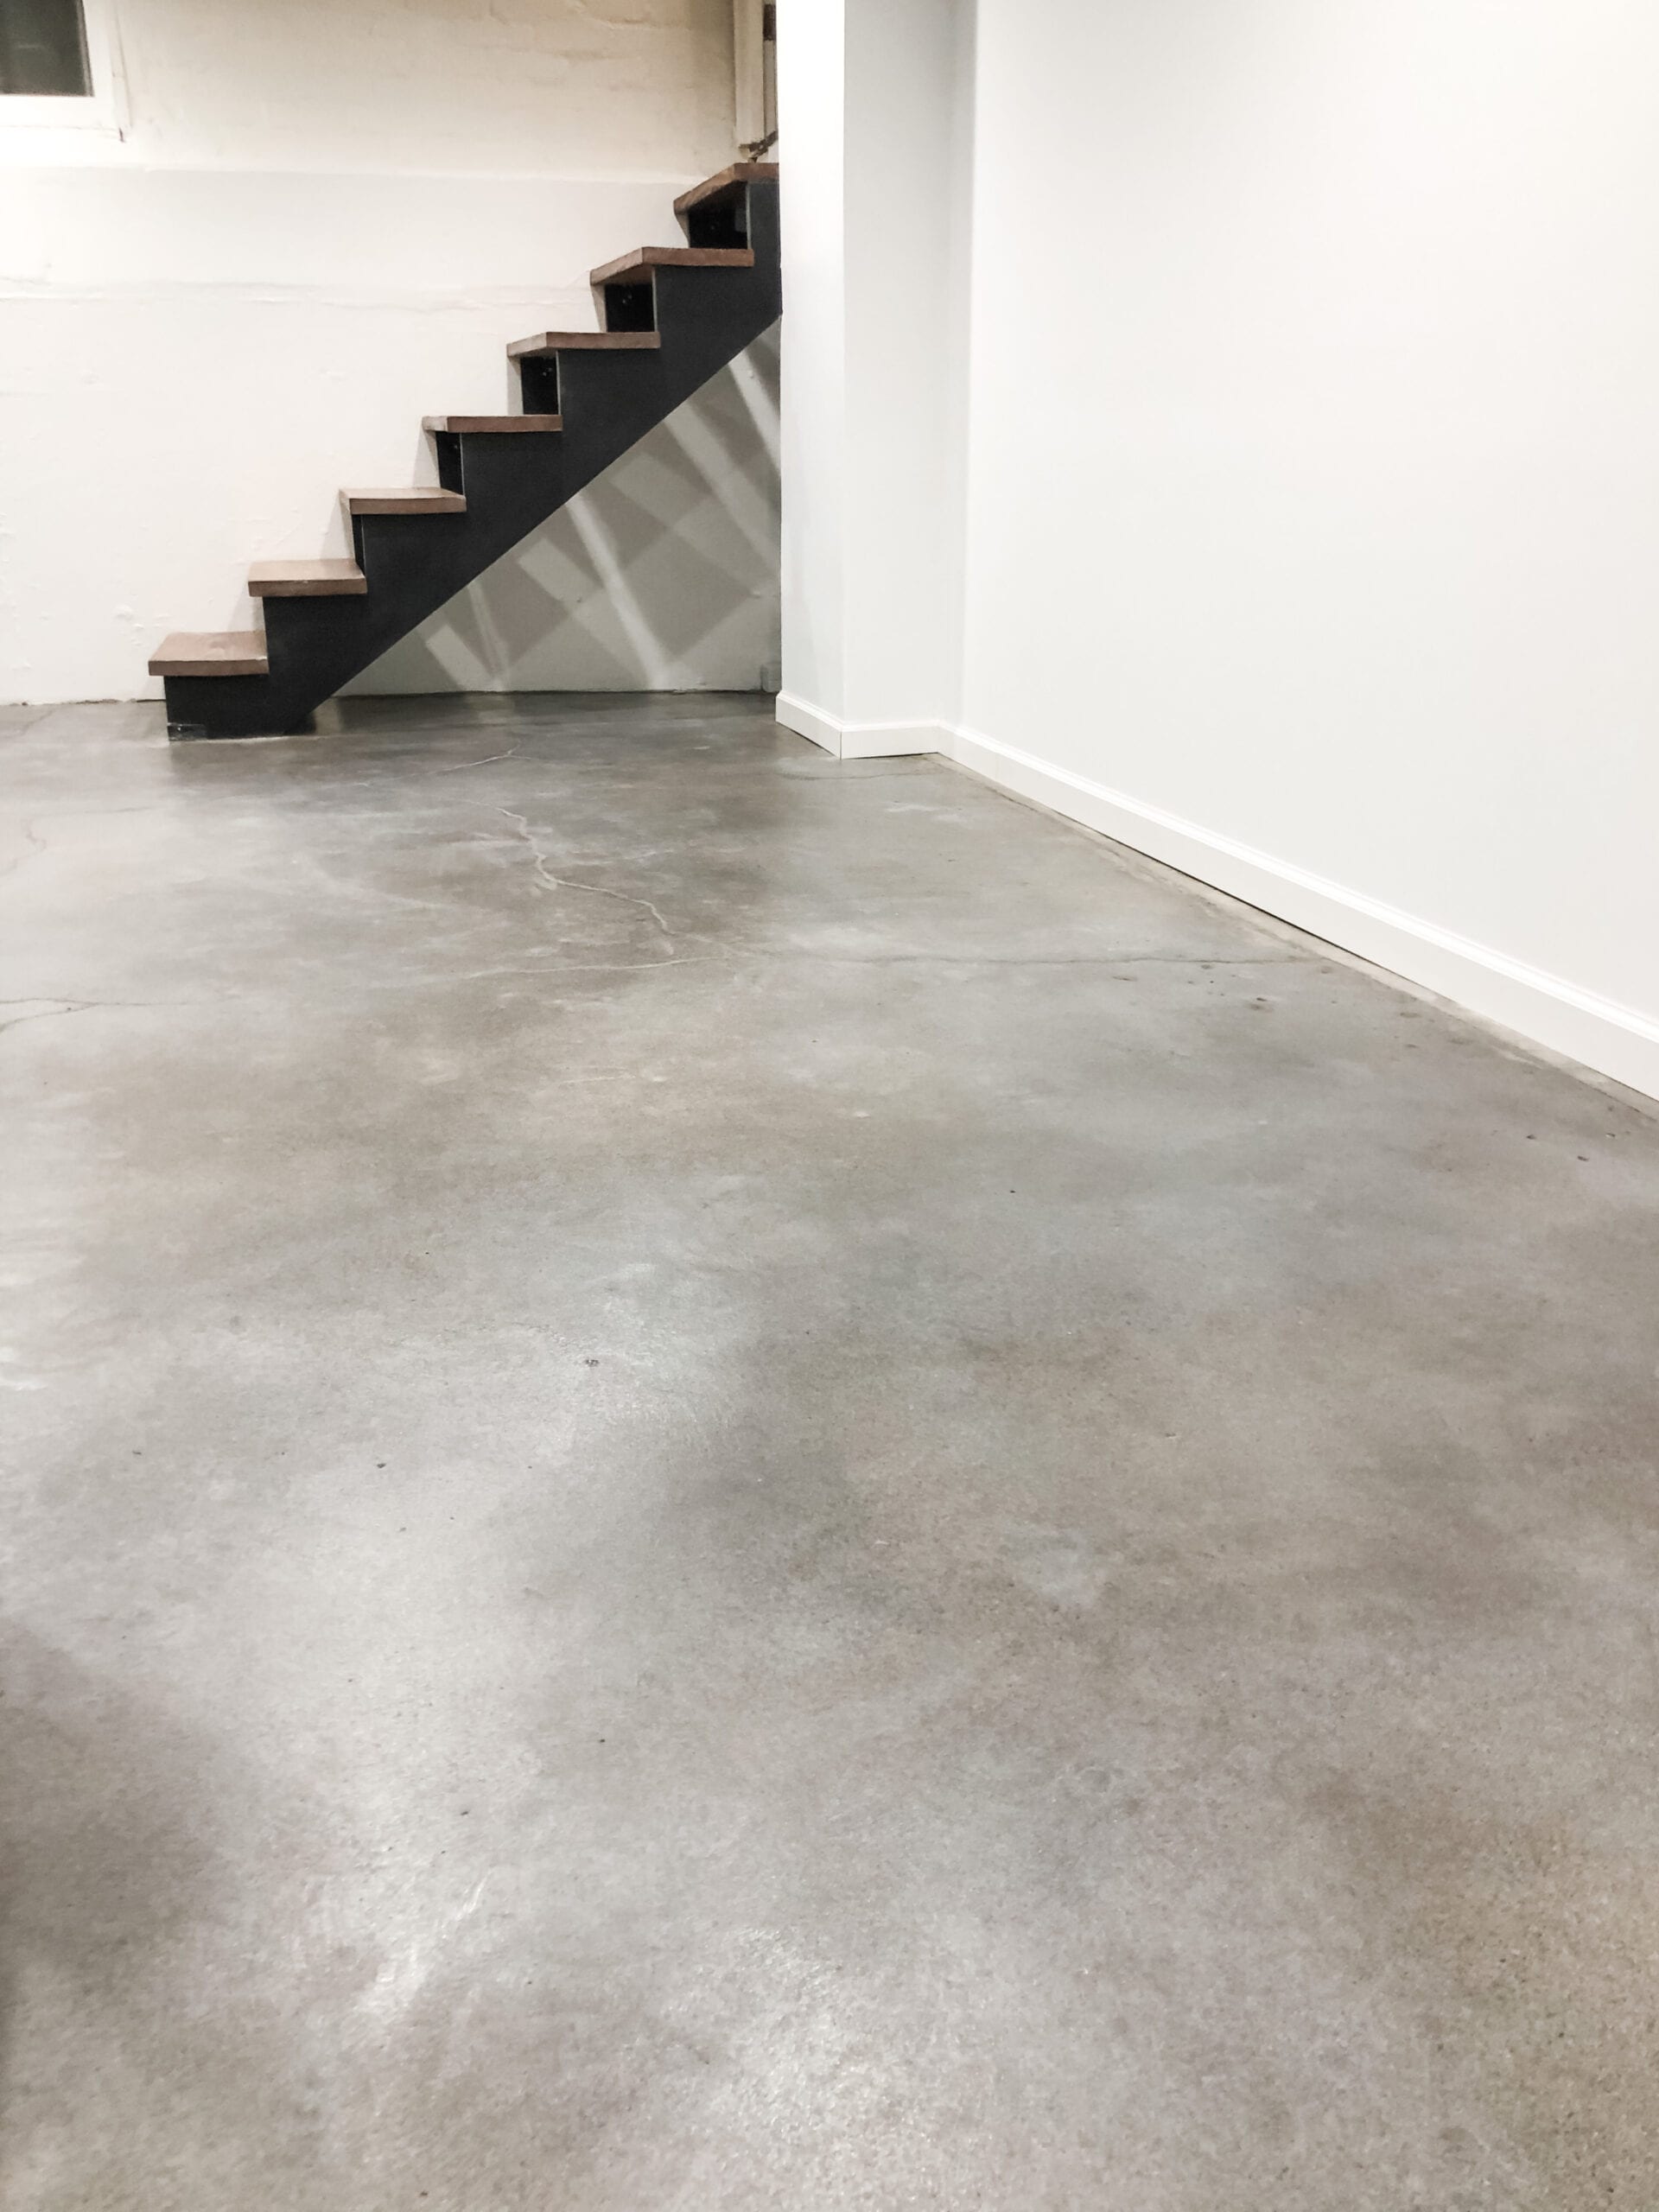
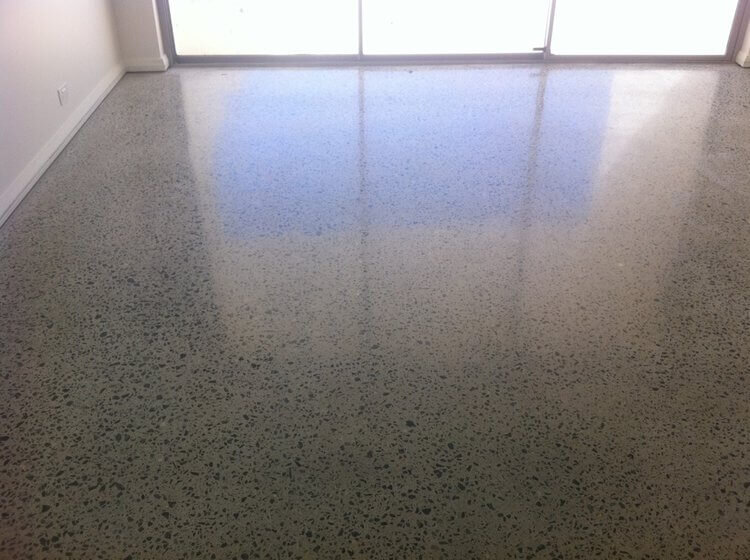
Polished Concrete Polished concrete is ideal if you prefer a sleek, modern look. This technique involves grinding the concrete surface with progressively finer diamond abrasives until it reaches the desired level of shine. I used a concrete polisher to achieve a glossy, reflective finish that’s easy to maintain and incredibly durable. Polished concrete floors are perfect for both residential and commercial spaces, offering a contemporary aesthetic and a high-end look.
Epoxy Coatings Epoxy coatings provide both decorative appeal and functional benefits, such as increased durability and resistance to stains. There are various types of epoxy coatings, including solid colors, metallic finishes, and flake systems. I chose a metallic epoxy for my garage floor, which created a stunning, marbled effect. Applying the epoxy involved mixing the components, pouring it onto the floor, and using a roller to spread it evenly. The result was a glossy, durable surface that’s both attractive and practical.
Engraved Concrete Engraving, or scoring, concrete is a technique that involves carving designs into the surface. This can be done using special tools or even a handheld grinder. I experimented with engraving a simple geometric pattern into my patio floor and then stained the grooves for added contrast. Engraving allows for custom designs and patterns, adding a unique touch to your decorative concrete project. It’s a great way to personalize your space and create intricate details.
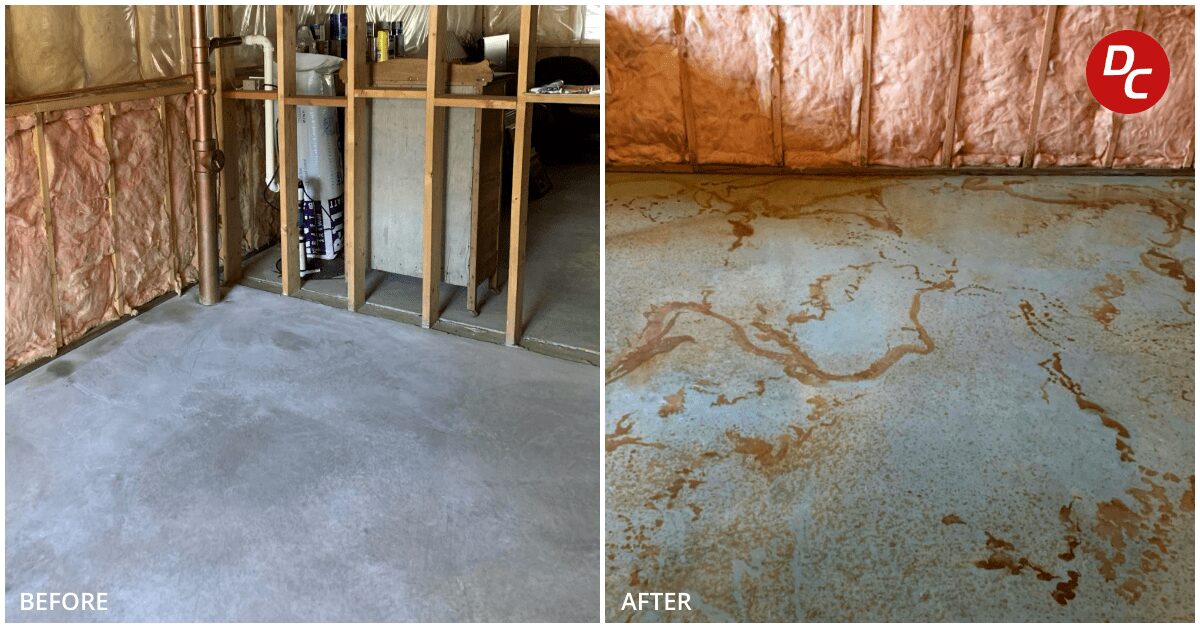
Overlay and Microtopping Overlay and microtopping involve applying a thin layer of concrete or cement-based material over an existing surface. This technique can be used to resurface old, worn-out concrete or to create a new decorative finish. I used a microtopping product to create a smooth, modern finish on my basement floor. After applying the microtopping, I stained and sealed it for added durability. This method is versatile and can be customized with various colors and textures to suit your design preferences.
Step-by-Step Guide to DIY Decorative Concrete
Undertaking a DIY decorative concrete project can be incredibly rewarding, transforming a plain surface into a work of art. Here’s a step-by-step guide based on my own experience to help you achieve beautiful decorative concrete floors:
Planning and Design Before starting, it’s important to have a clear plan and design in mind. I spent time researching different decorative techniques and finishes and then sketched out my ideas. Consider factors like color, texture, and pattern, as well as the overall style you want to achieve. Having a detailed plan helps ensure you have all the necessary materials and tools, and it sets you up for a successful project.
Gathering Materials and Tools Once you have your design, it’s time to gather all the materials and tools you’ll need. For my project, this included concrete mix, additives, stains, sealers, and tools like trowels, rollers, sprayers, and a concrete grinder. Having everything on hand before you start ensures a smooth workflow and prevents unnecessary delays. Double-checking your list and purchasing extra materials can save you from making multiple trips to the store.
Surface Preparation Proper surface preparation is crucial for the success of your decorative concrete project. Start by cleaning the existing surface thoroughly, removing any dirt, grease, or debris. Repair any cracks or damage, and ensure the surface is level. I used a concrete grinder to roughen up the surface, creating a texture that would help the new concrete adhere better. Applying a bonding agent further enhances adhesion and ensures a strong bond between the old and new concrete.
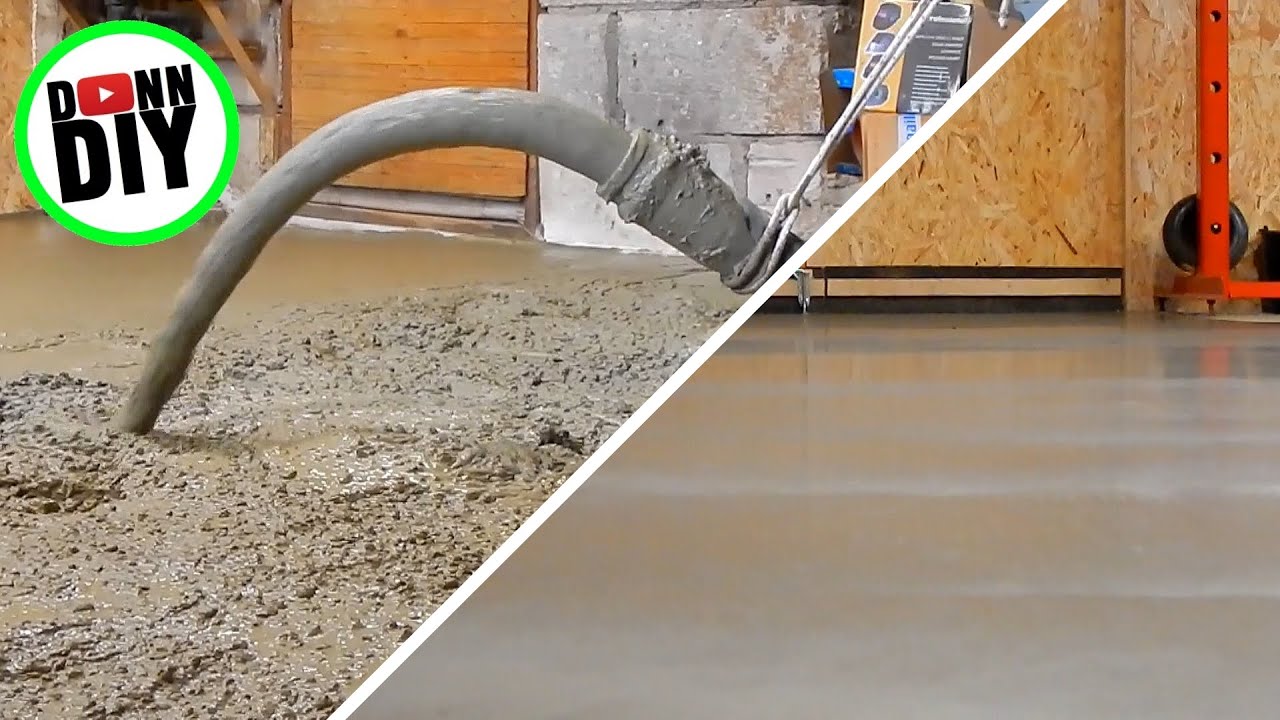
Mixing and Applying the Concrete Mixing the concrete according to the manufacturer’s instructions is the next step. Depending on your project, you may need to add pigments, plasticizers, or other additives to achieve the desired look and workability. For my project, I mixed the concrete in small batches to ensure consistency. Once mixed, I poured the concrete onto the prepared surface and used a trowel to spread it evenly. Working methodically and efficiently helps achieve a smooth and uniform finish.
Applying Decorative Techniques This is where the fun begins – applying your chosen decorative techniques. Whether you’re staining, stamping, polishing, or engraving, following the specific steps for each technique is essential. For my project, I used a water-based stain, applying it with a sprayer and then using a roller to blend the colors. I also experimented with engraving, carving a simple pattern into the surface. Taking your time and paying attention to detail ensures a professional-looking result.
Sealing and Finishing Once the decorative techniques are applied and the concrete is fully cured, sealing the surface is the final step. Sealing protects the decorative finish and enhances its durability. I used a high-quality concrete sealer, applying it with a roller in thin, even coats. Depending on the sealer, you may need to apply multiple coats for maximum protection. Allowing the sealer to cure fully before using the floor ensures a long-lasting and beautiful finish.
Maintaining Your Decorative Concrete Floors
Maintaining decorative concrete floors is essential to preserve their beauty and durability over time. Through my own experience, I’ve learned several key maintenance tips that keep my decorative floors looking their best. Here’s what you need to know about caring for your decorative concrete floors:
Regular Cleaning Regular cleaning is the first step in maintaining your decorative concrete floors. Dust, dirt, and debris can accumulate on the surface, dulling the finish and potentially causing scratches. I make it a habit to sweep or vacuum my floors regularly, especially in high-traffic areas. For more thorough cleaning, I use a damp mop with a mild, pH-neutral cleaner. Avoiding harsh chemicals and abrasive cleaning tools helps protect the finish and keep the floors looking pristine.
Addressing Spills and Stains Promptly addressing spills and stains is crucial for maintaining the appearance of decorative concrete floors. Whether it’s food, beverages, or oil, cleaning up spills immediately prevents them from penetrating the surface and causing stains. For tougher stains, I use a gentle scrub with a soft brush and a concrete-specific cleaner. Regularly checking for and addressing stains helps maintain the floor’s appearance and prevents long-term damage.
Protecting the Surface While decorative concrete floors are durable, taking extra precautions can help extend their life. I use mats or rugs in high-traffic areas to reduce wear and tear. For areas where I move heavy furniture or equipment, I placed protective pads under the legs to prevent scratches and dents. Additionally, using doormats at entryways helps reduce the amount of dirt and grit brought onto the floor. These small steps can go a long way in preserving the floor’s finish.
Resealing the Surface Over time, the sealer on decorative concrete floors can wear down, especially in high-traffic areas. Resealing the surface periodically is essential to maintain its protective barrier and enhance its appearance. I reseal my floors every 2-3 years, depending on the level of use. Before resealing, I clean the surface thoroughly and allow it to dry completely. Applying a fresh coat of sealer helps restore the floor’s shine and provides continued protection against stains and wear.
Preventing Damage from Furniture and Objects Heavy furniture and sharp objects can damage decorative concrete floors if not handled properly. I use furniture pads and felt protectors under the legs of chairs, tables, and other heavy items. When moving furniture, I lift rather than drag it to avoid scratches. Being mindful of how furniture and objects interact with the floor helps prevent damage and extends the life of the decorative finish.
Regular Inspections Periodically inspecting your decorative concrete floors for any signs of damage or wear is important for long-term maintenance. I make it a point to check for any cracks, chips, or areas where the sealer might be wearing off. Catching these issues early allows for timely repairs, preventing further damage. For minor repairs, concrete patching kits are available and can be used to fill in small cracks or chips. Regular inspections help ensure the floor remains in good condition.
Common Mistakes to Avoid When DIYing Decorative Concrete
Embarking on a DIY decorative concrete project can be both exciting and challenging. Throughout my own projects, I’ve encountered and learned to avoid several common mistakes. Here’s a guide to help you steer clear of these pitfalls and achieve a successful decorative concrete floor:
Inadequate Surface Preparation One of the most common mistakes is not properly preparing the surface before applying decorative concrete. Skipping steps like cleaning, repairing cracks, and profiling the surface can lead to poor adhesion and a subpar finish. I made sure to thoroughly clean my floor, fill any cracks, and roughen up the surface with a grinder. Proper surface preparation is the foundation for a successful decorative concrete application.
Ignoring Moisture Issues Moisture can be a major issue when working with concrete. Excess moisture in the existing floor can cause problems like bubbling or poor adhesion. Before starting my project, I conducted a moisture test to ensure my floor was dry enough for concrete application. Using a moisture meter or conducting a simple plastic sheet test can help identify any moisture problems. Addressing these issues beforehand prevents future headaches.
Incorrect Mixing Ratios Mixing the concrete components in the correct ratio is crucial for the product to cure properly. Even slight deviations can lead to problems like incomplete curing or weak spots. I carefully followed the manufacturer’s instructions for mixing the concrete, ensuring the right proportions of water, cement, and aggregates. Using a drill with a mixing attachment helped achieve a thorough and consistent mix.
Working in Inappropriate Conditions Temperature and humidity play a significant role in the concrete application process. Working in conditions that are too hot, cold, or humid can affect the curing process and final finish. I checked the weather forecast and chose a day with optimal conditions for my installation. Following the manufacturer’s guidelines for temperature and humidity levels helps achieve the best results.
Rushing the Application Applying decorative concrete requires patience and precision. Rushing the process can lead to uneven coverage, bubbles, and other imperfections. I found it helpful to divide the floor into sections and work methodically, ensuring each area was properly covered before moving on. Taking your time and using the right tools, like high-quality rollers and brushes, can make a significant difference in the final outcome.
Skipping the Sealer Some people might skip the sealer, thinking it’s an unnecessary extra step. However, sealing the surface adds a layer of protection and enhances the durability of the decorative finish. I applied a high-quality sealer to my floor, which not only made it more resistant to wear and tear but also enhanced its appearance. Investing in a good sealer helps extend the life of your decorative concrete floor and keeps it looking great.
Concrete Stain
The Beginner’s Guide to DIY Stained Concrete

How to Stain Concrete Floors
Stained Concrete Floors: Cost, How to Stain DIY, Maintenance Tips
Concrete Pour and Polishing Concrete Floors
How Do I Polish My Concrete Floor?
Guide to DIY Stained Concrete
DIY Basement Floor Stain and finish, 2 colors, Without Etching!
Acid Stained Hard Troweled Concrete Floor Direct Colors
Related Posts: