As homeowners, we constantly seek ways to make the most of our living spaces. Basements, often overlooked and underutilized, have the potential to be transformed into cozy retreats, entertainment hubs, or functional home offices. One innovative solution that elevates your basement experience is basement floor sleepers. In this comprehensive guide, I’ll take you through the world of basement floor sleepers, explaining their benefits, installation process, and how they can turn your basement into a welcoming and comfortable haven.
Understanding Basement Floor Sleepers
Imagine stepping into your basement and feeling the warmth underfoot, even during the coldest months. This is where basement floor sleepers come into play. These are essentially wooden or metal supports that elevate a subfloor above the cold, hard concrete slab, providing a layer of insulation and moisture protection. By creating an air gap between the subfloor and the concrete, sleepers effectively prevent dampness from seeping through and offer an opportunity to install insulation, making your basement cozier and more energy-efficient.
Types of Basement Floor Sleepers
When selecting the right type of sleeper for your basement, you have options. Wooden sleepers, often made from pressure-treated lumber, are popular due to their affordability and ease of installation. On the other hand, metal or composite sleepers offer durability and are moisture-resistant, making them suitable for basements prone to dampness. Some sleepers even have built-in insulation, streamlining the process and boosting your basement’s energy efficiency.
Planning and Preparation
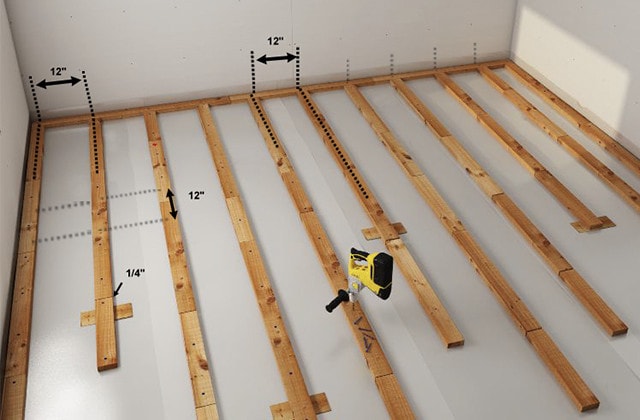
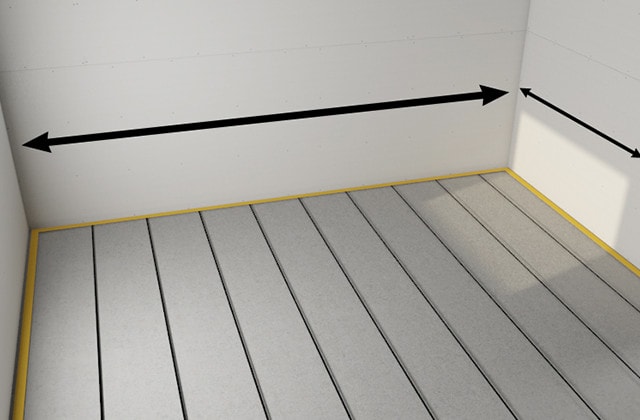
Before diving into the installation process, assessing your basement’s current condition is crucial. Look out for signs of moisture, ensure proper ventilation, and address any potential issues that could impact the effectiveness of the sleeper system. Accurate measurements and markings are essential for placing sleepers at the right intervals, ensuring a stable subfloor. To combat moisture concerns, consider employing vapor barriers and drainage solutions to keep your basement dry and comfortable.
Installation Process
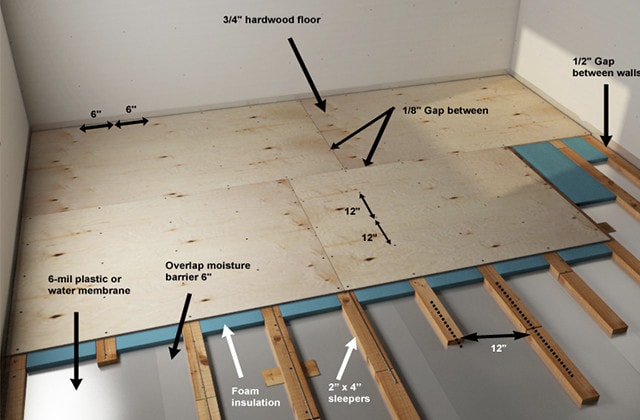
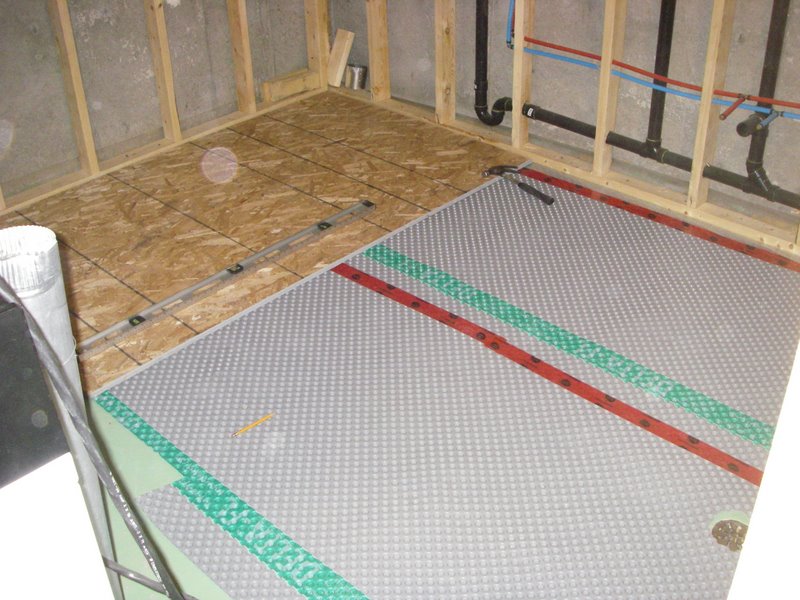
The installation process involves a series of steps to create the elevated subfloor. Begin by preparing the concrete subfloor – cleaning and leveling it while addressing any cracks or imperfections. Next, lay out the sleepers according to your measurements, ensuring they are properly aligned and fastened securely to the concrete. Once the sleepers are in place, it’s time to add the subfloor panels and insulation between the sleepers. This layered approach creates an effective barrier against cold and moisture, creating a warmer and more comfortable basement space.
Benefits of Basement Floor Sleepers
The advantages of incorporating basement floor sleepers extend far beyond just insulation. An elevated subfloor effectively reduces heat loss and cold air infiltration, resulting in a more energy-efficient living space. The prevention of moisture contact with the subfloor minimizes the risk of mold growth and dampness, enhancing the overall health of your basement environment. The added insulation layer also contributes to a cozier and quieter atmosphere, making your basement an inviting area for relaxation and activities.
Choosing the Right Materials
Selecting the appropriate materials for your sleeper system ensures its effectiveness and longevity. Consider the subfloor material – options range from plywood and oriented strand board (OSB) to specialized products like DRIcore. Each material has unique advantages, so choose based on your budget, preferences, and compatibility with the sleeper system. Similarly, when selecting insulation, pay attention to factors like R-values and moisture resistance to maximize the benefits of your sleeper setup.
Potential Challenges and Solutions
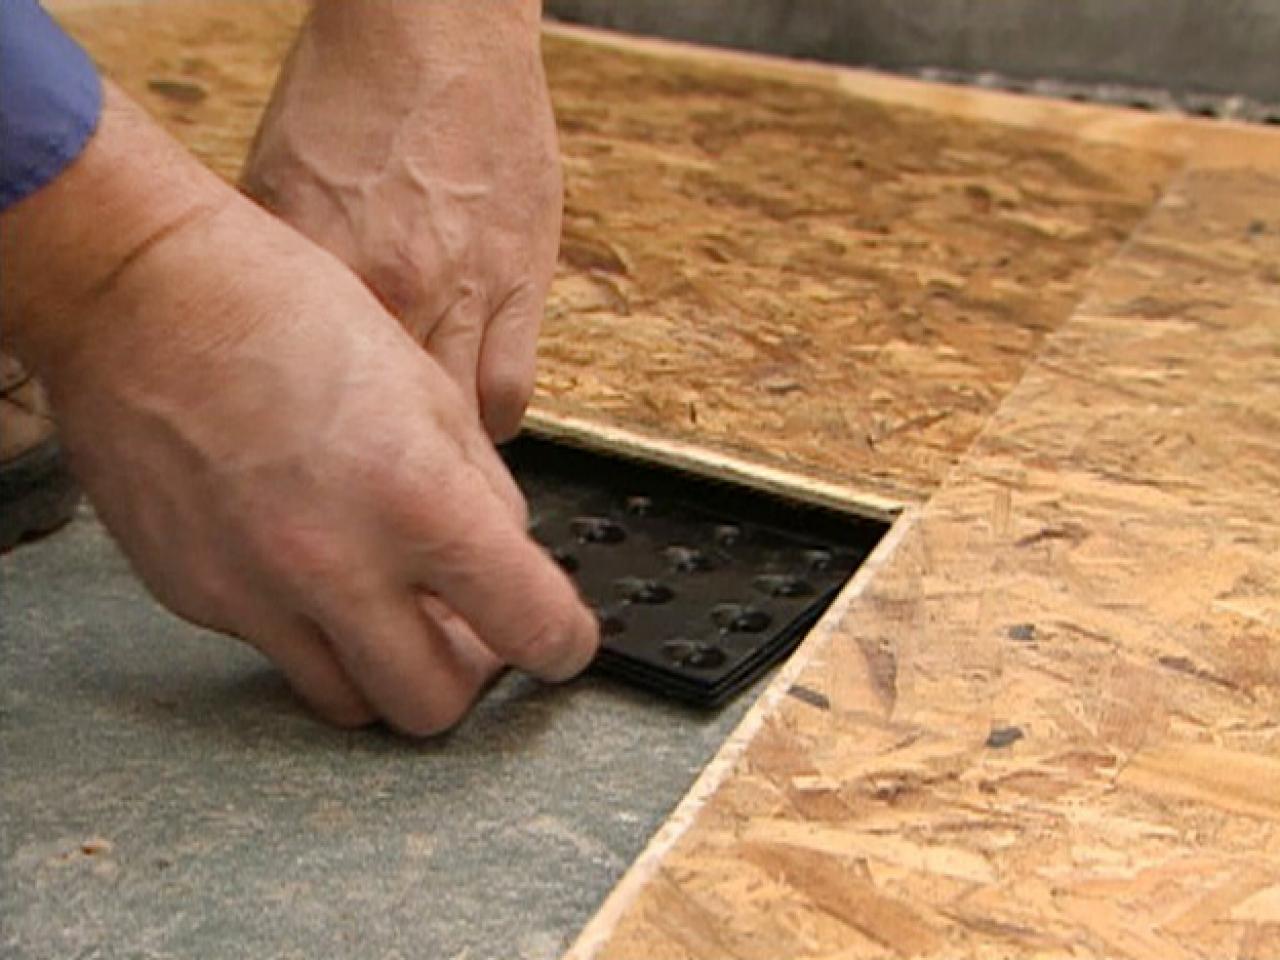
In the journey to transform your basement with sleeper systems, you might encounter challenges such as uneven concrete surfaces or sloping floors. These issues can be addressed through careful planning, leveling techniques, and shimming under sleepers. Moisture is another concern, but by ensuring proper drainage, employing vapor barriers, and using moisture-resistant materials, you can mitigate the risk and create a long-lasting solution.
Finished Flooring Options
With your basement floor sleepers in place, choosing the final flooring layer is time. Options abound, from classic hardwood and cost-effective laminate to cozy carpet and durable vinyl. When selecting your flooring, consider factors like the basement’s intended use, your style, and the compatibility of the chosen material with the sleeper system. Taking these factors into account ensures that your new flooring looks great and performs well in your transformed basement space.
Case Studies and Success Stories
To truly grasp the impact of basement floor sleepers, let’s explore some real-life examples. Meet homeowners who have revitalized their basements with sleeper systems, turning once-underutilized spaces into vibrant living areas. Through their stories, you’ll gain insights into the transformation process, the benefits they’ve experienced, and the newfound comfort they’ve embraced.
Your basement holds untapped potential for comfort, functionality, and increased living space. Basement floor sleepers offer a practical and effective way to transform a cold and unwelcoming basement into a warm and inviting retreat. By insulating against the cold, protecting against moisture, and providing a stable subfloor, sleepers set the foundation for a basement that’s visually appealing and comfortable year-round. Don’t overlook your basement’s potential – embrace the possibilities and turn it into a space you’ll love spending time in.
1u201d sleepers with 3/4u201d EPS on a concrete basement floor

How-to install a wood subfloor over concrete RONA
Subfloor Options for Basements HGTV
Basement Sub Floor Contractor Talk – Professional Construction

How-to install a wood subfloor over concrete RONA
Basement sub-floor · Greg MacLellan
Related Posts:
- Vinyl Plank Flooring Basement Installation
- Basement Floor Insulation
- Tile Basement Flooring
- Concrete Basement Floor
- Cleaning Concrete Basement Floor
- Wood Basement Floor
- Basement Laminate Flooring Ideas
- Basement Floor Coating
- Luxury Basement Floor
- Epoxy Paint Basement Floor