The downside to vinyl is, though it's countless plus points, it still has got the major flaw that all flooring has; it isn't invincible. However, certain aromatic hydrocarbons can soften the tiles to some extent. Vinyl by nature is quite sensitive to imperfections that might be present in the sub floor in which you lay it on. After installation plays an important factor. These're in tile as well as sheet forms.
Images about Click Lock Vinyl Flooring Installation
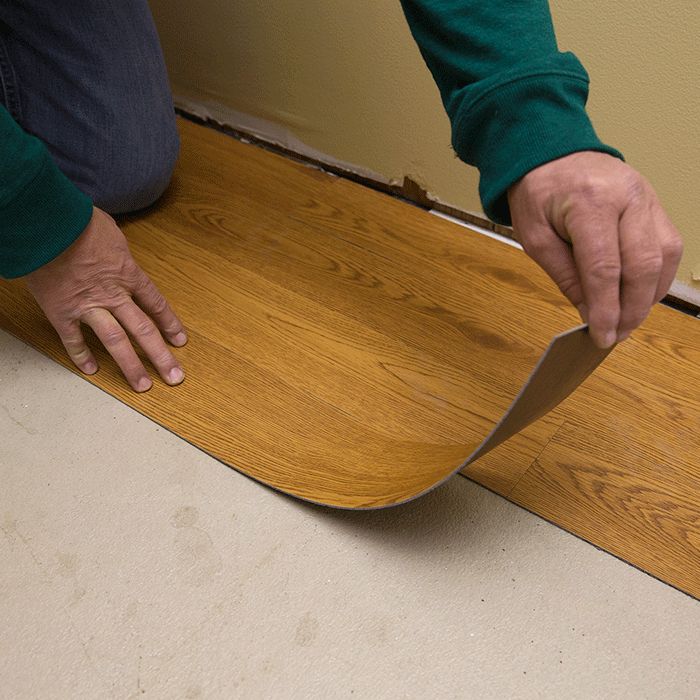
Click Lock Vinyl Flooring Installation

Vinyl could be used for a foyer, bathroom, living room, kitchen, office, and another room. Pick inlaid vinyl flooring for traffic areas that are heavy like shopping centers, schools and offices. What this means is it can be fitted over uneven floors and doesn't need a backing material to keep the feet of yours from becoming exhausted. It is the next layer of vinyl flooring that makes it extremely gorgeous and versatile.
How to Install Vinyl Plank Flooring
This technique of printing uses a rotary press with photoengraved plates to mark virtually any sort of design upon the vinyl. Apart from its self-adhesive character, vinyl might be fitted with any underlayment in spite of the make of its just provided that the surface have been smoothened out and also kept from any granules or anything that could very well ruin the feel of its.
10 Beginner Mistakes Installing Vinyl Plank Flooring – YouTube

How to Install Vinyl Plank Flooring
:max_bytes(150000):strip_icc()/easy-install-plank-vinyl-flooring-1822808-06-3bb4422ca1bd49b080bfa73bce749acc.jpg)
How to Install Vinyl Plank Flooring
How to Install Vinyl Plank Flooring Loweu0027s

How to Install Vinyl Plank Flooring
/easy-install-plank-vinyl-flooring-1822808-10-6cfb7acfac434155a53e0ef80bfbc825.jpg)
How to Install Vinyl Plank Flooring
/easy-install-plank-vinyl-flooring-1822808-hero-cefa2d84f781434b9e1e73a0c44e3a5c.jpg)
How To Fit Luxury Vinyl Click Flooring
Click-Lock u0026 Snap-Together Flooring: What it Is + How to Install
How to Install Luxury Vinyl Plank and Tile Stone Barn Floors

How to Install Vinyl Plank Flooring Loweu0027s
10 Beginner Mistakes Installing Vinyl Plank Flooring – YouTube

How to Install Vinyl Plank Flooring
:max_bytes(150000):strip_icc()/easy-install-plank-vinyl-flooring-1822808-05-91e4c44966a145a39ad38430e4f7cc45.jpg)
Related Posts:
- How To Repair Vinyl Flooring Scratches
- Copper Vinyl Flooring
- Vinyl Flooring In Bathroom
- Commercial Vinyl Flooring
- Luxury Vinyl Flooring Bedroom
- Herringbone Vinyl Floor Tiles
- Vinyl Flooring That Looks Like Wood
- Vinyl Flooring For Basement
- Toilet Vinyl Flooring
- Rustic Vinyl Flooring
Introduction to Click Lock Vinyl Flooring Installation
Vinyl flooring is one of the most popular flooring materials available today. It is durable, attractive, and affordable, making it a great choice for any home or business. Click lock vinyl flooring is an excellent choice for those who want the look and feel of real wood floors without the maintenance and upkeep involved with wood. Click lock vinyl flooring is easy to install and provides a secure, tight fit that will last for years. In this article, we will discuss the steps involved in click lock vinyl flooring installation and answer some frequently asked questions about this type of flooring.
Preparing to Install Click Lock Vinyl Flooring
Before you begin your click lock vinyl flooring installation, there are a few steps you should take to ensure the job goes smoothly. First, you should make sure that your subfloor is level and clean. If you have any large gaps or uneven surfaces, use a self-leveling compound to fill them in and create an even surface. You should also make sure that all doors are properly trimmed and trimmed to fit the height of the new flooring. Finally, it is important to measure the room carefully to ensure that you purchase enough material for your project.
Installing the Underlayment
Once your subfloor is ready, you can begin installing the underlayment. The underlayment acts as a cushion between your click lock vinyl flooring and the subfloor, helping to reduce noise and provide additional warmth. It is important to choose an underlayment that is specifically designed for use with vinyl flooring; some types of underlayment may not provide adequate protection or support. When installing your underlayment, be sure to cover the entire subfloor with overlapping layers; this will help create a strong foundation for your click lock vinyl flooring.
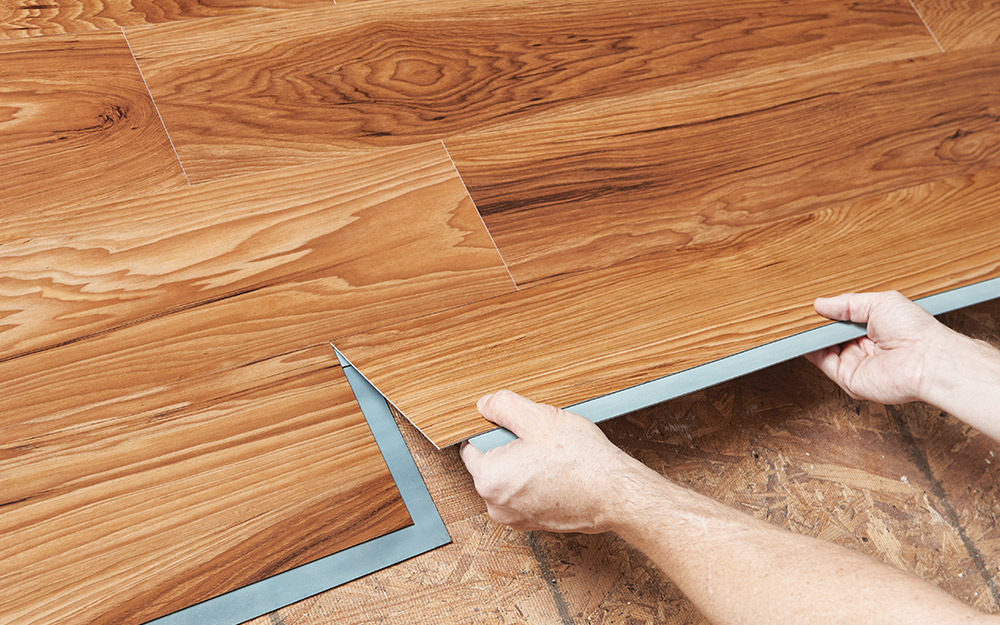
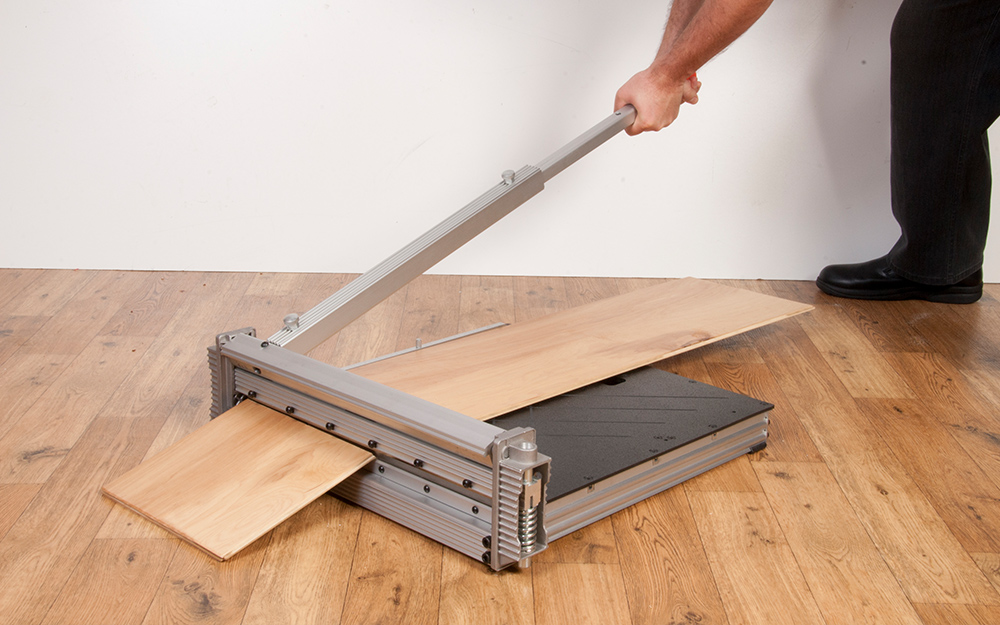
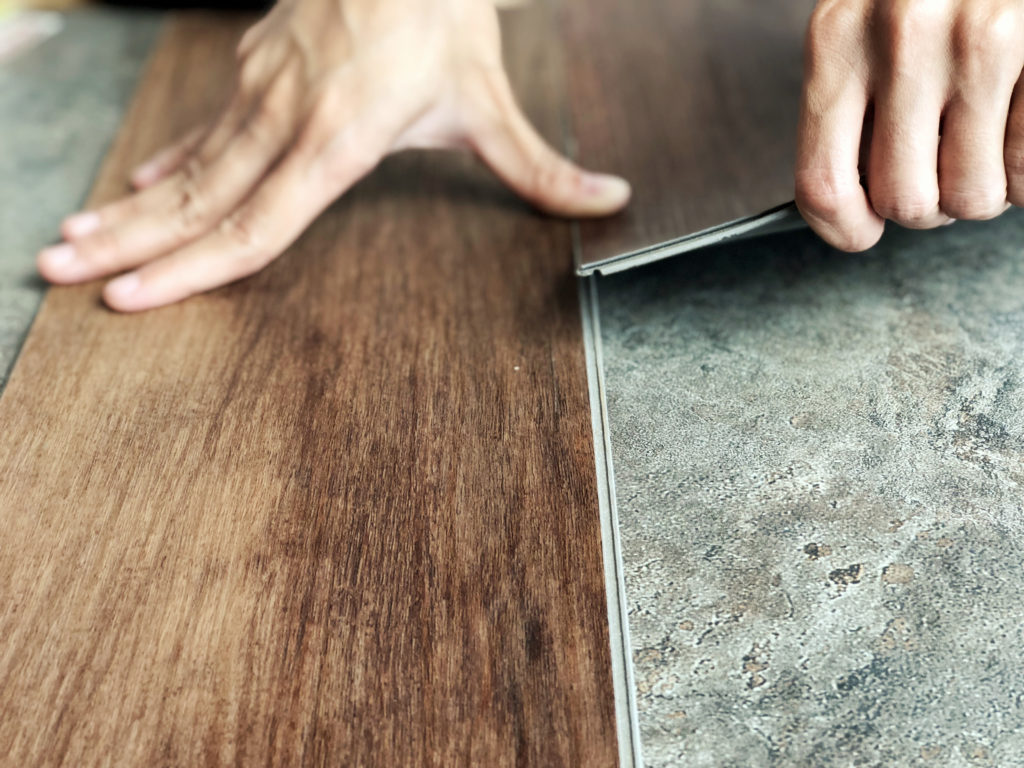
Laying the Click Lock Vinyl Planks
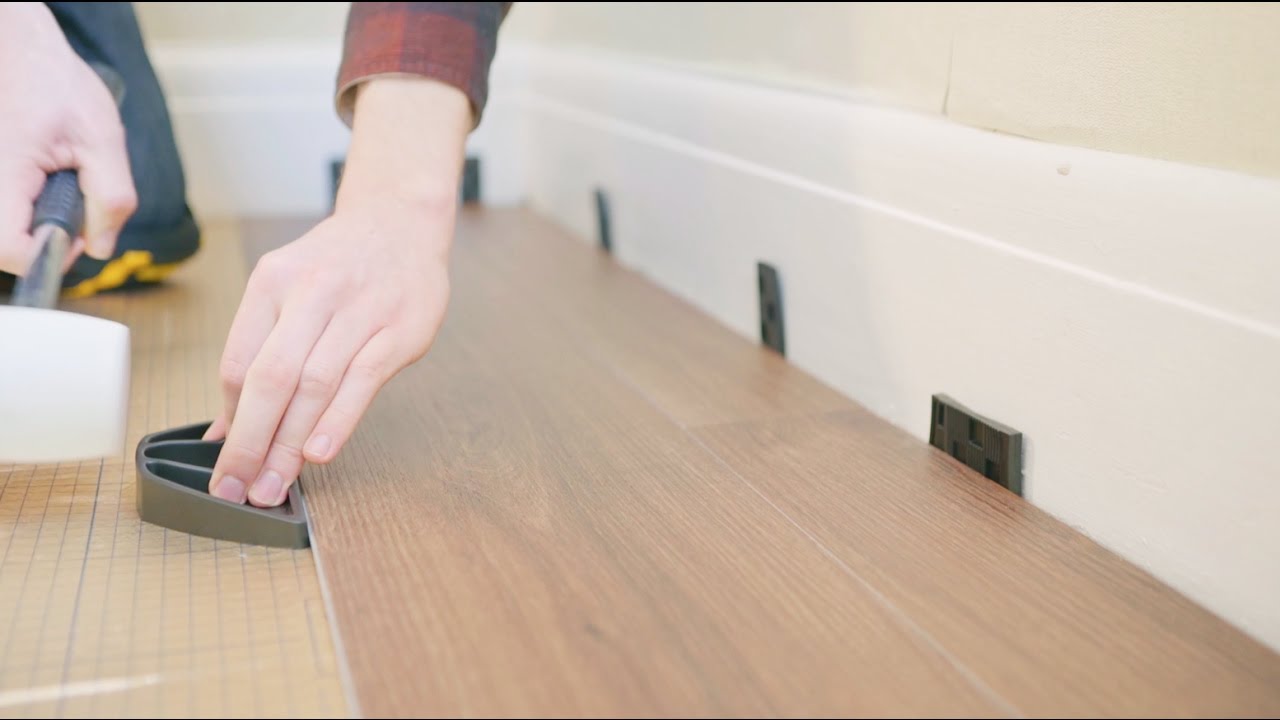
Once your underlayment is installed, you can begin laying down your click lock vinyl planks. It is important to start in one corner of the room and work your way out from there; this will ensure that all pieces are properly aligned and fit together correctly. When laying out planks, be sure to leave a 1/4 inch gap between each plank for expansion; this gap should be filled with silicone caulk once the planks are in place. As you lay out each plank, use a tapping block and hammer to firmly secure it into place; this will help create a strong bond between each plank and ensure a secure fit.
Finishing Touches
Once all of your planks are securely in place, there are a few finishing touches that can give your new click lock vinyl flooring an even more professional look. First, use a trim saw to cut off any excess material around doorways or other obstructions; this will create a clean, finished edge that will look great in your home or business. You can also choose to add baseboards or quarter rounds along the edges of your click lock vinyl floors; these pieces will help create an even more polished look. Finally, if desired, you can choose to add grout between each piece of click lock vinyl; this will create an even more secure fit and provide an additional layer of protection against moisture and wear.
FAQs about Click Lock Vinyl Floor Installation
Q: What kind of tools do I need for click lock vinyl floor installation?
A: You will need a few basic tools for installing click lock vinyl floors including a tape measure, utility knife, drill/driver, tapping block and hammer, trim saw, silicone caulk, and grout (if desired). You may also need additional tools depending on the specific type of click lock vinyl you are installing.
Q: How long does it take to install click lock vinyl?
A: The amount of time it takes to install click lock vinyl depends on several factors including room size and complexity of installation. Generally speaking, most small rooms can be completed within one day while larger rooms may take up to two days or more.
Q: Do I need to seal my click lock vinyl floors?
A: Sealing your click lock vinyl floors is not necessary but it can help protect them from dirt and moisture over time