Why Cork Flooring Is a Great Option for Stairs
When it comes to choosing the right flooring for stairs, cork might not be the first material that comes to mind. However, after exploring various options and learning about cork’s unique properties, I’ve come to appreciate why it’s such a fantastic choice for this high-traffic area. Here are several reasons why cork flooring is an excellent option for your stairs.
- Natural Resilience and Comfort Underfoot
Cork flooring has a natural resilience that makes it both comfortable and durable. Unlike harder materials like wood or tile, cork provides a slight give when you walk on it, which can be particularly beneficial on stairs. This cushioning effect not only makes climbing and descending stairs more comfortable but also helps reduce fatigue if you’re using the stairs frequently. - Excellent Sound Absorption
One of the standout features of cork is its ability to absorb sound. In my experience, this is a huge plus for stairs, where noise can easily travel throughout the house. Cork flooring can significantly reduce the sound of footsteps, making your home quieter and more peaceful. This is especially beneficial in multi-story homes where stairs are used often. - Warmth and Insulation
Cork is naturally warm to the touch, which makes it a cozy option for stairs. Unlike cold tiles or hardwood, cork retains heat and feels comfortable underfoot even in cooler weather. Additionally, cork’s insulating properties help maintain a consistent temperature in your home, making it an energy-efficient choice as well. - Eco-Friendly and Sustainable
If you’re looking for an environmentally friendly flooring option, cork is an excellent choice. Cork is harvested from the bark of cork oak trees, which regenerates naturally, making it a renewable resource. This sustainable harvesting process ensures that choosing cork for your stairs is not only good for your home but also good for the planet. - Safety Features: Slip Resistance and Cushioning
Safety is a top priority when it comes to stairs, and cork flooring offers several advantages in this area. Cork has a naturally slip-resistant surface, which can reduce the risk of accidents. Additionally, the cushioning effect of cork can provide a softer landing in case of a fall, making it a safer option compared to harder materials like wood or tile. - Aesthetic Versatility
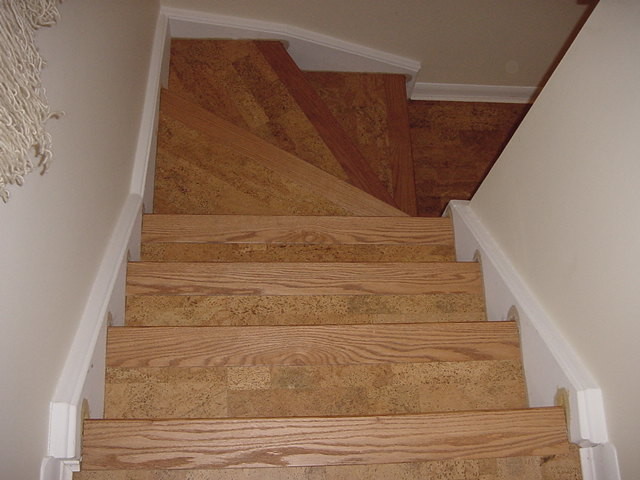
Cork flooring comes in a variety of colors, patterns, and textures, allowing you to customize the look of your stairs to match your home’s decor. Whether you prefer a natural, rustic look or a more modern design, cork offers plenty of aesthetic options. I’ve found that cork’s unique appearance can add warmth and character to any space.

Benefits of Installing Cork Flooring on Stairs
Installing cork flooring on stairs offers a variety of benefits that go beyond its aesthetic appeal. From durability to comfort, cork is a practical choice that can enhance both the functionality and beauty of your stairs. Here are some key benefits I’ve discovered from using cork flooring on stairs.
Durability and Longevity
One of the biggest advantages of cork flooring is its durability. Cork is naturally resilient and can withstand heavy foot traffic, making it an ideal choice for stairs, which are often subjected to constant use. When properly installed and maintained, cork flooring can last for many years, offering long-term value for your home.
Comfort and Cushioning
Cork’s natural softness provides a comfortable walking surface, which is especially beneficial on stairs. I’ve noticed that the slight give in cork flooring helps reduce strain on joints and muscles, making it more comfortable to use the stairs frequently. This cushioning effect also adds a level of comfort that harder flooring materials can’t match.
Thermal Insulation
Cork is a natural insulator, which means it helps keep your stairs warm in the winter and cool in the summer. This can be particularly noticeable in homes with hardwood or tile floors, where stairs can sometimes feel cold and uninviting. With cork, your stairs will remain comfortable to walk on year-round.
Impact Resistance
Cork flooring is highly impact-resistant, which makes it an excellent choice for stairs. The natural flexibility of cork allows it to absorb shocks and impacts, reducing the likelihood of dents or damage from dropped objects. This durability ensures that your stairs will continue to look great even with regular use.
Easy Maintenance
Maintaining cork flooring is relatively easy, which is a big plus for busy households. Regular sweeping or vacuuming is usually all that’s needed to keep cork stairs looking clean. Additionally, cork’s natural resistance to mold, mildew, and pests makes it a low-maintenance option that’s ideal for high-traffic areas like stairs.
Environmental Benefits
Cork is one of the most eco-friendly flooring options available. The cork oak tree, from which cork is harvested, regenerates its bark after each harvest, making cork a sustainable and renewable resource. By choosing cork flooring for your stairs, you’re not only enhancing your home but also making an environmentally responsible choice.
How to Choose the Right Cork Flooring for Your Stairs
Choosing the right cork flooring for your stairs is essential to achieving the desired look and performance. With so many options available, it’s important to consider factors like thickness, finish, and style to ensure you select the best cork flooring for your needs. Here’s a guide to help you make the right choice.
Consider the Thickness of the Cork
Thickness is a key factor when choosing cork flooring for stairs. Thicker cork tiles or planks offer better durability and cushioning, which can be particularly beneficial in high-traffic areas like stairs. I’ve found that a thickness of 10mm or more is ideal for stairs, as it provides a comfortable walking surface and enhances the floor’s longevity.
Choose the Right Finish
The finish of your cork flooring can affect both its appearance and durability. Cork flooring is available in a variety of finishes, including natural, stained, and pre-sealed options. I recommend choosing a finish that complements your home’s decor while also offering the level of protection you need. A polyurethane finish, for example, can provide added durability and moisture resistance.
Opt for a Non-Slip Surface
Safety is crucial when it comes to stairs, so it’s important to choose cork flooring with a non-slip surface. Many cork products are naturally slip-resistant, but it’s still worth checking the manufacturer’s specifications to ensure you’re getting the safest option for your stairs. If necessary, you can also apply a non-slip coating to enhance traction.
Match the Style to Your Home’s Decor
Cork flooring comes in a wide range of colors, patterns, and textures, allowing you to find a style that matches your home’s decor. Whether you prefer a natural wood look, a sleek modern design, or something more rustic, there’s a cork option that will suit your aesthetic. I’ve found that lighter shades can make a space feel larger and more open, while darker tones add warmth and coziness.
Consider the Installation Method
The installation method is another important consideration when choosing cork flooring for stairs. Cork can be installed using a variety of methods, including glue-down, floating, and click-together systems. For stairs, I recommend the glue-down method, as it provides the most secure and stable installation. This method also allows for better customization around stair edges and corners.
Check for Quality and Warranty
Finally, it’s important to choose a high-quality cork product that comes with a good warranty. Look for cork flooring that is certified for durability and performance, and check the manufacturer’s warranty to ensure you’re protected in case of defects or issues. A reputable brand with a solid warranty will give you peace of mind that your investment is protected.
Step-by-Step Guide to Installing Cork Flooring on Stairs
Installing cork flooring on stairs may seem like a daunting task, but with the right tools and techniques, it’s a project you can tackle yourself. Here’s a step-by-step guide to help you achieve a professional-looking installation that will stand the test of time.
Step 1: Gather Your Materials and Tools
Before you begin, make sure you have all the necessary materials and tools on hand. You’ll need cork flooring planks or tiles, a sharp utility knife, adhesive or glue, a notched trowel, a roller, and a tape measure. I’ve found that having everything ready before you start can make the process smoother and more efficient.
Step 2: Prepare the Stairs
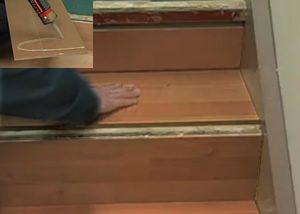
The first step in the installation process is to prepare the stairs. Remove any existing flooring, nails, or staples, and clean the surface thoroughly. It’s important to start with a smooth, clean surface to ensure the adhesive bonds properly. I also recommend sanding the surface to create a slightly rough texture, which will help the adhesive grip the stairs better.
Step 3: Cut the Cork to Fit
Next, measure the dimensions of each stair tread and riser, and cut the cork flooring to fit. Use a sharp utility knife to make precise cuts, and take your time to ensure each piece fits snugly. I’ve found that cutting the cork slightly larger than the measurement allows for a more secure fit, as you can trim the excess after installation.
Step 4: Apply the Adhesive
Once your cork pieces are cut to size, it’s time to apply the adhesive. Use a notched trowel to spread a thin, even layer of adhesive on the stair tread and riser. Make sure to apply the adhesive evenly to avoid lumps or gaps. I recommend working on one stair at a time to prevent the adhesive from drying before you can place the cork.
Step 5: Install the Cork Flooring
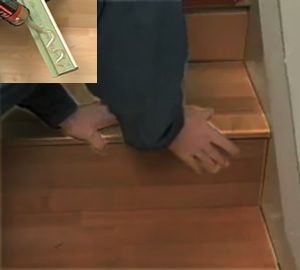
Carefully place the cork flooring onto the adhesive, starting with the stair tread and then the riser. Press down firmly to ensure good contact, and use a roller to smooth out any air bubbles or wrinkles. Repeat this process for each stair, taking your time to ensure a perfect fit. I’ve learned that patience during this step is key to achieving a flawless installation.
Step 6: Allow the Adhesive to Cure
After the cork flooring is installed, allow the adhesive to cure according to the manufacturer’s instructions. This typically takes 24 to 48 hours, during which time you should avoid walking on the stairs. Once the adhesive has fully cured, your new cork flooring is ready for use!
Maintaining and Caring for Cork Flooring on Stairs
Once you’ve installed cork flooring on your stairs, it’s important to maintain and care for it properly to ensure it stays looking beautiful for years to come. Cork is relatively low-maintenance, but there are a few key steps you can take to keep your stairs in top condition. Here’s a guide to maintaining and caring for cork flooring on stairs.
Regular Cleaning to Prevent Dirt Buildup
The best way to keep your cork flooring looking fresh is through regular cleaning. I recommend sweeping or vacuuming your stairs at least once a week to remove dirt and debris. Dirt and grit can act like sandpaper on the surface of cork, so keeping your stairs clean is essential to prevent scratches and wear.
Using a Damp Mop for Deeper Cleaning
For deeper cleaning, a damp mop can be used to remove stains or spills. Make sure to use a pH-neutral cleaner that’s safe for cork flooring, and avoid using excessive water. Cork is naturally resistant to moisture, but too much water can seep into the seams and cause damage over time. I’ve found that a well-wrung mop is best for cleaning cork stairs.
Protecting the Surface with Rugs or Mats
To protect your cork stairs from heavy foot traffic, consider using area rugs or mats on high-use sections. Rugs can help prevent wear and tear, and they also add an extra layer of cushioning. Just be sure to choose rugs with a non-slip backing to prevent accidents. I also recommend using stair runners, which can protect the center of each step while leaving the beautiful cork visible on the edges.
Addressing Spills and Stains Promptly
Cork is naturally resistant to spills and stains, but it’s still important to clean up any spills promptly. If a spill occurs, blot it up with a soft cloth and clean the area with a damp mop. Avoid rubbing the spill, as this can spread the stain or push it deeper into the cork. I’ve found that quick action can prevent most stains from setting in.
Reapplying Finish as Needed
Over time, the finish on your cork flooring may start to wear down, especially in high-traffic areas like stairs. To keep your cork stairs looking their best, you may need to reapply a protective finish every few years. I recommend using a water-based polyurethane finish, which provides a durable, clear coating that won’t yellow over time.
Avoiding Harsh Chemicals and Abrasives
Finally, it’s important to avoid using harsh chemicals or abrasive cleaning tools on cork flooring. These can damage the surface and strip away the protective finish. Stick to gentle, pH-neutral cleaners and soft cleaning tools to keep your cork stairs in top condition. With proper care, your cork flooring will remain beautiful and functional for years to come.
Design Ideas to Enhance Your Stairs with Cork Flooring
Cork flooring is not only practical but also incredibly versatile when it comes to design. Whether you want to make a bold statement or create a subtle, elegant look, cork flooring offers a range of design possibilities for your stairs. Here are some ideas to help you enhance your stairs with cork flooring.
Contrasting Colors for a Bold Look
One way to make your stairs stand out is by using contrasting colors. Consider using a darker cork for the treads and a lighter shade for the risers, or vice versa. This contrast can create a striking visual effect that draws attention to your stairs. I’ve found that this approach works particularly well in modern or contemporary spaces where bold design is key.
Natural Patterns for a Rustic Appeal
If you prefer a more natural, rustic look, choose cork flooring with visible grain patterns. These natural patterns can add warmth and character to your stairs, making them feel more inviting. Pairing natural cork with wooden handrails or banisters can enhance the rustic appeal and create a cohesive design throughout your space.
Geometric Patterns for a Modern Twist
For a modern twist, consider using cork flooring with geometric patterns. Hexagons, chevrons, and other geometric designs can add a contemporary edge to your stairs. I’ve seen this design approach work beautifully in minimalist spaces where clean lines and sharp angles are the focus. The key is to choose a pattern that complements your overall design aesthetic.
Layered Textures for Added Depth
Cork flooring comes in various textures, and layering different textures on your stairs can create a sense of depth and interest. For example, you could use a smooth cork for the treads and a more textured option for the risers. This contrast in textures can add a tactile element to your stairs, making them more engaging both visually and physically.
Custom Inlays for a Personalized Touch
For a truly unique look, consider adding custom inlays to your cork stairs. Inlays can be made from different materials like wood, metal, or even contrasting cork. I’ve found that custom inlays can add a personalized touch to your stairs, making them a true reflection of your style. Whether you opt for a simple border or an intricate design, inlays can elevate the overall look of your stairs.
Coordinating with Wall Colors and Decor
To create a cohesive look, coordinate your cork flooring with the wall colors and decor in your stairwell. For example, if your walls are painted in a cool shade like gray or blue, choose cork flooring with cooler undertones to match. Alternatively, if your decor features warm, earthy tones, opt for cork in a complementary shade. This coordination can create a harmonious flow from your stairs to the surrounding space.
Common Mistakes to Avoid
While cork flooring is a great choice for stairs, it’s important to avoid common mistakes during the installation process to ensure a successful outcome. From preparation to finishing, each step requires careful attention to detail. Here are some common mistakes to avoid when installing cork flooring on stairs.
Skipping the Surface Preparation
One of the most common mistakes is skipping the surface preparation. Properly preparing the stairs is crucial to ensuring that the cork flooring adheres well and lasts for years. This includes removing old flooring, cleaning the surface thoroughly, and sanding it to create a rough texture for better adhesion. I’ve found that taking the time to prepare the surface properly can make a significant difference in the final result.
Not Using the Right Adhesive
Using the wrong adhesive is another mistake that can lead to problems down the line. It’s important to use an adhesive that’s specifically designed for cork flooring and suitable for stairs. The adhesive should provide a strong bond that can withstand the wear and tear of daily use. I recommend consulting with the manufacturer or a flooring professional to ensure you’re using the right product.
Improper Cutting and Fitting
Cutting the cork flooring to fit the stairs is a delicate process, and improper cutting can lead to gaps, overlaps, or uneven edges. It’s important to measure each stair tread and riser carefully and make precise cuts to ensure a snug fit. I’ve learned that taking the time to double-check measurements and using a sharp utility knife can help avoid mistakes during this step.
Rushing the Installation Process
Rushing through the installation process is a common mistake that can result in poor adhesion, uneven surfaces, or visible seams. I always recommend taking your time, especially when applying adhesive and positioning the cork flooring. Patience during installation is key to achieving a smooth, professional-looking finish that will last.
Neglecting to Seal the Edges
Neglecting to seal the edges of the cork flooring can lead to moisture seepage and damage over time. Sealing the edges with a water-resistant sealant is particularly important in areas like stairs, where moisture exposure is common. I’ve found that applying a sealant to the edges of each stair tread and riser can help protect the flooring and extend its lifespan.
Ignoring the Curing Time
Finally, one of the most critical mistakes is ignoring the curing time. After installation, it’s important to allow the adhesive and any applied sealant to cure fully before using the stairs. This typically takes 24 to 48 hours, during which time you should avoid walking on the stairs. I’ve learned that waiting for the proper curing time ensures a strong bond and a durable finish that will hold up over time.
Related Posts:


