DIY bathroom floor replacement can be a challenging yet rewarding home improvement project that allows homeowners to update the look and functionality of their bathrooms while saving money on labor costs. The process involves removing the existing flooring, preparing the subfloor, and installing new flooring materials such as tile, vinyl, laminate, or hardwood. While it requires careful planning, preparation, and attention to detail, DIY bathroom floor replacement can be a manageable project for homeowners with basic DIY skills and the right tools and materials.
Images about DIY Bathroom Floor Replacement
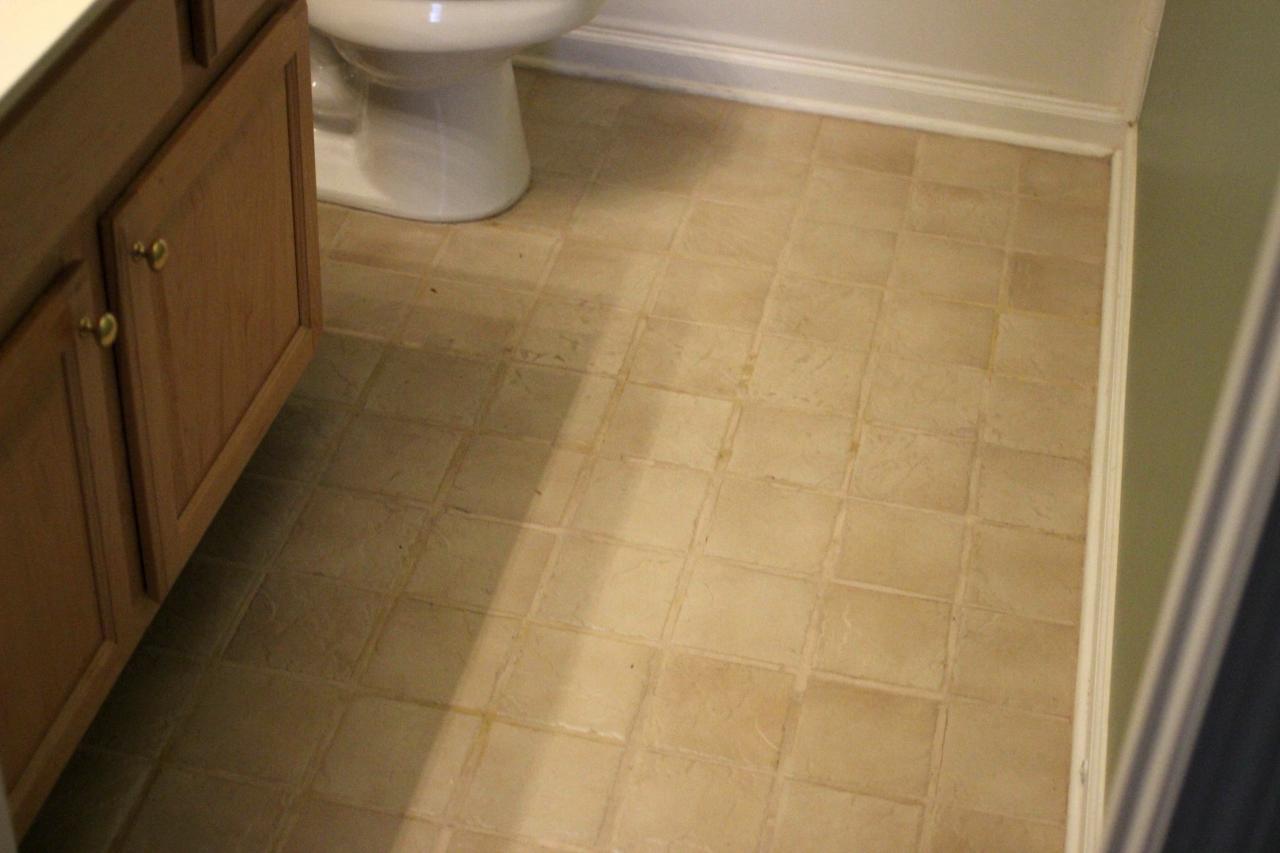
DIY Bathroom Floor Replacement
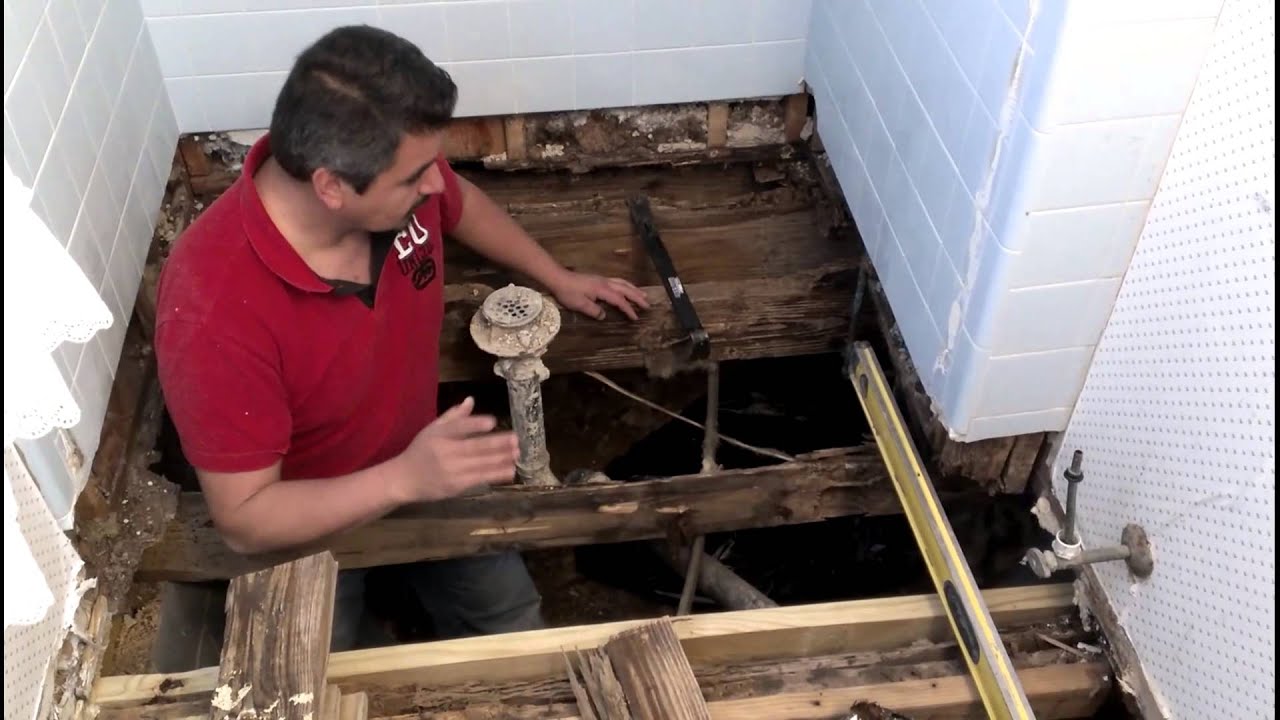
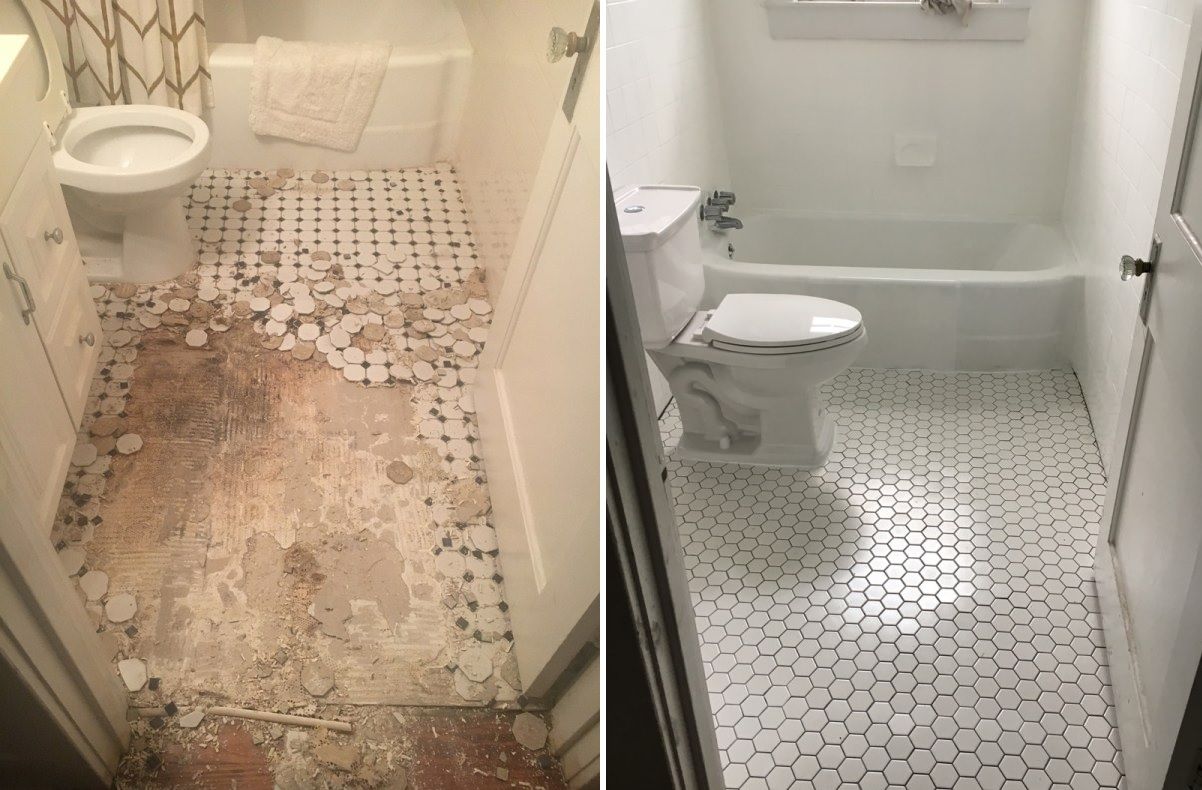
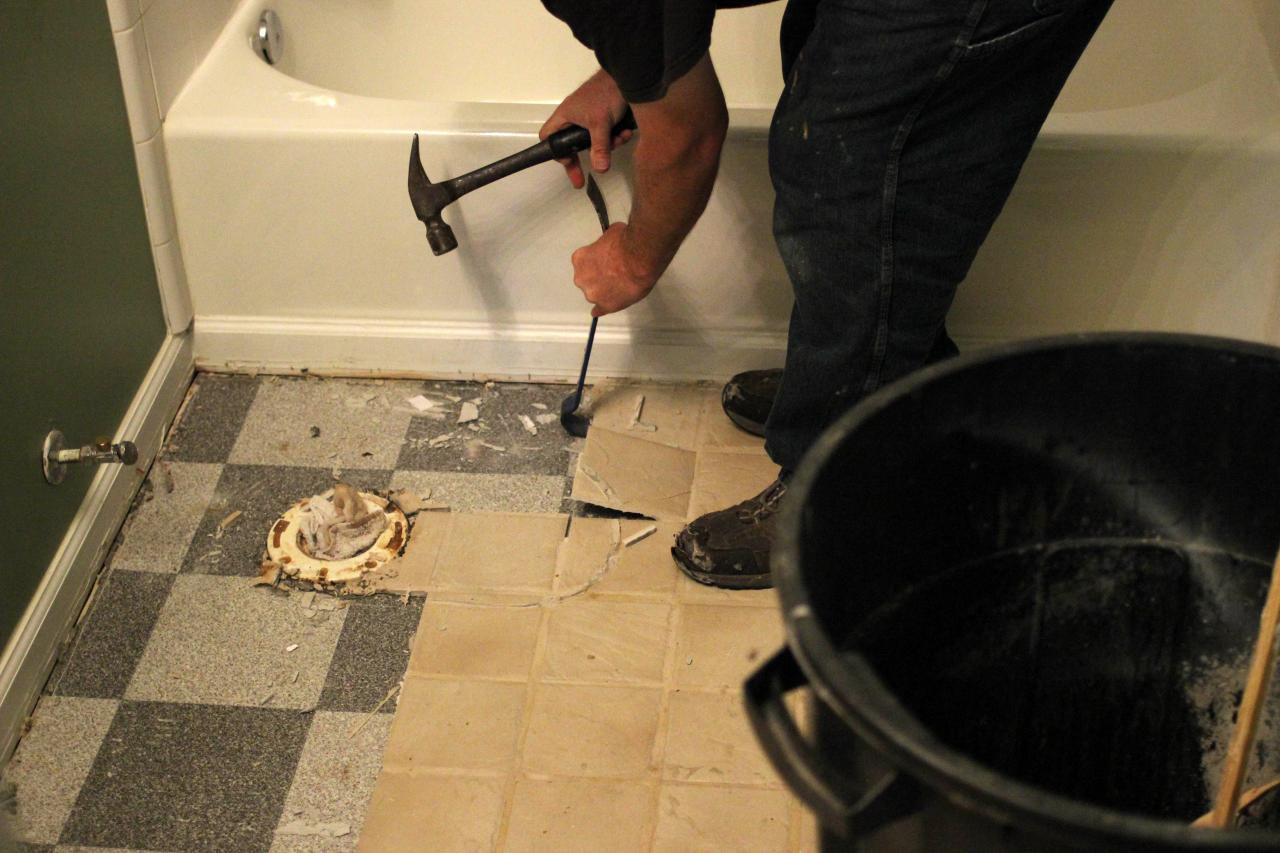
The first step in DIY bathroom floor replacement is to assess the condition of the existing flooring and determine the best course of action for removal. Depending on the type of flooring material, removal methods may vary, ranging from simply pulling up old vinyl tiles to breaking up and removing ceramic or porcelain tiles. It’s essential to take proper safety precautions during the removal process, such as wearing protective eyewear, gloves, and a dust mask to prevent injury and exposure to dust and debris.

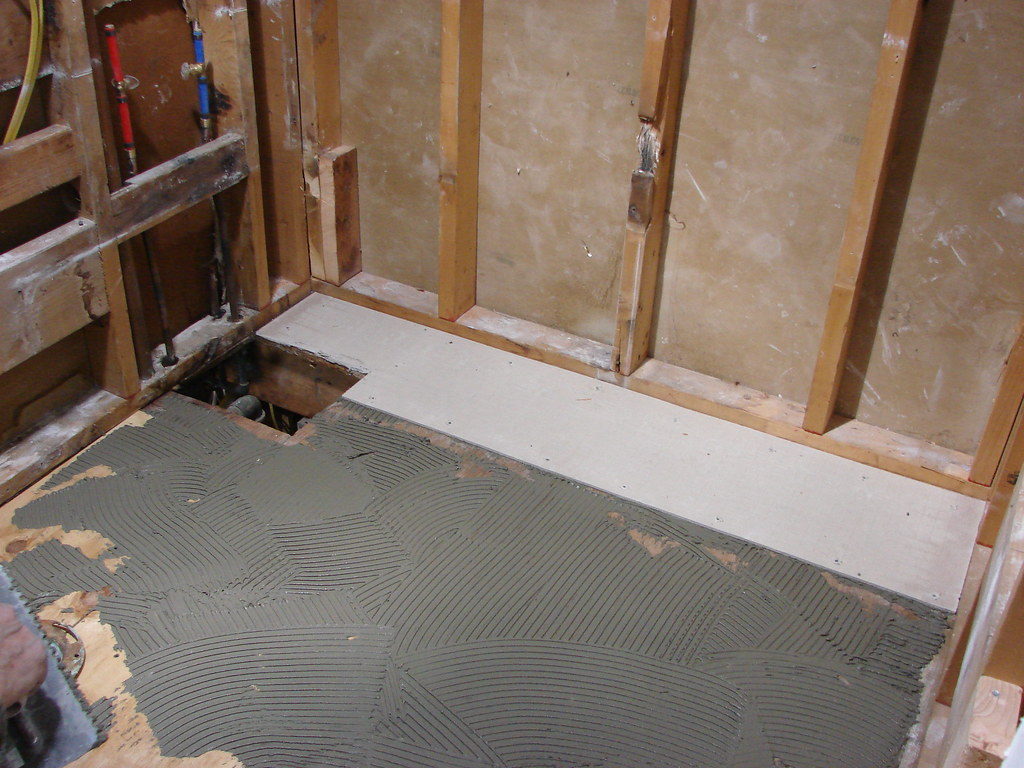
Once the old flooring is removed, the next step is to prepare the subfloor for installation of the new flooring material. This involves inspecting the subfloor for any damage or unevenness and making any necessary repairs or adjustments to ensure a smooth and level surface. Depending on the condition of the subfloor, this may involve patching holes, sanding down high spots, or adding a layer of underlayment to provide additional support and stability for the new flooring.
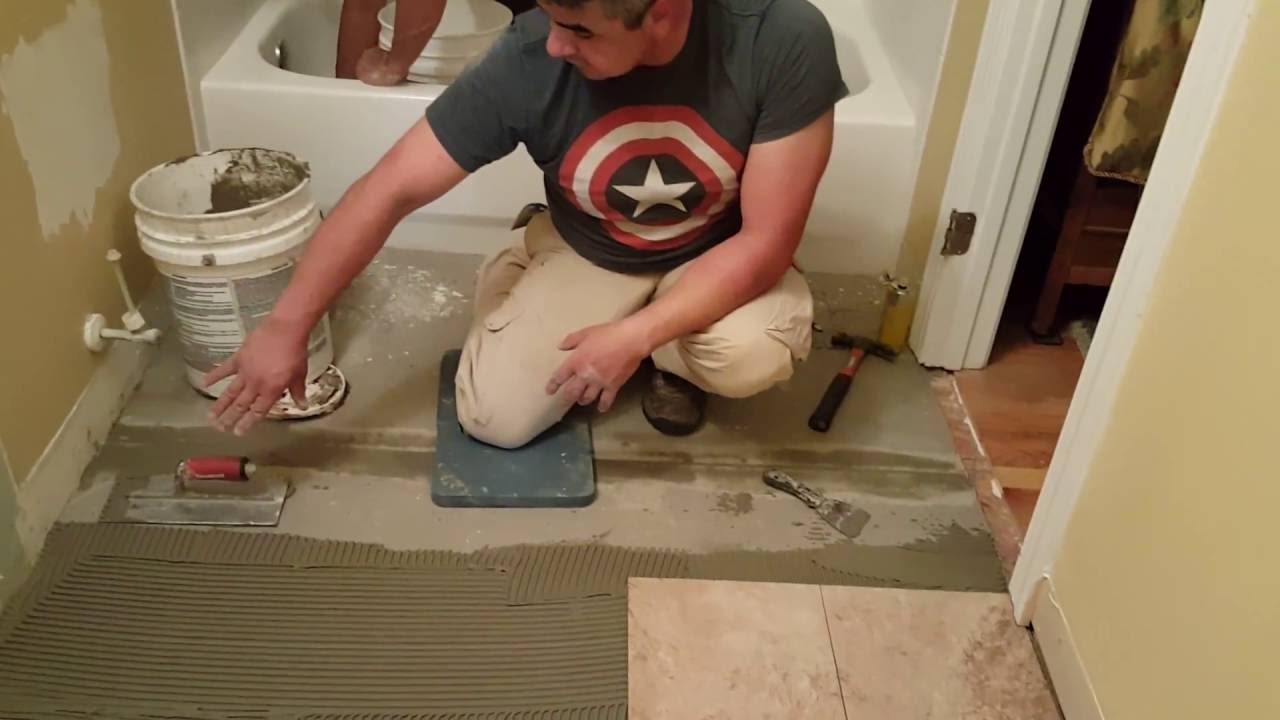
After the subfloor is prepared, the final step is to install the new flooring material according to the manufacturer’s instructions. This may involve laying tiles, planks, or sheets of flooring material, applying adhesive or grout, and allowing the flooring to set and cure before use. It’s important to take care during the installation process to ensure proper alignment, spacing, and adhesion of the new flooring material for a professional-looking finish.
DIY bathroom floor replacement is a feasible project for homeowners looking to update the look and functionality of their bathrooms without the expense of hiring a professional contractor. With careful planning, preparation, and attention to detail, homeowners can successfully remove old flooring, prepare the subfloor, and install new flooring materials to achieve beautiful and durable results. By taking proper safety precautions, following manufacturer’s instructions, and using the right tools and materials, DIY bathroom floor replacement can be a rewarding and cost-effective home improvement project that enhances the value and appeal of any bathroom space.
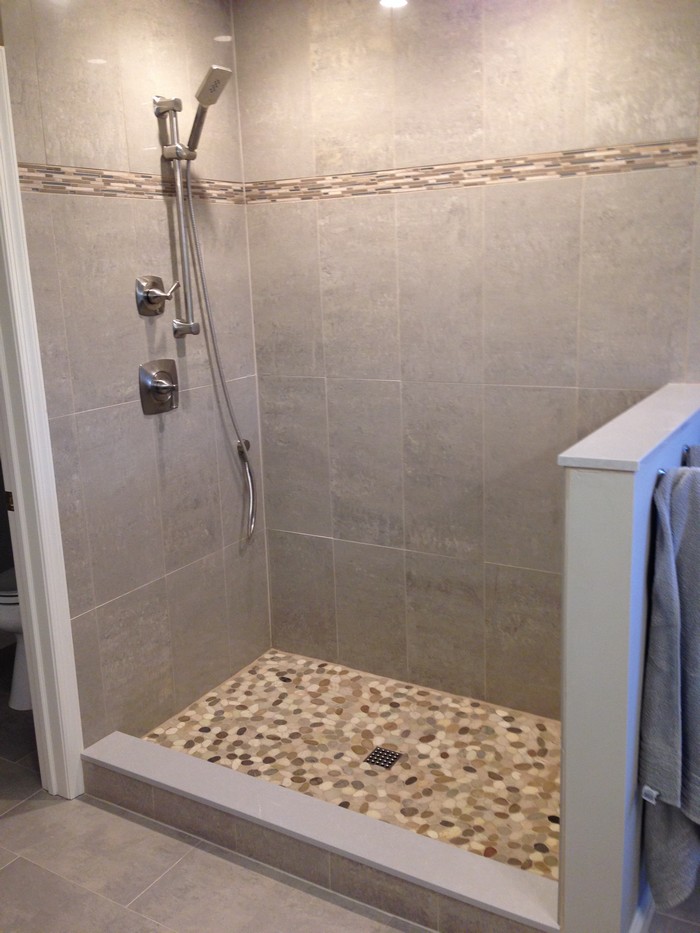
How To Update Your Bathroom Floor Tiles – 6 DIY ideas
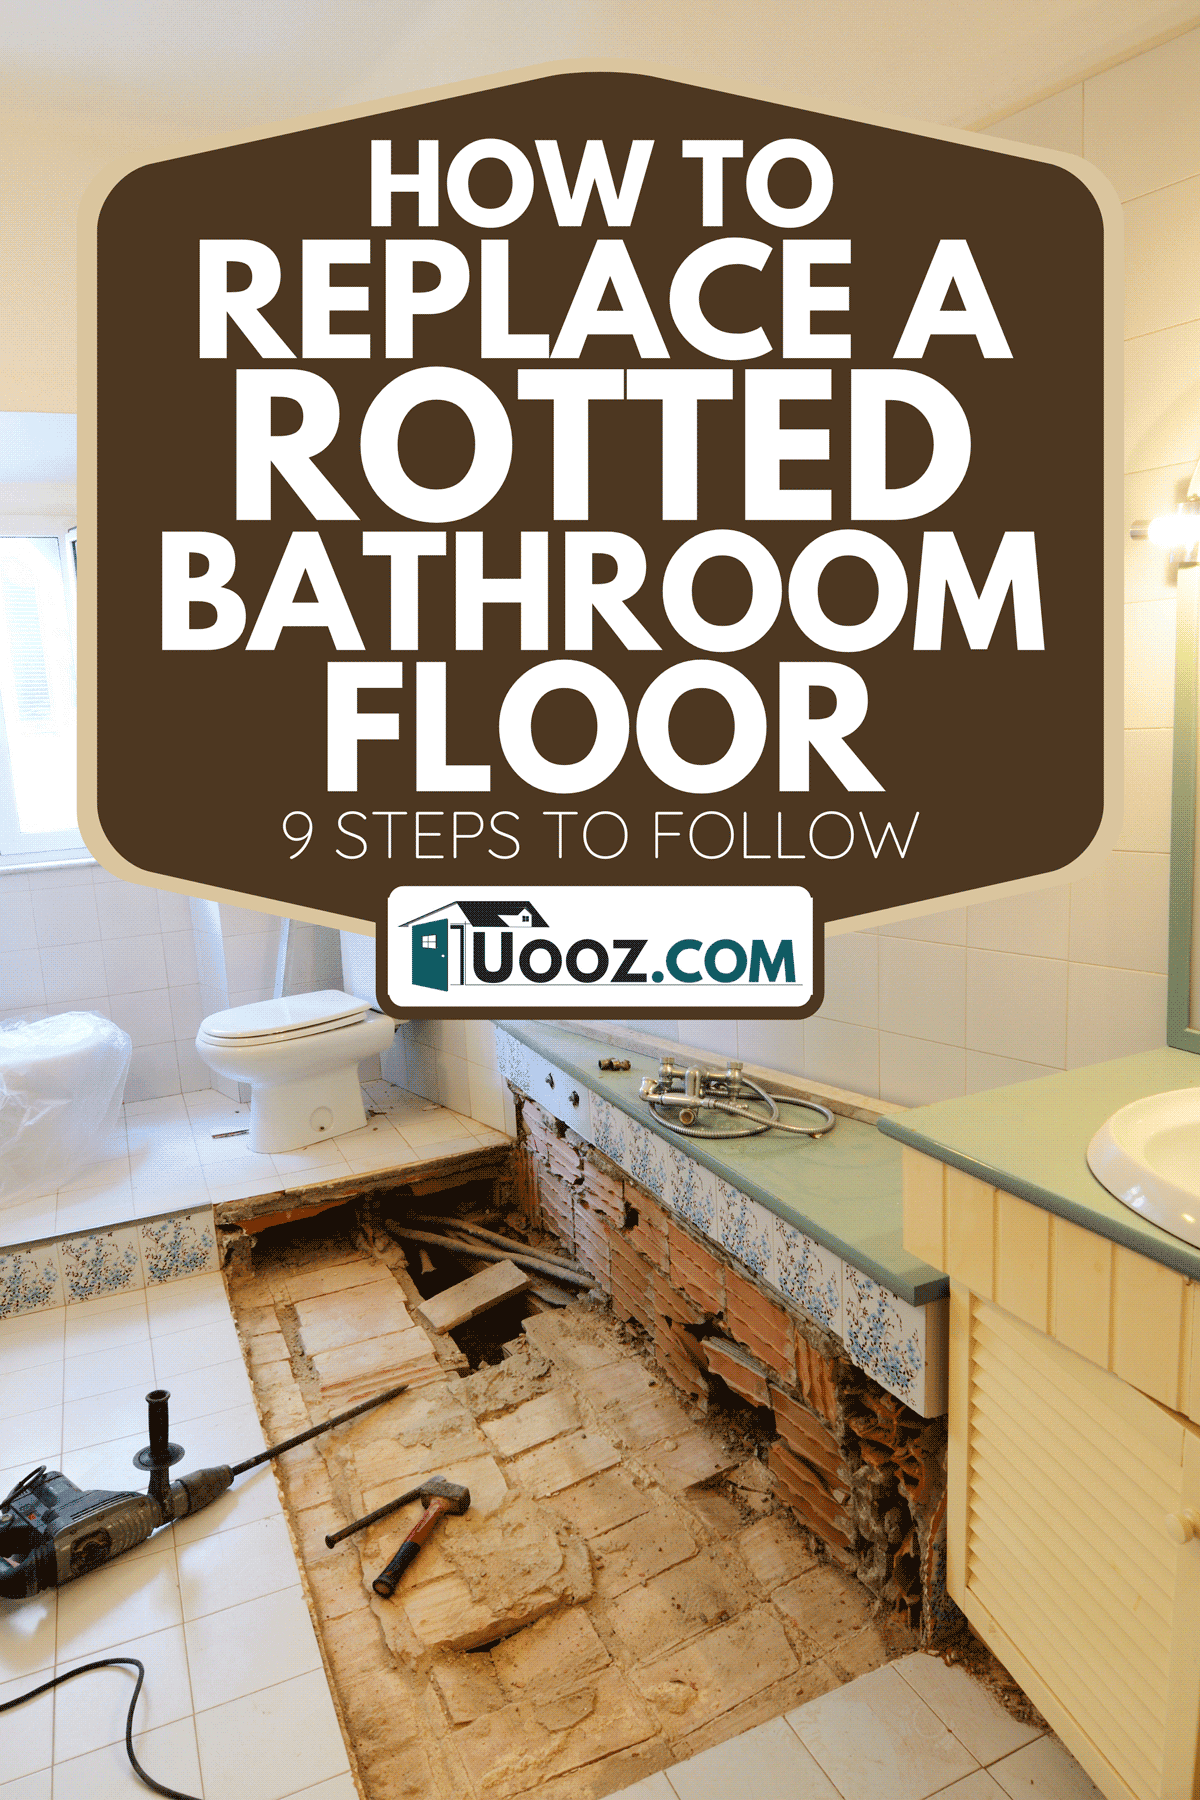
How To Replace A Rotted Bathroom Floor – 9 Steps To Follow
Should I replace subfloor in bathroom?
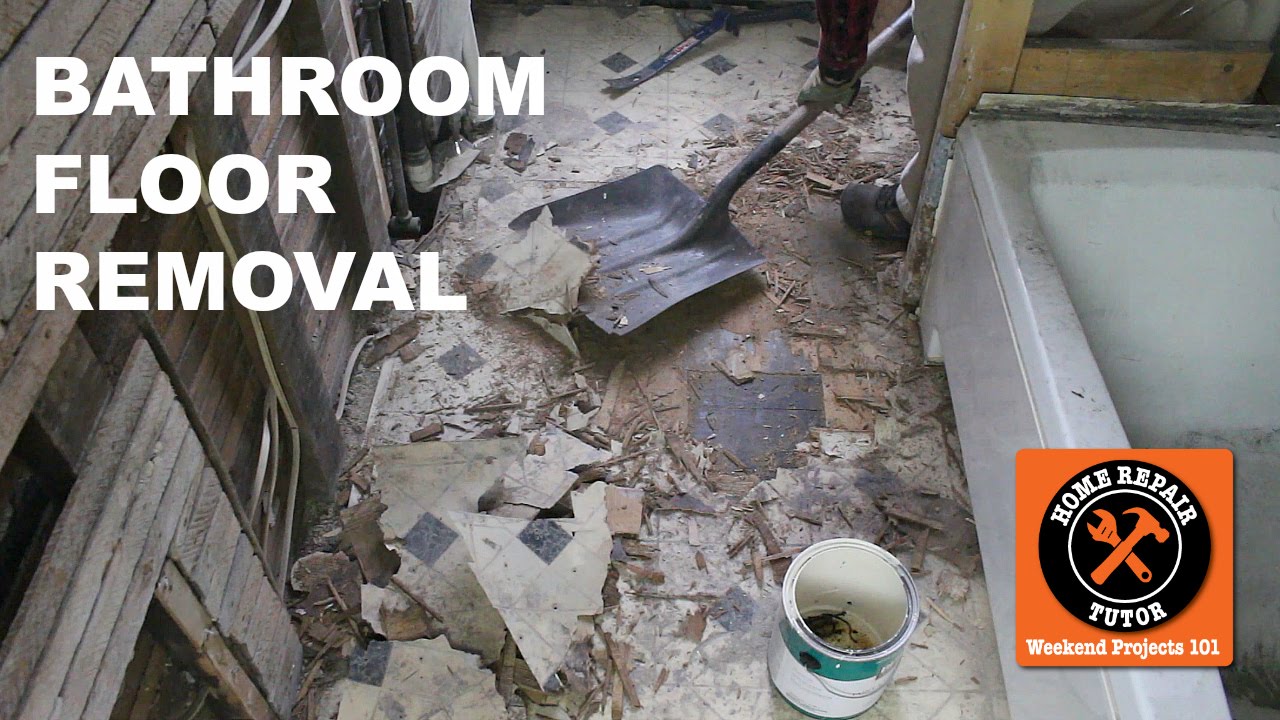
How to Remove a Bathroom Floor (Step-by-Step) – by Home Repair Tutor
Replace Your Bathroom Floor

How to Remove a Tile Floor
Bathroom Remodeling Tips: Choosing a Subfloor Material
How to Remove a Tile Floor
How To Update Your Bathroom Floor Tiles – 6 DIY ideas

Related Posts:
- Reglazing Bathroom Floor Tiles
- Colorful Bathroom Floor Tile
- Vinyl Flooring For Bathrooms
- Bathroom Flooring Ideas
- Bathroom Floor Patterns
- Bathroom Tile Floors
- Modern Vinyl Bathroom Flooring
- Mosaic Bathroom Floor Tiles
- Wood Bathroom Floor
- 1930s Bathroom Floor Tile
DIY Bathroom Floor Replacement: A Step-by-Step Guide
Is your bathroom floor looking a little worse for wear? If you’re looking for a more cost-effective way to spruce up your bathroom, replacing the floor yourself is a great option. A DIY bathroom floor replacement isn’t as intimidating as it sounds – with the right tools and materials, you can replace your bathroom floor in no time. Here’s a step-by-step guide to help you get started.
Gather Your Materials
The first step in any DIY project is to make sure you have the right materials. To replace your bathroom floor, you’ll need:
• Flooring of your choice
• Underlayment
• Tape measure
• Utility knife
• Circular saw
• Hammer and nails
• Caulk gun
• Silicone sealant
• Masking tape
• Pry bar
Prepare Your Flooring Area
Before you begin the installation process, it’s important to make sure that the surface of your subfloor is properly prepared. First, use a pry bar to remove any existing flooring. Next, inspect the subfloor for any signs of damage or moisture. If there are any damaged or soft spots, use a hammer and nails to repair them. Once the subfloor is in good condition, use a utility knife to cut away any excess material around the edges.
Install the Underlayment
The next step is to install the underlayment. Start by measuring the area and cutting the underlayment with a utility knife so that it fits perfectly. Then, use a caulking gun to apply adhesive to the back of the underlayment. Place it on top of your subfloor and press down firmly with a rolling pin or similar object. To ensure that the underlayment is properly installed, use masking tape along the edges.
Lay Down Flooring
Now that your underlayment is installed, it’s time to lay down your new flooring. Begin by measuring the area and cutting the flooring with a circular saw so that it fits perfectly. Then, use a hammer and nails to secure it in place. For added security, you can also use silicone sealant along the edges of each piece of flooring.
Finishing Touches
Finally, you’ll need to add some finishing touches to complete your DIY project. First, use a putty knife or similar tool to fill in any gaps between pieces of flooring with caulk or wood filler. Then, use a damp cloth to wipe down the entire surface and remove any debris or dust. Once your new bathroom floor is clean and dry, it’s ready for use!
How long does it take to replace a bathroom floor?
This depends on the size of your bathroom and the type of materials you are using. On average, it should take around four hours to complete a DIY bathroom floor replacement project.
What tools do I need for this project?
You’ll need some basic tools such as a tape measure, utility knife, circular saw, hammer and nails, caulk gun, silicone sealant, masking tape, pry bar, and putty knife or wood filler.
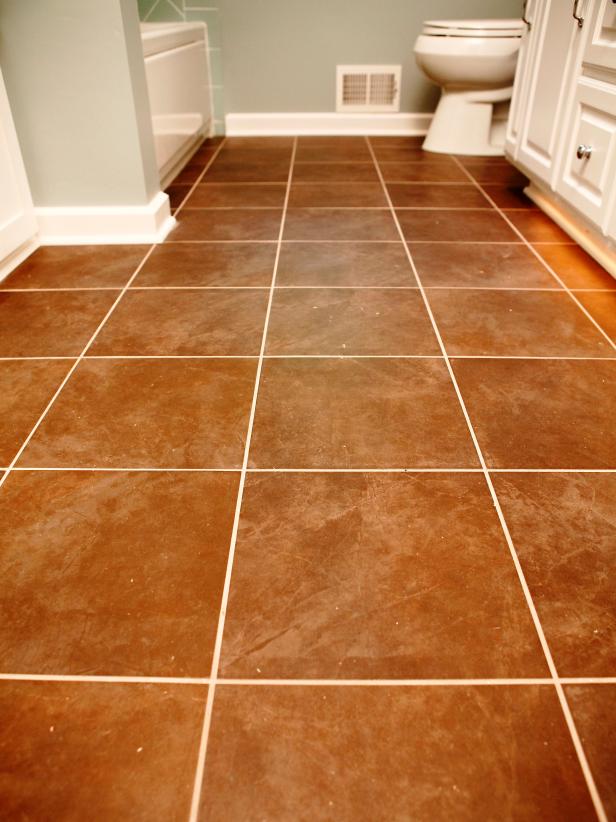
What type of flooring should I choose?
The type of flooring you choose will depend on your budget and personal preference. Popular options include vinyl plank flooring, tile floors, laminate floors, and hardwood floors.