DIY epoxy resin flooring has gained popularity as a cost-effective and durable option for homeowners looking to upgrade their floors. Epoxy resin is a type of thermosetting polymer that, when mixed with a hardening agent, creates a tough, durable coating that adheres well to concrete, wood, or tile surfaces. Epoxy resin flooring offers numerous benefits, including resistance to stains, scratches, and chemicals, as well as easy maintenance and long-term durability. By undertaking a DIY epoxy resin flooring project, homeowners can achieve professional-looking results at a fraction of the cost of hiring a professional contractor.
Images about Diy Epoxy Resin Flooring
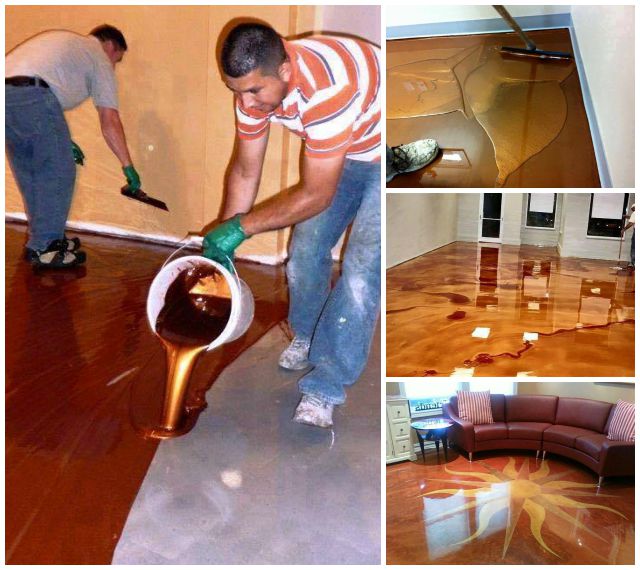
Diy Epoxy Resin Flooring

Before starting a DIY epoxy resin flooring project, it’s essential to properly prepare the surface to ensure adhesion and longevity of the coating. This involves cleaning the floor thoroughly to remove dirt, grease, and other contaminants that could interfere with adhesion. Depending on the condition of the floor, this may require scrubbing with a degreaser, sanding to remove any existing coatings or imperfections, and patching any cracks or holes with epoxy filler. Once the surface is clean and smooth, it’s important to allow it to dry completely before proceeding with the epoxy resin application.
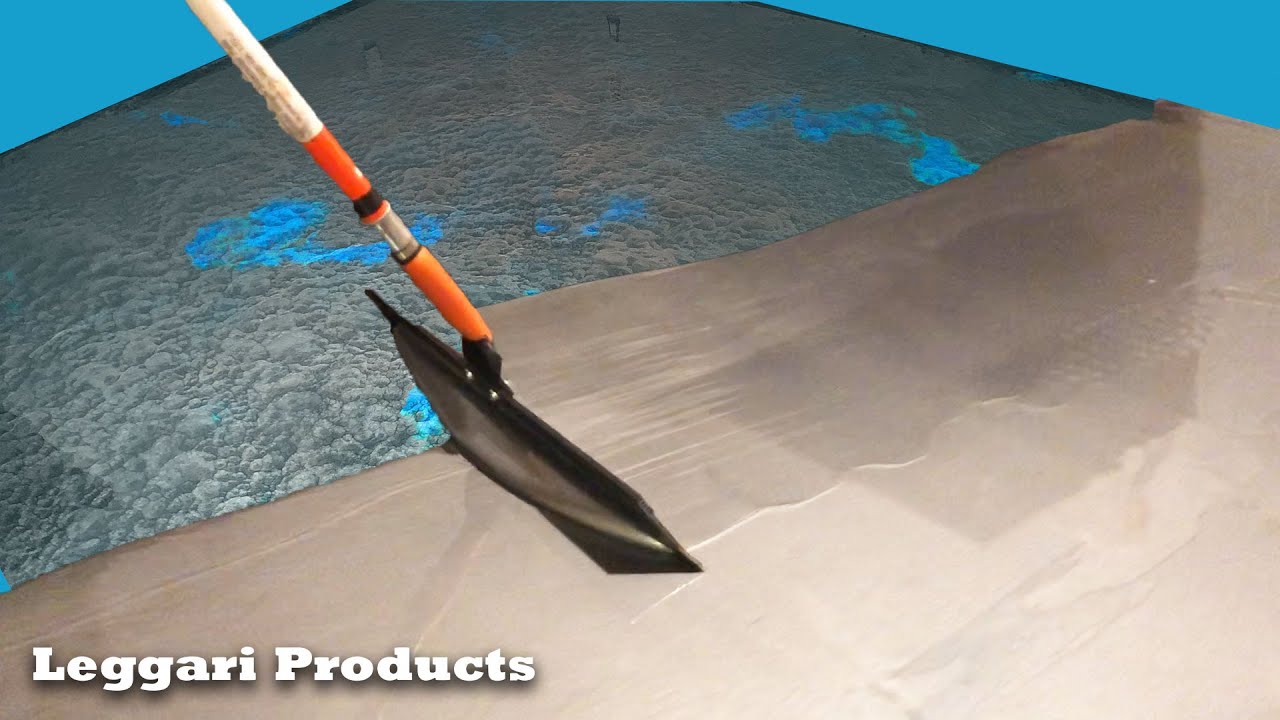
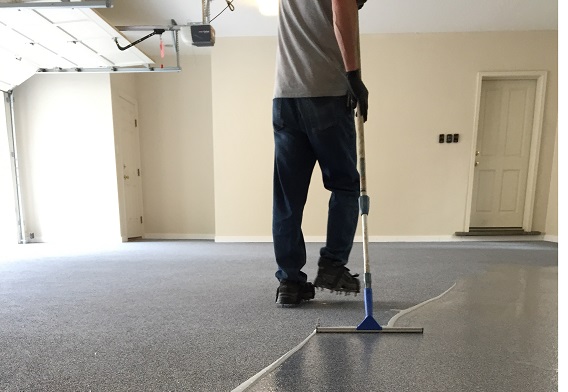
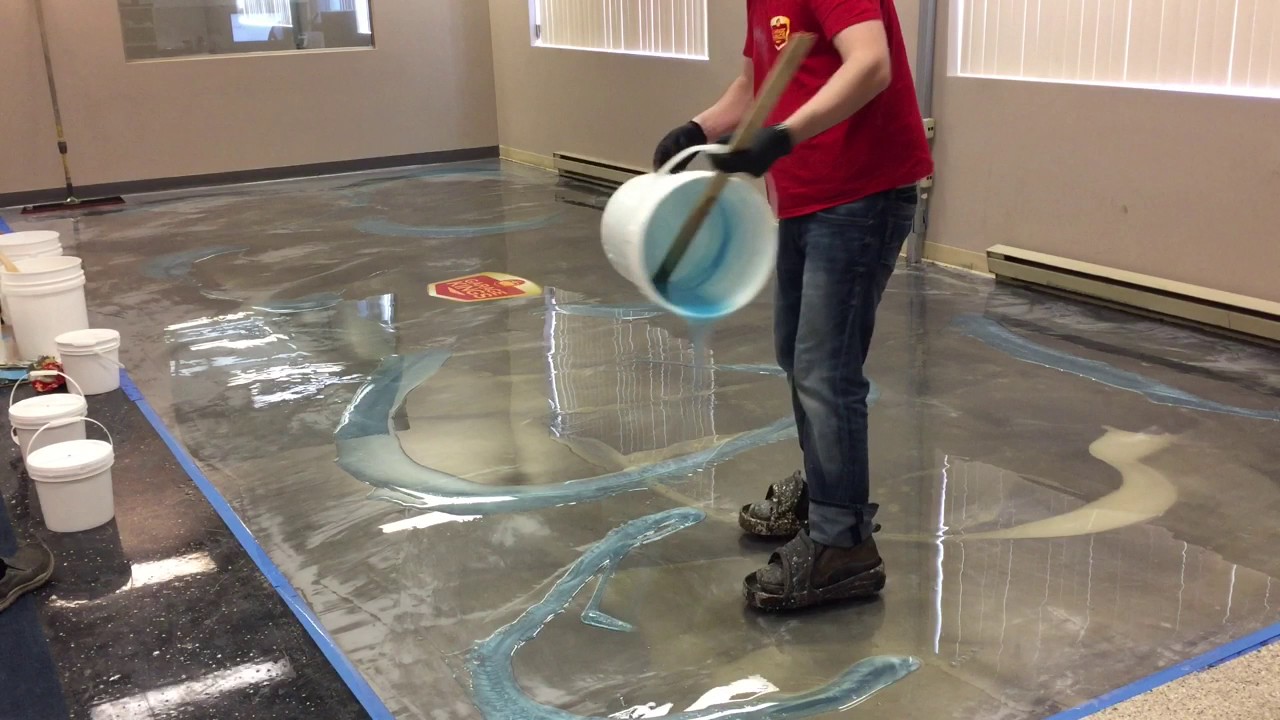
The application process for DIY epoxy resin flooring typically involves mixing the epoxy resin and hardening agent according to the manufacturer’s instructions and then applying the mixture to the prepared surface using a roller or brush. It’s essential to work quickly and methodically, as epoxy resin has a limited working time before it begins to cure. Once the epoxy resin is applied, it may be necessary to use a spiked roller or squeegee to help spread the material evenly and remove any air bubbles. Depending on the type of epoxy resin used, additional coats may be required to achieve the desired thickness and durability.
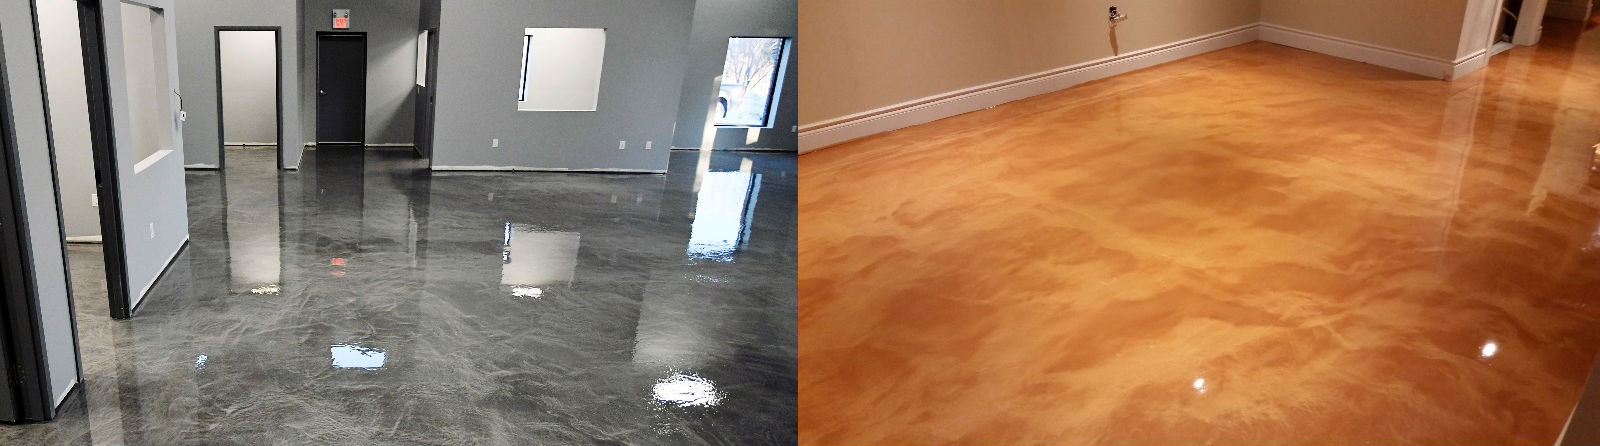
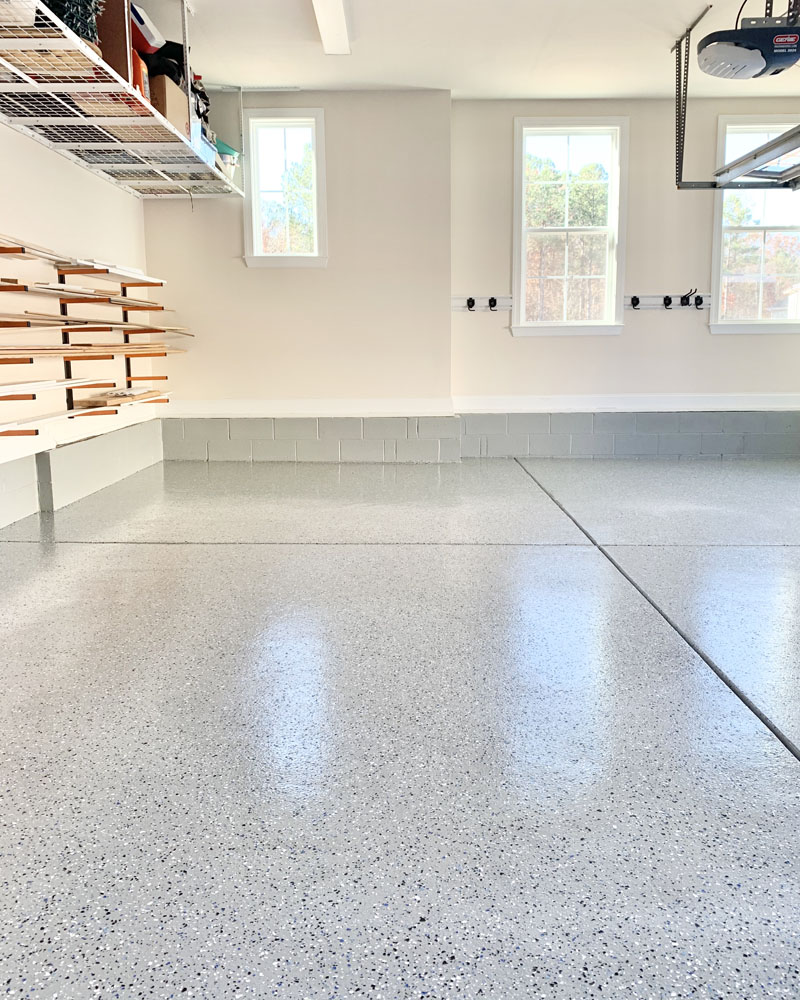
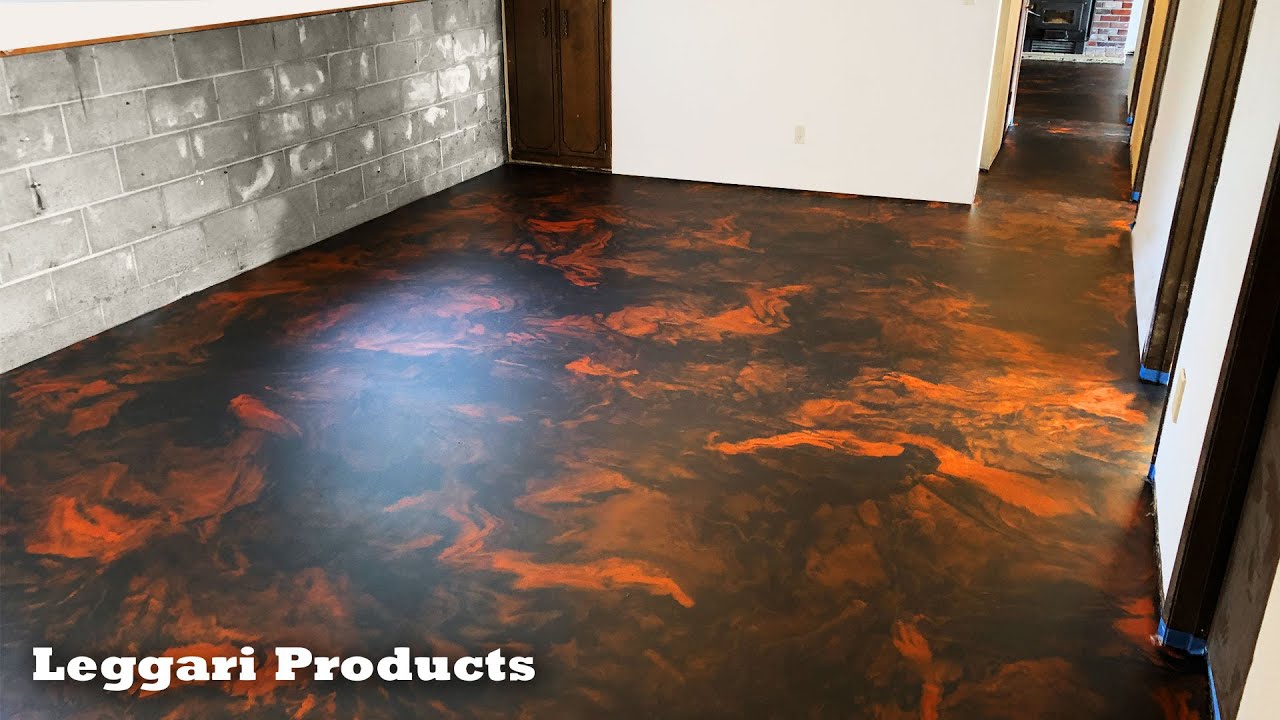
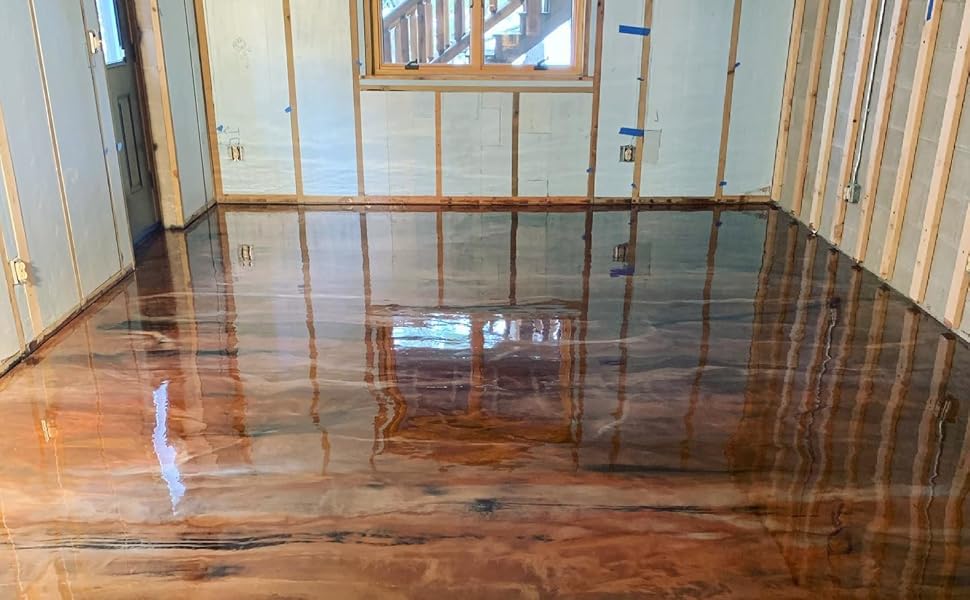
After the epoxy resin is applied, it’s important to allow it to cure completely before using the floor. This typically involves letting the floor dry for at least 24-48 hours, depending on the ambient temperature and humidity levels. Once cured, DIY epoxy resin flooring offers a smooth, glossy surface that is easy to clean and maintain. Regular sweeping and mopping with a mild detergent are usually all that’s needed to keep the floor looking its best. Additionally, homeowners can choose to add decorative elements such as colored flakes, metallic pigments, or decorative chips to customize the look of their epoxy resin floor and create a unique and stylish finish.
DIY epoxy resin flooring offers homeowners a cost-effective and durable solution for upgrading their floors. By properly preparing the surface and following the manufacturer’s instructions for mixing and applying the epoxy resin, homeowners can achieve professional-looking results that are resistant to stains, scratches, and chemicals. With proper care and maintenance, DIY epoxy resin flooring can provide long-term durability and enhance the aesthetic appeal of any room in the home. Whether you’re looking to update your garage, basement, or living space, epoxy resin flooring offers a versatile and customizable option that’s sure to impress.
DIY Designer Epoxy Resin Floor

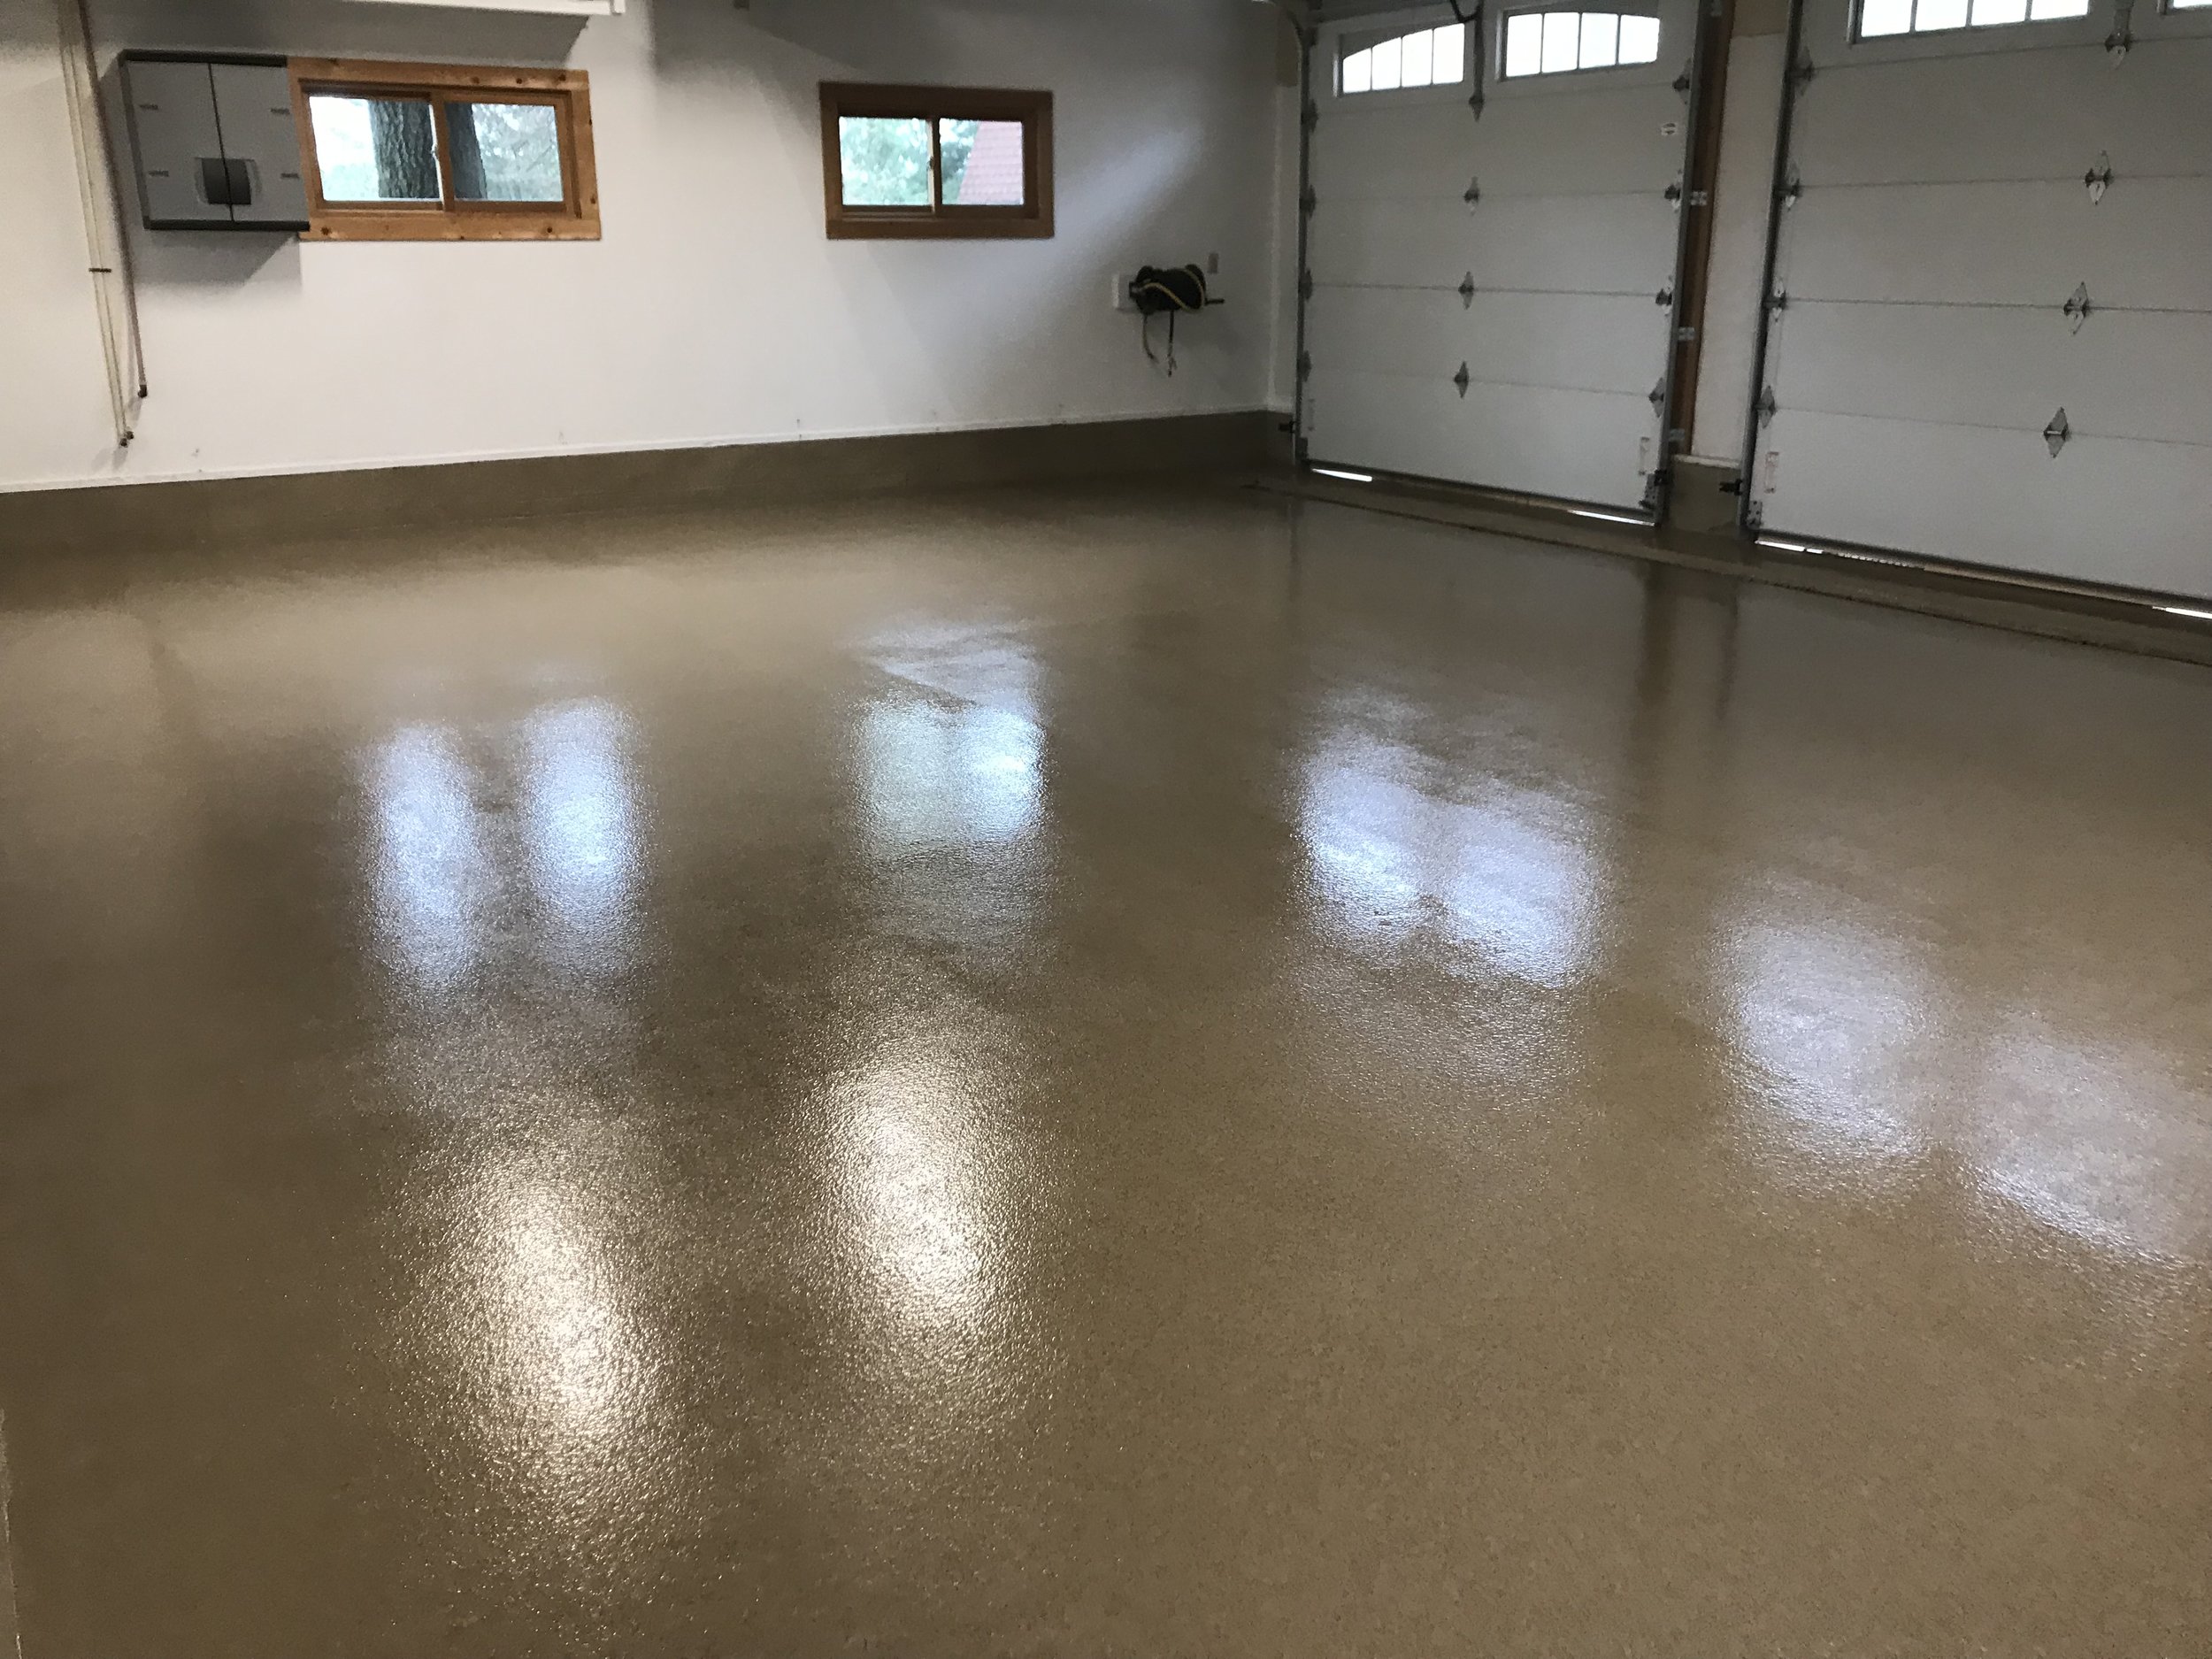
Epoxy Floor Installation Over Old Concrete
DIY Epoxy Garage Floor Coating Repair – Casper, WY

Flooring Epoxy 1.5 Gallon Kit (Stone Coat Countertops)
DIY Epoxy Makeover. Purchase your Epoxy floor kit today!

How To Do Amazing Metallic Epoxy Floor!
DIY vs. Professional Garage Floor Coatings u2014 Advanced Flooring Systems
DIY Metallic Epoxy Floor
Related Posts:
- Epoxy Flooring Advantages Disadvantages
- Metallic Epoxy Bathroom Floor
- Sherwin Williams Epoxy Floor
- High Gloss Epoxy Flooring
- Epoxy Flooring Interior Design
- Metallic Epoxy Floor Coating
- Epoxy Floor Coating
- Epoxy Kitchen Floor
- Epoxy Basement Floor
- Epoxy Resin Garage Floor
DIY Epoxy Resin Flooring: A Comprehensive Guide
If you’re looking for a way to bring a durable, stylish touch to your home, DIY epoxy resin flooring is a great option. Resin-based floors are easy to install, highly durable, and offer an attractive finish that will last for years. In this article, we’ll take you through the basics of epoxy resin flooring, including the materials you’ll need and the installation process.
What is Epoxy Resin Flooring?
Epoxy resin flooring is a type of flooring made from a combination of epoxy resin and hardener. This mixture creates a strong, durable surface that’s resistant to abrasion, impact, stains, and chemicals. It also offers an attractive finish that can be customized with various colors and designs.
Benefits of Epoxy Resin Flooring
Epoxy resin flooring is ideal for a variety of applications, including residential and commercial spaces. Here are some of the benefits it offers:
Durable: The strength of epoxy resin makes it highly resistant to damage. This makes it ideal for high-traffic areas and areas prone to spills or stains.
ow Maintenance: Once installed, epoxy resin floors require very little maintenance. They can be easily cleaned with soap and water and do not need to be waxed or sealed.
Customizable: Epoxy resin floors can be customized with various colors, designs, and textures. This allows you to create a unique look that fits your style.
Cost Effective: Installing an epoxy resin floor is generally much more cost effective than other types of flooring such as tile or hardwood.
Materials Needed for DIY Epoxy Resin Flooring
Before you begin installing an epoxy resin floor, you’ll need to gather the necessary materials. These include:
– Epoxy resin
– Hardener
– Mixer
– Paint roller or applicator brush
– Drop cloths or plastic sheeting
– Safety glasses
– Gloves
– Mask (optional)
– Sandpaper (optional)
– Vacuum cleaner (optional)
Steps for Installing DIY Epoxy Resin Flooring
Installing an epoxy resin floor is relatively simple if you take the time to prepare properly. Here are the steps you should take:
Prepare the Surface: Start by preparing the surface on which you’ll be applying the epoxy resin. Remove any existing sealants or waxes, and use sandpaper to smooth any rough patches in the floor. Vacuum up any dust or debris before proceeding.
Mix the Epoxy Resin: Using a mixer, combine the epoxy resin and hardener according to the manufacturer’s instructions. Do not mix more than you can apply in one hour; any excess mixture should be discarded after this time period.
Apply the Mixture: Once mixed, use a paint roller or applicator brush to apply the mixture evenly across the floor surface in thin layers. Allow each layer to dry completely before adding another layer.
Finish Up: Once all layers have been applied and dried completely, remove any excess material with a vacuum cleaner or wet rag. Allow the finished floor to cure for at least 24 hours before walking on it or moving furniture back into the room.
How long will an epoxy resin floor last?
With proper care and maintenance, an epoxy resin floor can last up to 10 years without needing to be replaced.
Is epoxy resin safe for use in homes?
Yes, epoxy resin is safe for use in both residential and commercial spaces as long as proper ventilation is provided during installation and use of protective gear is worn.
Is it possible to apply more than one color of epoxy resin?
Yes! You can create custom designs using multiple colors of epoxy resin for a unique look that fits your style.