Transform Your Garage with DIY Metallic Epoxy Flooring
Are you tired of looking at your dull and boring garage floor? It’s time to give it a makeover with DIY metallic epoxy flooring. This innovative flooring solution not only adds a touch of glamour to your garage but also provides a durable and low-maintenance surface. We will discuss the transformative power of metallic epoxy and how it can completely change the look and feel of your garage.
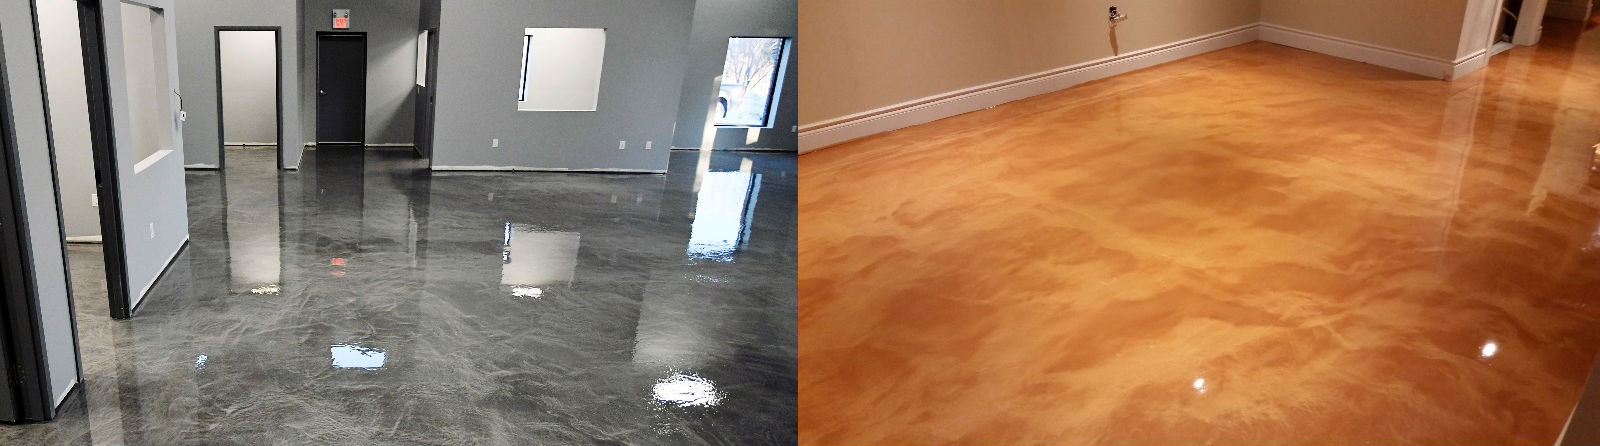
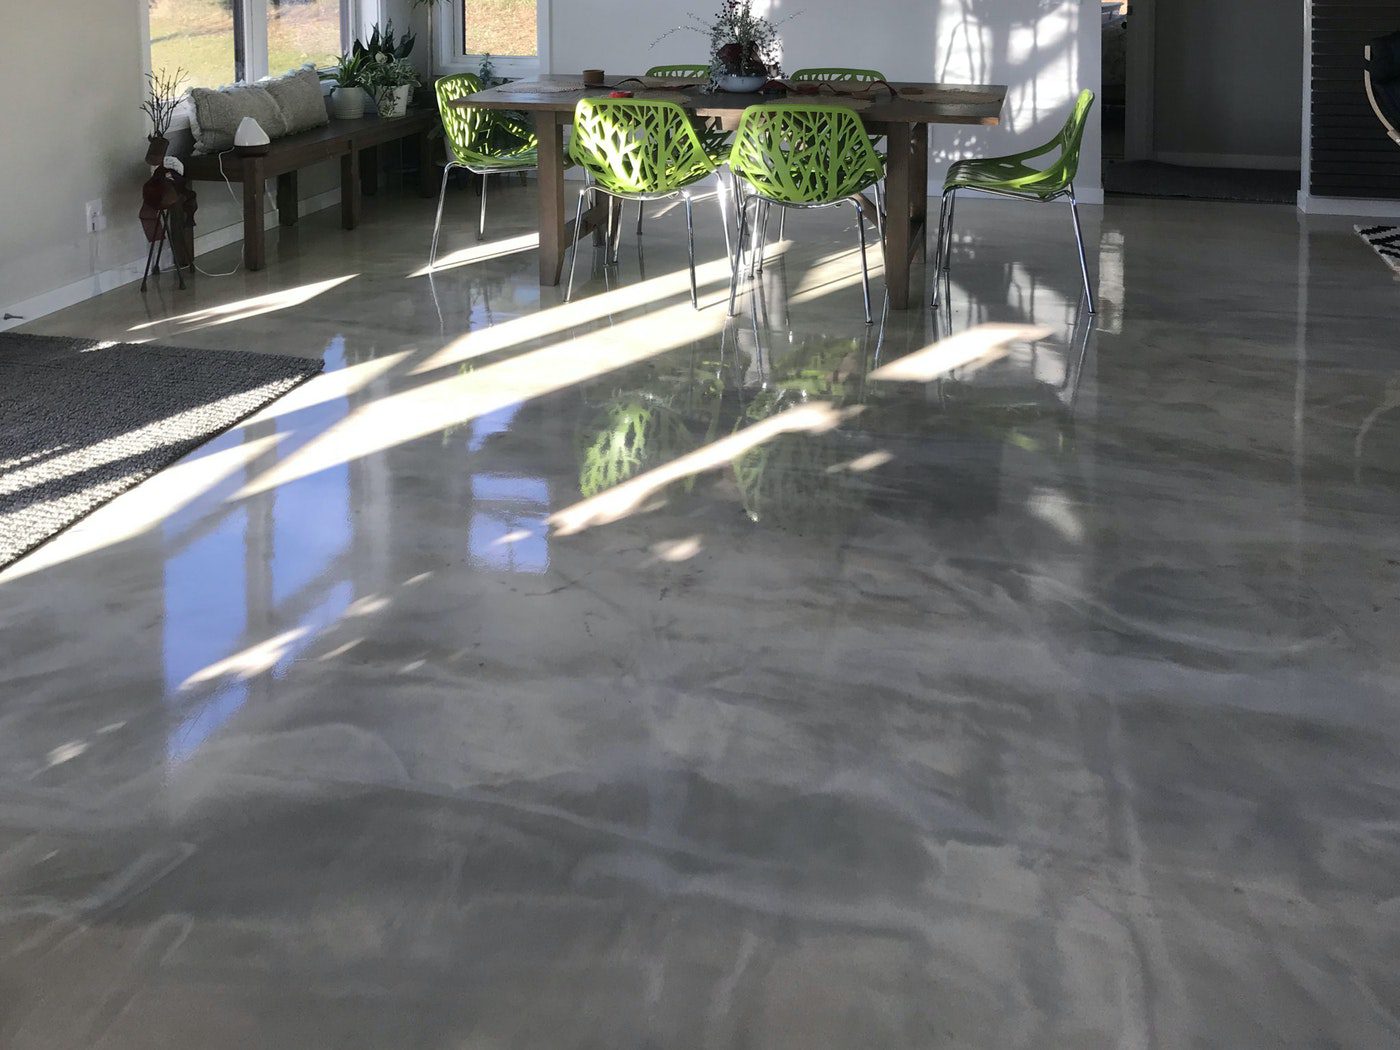
- Elevating Aesthetics: One of the main reasons why homeowners are opting for metallic epoxy garage floors is the stunning visual appeal it offers. The glossy finish combined with metallic pigments creates a unique and luxurious look. The metallic epoxy creates a sense of depth and movement, resembling a work of art on your garage floor. It instantly transforms your garage into a stylish and inviting space.
- Enhanced Durability: Aside from aesthetics, metallic epoxy flooring offers exceptional durability. It is resistant to stains, chemicals, and abrasions, making it perfect for a high-traffic area like a garage. The epoxy coating forms a protective layer that can withstand heavy vehicles, tools, and equipment. It also prevents moisture penetration, reducing the chances of cracks and damage to the concrete underneath.
- Low Maintenance: Maintaining a garage floor can be a hassle, but metallic epoxy makes it easy. The seamless and non-porous surface is effortless to clean. Dust, dirt, and spills can be easily wiped away with a damp mop or cloth, keeping your garage floor looking pristine. Unlike traditional garage floor options, metallic epoxy does not require constant sealing or waxing, saving you time and effort in the long run.
- Cost-Effective Solution: Investing in a metallic epoxy garage floor may seem like a significant expense, but it is actually a cost-effective solution in the long term. The enhanced durability means fewer repairs and replacements over the years. Additionally, the low maintenance requirements save you money on cleaning products and ongoing maintenance. It’s a worthwhile investment that adds value to your home.
- DIY-Friendly: Another advantage of metallic epoxy flooring is that it is DIY-friendly. With proper preparation and the right tools, you can transform your garage floor on your own. The application process is relatively straightforward, and many manufacturers provide detailed instructions and video tutorials. However, it is essential to follow the guidelines carefully for a successful installation.

Benefits of Metallic Epoxy Garage Floors
If you’re considering upgrading your garage floor, metallic epoxy should be at the top of your list. This innovative flooring option offers numerous benefits that make it a popular choice among homeowners. Below are the advantages of metallic epoxy garage floors and why they are worth considering for your next home improvement project.
Aesthetics that Wow: One of the most notable benefits of metallic epoxy garage floors is their stunning appearance. The combination of metallic pigments and epoxy resin creates a mesmerizing, three-dimensional effect that adds a touch of elegance and sophistication to your garage. The glossy finish enhances the metallic shine, giving your floor a unique and eye-catching look.
Durability that Lasts: When it comes to garage floors, durability is key. Metallic epoxy excels in this aspect, providing a durable surface that can withstand heavy vehicles, tools, and equipment. The epoxy coating acts as a protective layer, making your garage floor resistant to stains, chemicals, and abrasions. This longevity ensures that your garage floor remains in excellent condition for years to come.
Easy Maintenance: Maintaining a garage floor can be a time-consuming task, but metallic epoxy makes it a breeze. The seamless and non-porous surface is resistant to dirt, dust, and spills. Regular sweeping and occasional mopping are all it takes to keep your floor looking pristine. Unlike other flooring options, metallic epoxy does not require waxing or sealing, saving you both time and effort.
Versatile Design Options: Metallic epoxy garage floors offer endless design possibilities. From vibrant colors to subtle hues, you can choose a design that complements your garage’s overall aesthetic. Additionally, you can experiment with different metallic pigments and techniques to create a personalized and unique look. Whether you prefer a bold and dramatic statement or a more understated elegance, metallic epoxy can cater to your design preferences.
Increased Home Value: Investing in a metallic epoxy garage floor can significantly increase the value of your home. Potential buyers are often impressed by the visual appeal and durability of metallic epoxy flooring. It adds a touch of luxury to your garage, making it stand out from the crowd. If you ever decide to sell your home, a metallic epoxy garage floor can be a valuable selling point.
How to Apply Metallic Epoxy to Your Garage Floor
Applying metallic epoxy to your garage floor is a rewarding DIY project that can completely transform the look of your space. With the right materials and techniques, you can achieve a professional-looking finish that will enhance the aesthetics and durability of your garage floor. We will guide you through the step-by-step process of applying metallic epoxy to your garage floor.
Preparation: Before applying metallic epoxy, proper preparation of the garage floor is essential. Start by cleaning the floor thoroughly, removing any dirt, grease, or oil stains. Fill any cracks or imperfections with a concrete patching compound and allow it to dry completely. Next, mechanically etch the surface using a floor grinder or a diamond-embedded pad to ensure proper adhesion. Finally, vacuum and wipe down the floor to remove any dust or debris.
Priming: To enhance the adhesion of the epoxy to the concrete, it is recommended to apply a primer coat. Mix the primer according to the manufacturer’s instructions and apply it evenly using a roller or a brush. Allow the primer to dry completely before proceeding to the next step.
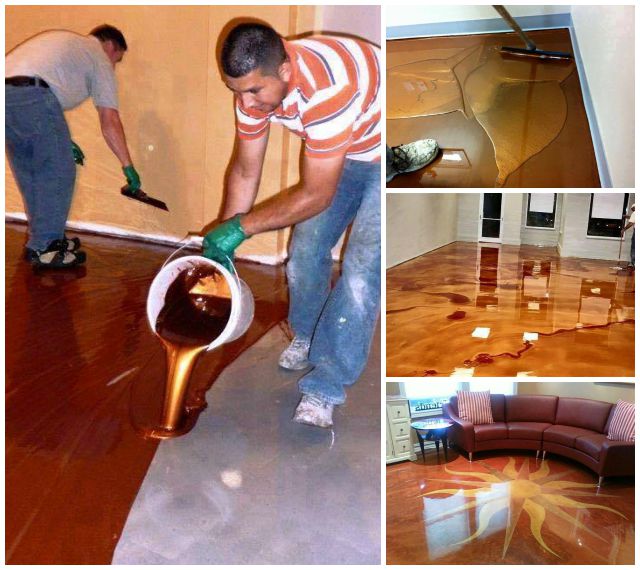
Mixing the Metallic Epoxy: Carefully measure and mix the metallic epoxy resin and hardener according to the manufacturer’s instructions. It is crucial to follow the correct mixing ratios to achieve the desired effects. Once the components are mixed, let the epoxy sit for a few minutes to allow any air bubbles to rise to the surface.
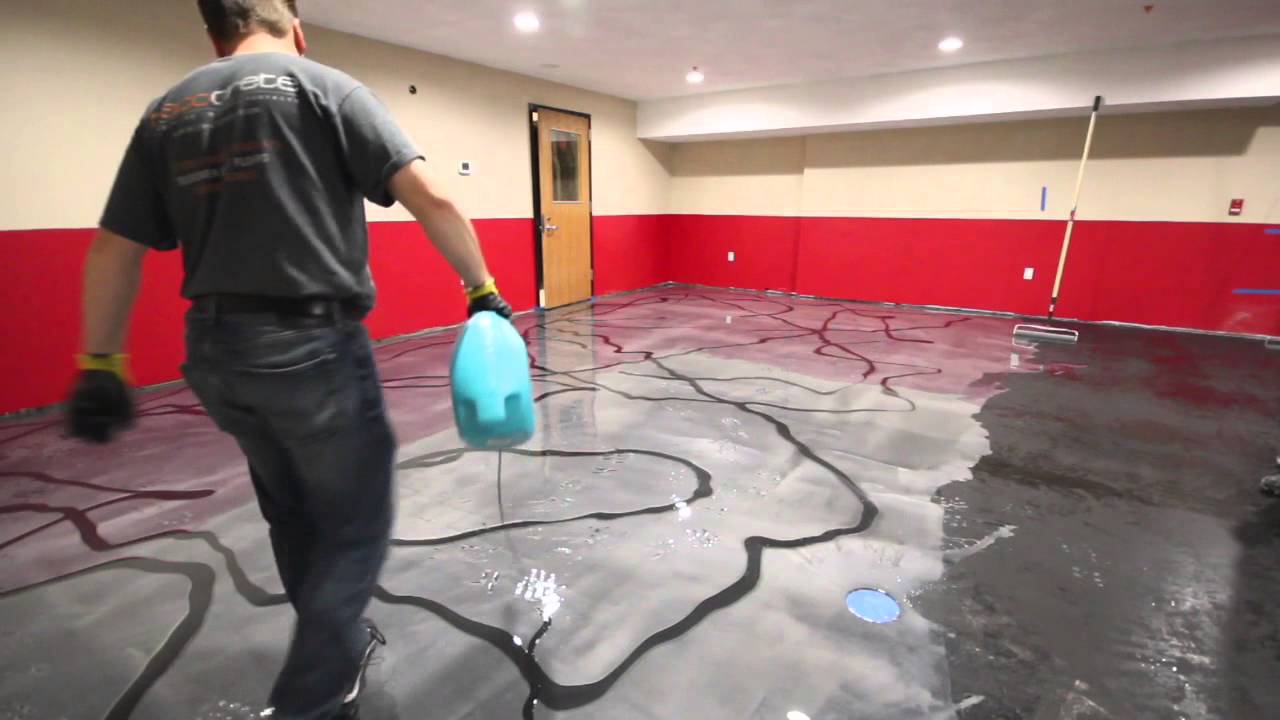
Applying the Metallic Epoxy: Begin by cutting in the edges of the garage floor using a brush or a small roller. This will ensure that the epoxy reaches all the corners and edges of the floor. Then, pour the mixed epoxy onto the floor in a ribbon-like pattern, working in small sections at a time. Use a roller with a nap suitable for epoxy application to spread the epoxy evenly, ensuring a smooth and consistent coverage. To create the desired metallic effects, use a trowel or a squeegee to manipulate the epoxy and create patterns or swirls.
Finishing Touches: Once the entire floor is coated with metallic epoxy, you can add additional decorative elements such as color flakes or glitter to enhance the visual appeal. Sprinkle the desired amount of flakes or glitter onto the wet epoxy and gently press them down with a roller or a brush. This will add depth and texture to the floor. Allow the epoxy to cure according to the manufacturer’s instructions before using the garage.
Maintenance and Care: To maintain the beauty and longevity of your metallic epoxy garage floor, it is important to follow proper maintenance practices. Avoid dragging heavy objects across the floor to prevent scratches, and use furniture pads or mats under heavy equipment or vehicles. Clean up spills promptly to prevent staining, and avoid using harsh chemicals or abrasive cleaners that could damage the epoxy coating. Regularly sweep or vacuum the floor to remove dirt and debris, and occasionally damp mop with a mild detergent and water solution.
Tips and Tricks for a Successful DIY Metallic Epoxy Garage Floor Project
Embarking on a DIY metallic epoxy garage floor project can be an exciting and fulfilling endeavor. However, it’s important to be prepared and armed with the right knowledge and techniques to ensure a successful outcome. Below we share some valuable tips and tricks to help you achieve professional-looking results with your DIY metallic epoxy garage floor project.
Proper Surface Preparation: The key to a successful metallic epoxy garage floor project lies in proper surface preparation. Take the time to thoroughly clean the floor, removing any dirt, grease, or oil stains. Repair any cracks or imperfections in the concrete before proceeding. Additionally, ensure that the surface is properly etched to promote adhesion. This will ensure that the epoxy adheres well and provides a long-lasting finish.
Temperature and Humidity Control: When applying metallic epoxy, it’s important to consider temperature and humidity conditions. Ideal conditions for epoxy application are typically between 60°F and 90°F (15°C – 32°C) with low humidity. Extreme temperatures or high humidity can affect the curing process and the final appearance of the epoxy. Make sure to check the weather forecast and choose a time when conditions are favorable for epoxy application.
Proper Mixing and Application: Follow the manufacturer’s instructions carefully when mixing the metallic epoxy components. Proper mixing ensures that the epoxy cures correctly and achieves the desired visual effects. Take the time to mix thoroughly and allow any air bubbles to rise to the surface. When applying the epoxy, work in small sections and maintain a wet edge to avoid visible seams or lines. Use the recommended tools, such as rollers and brushes, for a smooth and even application.
Experiment with Techniques and Colors: One of the advantages of metallic epoxy is its versatility in creating unique and eye-catching designs. Don’t be afraid to experiment with different techniques and colors to achieve the desired effect. You can try techniques like marbling, swirling, or layering to create depth and movement on the floor. Additionally, consider using multiple colors or metallic pigments to create a custom look that matches your personal style.
Practice Patience during the Curing Process: After applying the metallic epoxy, it’s important to be patient during the curing process. Follow the manufacturer’s instructions regarding the curing time and avoid walking or placing heavy objects on the floor until it is fully cured. Rushing the curing process can lead to imperfections or damage to the epoxy. Allow the epoxy to cure completely before using the garage to ensure a durable and long-lasting finish.
Proper Maintenance and Care: To extend the lifespan of your metallic epoxy garage floor, proper maintenance and care are essential. Avoid using harsh chemicals or abrasive cleaners that could damage the epoxy coating. Instead, use a mild detergent and water solution for routine cleaning. Place mats or rugs at entry points to prevent dirt and debris from being tracked onto the floor. Regularly inspect the floor for any signs of wear and tear and address any issues promptly to maintain the beauty and functionality of your metallic epoxy garage floor.
Creating Unique and Eye-Catching Metallic Epoxy Garage Floors
If you’re looking to make a bold statement with your garage floor, metallic epoxy is the perfect choice. With its unique visual effects and customizable options, you can create a garage floor that is both unique and eye-catching. Below are different ways to create stunning and one-of-a-kind metallic epoxy garage floors that will impress anyone who steps into your garage.
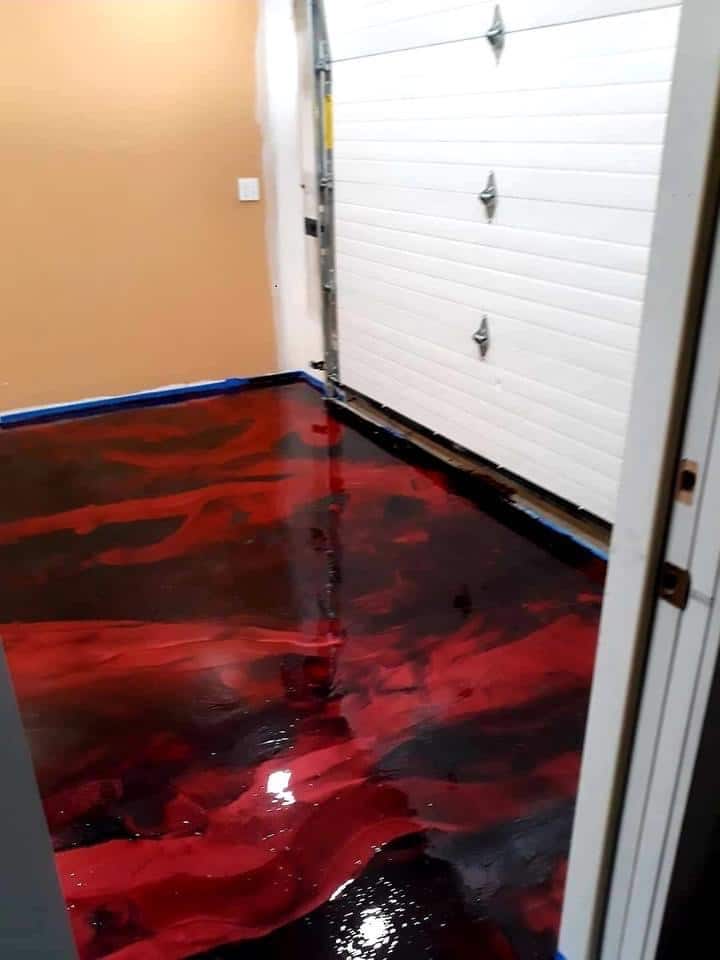
Choosing the Right Metallic Pigments: The first step in creating a unique metallic epoxy garage floor is choosing the right metallic pigments. Metallic pigments come in a wide range of colors, including gold, silver, copper, and various shades of blue, green, and red. Consider the overall color scheme of your garage and choose metallic pigments that complement or contrast with the existing elements. You can also experiment with mixing different metallic pigments to create a custom color that is truly unique.
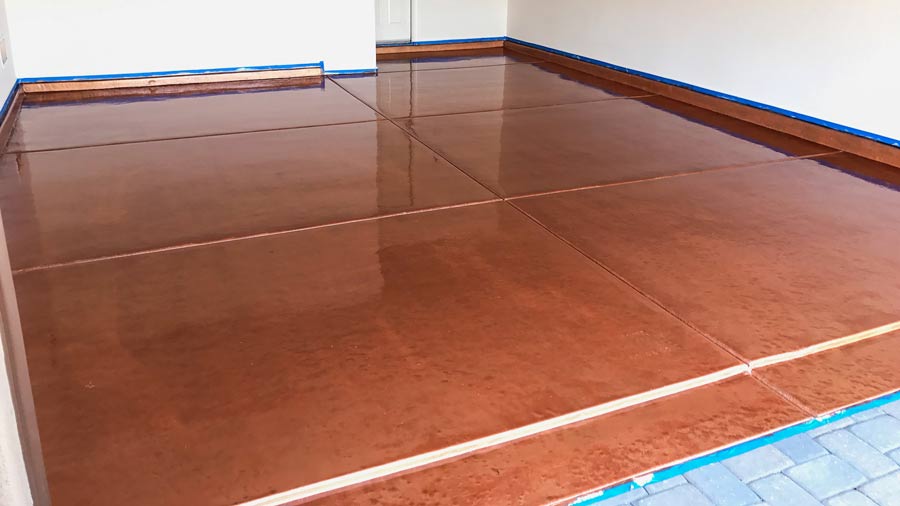
Layering and Combining Colors: To add depth and dimension to your metallic epoxy garage floor, consider layering and combining colors. This technique involves applying multiple layers of metallic epoxy in different shades or colors to create a multi-dimensional effect. For example, you can start with a base layer of a darker metallic pigment and then apply a top layer of a lighter or contrasting color. This will create a stunning visual effect that mimics the look of natural stone or marble.
Experimenting with Patterns and Designs: Another way to create a unique metallic epoxy garage floor is by experimenting with patterns and designs. Metallic epoxy allows for endless possibilities when it comes to creating patterns and designs on the floor. You can use tools like brushes, squeegees, or trowels to manipulate the epoxy and create swirls, waves, or even geometric patterns. Consider your personal style and the overall aesthetic of your garage when choosing the pattern or design.
Adding Color Flakes or Glitter: To further enhance the visual appeal of your metallic epoxy garage floor, consider adding color flakes or glitter. Color flakes are small, decorative chips that can be sprinkled onto the wet epoxy to add texture and depth. They come in a variety of colors and sizes, allowing you to customize the look of your floor. Glitter, on the other hand, can be sprinkled onto the wet epoxy to create a sparkling effect. Experiment with different amounts and combinations of color flakes or glitter to achieve the desired look.
Sealing and Protecting the Floor: Once you have achieved the desired look for your metallic epoxy garage floor, it’s important to seal and protect the floor to ensure its longevity. Applying a clear topcoat or a polyurethane sealer will provide an extra layer of protection against stains, scratches, and UV damage. It will also enhance the shine and durability of the metallic epoxy. Follow the manufacturer’s instructions for proper application and curing of the sealer.

Metallic Epoxy Floor Coatings

DIY Epoxy Garage Floor Coating Install in Tucson, AZ
Learn To Install Metallic Epoxy Floors Like The Pros Start To Finish

DIY: Homeowner Installs Designer Metallic Epoxy Floor Coating
How to Install Amazing Metallic Epoxy Floor! Coffee, Brass and Black

How To Prep A Garage Floor For Epoxy Coating Floor Shields
Related Posts: