Preparing Your Hardwood Floors for Hand Finishing
When preparing your hardwood floors for hand finishing, taking the right steps can make all the difference in achieving a flawless final result. Whether you’re rejuvenating old floors or finishing newly installed hardwood, thorough preparation is crucial. We will guide you through the essential steps to get your floors ready for the perfect hand finish.
- Clear the Area: The first step in preparing your hardwood floors is to clear the room of all furniture, rugs, and decor. Any obstacles can impede your work and potentially damage your belongings. Ensuring the area is completely free of obstructions will allow you to work more efficiently and safely.
- Clean the Floors: Once the room is empty, it’s time to clean the floors thoroughly. Sweep or vacuum to remove loose dirt and debris. Follow up with a damp mop to lift any remaining dust. For particularly grimy areas, a mild wood floor cleaner can be used. It’s essential to let the floors dry completely before proceeding to the next step.
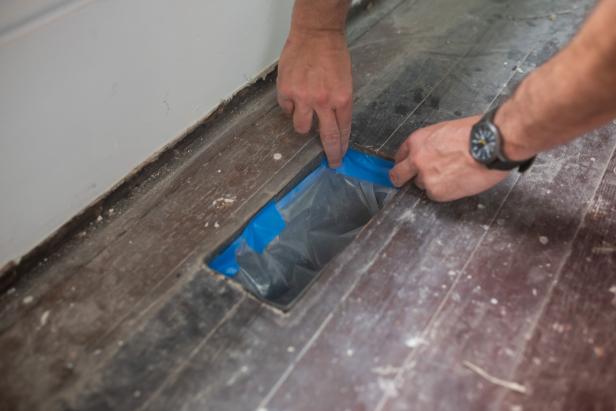
- Inspect for Damage: Before you begin sanding, inspect the floors for any damage. Look for loose boards, nails that stick up, or any other imperfections. Repair any issues you find to ensure a smooth surface for sanding and finishing. Addressing these problems early can save you time and ensure a more professional result.
- Remove Old Finish: If your floors have an existing finish, it needs to be removed. This can be done with a chemical stripper or by sanding the surface. Chemical strippers can be harsh, so follow the manufacturer’s instructions and use proper protective gear. If you opt for sanding, start with a coarse grit to remove the old finish and then move to finer grits for a smooth surface.
- Fill Gaps and Cracks: Once the old finish is removed, inspect the floor for gaps and cracks. Use a high-quality wood filler that matches the color of your hardwood to fill any imperfections. Apply the filler with a putty knife and smooth it out. Allow it to dry completely before sanding it smooth.
- Final Cleaning: After repairing and filling gaps, give the floor one final clean. Vacuum and wipe down the floor to remove all dust and debris. Any particles left on the surface can affect the finish, so this step is crucial for achieving a flawless look. Once the floor is clean and dry, you’re ready to move on to sanding.

Essential Tools and Materials for Hand-Finishing Hardwood Floors
Hand finishing hardwood floors is a meticulous task that requires the right tools and materials to achieve a professional result. From sanding to staining and sealing, each step demands specific equipment and supplies. Here are the essential tools and materials you’ll need for the job.
Sandpaper and Sanding Blocks: Sanding is a critical part of preparing your floors, and having a range of sandpaper grits is essential. Coarse grit (around 40-60) is used to remove old finishes and level the surface, while medium (80-120) and fine grits (150-220) smooth out the wood. Sanding blocks help maintain even pressure and reach into corners.
Scrapers and Putty Knives: For removing old finish or working on edges and corners where sanders can’t reach, scrapers and putty knives are indispensable. A good-quality scraper with replaceable blades will save time and effort. Putty knives are also essential for applying wood filler to cracks and gaps.
Vacuum and Tack Cloths: Cleanliness is key to a successful finish. A vacuum designed for shop use will effectively remove dust and debris from sanding. Tack cloths are sticky rags that pick up the finest dust particles, ensuring a clean surface before staining and sealing.
Stains and Sealers: Choosing the right stain and sealer is crucial for the appearance and durability of your floor. Stains come in various colors and types, including oil-based and water-based options. Sealers like polyurethane or varnish protect the wood and give it a beautiful finish. Make sure to select high-quality products that suit your wood type.
Brushes and Applicators: Applying stains and sealers requires the right brushes and applicators. Foam brushes, bristle brushes, and lambswool applicators are all popular choices. Foam brushes are great for smooth, even application, while lambswool applicators cover larger areas efficiently.
Safety Gear: Safety should never be overlooked. Equip yourself with safety glasses, gloves, and a dust mask or respirator. Sanding and applying finishes can release particles and fumes that are harmful if inhaled. Ensuring proper ventilation in your workspace is also crucial.

Step-by-Step Guide to Sanding Hardwood Floors by Hand
Sanding hardwood floors by hand is a labor-intensive but rewarding process. Hand sanding allows for greater control and precision, especially in tight spaces and around edges. This step-by-step guide will walk you through the entire process, ensuring your floors are perfectly prepped for staining and sealing.
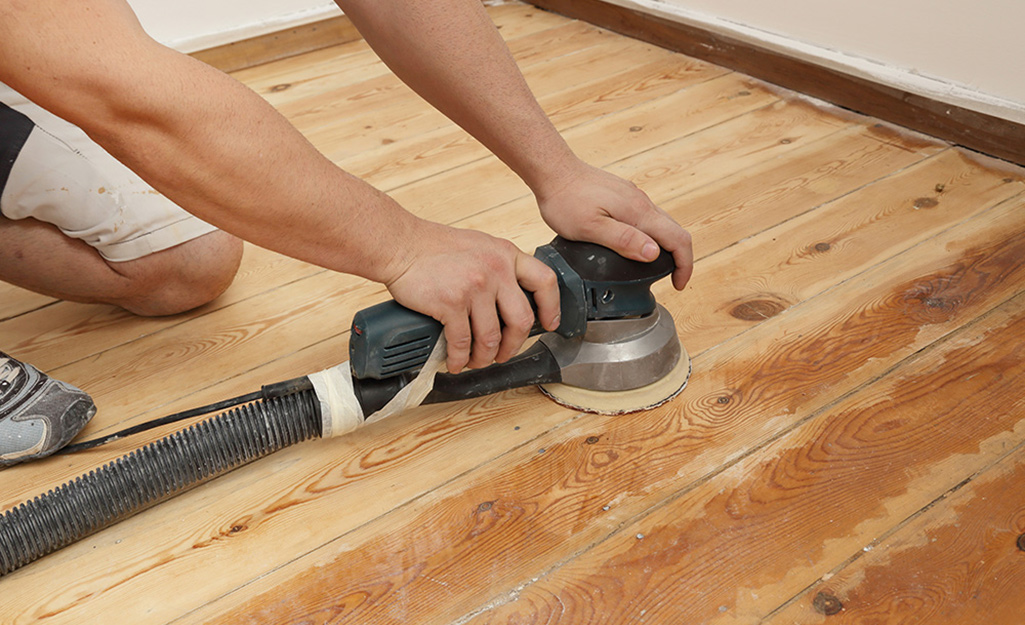
Start with Coarse Grit Sandpaper: Begin sanding with coarse grit sandpaper (40-60 grit). This stage removes old finish and levels the surface. Use a sanding block or a handheld sander to maintain even pressure. Work in small sections, sanding in the direction of the wood grain to avoid scratches.
Sand the Edges and Corners: Edges and corners can be tricky. Use a detail sander or hand sand with a coarse grit sandpaper to reach these areas. Be patient and thorough, ensuring the entire surface is evenly sanded. This attention to detail will result in a smoother final finish.
Move to Medium Grit Sandpaper: Once the old finish is removed and the surface is level, switch to medium grit sandpaper (80-120 grit). This step smooths out the rough surface left by the coarse grit. Continue to sand in the direction of the grain, covering the entire floor evenly.
Finish with Fine Grit Sandpaper: For the final sanding, use fine grit sandpaper (150-220 grit). This stage polishes the wood to a smooth finish, preparing it for staining and sealing. Sand carefully, paying extra attention to areas that may need more smoothing.
Vacuum and Wipe Down: After sanding, it’s essential to clean up all dust and debris. Use a vacuum with a brush attachment to remove the bulk of the dust. Follow up with tack cloths to pick up any remaining fine particles. A clean surface is crucial for a smooth application of stain and sealer.
Inspect Your Work: Before moving on to staining, inspect your sanding job. Run your hand over the surface to feel for any rough spots or imperfections. If you find any, go back and sand those areas again. Ensuring a flawless surface at this stage will make a significant difference in the final look of your floors.

Choosing the Right Stain for Your Hardwood Floors
Selecting the right stain for your hardwood floors is a critical decision that impacts the overall look and feel of your space. The right stain enhances the natural beauty of the wood while complementing your decor. We will guide you through the factors to consider when choosing a stain for your hardwood floors.
Understand Your Wood Type: Different types of wood react differently to stains. Hardwoods like oak, maple, and cherry have unique grain patterns and densities, which affect how they absorb stain. Knowing your wood type will help you choose a stain that enhances its natural characteristics.
Consider the Room’s Lighting: The lighting in your room can significantly affect how a stain color appears. Natural light, artificial lighting, and the direction of the light source can all influence the final look. Test stain samples in different lighting conditions to see how they change throughout the day.
Test Stain Samples: Always test stain samples on a small, inconspicuous area of your floor or on a scrap piece of the same wood. This allows you to see how the stain interacts with your wood and helps you avoid any surprises. Testing multiple samples can also help you compare and choose the best option.
Choose Between Oil-Based and Water-Based Stains: Oil-based stains tend to penetrate deeper and enhance the wood’s natural grain, providing a rich, warm look. Water-based stains, on the other hand, dry faster and have less odor, making them a more environmentally friendly option. Consider the pros and cons of each type based on your needs.
Think About Maintenance and Durability: Some stains and finishes require more maintenance than others. Darker stains can show dust and scratches more easily, while lighter stains might need more frequent cleaning to maintain their appearance. Consider your lifestyle and how much maintenance you’re willing to commit to.
Match with Home Decor: Your stain choice should complement the overall style and color scheme of your home. Think about how the floor color will work with your furniture, walls, and other design elements. A cohesive look enhances the aesthetic appeal of your space, making it feel more harmonious and inviting.
Applying the Finish: Techniques for a Smooth, Professional Look
Applying the finish to your hardwood floors is the final step in the hand finishing process. A smooth, professional finish not only enhances the beauty of your floors but also protects them from wear and tear. We will provide you with the techniques needed to achieve a flawless finish.
Choose the Right Finish: There are various types of finishes to choose from, including polyurethane, varnish, and natural oils. Polyurethane is popular for its durability and water resistance, while varnish offers a high-gloss finish. Natural oils penetrate the wood, enhancing its natural beauty and providing a more matte look. Choose the finish that best suits your needs and aesthetic preferences.
Prepare the Floor: Before applying the finish, ensure the floor is completely clean and free of dust. Use a vacuum and tack cloth to remove any remaining particles from the sanding process. Any dust left on the floor can become trapped in the finish, resulting in an uneven and rough texture.
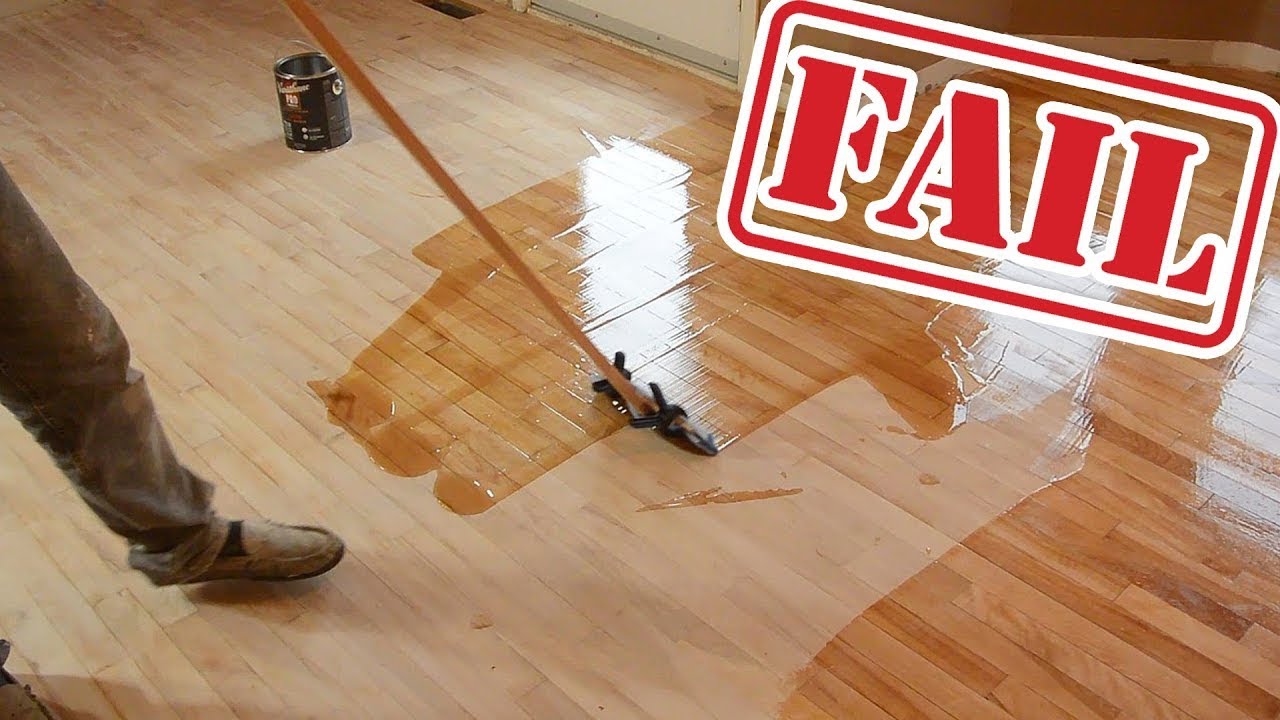
Apply the First Coat: Start by applying a thin, even coat of finish using a high-quality brush or applicator. Work in small sections, following the direction of the wood grain to avoid streaks. Make sure to overlap each stroke slightly to ensure even coverage. Allow the first coat to dry completely according to the manufacturer’s instructions.
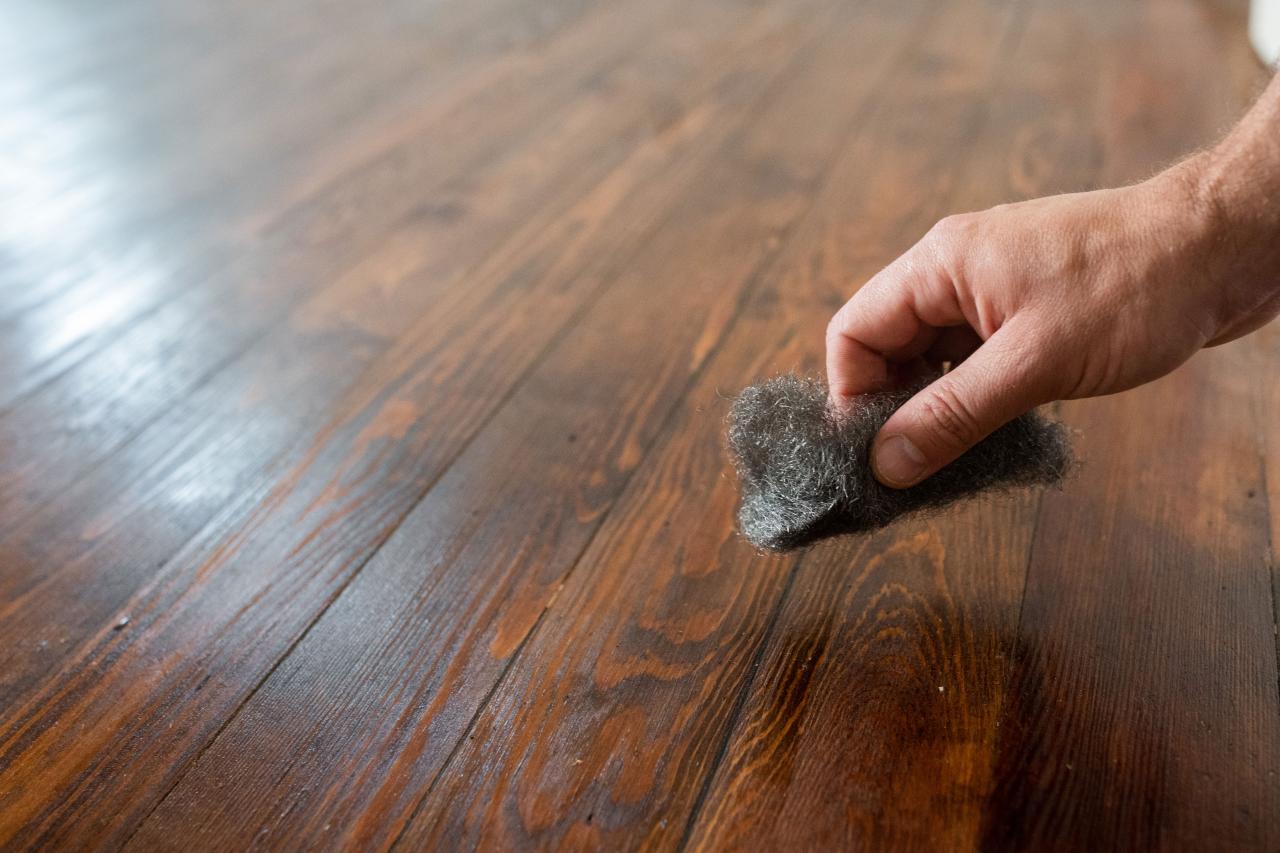
Sand Between Coats: Once the first coat is dry, lightly sand the surface with fine grit sandpaper (220 grit). This step removes any bubbles or imperfections and helps the next coat adhere better. Vacuum and wipe the floor with a tack cloth to remove all dust before applying the next coat.
Apply Additional Coats: Apply at least two more coats of finish, following the same process of applying, drying, and sanding between coats. Each additional coat will enhance the durability and appearance of the floor. Be sure to follow the drying times recommended by the finish manufacturer to ensure a hard, durable surface.
Final Inspection and Touch-Ups: After the final coat has dried, inspect the floor for any missed spots or imperfections. Touch up any areas as needed with a small brush. Allow the floor to cure completely before moving furniture back into the room. Proper curing time ensures that the finish hardens fully, providing maximum protection and longevity.

Maintenance Tips for Hand-Finished Hardwood Floors
Maintaining hand-finished hardwood floors is essential to preserve their beauty and longevity. Proper care and regular maintenance can keep your floors looking pristine for years. Below we provide you with practical tips for maintaining your hand-finished hardwood floors.
Regular Cleaning: Keeping your floors clean is the first step in maintenance. Sweep or vacuum regularly to remove dirt and debris that can scratch the surface. Use a vacuum with a hardwood floor attachment to avoid damaging the finish. For a deeper clean, use a damp mop with a hardwood floor cleaner. Avoid using excessive water, as it can damage the wood.
Protect from Furniture and Foot Traffic: Place felt pads under furniture legs to prevent scratches and dents. Consider using rugs or mats in high-traffic areas to reduce wear. Encourage family and guests to remove shoes before walking on the floors, as dirt and grit on shoes can cause scratches.
Control the Environment: Wood floors can expand and contract with changes in humidity and temperature. Use a humidifier in the winter and an air conditioner or dehumidifier in the summer to maintain a stable environment. Keeping the humidity level between 30% and 50% can prevent the wood from warping or cracking.
Immediate Spill Cleanup: Wipe up spills immediately to prevent stains and water damage. Use a soft, dry cloth to blot the spill and then clean the area with a damp cloth if necessary. Avoid using harsh chemicals or abrasive cleaners that can damage the finish.
Regular Inspection and Touch-Ups: Periodically inspect your floors for signs of wear or damage. Address minor scratches and dents promptly with touch-up kits available from flooring stores. For more significant damage, consider hiring a professional to repair and refinish the affected areas.
Re-Finishing When Necessary: Over time, even well-maintained floors may require re-finishing. Signs that your floor needs re-finishing include deep scratches, dullness, or areas where the finish has worn away. Depending on the traffic and wear, re-finishing might be needed every 5-10 years. Regular maintenance can extend the time between refinishing, keeping your floors looking beautiful longer.
How To Refinish Hardwood Floors
How To Refinish Hardwood Floors – DIY Home Improvement
How To Refinish Hardwood Floors – DIY Home Improvement
How To Refinish Hardwood Floors
Can You Sand or Refinish Hardwood Floors by Hand? – House Practical

How to Hand Scrape a Floor and Finish it With Waterlox

Related Posts: