The Importance of Garage Floor Coatings: Why Your Garage Needs Protection
When I first started considering home improvements, my garage floor was far from the top of my list. Like many people, I viewed it as a purely functional space—just a place to park my car and store tools. But as I began to dig deeper into the world of home maintenance, I realized just how much wear and tear my garage floor was enduring. If you’ve ever noticed cracks, stains, or a general sense of wear on your garage floor, you might be underestimating the importance of giving it the protection it deserves.
- Protection Against Wear and Tear When I first noticed the small cracks and stains on my garage floor, I didn’t think much of them. But over time, these small imperfections began to grow, turning into larger cracks and unsightly blemishes. Garage floors endure constant pressure from vehicles, heavy tools, and various chemicals, leading to gradual degradation. Without a protective coating, these issues can worsen, potentially compromising the structural integrity of the concrete.
- Prevention of Stains and Chemical Damage I’ve always considered my garage a place to work on projects, which means occasional oil spills and chemical drips are inevitable. I learned the hard way that these substances can seep into the porous concrete, leaving behind stubborn stains and causing chemical reactions that weaken the floor. A garage floor coating acts as a barrier, preventing these substances from penetrating the surface and making cleanup a breeze.
- Enhanced Safety One rainy day, I almost slipped on the slick, wet concrete in my garage. That’s when I realized that a coated floor offers more than just protection—it enhances safety. Many coatings provide a textured surface that reduces the risk of slipping, even when the floor is wet. This added grip is especially important if you use your garage as a workspace or if it’s frequently exposed to water or snow.
- Improved Aesthetics I never thought much about how my garage looked until I had guests over, and they saw the discolored, cracked floor. A high-quality garage floor coating can transform a dull, worn-out floor into a sleek, polished surface that enhances the overall look of your space. Whether you’re into a glossy finish or a more subtle matte look, there’s a coating that can give your garage a professional, finished appearance.
- Increased Home Value When I was considering selling my home, I learned that the state of the garage can significantly impact its market value. A well-maintained, coated garage floor is a selling point that can attract potential buyers. It signals that the home has been cared for and can even add to the overall appeal, making it easier to justify a higher asking price.
- Long-Term Cost Savings Initially, I hesitated at the idea of investing in a garage floor coating. However, after doing some research, I realized that this upfront investment can save a lot of money in the long run. By preventing damage, reducing the need for repairs, and extending the life of the floor, a good coating ultimately reduces the overall maintenance costs of your garage.

Types of Garage Floor Coatings: A Comprehensive Guide to Available Options
Epoxy Coatings When I first started exploring garage floor coatings, epoxy was the most recommended option. Epoxy is well-known for its durability and resistance to a variety of chemicals and impacts. It’s a popular choice for those looking to protect their garage floor while also giving it a polished, high-gloss finish. The range of colors and finishes available with epoxy coatings means you can customize your garage floor to suit your style.
Polyurea Coatings As I dug deeper into garage floor coatings, I discovered polyurea—a more recent innovation that offers some impressive benefits. Polyurea is incredibly durable, withstanding extreme temperatures and heavy impacts. What stood out to me was its fast curing time; unlike epoxy, which can take several days to fully cure, polyurea can be ready in just a few hours. This makes it an excellent option for those who want minimal downtime.
Polyaspartic Coatings I came across polyaspartic coatings when I was looking for something that combined the best features of both epoxy and polyurea. Polyaspartic coatings are highly versatile, offering excellent UV resistance, which means they won’t yellow or fade over time. They’re also incredibly durable, similar to polyurea, and offer a range of finishes from matte to high-gloss. For those looking for a quick installation with long-lasting results, polyaspartic is a solid choice.
Acrylic Sealers On a budget? Acrylic sealers caught my eye as a more affordable option. While they don’t offer the same level of durability as epoxy or polyurea, they still provide a decent layer of protection against stains and moisture. They’re easy to apply and can be a good choice for those looking to refresh their garage floor without breaking the bank. However, it’s worth noting that acrylic sealers may require more frequent reapplication compared to other coatings.
Concrete Stains When aesthetics are a top priority, concrete stains are an option worth considering. Unlike other coatings that sit on top of the concrete, stains penetrate the surface, creating a more natural, variegated look. I found that concrete stains offer a unique finish that highlights the natural texture of the concrete, giving the garage a more rustic or industrial vibe. However, stains don’t provide the same level of protection as coatings, so they’re best used in conjunction with a sealer.
Concrete Paint If you’re looking for a quick and easy way to refresh your garage floor, concrete paint might be the way to go. I initially considered this option because of its simplicity and the wide range of colors available. Concrete paint can give your garage floor a new look, but it doesn’t offer the same durability as other coatings. It’s more prone to chipping and peeling, especially in high-traffic areas, so it’s best suited for lighter use.
Epoxy Garage Floor Coatings: The Gold Standard for Durability and Aesthetics
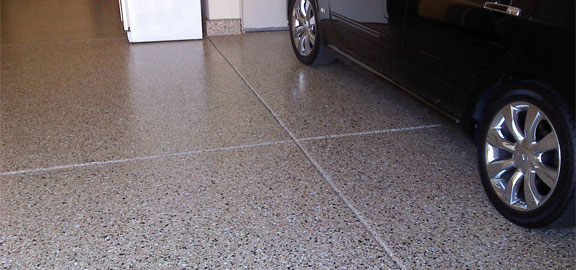
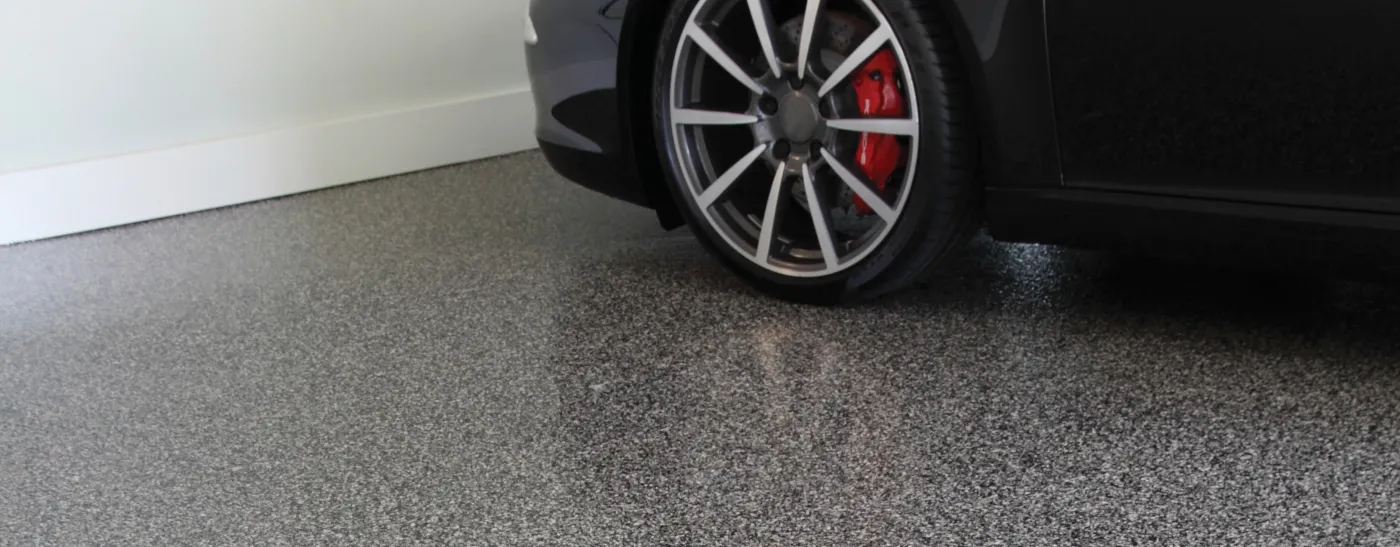
Unmatched Durability When I first researched epoxy coatings, the word “durability” kept coming up. Epoxy is renowned for its toughness, making it an ideal choice for garages that see a lot of action. From heavy vehicles to dropped tools, epoxy can withstand impacts without showing signs of wear. I was particularly impressed by its resistance to chemicals like oil, gasoline, and even some acids, which are common in garages.
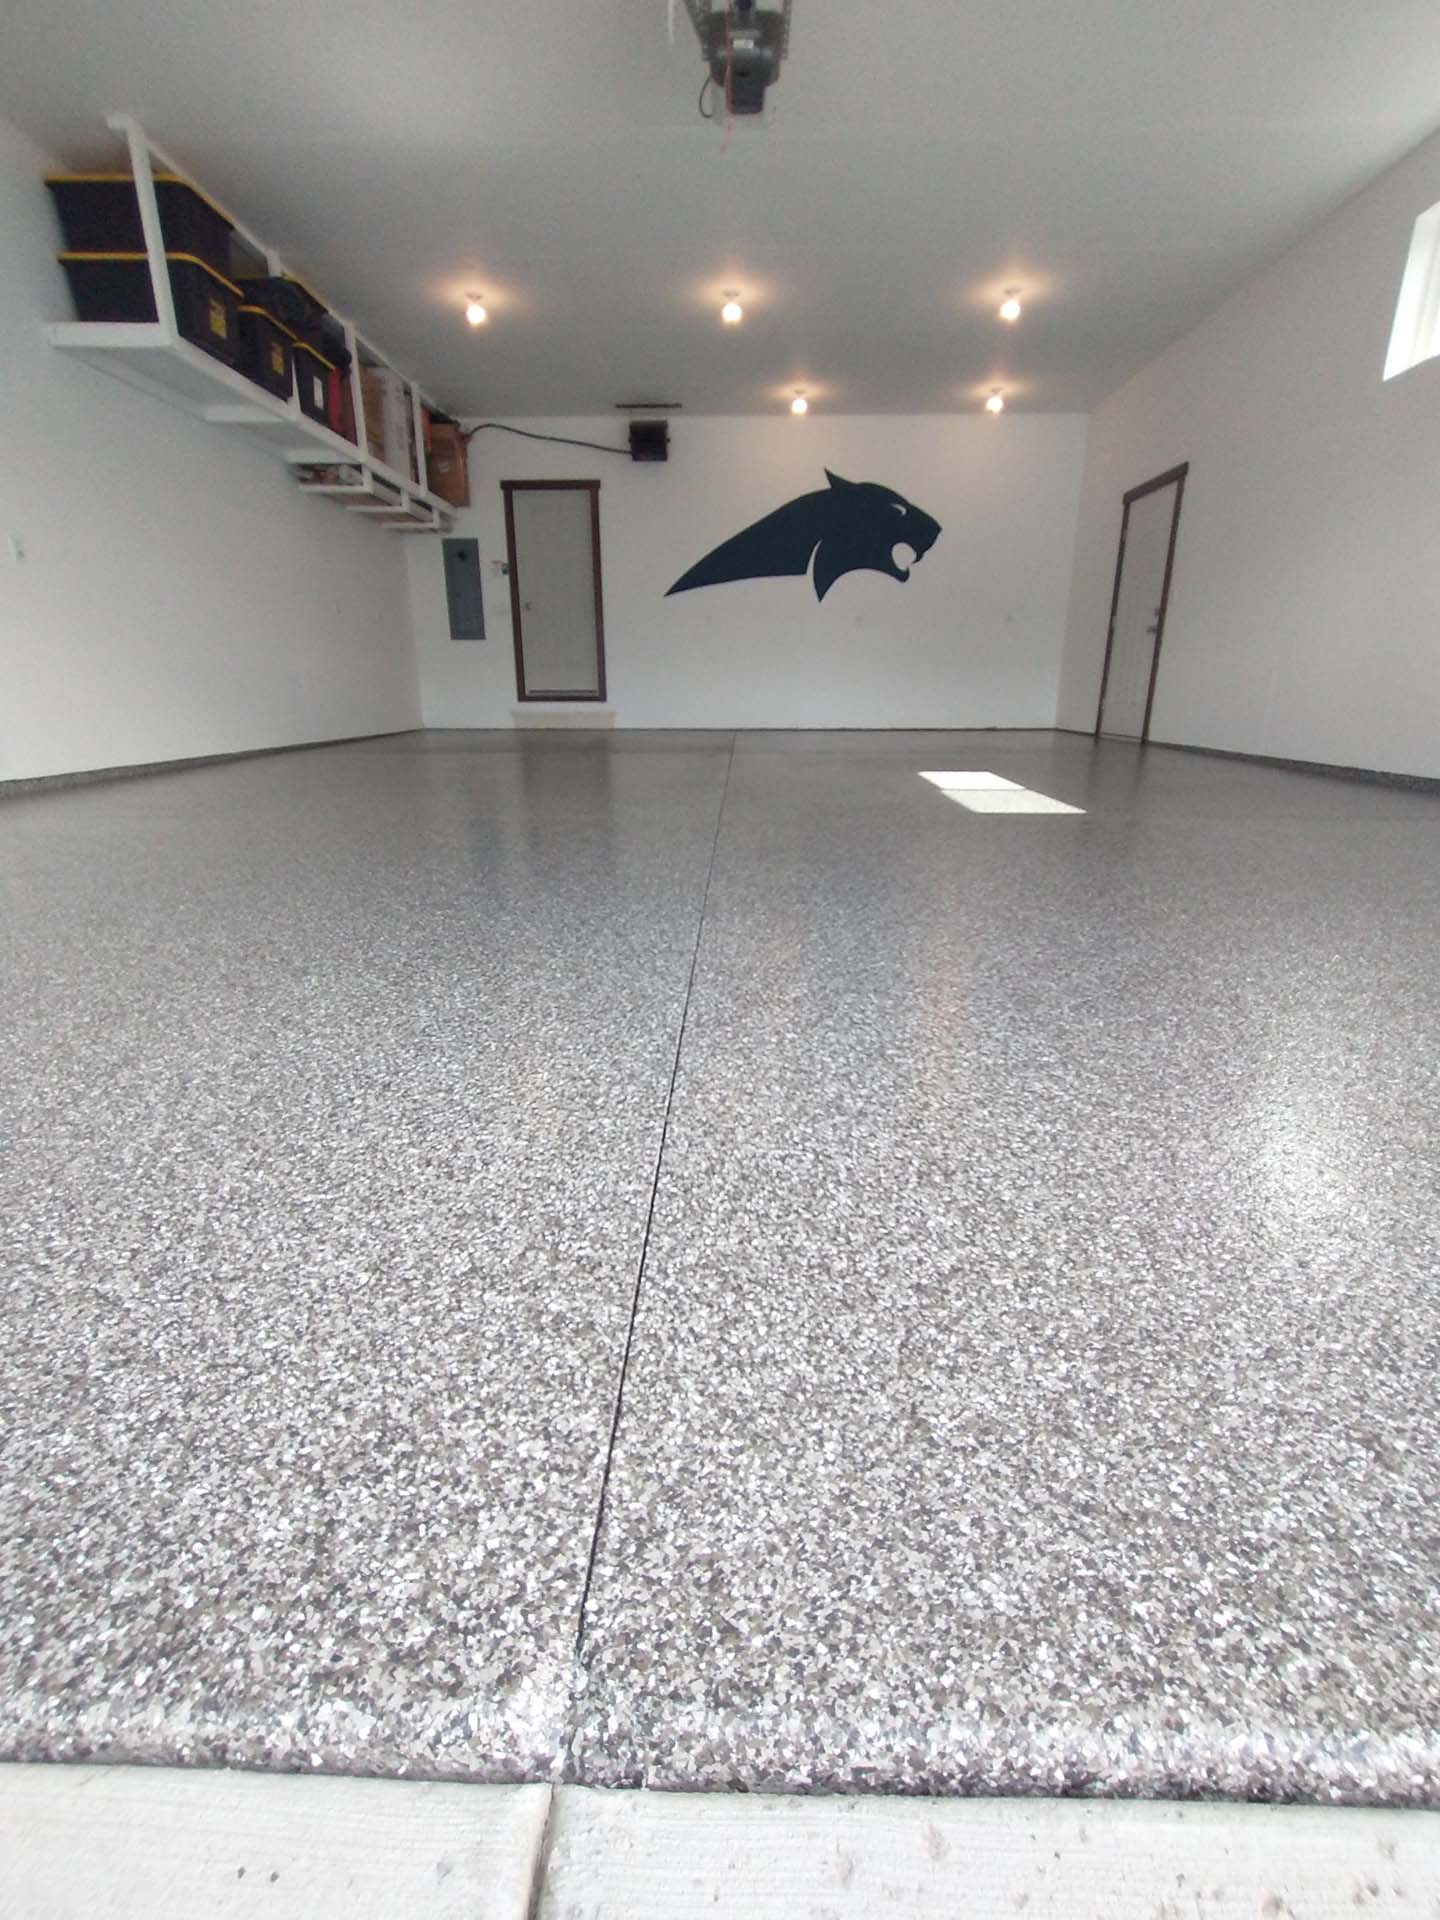
Aesthetic Appeal One of the main reasons I chose epoxy for my garage floor was its aesthetic versatility. Epoxy can transform a dull, gray concrete floor into a vibrant, polished surface. The variety of colors, textures, and finishes available means you can create a floor that matches your style. Whether you prefer a sleek, glossy finish or a more subdued matte look, epoxy offers options that cater to both functionality and design.
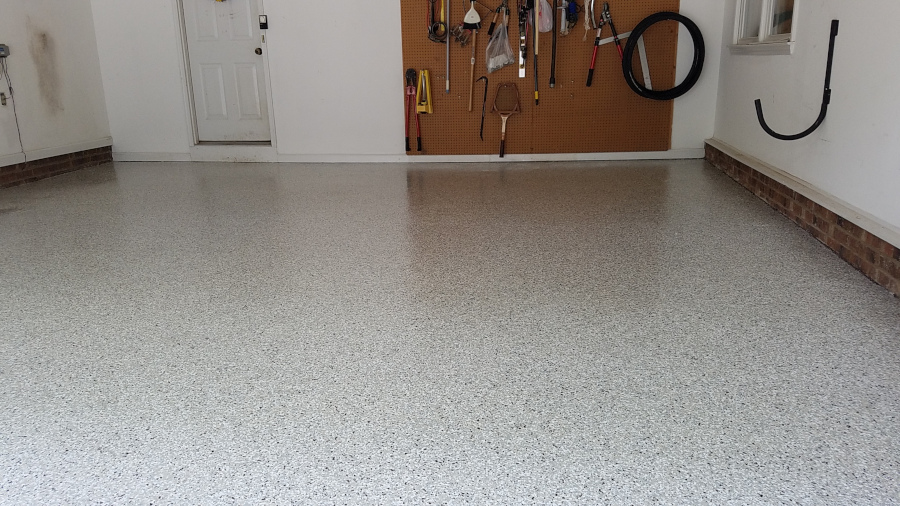
Seamless Finish When I applied the epoxy, I was amazed at the smooth, seamless finish it provided. Unlike tile or other flooring options, epoxy creates a continuous surface with no joints or seams where dirt and debris can accumulate. This not only makes the floor easier to clean but also gives it a modern, cohesive appearance. The seamless finish also enhances the durability, as there are no weak points where the coating might start to peel or chip.
Longevity One of the most appealing aspects of epoxy is its longevity. I wanted a solution that wouldn’t need constant maintenance or reapplication, and epoxy fit the bill perfectly. When properly applied, epoxy can last for many years, maintaining its appearance and protective qualities. This long lifespan makes it a cost-effective choice in the long run, as it reduces the need for frequent repairs or replacements.
Customizability I was surprised to learn about the level of customizability epoxy offers. Whether you’re looking for a solid color, metallic finish, or even a pattern like a checkerboard, epoxy can be tailored to meet your specific design preferences. The ability to incorporate flakes, chips, or even logos into the coating adds a unique touch that can make your garage stand out. This customization was a big draw for me, as it allowed me to create a garage floor that was truly my own.
UV Resistance and Maintenance Initially, I was concerned about how the epoxy would hold up under the sun’s harsh rays, especially since my garage door is often open. Fortunately, many epoxy coatings offer UV resistance, preventing them from yellowing or fading over time. Maintenance is also a breeze—regular sweeping and occasional mopping are usually all that’s needed to keep the floor looking pristine. This low-maintenance aspect was a significant factor in my decision to go with epoxy.
Polyurea and Polyaspartic Coatings: Modern Alternatives for Quick and Long-Lasting Results
Fast Curing Time When I learned about polyurea and polyaspartic coatings, the fast curing time was one of the most appealing features. Unlike epoxy, which can take several days to fully cure, these modern coatings can be ready for use within just a few hours. This quick turnaround was a game-changer for me, as it meant I could have my garage back in action almost immediately after application, without the prolonged wait time.
Superior Durability Both polyurea and polyaspartic coatings boast impressive durability, often outperforming traditional epoxy. These coatings are resistant to a wide range of chemicals, abrasions, and impacts, making them ideal for garages that see heavy use. I was particularly impressed by their ability to withstand extreme temperature fluctuations without cracking or peeling, which is crucial in areas with harsh weather conditions.
UV Stability One of my concerns with garage floor coatings was how they would hold up under constant exposure to sunlight, especially since my garage gets a lot of natural light. Polyaspartic coatings, in particular, offer excellent UV stability, ensuring that the floor won’t yellow or fade over time. This was a big selling point for me, as it meant my garage floor would maintain its vibrant color and finish for years to come.
Customization Options Like epoxy, polyurea and polyaspartic coatings offer a range of customization options. Whether I wanted a high-gloss finish, a matte look, or even decorative flakes or chips, these coatings provided plenty of choices. I appreciated the ability to create a floor that not only offered top-notch protection but also looked exactly how I wanted it to. The versatility of these coatings makes them a great option for those who want both performance and style.
Flexibility and Adhesion One of the unique benefits of polyurea and polyaspartic coatings is their flexibility. This flexibility allows the coating to move with the concrete as it expands and contracts, reducing the likelihood of cracks forming. I found this particularly important in regions with significant temperature changes. Additionally, these coatings offer excellent adhesion to the concrete surface, ensuring a strong, long-lasting bond that won’t easily peel or chip.
Ease of Application Despite their advanced properties, polyurea and polyaspartic coatings are relatively easy to apply, whether you’re doing it yourself or hiring a professional. The fast curing time also means that the entire process can be completed in a single day, minimizing disruption to your routine. For me, the combination of ease of application, quick curing, and long-lasting results made these coatings an attractive alternative to traditional options.

Preparing Your Garage Floor: Essential Steps Before Applying Coatings
Cleaning the Surface Before applying any coating, I quickly realized that a thorough cleaning was essential. The garage floor needs to be free of dirt, dust, oil stains, and any other contaminants that could interfere with the adhesion of the coating. I started by sweeping the floor to remove loose debris, followed by a deep clean using a degreaser to tackle any oil spots. This step might seem tedious, but I learned that a clean surface is crucial for ensuring the coating adheres properly and lasts longer.
Repairing Cracks and Holes As I inspected my garage floor, I noticed several cracks and small holes that needed attention. Ignoring these imperfections could lead to problems down the line, as the coating might not adhere properly or could highlight the existing damage. I used a concrete repair compound to fill in the cracks and holes, smoothing them out to create a level surface. Taking the time to repair these issues was a crucial step in preparing the floor for coating.
Etching the Concrete One of the most important steps in the preparation process is etching the concrete. This involves using an acid-based solution to open up the pores of the concrete, allowing the coating to penetrate and bond effectively. I applied the etching solution evenly across the floor, following the manufacturer’s instructions. After allowing it to sit for the recommended time, I thoroughly rinsed the floor with water, ensuring that no residue was left behind.
Drying the Surface After cleaning and etching, I had to ensure the floor was completely dry before applying the coating. Any moisture left on the surface could prevent the coating from adhering properly and could cause bubbling or peeling. I waited for a full day to make sure the floor was bone dry. In some cases, using fans or a dehumidifier can speed up this process, but patience is key to achieving the best results.
Testing for Moisture Even though the floor appeared dry, I wanted to be certain there was no residual moisture. I performed a simple moisture test by taping a small piece of plastic sheeting to the floor and leaving it overnight. If condensation formed under the plastic, it indicated that the floor wasn’t ready for coating. Fortunately, my floor passed the test, confirming that it was safe to proceed with the application.
Priming the Surface Some coatings require a primer to enhance adhesion, especially if the floor has been repaired or is particularly smooth. I decided to apply a primer to ensure the coating would bond as strongly as possible. The primer also helps to seal the concrete, reducing the chance of moisture seeping through and affecting the coating. Applying the primer was a straightforward process, and it provided an extra layer of assurance that the coating would last.
DIY vs. Professional Installation: Which Garage Floor Coating Approach is Right for You?
Assessing Your Skill Level When I first considered applying a garage floor coating, I had to be honest with myself about my DIY skills. Coating a garage floor isn’t a simple weekend project; it requires attention to detail, patience, and a good understanding of the process. If you’re confident in your ability to follow instructions carefully and have experience with similar projects, a DIY approach might be feasible. However, if you’re not comfortable with the idea of mixing chemicals or working with potentially hazardous materials, hiring a professional is likely the safer choice.
Considering Time and Effort I quickly realized that applying a garage floor coating is time-consuming, especially if you want to do it right. From cleaning and repairing the floor to applying the coating itself, each step takes time and can’t be rushed. For those with busy schedules, dedicating several days to this project might not be practical. In contrast, professional installers can often complete the job more quickly, as they have the experience and tools to streamline the process.
Understanding the Costs Initially, I thought that doing the job myself would save money, but I soon learned that the costs can add up. Between purchasing the coating materials, tools, and any necessary safety equipment, the expenses can approach or even exceed the cost of hiring a professional. Additionally, if mistakes are made during the DIY process, repairs can be costly and time-consuming. Weighing the potential savings against the risk of errors and additional costs was a crucial part of my decision-making process.
Evaluating the Quality of Results One of my main concerns with a DIY approach was whether I could achieve the same level of quality as a professional. Coating a garage floor requires precision, especially when it comes to mixing and applying the materials evenly. Professionals have the experience to deliver a flawless finish, while DIY results can sometimes be uneven, with bubbles or streaks. If you’re aiming for a high-end, durable finish, hiring a professional may be worth the investment.
Access to Specialized Tools and Materials Another factor that influenced my decision was the availability of tools and materials. Professional installers often have access to industrial-grade products that aren’t available to the average consumer. These materials can offer superior durability, appearance, and longevity compared to what’s available at your local hardware store. Additionally, professionals have specialized tools that can make the application process more efficient and effective.
Peace of Mind and Warranties Ultimately, I decided that the peace of mind provided by a professional installation was invaluable. Many professional installers offer warranties on their work, which means that if anything goes wrong, they’ll come back to fix it. This warranty gave me confidence that I wouldn’t have to worry about the coating failing or requiring repair soon after application. For those who want assurance that the job will be done right the first time, hiring a professional is the best option.

Maintenance and Longevity: How to Keep Your Garage Floor Coating Looking New for Years
Regular Cleaning One of the first things I learned about maintaining my garage floor coating was the importance of regular cleaning. Dirt, dust, and debris can accumulate over time, potentially scratching the surface or dulling its appearance. I make it a habit to sweep the floor weekly and mop it with a mild detergent as needed. Keeping the floor clean not only preserves its aesthetic appeal but also helps maintain its protective properties.
Spot Treatment for Stains Despite the protective coating, occasional spills are inevitable. I found that addressing these spills immediately is key to preventing stains. Whether it’s oil, paint, or any other substance, I clean up spills as soon as they happen using a gentle cleaner. For more stubborn stains, I use a specialized cleaner designed for coated floors, being careful not to use anything too abrasive that could damage the finish.
Avoiding Harsh Chemicals While my garage floor coating is tough, I learned that certain harsh chemicals can still damage it over time. I avoid using strong acids, solvents, or ammonia-based cleaners on the floor, as these can break down the coating and cause it to lose its luster. Instead, I stick to pH-neutral cleaners that are safe for use on coated surfaces. This precaution helps ensure the longevity of the coating and keeps it looking like new.
Protecting the Surface from Heavy Objects I quickly realized that even though the coating is durable, it’s still important to protect it from heavy impacts. When moving heavy equipment or tools, I’m careful to avoid dragging them across the floor, as this can cause scratches or gouges. For added protection, I placed rubber mats under heavy machinery, which helps distribute the weight and reduce the risk of damage.
Monitoring for Wear and Tear Over time, even the best coatings can show signs of wear, especially in high-traffic areas. I regularly inspect my garage floor for any signs of damage, such as peeling, chipping, or discoloration. Catching these issues early allows me to address them before they worsen. In some cases, a touch-up with a matching coating product can restore the area, extending the life of the entire floor.
Reapplying the Coating While a good garage floor coating can last for many years, it’s important to know when it’s time to reapply. I learned that reapplying the coating every 5 to 10 years, depending on the level of use, can refresh the appearance and reinforce the protective layer. This reapplication process is much easier than the initial application, especially if the floor has been well-maintained. By staying on top of maintenance and being proactive with reapplications, I can keep my garage floor looking pristine for decades.
Common Mistakes to Avoid with Garage Floor Coatings
Skipping Surface Preparation One of the most common mistakes I’ve seen is skipping or rushing through the surface preparation. Properly cleaning, repairing, and etching the concrete is crucial for the coating to adhere correctly. Skipping these steps can lead to peeling, bubbling, or an uneven finish that won’t last.
Using the Wrong Products Not all coatings are created equal, and using the wrong type of product for your specific needs can result in poor performance. It’s important to choose a coating that’s appropriate for the level of use your garage will see, as well as the environmental conditions it will face.
Applying Too Thick or Too Thin Applying the coating too thickly or too thinly is another common mistake. A coating that’s too thick can crack as it cures, while a too-thin application may not provide adequate protection. Following the manufacturer’s guidelines for thickness is essential for achieving the best results.
Ignoring Cure Times It can be tempting to rush the process, but ignoring the recommended cure times is a mistake that can compromise the entire project. Using the garage too soon after applying the coating can result in damage to the still-curing surface, leading to a need for costly repairs.
Inadequate Ventilation Proper ventilation is critical during the application process, especially with coatings that emit strong fumes. Failing to ventilate the area adequately can not only affect the curing process but also pose health risks. Ensuring good airflow during and after application is key to a successful coating job.
Neglecting Maintenance Finally, neglecting regular maintenance can lead to a once-beautiful garage floor becoming dull and damaged. Regular cleaning, prompt stain treatment, and periodic inspections are essential for keeping the coating in top condition for years to come.

What is the best type of coating for a high-traffic garage? For high-traffic garages, epoxy and polyurea coatings are often considered the best options due to their superior durability and resistance to wear and tear. Polyaspartic coatings are also a good choice, offering quick curing times and excellent UV stability.
How long does a typical garage floor coating last? The lifespan of a garage floor coating depends on the type of coating used and the level of traffic. Epoxy coatings can last 5-10 years, while polyurea and polyaspartic coatings may last even longer, up to 15-20 years with proper maintenance.
Can I apply a garage floor coating myself, or should I hire a professional? While it’s possible to apply a garage floor coating yourself, the process requires careful preparation, the right tools, and attention to detail. If you’re not confident in your DIY skills or want the best possible finish, hiring a professional is recommended.
What is the cost difference between DIY and professional installation? The cost of DIY installation typically includes the price of materials and any tools you might need to purchase, while professional installation includes labor and potentially higher-quality materials. Depending on the size of your garage, DIY can save you money, but the quality and longevity may not match professional results.
How do I maintain my garage floor coating? Regular cleaning, avoiding harsh chemicals, and promptly addressing any stains or damage are key to maintaining your garage floor coating. Periodic reapplication of the coating, usually every 5-10 years, can also help keep it looking new.
What are the most common mistakes to avoid when applying a garage floor coating? Common mistakes include inadequate surface preparation, using the wrong type of coating, applying the coating too thickly or too thinly, ignoring cure times, not ventilating the area properly, and neglecting regular maintenance. Avoiding these mistakes is crucial for a successful and long-lasting garage floor coating.

Related Posts: