Why Resurface Your Concrete Garage Floor?
When I first noticed the cracks and rough patches on my garage floor, I knew something had to be done. It wasn’t just about appearances—there were practical reasons for resurfacing the concrete. A worn-out garage floor can lead to all sorts of issues, from water damage to difficulties with cleaning. After some research and hands-on experience, I realized there are several compelling reasons to resurface your garage floor. Here are a few of them.
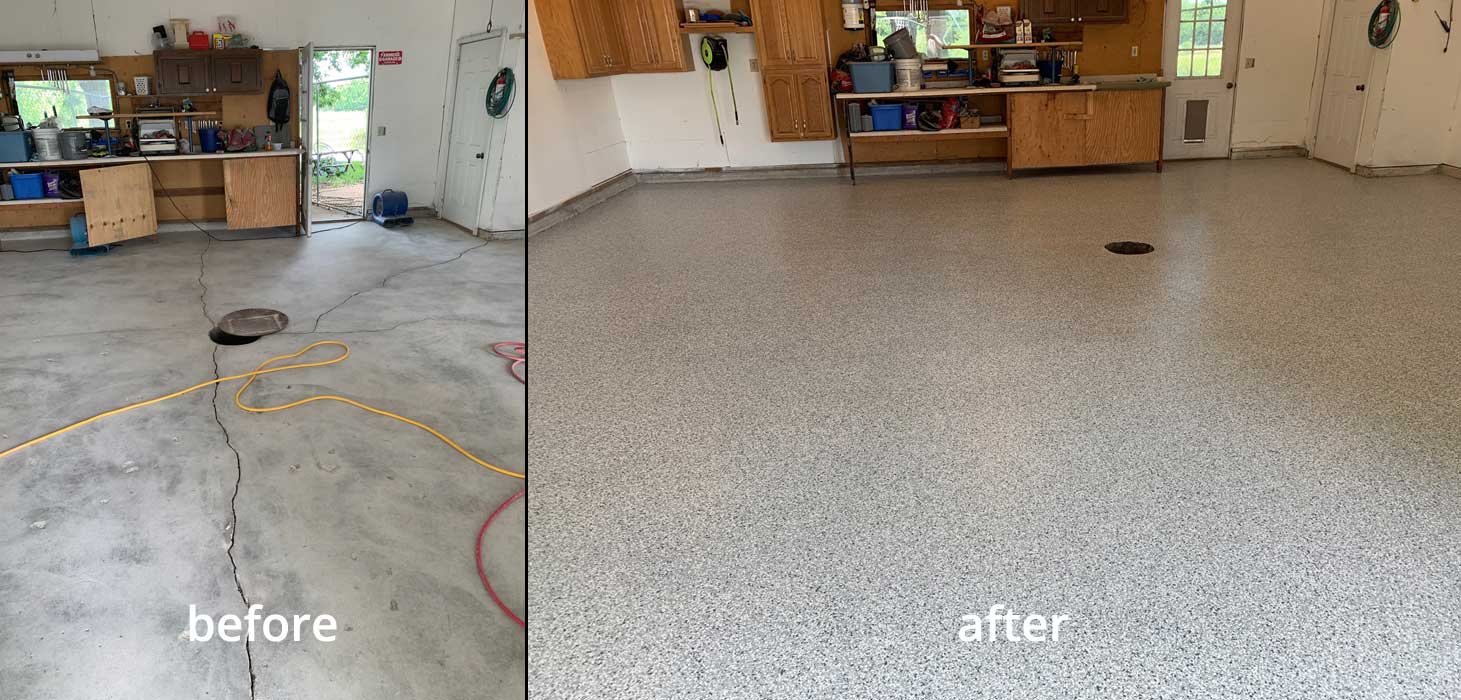
- Improving the Aesthetics: One of the most immediate benefits of resurfacing a concrete garage floor is how much it improves the look of the space. My garage floor had accumulated years of wear and tear, including oil stains, dirt, and cracks. After resurfacing, the floor looked clean, smooth, and brand new. It’s amazing how much a fresh surface can change the overall feel of your garage.
- Enhancing Durability: Concrete floors, while durable, are not immune to damage over time. Cracks and pits can form due to temperature changes, moisture, and heavy use. By resurfacing the floor, you add an extra layer of protection that makes the surface more resistant to future damage. In my case, I’ve noticed that the floor now stands up better to the weight of my car and everyday foot traffic.
- Preventing Further Damage: I learned that resurfacing can help prevent more significant structural damage to the concrete. Cracks, if left untreated, can grow larger and allow water to seep in, causing the concrete to deteriorate further. Resurfacing seals those cracks, protecting the concrete from moisture and preventing it from weakening over time.
- Making Cleaning Easier: I used to dread cleaning my garage floor—it was nearly impossible to get rid of the stains and grime embedded in the rough concrete. After resurfacing, the smoother finish made cleaning a breeze. Dirt, oil, and debris no longer cling to the surface, and all it takes is a quick sweep or mop to keep the floor looking great.
- Adding Safety Features: Resurfacing can also enhance the safety of your garage floor. Before I resurfaced, I was constantly worried about slipping on wet spots or tripping over cracks. The new surface can be textured to provide extra grip, reducing the chances of slipping. I also added a non-slip coating to ensure that the floor remains safe even when wet.
- Boosting Home Value: I hadn’t thought about this initially, but resurfacing my garage floor increased my home’s resale value. A clean, smooth, and durable garage floor is a selling point for potential buyers. It shows that the garage has been well-maintained, and they won’t have to worry about dealing with floor repairs in the future.

Assessing the Condition of Your Garage Floor Before Resurfacing
Before jumping into resurfacing my garage floor, I realized it was crucial to assess its current condition. A thorough inspection helped me determine whether resurfacing was the best option or if more extensive repairs were necessary. Here’s what I did to assess the condition of my garage floor before getting started.
Inspecting for Cracks and Damage
The first thing I did was take a close look at the cracks in the concrete. Not all cracks are created equal—some are purely cosmetic, while others indicate deeper structural problems. Hairline cracks are usually fine to resurface over, but large, deep cracks might require patching before applying a new surface. I found a couple of wider cracks that needed filling before I could move forward.
Checking for Moisture Issues
Moisture can be a major issue for garage floors, especially if water is seeping up from the ground. I tested for moisture by taping a piece of plastic sheeting to the floor and leaving it there for 24 hours. If condensation forms underneath the plastic, it’s a sign that there’s moisture coming through the concrete. Luckily, my floor was dry, but if you find moisture, it’s essential to address that problem before resurfacing.
Evaluating the Surface Texture
Surface texture is another important factor to consider. My garage floor had several rough patches where the surface had become uneven or pitted. Resurfacing works best on relatively smooth surfaces, so I knew I’d have to level out some of these areas before moving on. Using a grinder or patching compound can help smooth out uneven surfaces, ensuring the new layer adheres properly.
Testing for Oil and Stains
Oil and other stains can prevent the resurfacing material from properly bonding with the concrete. I had several oil stains from years of car maintenance that I needed to address. I used a degreaser and scrubbed the stains thoroughly to remove any residue. It’s important to remove as much oil as possible to ensure the resurfacing product adheres evenly.
Assessing Structural Integrity
While small cracks and surface issues are common, structural damage to the foundation of the concrete is a bigger problem. I looked for signs of sinking or shifting in the concrete, which could indicate foundational issues. If you notice significant unevenness or shifting, it might be worth consulting a professional before resurfacing.
Deciding on Resurfacing or Repairing
After thoroughly inspecting my garage floor, I felt confident that resurfacing was the right choice. However, if the damage had been more severe, I would have considered other options, such as replacing sections of the concrete. Taking the time to assess your garage floor will help you make the best decision for your space.
Tools and Materials Needed for Resurfacing a Concrete Garage Floor
When I decided to resurface my garage floor, gathering the right tools and materials was key to making the job go smoothly. Having everything prepared ahead of time saved me a lot of hassle. Here’s a list of the tools and materials I used to successfully resurface my garage floor.
Concrete Cleaner/Degreaser
The first thing I needed was a concrete cleaner or degreaser to remove dirt, oil, and stains from the garage floor. Cleaning the surface thoroughly is essential for getting the resurfacing material to bond correctly. I found that using a strong degreaser worked wonders on the old oil stains that had built up over the years.
Concrete Repair Compound
For the cracks and pits in my floor, I used a concrete repair compound. This material is designed to fill in any gaps or damaged areas, creating a smooth surface for the new layer. If your floor has any large cracks or holes, you’ll want to make sure you have a repair compound on hand before starting the resurfacing process.
Pressure Washer
After cleaning and repairing the cracks, I used a pressure washer to give the entire surface a deep clean. This removed any lingering debris and dust, ensuring that the resurfacing product would adhere properly. If you don’t have a pressure washer, renting one for the day is a great option.
Concrete Resurfacer
The main material I used was a concrete resurfacer. This is a mix that’s designed to cover and bond with the existing concrete, creating a new layer. I made sure to choose a high-quality resurfacer that’s designed for garage floors, as these are built to withstand heavy use and temperature fluctuations.
Trowel and Squeegee
To spread the resurfacer evenly across the floor, I used a trowel and a squeegee. The trowel helped me apply the resurfacer to smaller areas, while the squeegee allowed me to spread it out smoothly across larger sections. Having both tools on hand made the job much easier and helped achieve a uniform finish.
Protective Gear
Safety is important when working with concrete and chemicals, so I made sure to wear the right protective gear. I used gloves, safety glasses, and a mask to protect myself from dust and fumes. It’s always a good idea to prioritize safety, especially when working with potentially hazardous materials.
Step-by-Step Guide to Resurfacing a Concrete Garage Floor
Resurfacing my garage floor was a bigger project than I initially thought, but breaking it down into manageable steps made the whole process much more approachable. Here’s the step-by-step guide I followed to get a smooth, new surface in my garage.
Clean the Surface Thoroughly
The first step was to clean the garage floor as thoroughly as possible. I used a strong degreaser to scrub away oil stains, followed by a pressure washer to remove dirt, dust, and grime. This part of the process took a bit of time, but it’s crucial to ensure the resurfacing product bonds properly to the concrete.
Repair Cracks and Holes
After cleaning, I used a concrete repair compound to fill in any cracks, pits, or holes. I made sure the compound was level with the rest of the floor, using a trowel to smooth it out. This step helps create an even surface for the resurfacing layer to adhere to.
Prepare the Resurfacing Mix
Next, I mixed the concrete resurfacer according to the manufacturer’s instructions. I found that using a bucket and a mixing paddle attached to a drill made this process much easier. It’s important to get the consistency just right—too thick, and it’s hard to spread; too thin, and it won’t bond well.
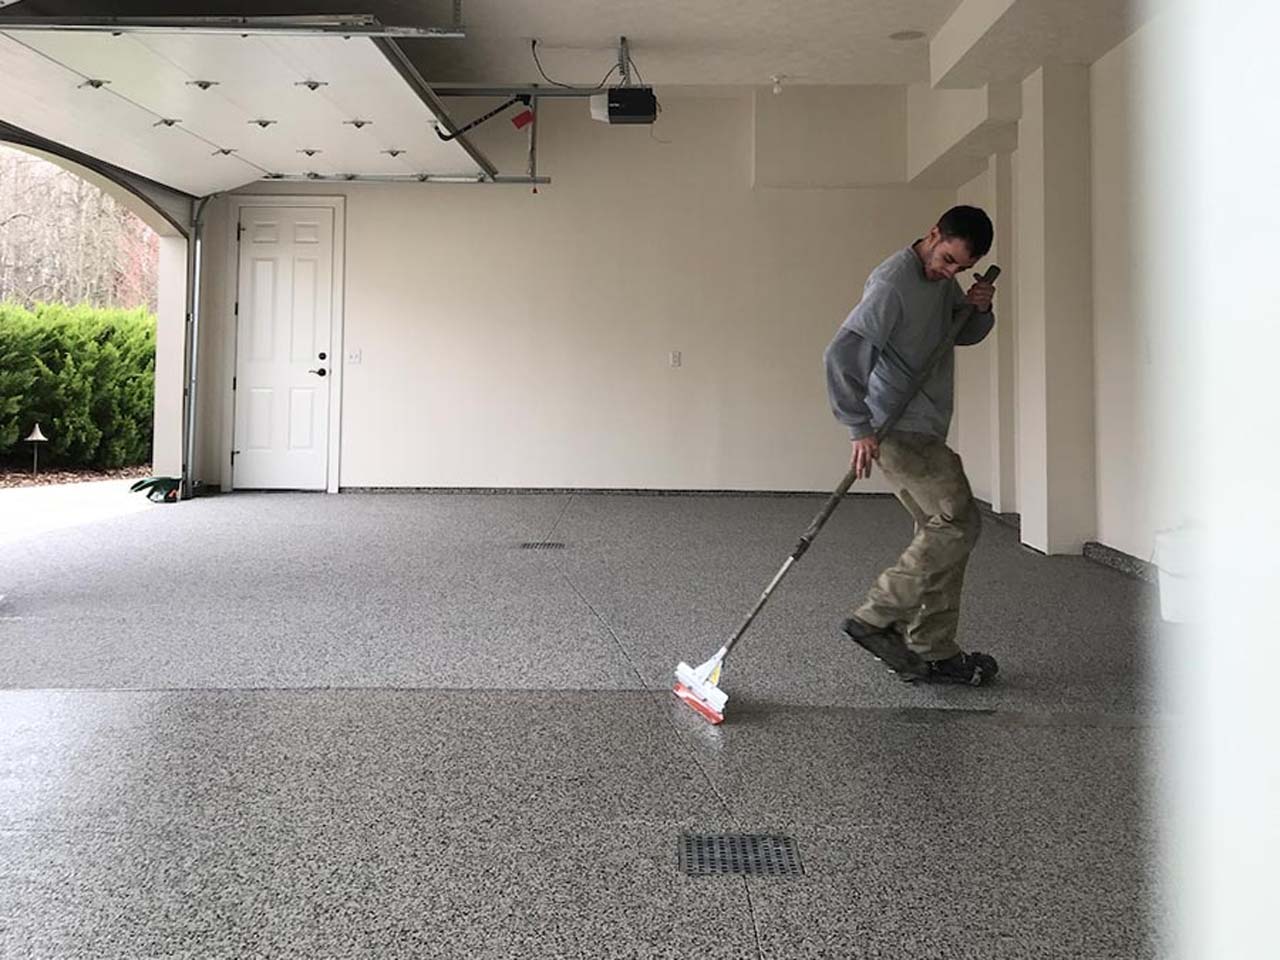
Apply the Resurfacer
Once the mix was ready, I used a trowel to apply it to the edges and corners of the garage floor. Then, I switched to a squeegee to spread the resurfacer across the larger areas of the floor. Working in small sections, I made sure to spread the product evenly and avoid leaving any gaps or thick spots.
Smooth and Level the Surface
After applying the resurfacer, I went over the surface with a trowel to smooth out any ridges or imperfections. It’s important to do this while the resurfacer is still wet, as it starts to harden fairly quickly. Taking the time to smooth everything out made a big difference in the final result.
Allow the Surface to Cure
The final step was to let the resurfaced floor cure for the recommended amount of time. In my case, it took about 24 hours before I could walk on the floor, and 48 hours before I could park my car on it. Patience is key here—letting the surface cure fully ensures a durable, long-lasting finish.
Choosing the Right Resurfacing Product for Your Garage Floor
Choosing the right resurfacing product for my garage floor took some research, but it was worth it. There are plenty of options on the market, and each one has its pros and cons. Here’s what I learned about picking the best product for resurfacing a concrete garage floor.
Consider the Type of Damage
The first thing I considered was the type of damage I was dealing with. If your floor has minor cracks and surface wear, a standard concrete resurfacer will work well. For deeper cracks or areas with significant pitting, I found that a resurfacer with a thicker consistency worked best.
Choose a High-Durability Product
Garage floors take a lot of wear and tear, so durability was a top priority for me. I made sure to choose a resurfacer that was specifically designed for heavy-duty use, including vehicles and heavy foot traffic. Look for products that are labeled as industrial-strength or designed for garages.
Look for Fast-Setting Options
Time was another consideration—I didn’t want my garage out of commission for too long. Fast-setting resurfacing products are great for homeowners like me who want to get back to using their garage quickly. Some products dry in as little as 24 hours, making them a convenient option.
Check for Non-Slip Additives
Safety is always a concern, so I chose a resurfacing product that included non-slip additives. These additives create a textured surface that provides extra grip, which is especially useful in garages where spills or moisture are common. Non-slip resurfacing made my garage floor safer to walk on, even when wet.
Consider Aesthetic Options
If you’re concerned about the look of your garage floor, some resurfacing products come with color options or can be stained after application. I opted for a neutral gray resurfacer that matched the original look of my garage, but there are plenty of other options available if you want to customize the appearance.
Check the Product Reviews
Finally, I made sure to check product reviews and customer feedback before making my purchase. Hearing from other homeowners who had used the product helped me make an informed decision. Their experiences gave me confidence that I was choosing a reliable, high-quality resurfacer for my garage floor.
Tips for Achieving a Smooth, Durable Finish
Getting a smooth, durable finish on my resurfaced garage floor took some practice, but with the right techniques, it’s achievable. Here are the tips I found most helpful for creating a flawless finish that lasts.
Work in Small Sections
One of the best tips I picked up is to work in small sections, especially when applying the resurfacer. The product can dry quickly, so trying to do the entire garage floor at once can lead to uneven results. By focusing on one section at a time, I was able to maintain better control and get a more even finish.
Use the Right Tools
Having the right tools made all the difference in achieving a smooth finish. I used a combination of a trowel and a squeegee, which allowed me to spread the resurfacer evenly and avoid any ridges or bumps. Using high-quality tools ensures a professional-looking result.
Apply Even Pressure
Applying even pressure when spreading the resurfacer is key to avoiding inconsistencies. I found that using too much pressure in one area can create dips, while too little pressure leaves thick spots. Maintaining steady, even pressure helped me get a smooth, uniform surface across the entire garage.
Smooth Out Imperfections Quickly
It’s important to address any imperfections or ridges as soon as they appear. The resurfacer starts to set fairly quickly, so going back to smooth out areas later isn’t always an option. I kept an eye on the surface as I worked, making adjustments and smoothing out imperfections in real-time.
Allow Adequate Curing Time
While it can be tempting to use the garage right away, allowing the resurfacer to cure fully is critical for achieving a durable finish. I followed the manufacturer’s recommendations and waited the full 48 hours before parking my car on the resurfaced floor. The wait was worth it, as the surface is now incredibly strong and resistant to wear.
Consider Adding a Sealant
After resurfacing, I decided to apply a sealant for extra protection. The sealant helps prevent moisture from penetrating the surface and adds another layer of durability. I’ve noticed that the sealed surface is easier to clean and stands up even better for heavy use.
Maintaining Your Resurfaced Garage Floor for Longevity
After putting in the effort to resurface my garage floor, I wanted to make sure it stayed in great condition for as long as possible. Proper maintenance is the key to extending the life of your resurfaced floor. Here are the steps I’ve been following to keep my garage floor looking new.
Regular Sweeping and Cleaning
One of the simplest ways to maintain a resurfaced garage floor is regular cleaning. I make it a habit to sweep the floor every week to remove dirt, dust, and debris that can cause scratches over time. If you notice any spills or stains, it’s a good idea to clean them up right away to prevent them from setting in.
Avoid Using Harsh Chemicals
I’ve learned to be cautious about the types of cleaners I use on my resurfaced floor. Harsh chemicals can break down the resurfacing material and damage the finish. Instead, I use a mild detergent and water for routine cleaning. For tougher stains, there are specific garage floor cleaners designed to be safe for resurfaced concrete.
Use Floor Mats for Added Protection
Placing floor mats in high-traffic areas, such as near the entrance or where the car is parked, can help reduce wear and tear on the resurfaced floor. I’ve added mats under my car to catch oil drips and under my workbench to prevent tool drops from damaging the surface.
Address New Cracks or Chips Immediately
Even after resurfacing, small cracks or chips can develop over time. When I noticed a small crack forming, I quickly filled it with a concrete repair compound to prevent it from growing. Taking care of these minor issues early on will save you from needing more extensive repairs later.
Reapply a Sealant as Needed
To keep the surface protected, I plan to reapply a sealant every couple of years. This helps maintain the durability of the resurfaced floor and keeps it looking smooth and clean. A fresh coat of sealant can also enhance the floor’s resistance to moisture and stains.
Avoid Heavy Impacts
Finally, I’m mindful of avoiding heavy impacts or dragging sharp objects across the resurfaced floor. While the surface is durable, repeated impacts or dragging heavy items can cause damage. By taking care of the floor and being cautious with heavy objects, I’m ensuring that the resurfacing job lasts for many years.
Concrete Stain – Concrete Resurfacing Systems
Related Posts:


