The Benefits of Garage Floor Epoxy Paint
If you’ve ever considered upgrading your garage floor, you’ve probably come across epoxy paint as a top option. It’s not just a visual upgrade—it’s a practical solution that adds value to your space in many ways. When applied properly, epoxy paint transforms a dull, gray concrete floor into a sleek, durable, and easy-to-maintain surface. This type of coating is gaining popularity because it offers a range of benefits that other flooring options simply can’t match. Let me break down the primary advantages of using garage floor epoxy paint and why it might be the perfect choice for your garage.
- Enhanced Durability and Longevity
Epoxy paint is known for its toughness and resilience. Once applied, it creates a strong, hard surface that resists impacts, abrasions, and heavy loads. Whether you’re parking your car, storing heavy tools, or using your garage as a workshop, an epoxy-coated floor can handle the wear and tear without showing signs of damage. Unlike standard concrete, which can crack or chip over time, epoxy provides a protective layer that extends the life of your garage floor and minimizes costly repairs. - Improved Aesthetic Appeal
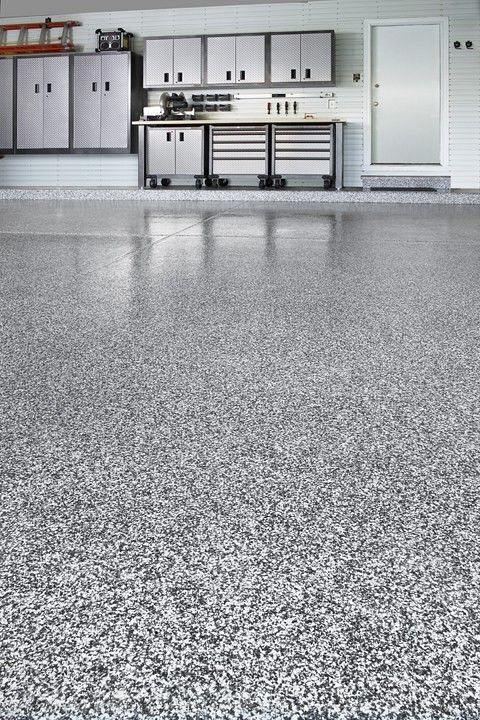
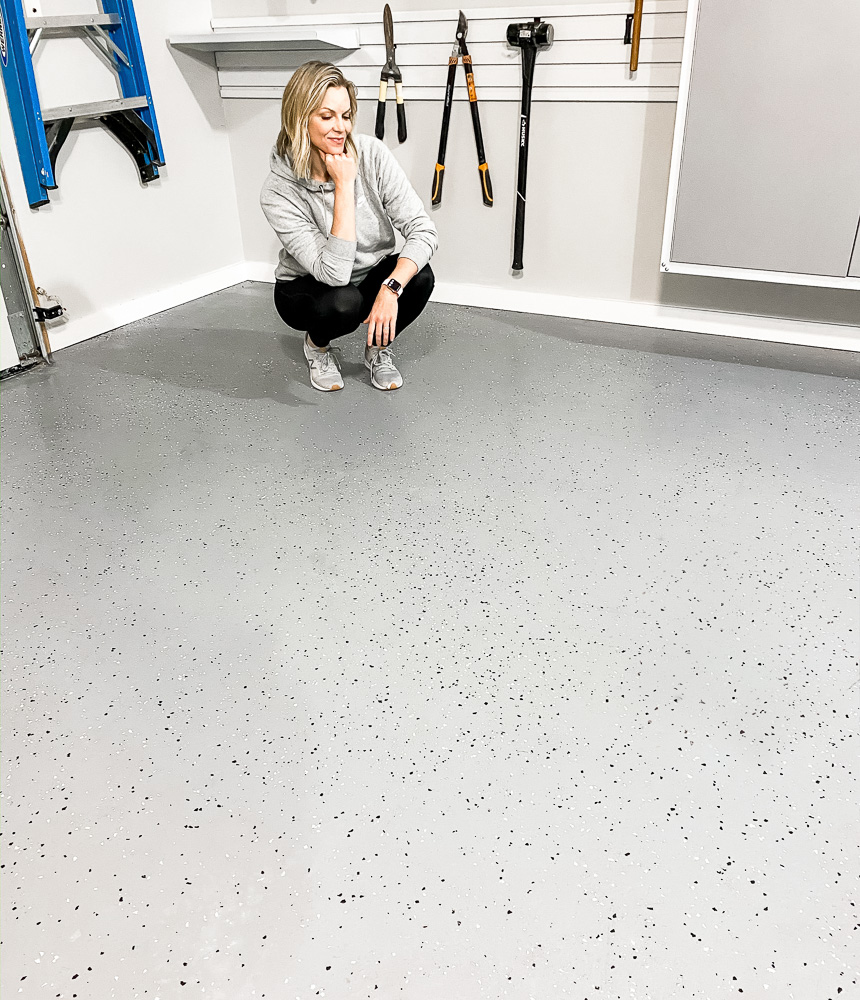
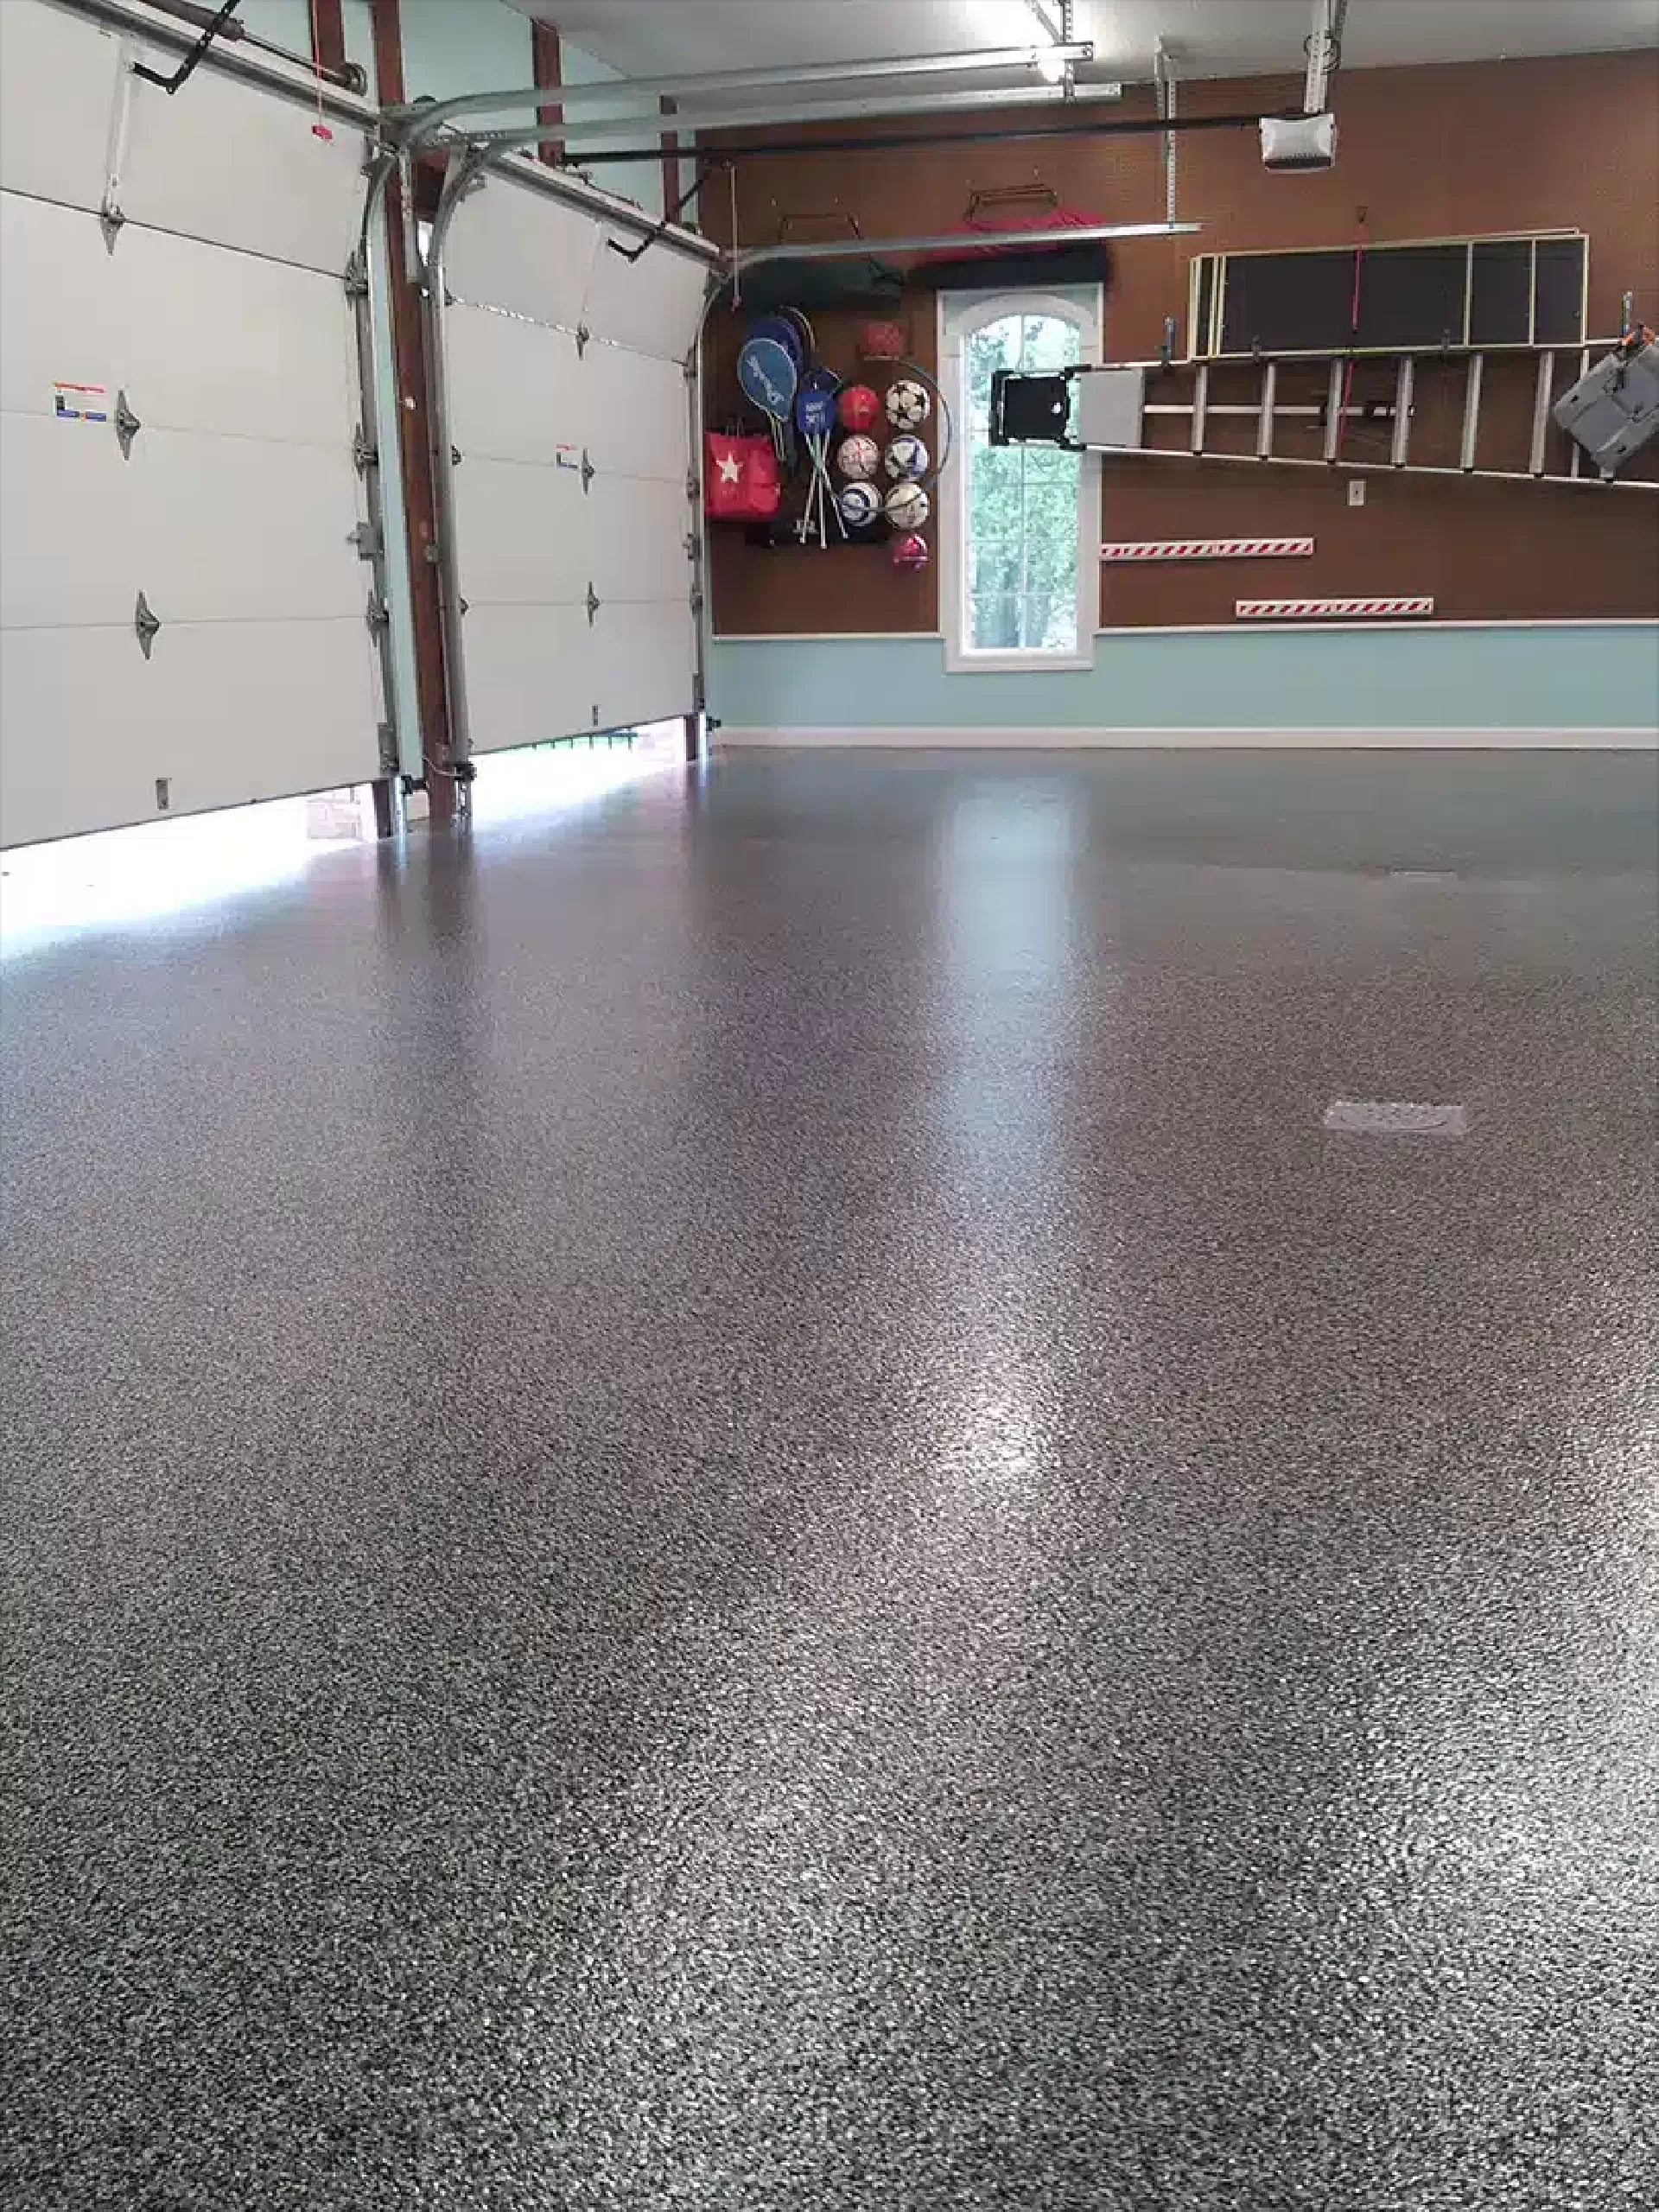
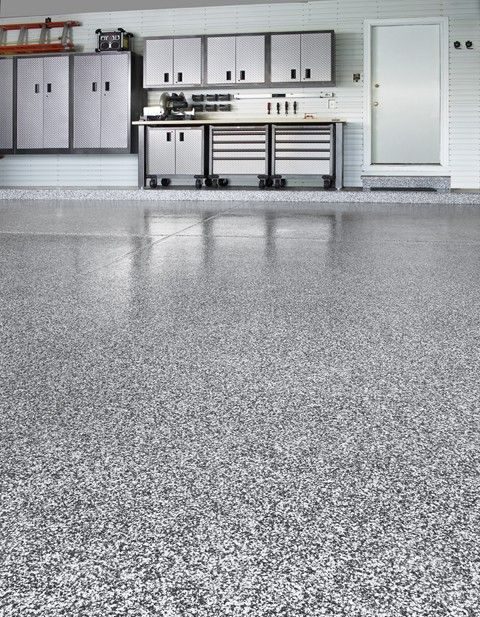
One of the first things you’ll notice after applying epoxy paint is the dramatic improvement in appearance. Epoxy coatings come in a variety of colors and finishes, from solid hues to decorative flakes that mimic the look of granite or terrazzo. The glossy finish not only looks clean and professional but also reflects light, brightening up the entire garage. If you’ve been using your garage as a multipurpose space, an epoxy floor can elevate its look, making it feel more like an extension of your home rather than a neglected storage area. - Easy Maintenance and Cleaning
Another great benefit of epoxy is its low maintenance. The smooth, non-porous surface repels dirt, dust, and spills, making cleanup a breeze. Unlike bare concrete which absorbs stains and becomes increasingly difficult to clean over time, epoxy paint resists oil, chemicals, and other substances commonly found in garages. If something spills, a quick wipe with a cloth or mop is usually all it takes to restore its appearance. This ease of maintenance means you’ll spend less time scrubbing and more time enjoying a clean, attractive garage space. - Chemical and Stain Resistance
Garages are often exposed to a variety of chemicals, from motor oil and gasoline to paint thinners and cleaning solvents. Epoxy paint is specially formulated to withstand chemical exposure, so you won’t have to worry about spills causing unsightly stains or degrading the surface. This resistance makes it an ideal choice for those who frequently work on cars or perform DIY projects in the garage. Even if you accidentally spill something, the epoxy’s chemical resistance will keep it looking like new. - Increased Safety Features
Safety is a crucial factor when it comes to choosing flooring, and epoxy offers several features that enhance safety in your garage. Many epoxy coatings include anti-slip additives that reduce the risk of slipping, even when the floor is wet. Additionally, the bright, reflective surface improves visibility, reducing the likelihood of accidents. You can also add customized markings, such as safety zones or parking guides, to create a safer and more organized space. These features make epoxy an excellent choice if you use your garage for more than just parking your car. - Cost-Effective Flooring Solution
While epoxy paint might seem expensive at first glance, it’s a cost-effective investment in the long run. Its durability means you won’t need to replace or repair the flooring as frequently as other options. Plus, with its easy maintenance and stain-resistant properties, you’ll save money on cleaning supplies and professional services. The overall value it adds to your garage, in terms of aesthetics and functionality, makes it a smart financial decision for homeowners looking to upgrade their space.
Choosing the Right Epoxy Paint for Your Garage Floor
Not all epoxy paints are created equal, and choosing the right one for your garage floor can be a daunting task. With so many types, brands, and finishes available, how do you know which product will meet your needs? The key is understanding the different types of epoxy and selecting a product that aligns with your garage’s unique requirements. Let’s see what to look for when choosing the right epoxy paint, so you can make an informed decision that guarantees a long-lasting and visually appealing finish.
Water-Based vs. Solvent-Based Epoxy Paints
The first thing to consider is the base of the epoxy paint. Water-based epoxy is the most user-friendly option, emitting fewer fumes and being easier to clean up. It’s also less expensive, making it a popular choice for DIY enthusiasts. However, solvent-based epoxies are more durable and offer better chemical resistance, making them ideal for high-traffic garages or professional settings. The downside is that they produce stronger fumes and require careful ventilation. Choosing between these two depends on your comfort level and the conditions in your garage.
100% Solid Epoxy for Maximum Durability
If durability is your main concern, 100% solid epoxy is the way to go. This type of epoxy is made entirely of solid ingredients, meaning there’s no water or solvent to evaporate during curing. The result is a thicker, more resilient coating that can withstand heavy traffic and extreme conditions. It’s commonly used in commercial garages and industrial settings but is also suitable for residential garages that see a lot of activity. Keep in mind that 100% solid epoxy is more challenging to apply and often requires professional installation for the best results.
Choosing the Right Finish: Glossy, Matte, or Satin
The finish you choose can have a big impact on the final look and feel of your garage. Glossy finishes are the most popular for garage floors, as they create a bright, reflective surface that enhances visibility. However, if you prefer a more understated look, consider a matte or satin finish. Matte finishes are less reflective and show fewer imperfections, while satin finishes strike a balance between shine and subtlety. Your choice will depend on your aesthetic preference and how much light you want your garage to reflect.
Consider Decorative Flakes or Metallic Finishes
If you want to add a touch of style to your garage floor, consider choosing epoxy paint with decorative flakes or metallic pigments. Decorative flakes are available in a range of colors and sizes, adding texture and visual interest to your floor while also providing a slight anti-slip effect. Metallic epoxies, on the other hand, create a stunning, marbled effect that mimics the look of high-end stone surfaces. These options are great if you want your garage to stand out or if you’re using it as a showroom or workshop.
Evaluate Drying and Curing Times
Different epoxy products have varying drying and curing times, which can affect your project timeline. Water-based and solvent-based epoxies generally dry faster, while 100% solid epoxies can take longer to cure fully. If you’re working on a tight schedule, opt for a product with a shorter drying time. However, keep in mind that faster-drying epoxies might not offer the same level of durability as those with longer curing times. Always balance convenience with quality to ensure a durable, long-lasting finish.
Read Product Reviews and Consult Professionals
Finally, it’s always a good idea to read product reviews and consult with professionals before making your final choice. Reviews from other homeowners can provide insights into how a particular product performs over time and whether it lives up to its claims. If you’re unsure which type of epoxy to use, don’t hesitate to ask for recommendations from a local flooring expert or home improvement store. Their experience can help you select the best epoxy paint for your specific needs, ensuring a successful project from start to finish.
Preparing Your Garage Floor for Epoxy Application
Proper preparation is the foundation of a successful epoxy coating. If you skip or rush through this step, you’ll likely end up with peeling, uneven surfaces, or a finish that doesn’t adhere properly. Taking the time to prepare your garage floor correctly will ensure a smooth and long-lasting application. Let me walk you through the steps I always follow to get my garage floor ready for a flawless epoxy paint job.
Clear the Garage and Inspect the Floor
Before you begin, you need a blank slate. Start by removing everything from the garage, including vehicles, storage items, and any floor coverings like rugs or mats. Once the space is clear, inspect the floor for imperfections such as cracks, oil stains, or moisture issues. Take note of any areas that will need patching or extra attention, as these can impact the final look and durability of your epoxy coating. If there are major issues like water seepage or extensive cracks, you’ll want to address these first before moving forward with the epoxy application.
Clean the Surface Thoroughly
The most important step in floor preparation is cleaning. Dirt, oil, and other contaminants can prevent the epoxy from bonding with the concrete. Start by sweeping the entire floor to remove dust and debris. Next, use a degreaser or heavy-duty cleaner to tackle oil stains and any remaining dirt. For stubborn stains, scrub with a stiff-bristle brush or use a pressure washer if available. After cleaning, rinse the floor thoroughly and allow it to dry completely. If the floor isn’t perfectly clean, the epoxy won’t adhere properly, leading to peeling and chipping down the line.
Etch the Concrete for Better Adhesion
Etching is a crucial step that many DIYers overlook. This process opens up the concrete’s pores, allowing the epoxy to penetrate and bond effectively. Use an etching solution, typically a mixture of water and muriatic acid, and apply it evenly over the entire floor. Make sure to wear protective gear, including gloves, goggles, and a mask, as the acid can be harmful if it comes into contact with your skin or eyes. Let the solution sit for the recommended time, then scrub the surface with a stiff-bristle brush. Rinse the floor thoroughly to remove all traces of the etching solution and let it dry completely before moving to the next step.
Repair Any Cracks or Damage
If your garage floor has cracks or pitted areas, now is the time to repair them. Use a concrete patching compound or epoxy filler to fill in the cracks and level any uneven surfaces. Follow the product instructions carefully, making sure the filler is completely dry and smooth before moving forward. Use a trowel to ensure the repairs are level with the rest of the floor. If you skip this step, the imperfections will show through the epoxy and could cause weak spots in the finish. Proper patching is essential for a seamless and professional-looking epoxy floor.
Test for Moisture Issues
Before applying any epoxy, it’s crucial to check for moisture in the concrete. Epoxy won’t adhere well to damp surfaces, leading to bubbling or peeling. To test for moisture, tape a piece of plastic sheeting to the floor and leave it for 24 hours. If condensation forms on the underside of the plastic, your floor has a moisture problem that needs to be addressed before applying the epoxy. Solutions for moisture issues include installing a vapor barrier, using a moisture-blocking primer, or opting for a moisture-resistant epoxy product.
Apply a Suitable Primer
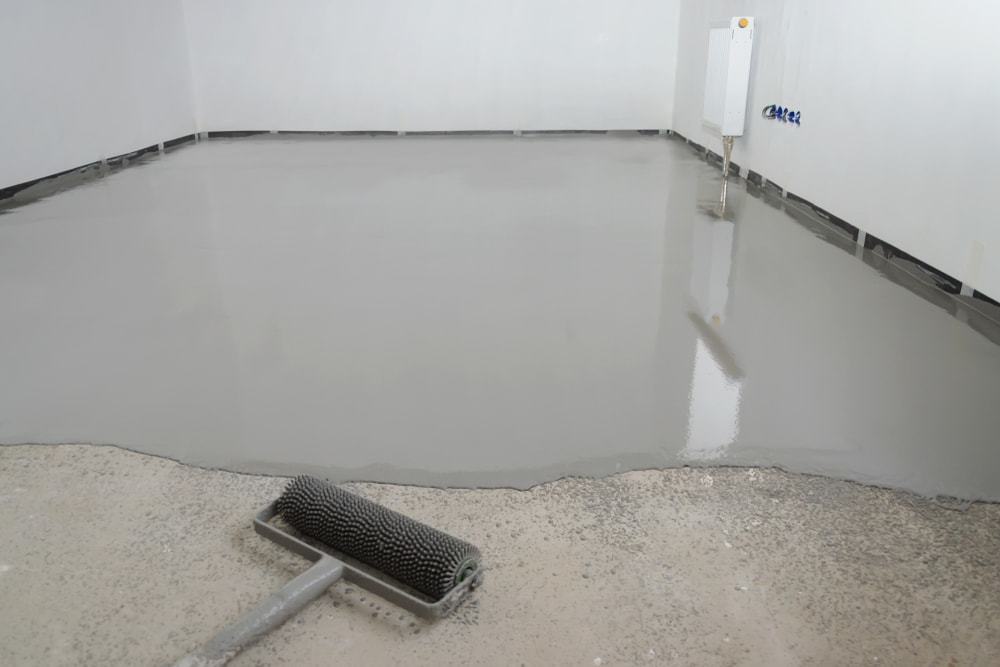
Once the floor is clean, etched, and fully dry, it’s time to apply a primer. Primer is essential for ensuring that the epoxy adheres properly and provides a smooth, even finish. Choose a primer that is compatible with your epoxy paint and apply it according to the manufacturer’s instructions. Use a roller to spread the primer evenly across the surface, working in small sections to avoid missed spots. Allow the primer to dry completely before moving on to the epoxy application. The primer will create a strong bond between the concrete and the epoxy, minimizing the risk of peeling and improving the overall durability of your floor.
Step-by-Step Guide to Applying Garage Floor Epoxy Paint
Now that your floor is perfectly prepped, it’s time for the main event: applying the epoxy paint. This process requires attention to detail and a bit of patience, but the results are well worth the effort. With the right tools and techniques, you can achieve a professional-quality finish that will transform your garage into a space you’ll be proud of. Let’s go through each step to ensure your application goes smoothly.
Mix the Epoxy Properly
Epoxy paint usually comes in two parts: the resin and the hardener. When mixed, these two components undergo a chemical reaction that causes the epoxy to harden and form a durable coating. Start by carefully measuring and mixing the resin and hardener according to the manufacturer’s instructions. Use a drill with a mixing paddle attachment for thorough blending. Make sure to mix for the recommended time to ensure an even consistency. Once mixed, you’ll have a limited window to apply the epoxy before it begins to set, so work efficiently.
Cut in the Edges First
Before rolling the epoxy onto the main surface, use a paintbrush to cut in around the edges of the garage floor. This technique ensures that the entire floor is covered and prevents the roller from missing tight corners or awkward spaces. Dip your brush into the epoxy and carefully apply a thin layer along the perimeter, paying special attention to areas where the floor meets the walls or any fixed structures. Take your time with this step, as clean, precise edges contribute to a polished final look.
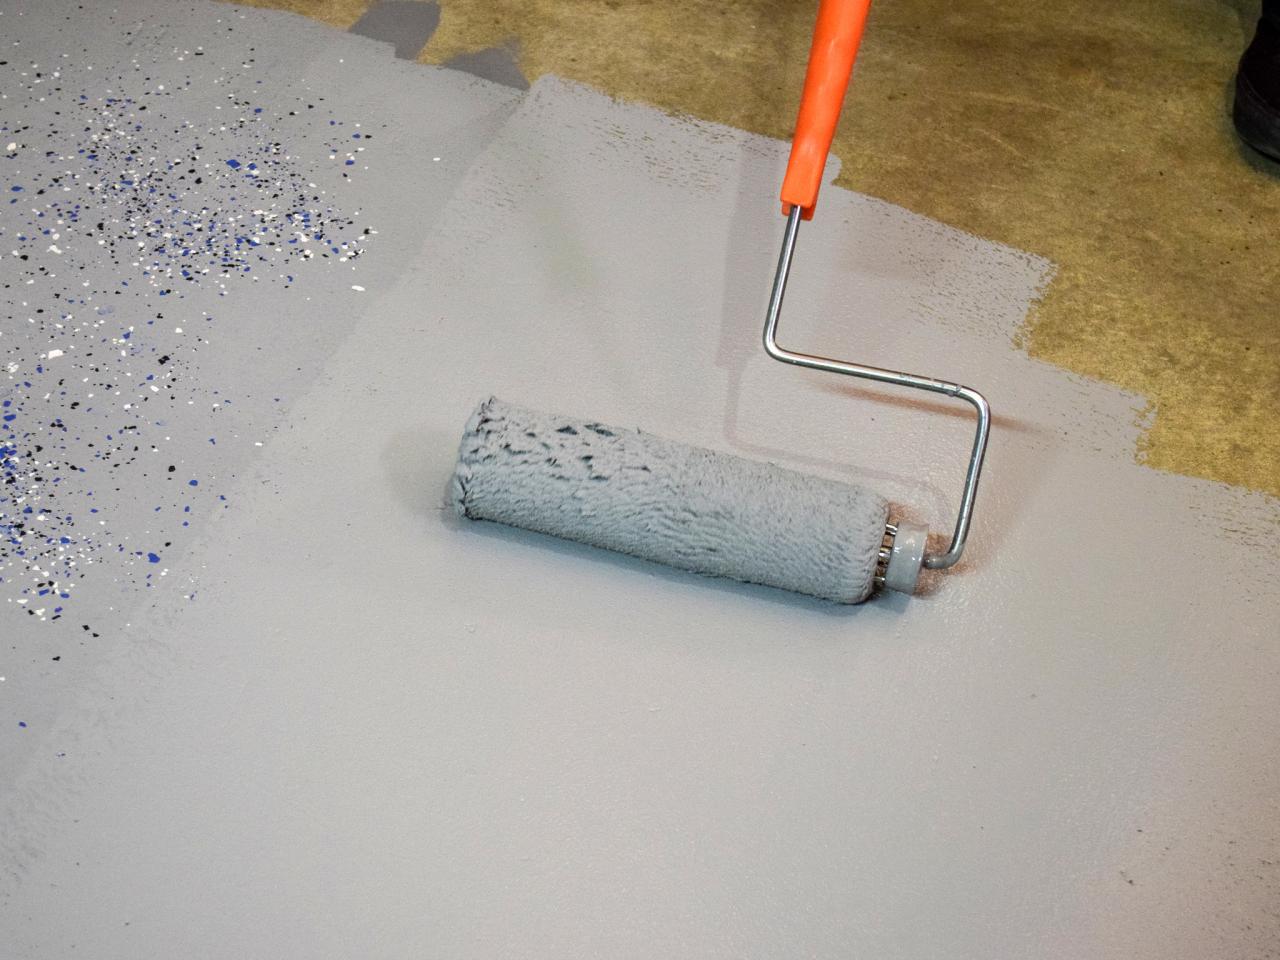
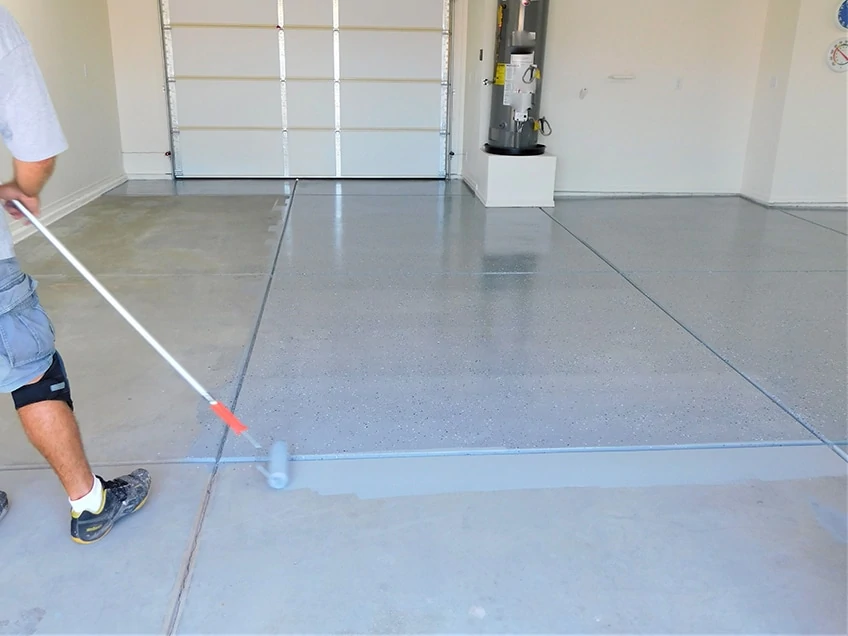
Roll the Epoxy Onto the Floor in Sections
After cutting in, switch to a roller for the main application. Pour a small amount of mixed epoxy onto the floor and use a 9-inch roller with a 3/8-inch nap to spread it evenly. Work in 4×4 foot sections, rolling in one direction and then backrolling in the opposite direction to eliminate bubbles and ensure even coverage. Avoid over-rolling, as this can lead to an uneven finish. Continue working in small sections until the entire floor is coated. If you’re using decorative flakes, sprinkle them onto the wet epoxy as you go to achieve a uniform distribution.
Apply a Second Coat if Necessary
Depending on the type of epoxy and the desired thickness, you may need to apply a second coat. If a second coat is recommended, wait for the first coat to dry according to the manufacturer’s instructions, usually about 12-24 hours. Lightly sand the first coat to promote adhesion, then wipe away any dust. Apply the second coat using the same technique, ensuring even coverage and a smooth finish. The second coat will enhance the durability and appearance of your garage floor, giving it a thicker, more resilient surface.
Allow Proper Drying and Curing Time
After applying the final coat, it’s crucial to allow the epoxy to dry and cure properly. The drying time will vary depending on the product and environmental conditions, but it typically takes 24 hours before you can walk on the floor and up to 72 hours before it’s ready for heavy use. Keep the garage well-ventilated during this time to speed up the curing process and ensure a strong bond. Avoid placing any heavy objects or vehicles on the floor until it has fully cured to prevent damaging the surface.
Inspect the Finished Floor for Imperfections
Once the epoxy has fully cured, inspect the floor for any imperfections such as bubbles, uneven areas, or missed spots. If you notice any issues, they can often be corrected with a light sanding and touch-up application. Addressing these imperfections early will prevent them from worsening over time and ensure a flawless finish. A well-applied epoxy floor should have a smooth, glossy appearance with no visible defects.
Drying and Curing: What to Expect After Applying Epoxy Paint
After all the hard work of prepping and applying the epoxy paint, the next step is to let it dry and cure properly. While it might be tempting to start using your newly finished garage floor right away, patience is key here. Understanding the drying and curing process will ensure that your floor achieves maximum strength and durability. Let me walk you through what to expect during this critical stage and how to ensure that your beautiful new floor sets up perfectly.
The Difference Between Drying and Curing
It’s essential to understand the difference between drying and curing. When we talk about drying, we’re referring to the time it takes for the surface to be dry to the touch. Curing, on the other hand, is the process where the epoxy reaches its maximum hardness and chemical resistance. While epoxy paint can feel dry within a day, it typically takes several days to weeks for it to fully cure. During this curing period, the epoxy undergoes a chemical reaction that solidifies the coating and gives it its signature durability and strength.
Initial Drying Time: When You Can Walk on It
The initial drying time varies depending on the type of epoxy, the temperature, and the humidity level in your garage. Most epoxy paints are dry to the touch within 12 to 24 hours. At this stage, you can usually walk on the floor with soft-soled shoes, but it’s best to avoid heavy foot traffic to prevent scuffing or damaging the surface. If you applied decorative flakes, this is also the time to gently brush away any loose flakes that didn’t adhere to the epoxy. Remember, even though the floor seems dry, it’s not fully hardened yet, so be cautious with any activity.
Secondary Curing: Light Use and Furniture Placement
After about 48 to 72 hours, the epoxy should be strong enough for light use, such as placing light furniture or moving small items back into the garage. Avoid dragging heavy objects across the floor, as this can leave marks or scratches before the epoxy has fully cured. During this secondary curing stage, the epoxy continues to harden, but it still doesn’t have its full chemical resistance. For this reason, avoid exposing the floor to harsh chemicals, water, or spills during this time.
Full Curing: When It’s Ready for Vehicles and Heavy Use
The full curing time for most epoxy coatings is around 7 to 10 days, though some high-solids or commercial-grade products can take up to 30 days to reach full strength. Once fully cured, the floor is ready for heavy use, including parking vehicles and using the space as a workshop. At this stage, the epoxy has reached its maximum chemical and impact resistance, meaning it’s ready to handle the wear and tear of daily use. To be safe, always check the manufacturer’s recommendations for curing times, as they can vary based on the specific product and environmental conditions.
Factors That Affect Drying and Curing Times
Several factors can impact how quickly or slowly your epoxy dries and cures. Temperature is a major factor—epoxy cures faster in warmer temperatures and slower in colder conditions. Ideally, aim for a garage temperature between 60 and 85 degrees Fahrenheit for optimal curing. Humidity also plays a role; high humidity can slow down the curing process, while extremely low humidity can cause the epoxy to cure too quickly, leading to a brittle finish. Proper ventilation is also essential to remove fumes and help the epoxy set evenly. If you’re working in less-than-ideal conditions, consider using a space heater or dehumidifier to create a controlled environment.
Tips to Ensure a Successful Curing Process
To achieve the best results, avoid rushing the curing process. Keep the garage well-ventilated but free from drafts that could blow dust or debris onto the wet epoxy. Resist the urge to touch up any small imperfections until the floor is completely cured. If you notice any areas that seem to be curing unevenly, such as spots that remain tacky or soft, leave them alone for a few more days before taking action. Patience and a controlled environment are key to ensuring your epoxy floor cures into a smooth, durable finish that will last for years to come.

Maintaining and Cleaning Epoxy-Coated Garage Floors
A well-applied epoxy coating can make your garage floor nearly indestructible, but that doesn’t mean it’s completely maintenance-free. Regular cleaning and a few simple care practices can help your epoxy floor stay in top condition for years. The good news is that maintaining an epoxy floor is much easier than cleaning bare concrete. Let me share some tried-and-true tips for keeping your garage floor looking as good as the day you applied the epoxy paint.
Daily and Weekly Cleaning Routine
For everyday cleaning, a quick sweep with a soft broom or a dust mop is usually all you need to keep the floor free of dust and debris. If you use your garage frequently, aim to sweep it out at least once a week to prevent dirt from building up. Avoid using stiff-bristled brooms, as they can leave small scratches on the epoxy surface. For a more thorough weekly clean, you can use a damp mop with a mild cleaning solution to remove any dirt or residue. Make sure to wring out the mop well—excess water can seep into cracks and damage the epoxy over time.
Handling Spills and Stains Promptly
One of the biggest advantages of epoxy floors is their resistance to spills and stains. However, it’s still best to clean up spills as soon as they happen, especially if they involve harsh chemicals like oil, gasoline, or solvents. Use a soft cloth or paper towel to blot up the spill, then clean the area with warm water and a gentle degreaser if necessary. Avoid scrubbing too hard, as this can damage the finish. For tougher stains, such as rust or paint, use a non-abrasive cleaner and a soft scrubbing pad to gently remove the mark.
Avoid Using Harsh Cleaners
Although epoxy is highly durable, it can be damaged by harsh or acidic cleaners. Avoid using products that contain vinegar, citrus, bleach, or ammonia, as these can break down the epoxy over time and dull its shine. Stick to neutral-pH cleaners designed for use on coated floors. If you’re unsure, test a small amount of cleaner in an inconspicuous area before applying it to the entire floor. For best results, dilute the cleaner with water according to the manufacturer’s instructions to avoid using too strong of a solution.
Protecting the Epoxy from Scratches and Scuffs
Even though epoxy floors are tough, they’re not entirely immune to scratches and scuffs. To prevent damage, avoid dragging heavy items or sharp tools across the surface. If you’re moving equipment or heavy furniture, place a piece of cardboard or plywood underneath to protect the floor. Consider using felt pads or mats under heavy objects like tool chests or workbenches to minimize the risk of scratches. Keeping a few small mats or rugs near entry points can also help reduce wear in high-traffic areas.
Reapplying a Top Coat for Added Protection
Over time, you might notice that your epoxy floor starts to lose its shine or show signs of wear. To restore its appearance and protect it from further damage, consider reapplying a top coat every few years. A new top coat will rejuvenate the floor’s glossy finish and provide an extra layer of protection against scratches and chemicals. Before reapplying, make sure to clean and lightly sand the surface to ensure good adhesion. This small maintenance step can extend the life of your epoxy floor and keep it looking brand new.
Dealing with Wear and Minor Damage
If your epoxy floor starts to show signs of wear or small areas of damage, address them as soon as possible. Minor scratches and scuffs can often be buffed out with a polishing compound, while deeper gouges may require a patch kit. For large areas of wear, you might need to sand and reapply a fresh coat of epoxy. Regular maintenance and prompt repairs will prevent minor issues from becoming major problems and keep your floor in excellent condition for years.

Common Mistakes to Avoid When Using Garage Floor Epoxy Paint
Applying epoxy to your garage floor can be a rewarding project that transforms a dull space into a sleek, durable, and easy-to-clean area. However, several common pitfalls can turn this straightforward job into a frustrating experience if you’re not careful. From improper surface preparation to choosing the wrong products, there are many ways this project can go awry. Let me walk you through the most common mistakes I’ve encountered, so you can avoid them and achieve professional-looking results.
Skipping Proper Surface Preparation
The biggest mistake people make when applying garage floor epoxy is not preparing the surface correctly. A clean and properly prepped surface is crucial for the epoxy to bond effectively. If the floor isn’t free from dirt, oil, and other contaminants, the epoxy won’t adhere properly, leading to peeling and bubbling down the line. Always start by thoroughly cleaning the floor, using a heavy-duty degreaser if necessary, and addressing any stains or residue. Follow up by etching the concrete to open up its pores and allow the epoxy to penetrate deeply. Skipping this step will almost certainly result in a poor-quality finish.
Ignoring Moisture Problems
Moisture is the enemy of epoxy coatings. If your garage floor has moisture issues, applying epoxy without addressing them first will cause the coating to peel and bubble. Many homeowners overlook this step and end up disappointed when the epoxy starts lifting within a few months. Always perform a moisture test before starting your project. Simply tape a piece of plastic to the concrete and leave it for 24 hours. If you notice condensation under the plastic, you’ll need to address the moisture problem with a vapor barrier or moisture-blocking primer before applying the epoxy. Trust me, skipping this step can turn a straightforward project into a costly redo.
Using the Wrong Type of Epoxy
Not all epoxy products are created equal, and choosing the wrong type for your garage floor can lead to disappointing results. Some homeowners opt for low-cost, water-based epoxies, which may not provide the same level of durability and chemical resistance as high-solids or 100% solids epoxies. While water-based products are easier to apply and dry faster, they’re better suited for light-duty applications. For garages that see heavy vehicle use or exposure to chemicals, choose a high-quality, solvent-based epoxy. It’s a bit more challenging to apply, but the added durability and long-lasting finish are worth the effort.
Mixing the Epoxy Incorrectly
Another common mistake is not mixing the epoxy components properly. Epoxy typically comes in two parts—the resin and the hardener—that need to be combined in exact proportions. If you don’t mix these components thoroughly, the epoxy won’t cure correctly, resulting in a sticky, soft, or uneven finish. Always follow the manufacturer’s instructions carefully, using a drill with a mixing paddle to ensure a consistent mixture. Mix for the recommended time, usually around 3 to 5 minutes, scraping the sides and bottom of the container as you go. Under-mixing or over-mixing can ruin your project before you even start applying the paint.
Applying Epoxy in Poor Conditions
Temperature and humidity levels play a significant role in how well epoxy adheres and cures. Applying epoxy in extreme temperatures—either too hot or too cold—can cause the coating to cure too quickly or not at all. High humidity can introduce moisture into the mix, leading to a cloudy finish or poor adhesion. Aim to apply epoxy when the temperature is between 60 and 85 degrees Fahrenheit, and humidity levels are below 80%. Check the weather forecast and plan your project for a period of stable conditions to avoid issues like sweating or incomplete curing. Taking the time to wait for the right conditions can make all the difference in the outcome.
Rushing the Curing Process
Patience is key when it comes to epoxy application. One of the most common mistakes I see is rushing the curing process. People often start moving items back into the garage or parking their vehicles too soon, which can lead to unsightly dents, scratches, or even damage to the epoxy coating. Remember, just because the epoxy feels dry doesn’t mean it’s fully cured. Depending on the product, it can take up to a week or more for the epoxy to reach its maximum hardness. Follow the manufacturer’s curing recommendations to the letter, and resist the temptation to use the space until the floor has fully set.
Applying Too Thick of a Coat
It might seem like applying a thicker coat of epoxy will lead to a more durable finish, but in reality, this can cause more harm than good. When epoxy is applied too thickly, it can develop bubbles or trap moisture, leading to a rough, uneven finish. Thick coats also increase the risk of uneven curing, which can result in soft spots that are prone to damage. The best approach is to apply thin, even coats, working in small sections and allowing each coat to dry completely before applying another. If you want a thicker finish, multiple thin coats are the way to go.
Forgetting to Account for Pot Life
Epoxy has a limited working time, known as its “pot life,” after it’s mixed. Depending on the type of epoxy, pot life can range from 20 minutes to an hour. If you take too long to apply the mixed epoxy, it will start to harden in the container, making it unusable. Many DIYers don’t realize how quickly pot life can pass, and they end up wasting product or applying epoxy that’s already begun to set. Plan your project carefully, mix smaller batches if needed, and work quickly but efficiently to ensure the epoxy is still in its optimal state when applied.
Best Epoxy Floor Paint – Complete Guide for Epoxy Painting
Do-It-Yourself Epoxy Floor Coating
Related Posts: