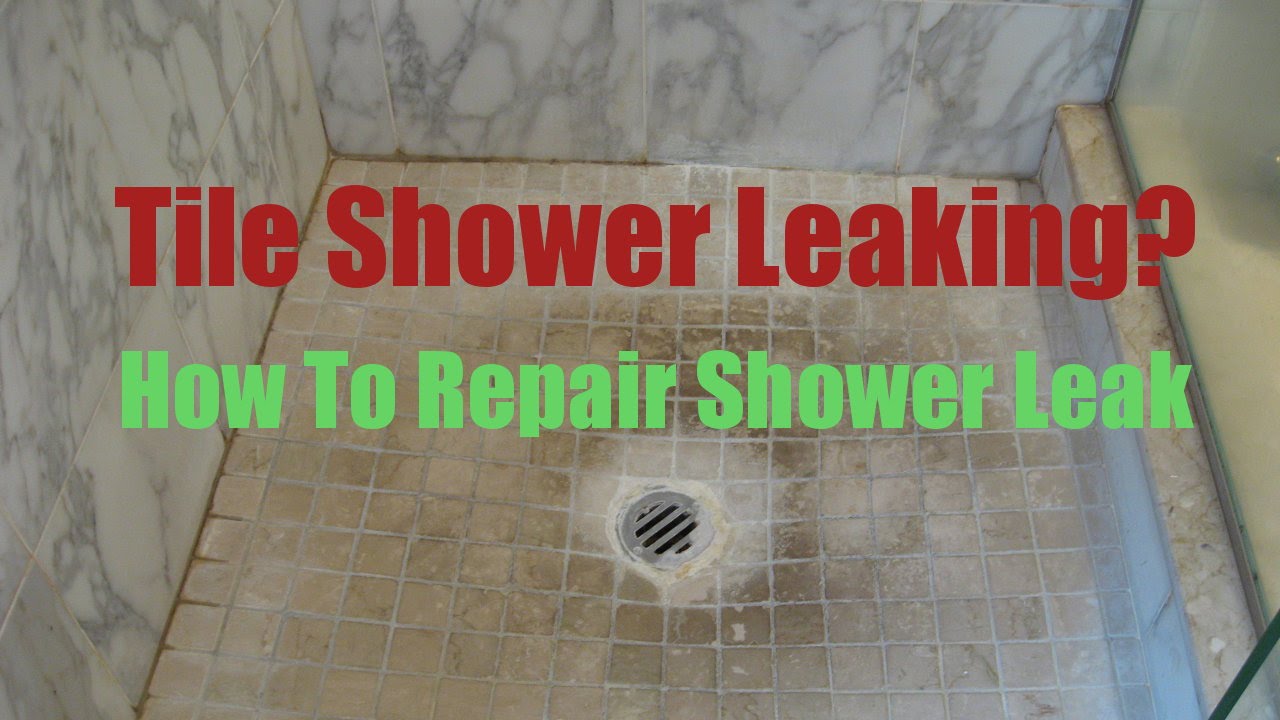
Identifying the Source of the Leak: A Step-by-Step Guide
Dealing with a leaking shower tile floor can be frustrating, but before you can fix the problem, it’s essential to identify the source of the leak. This step-by-step guide will help you pinpoint the cause and take the necessary steps to address it.
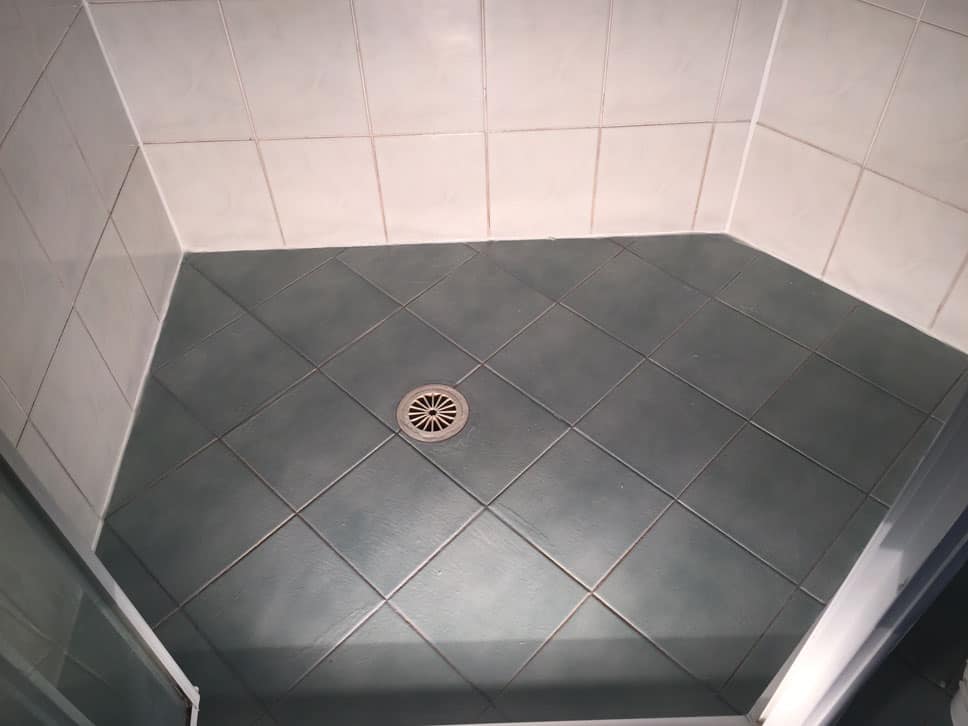
- Check the Grout Lines: Start by examining the grout lines between the tiles. Look for any cracks or gaps that could be allowing water to seep through. Use a flashlight to get a closer look, paying attention to areas near corners, edges, and the shower drain. If you notice any damaged or deteriorated grout, it could be the culprit.
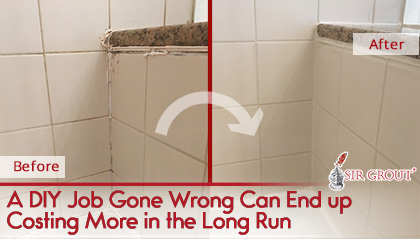
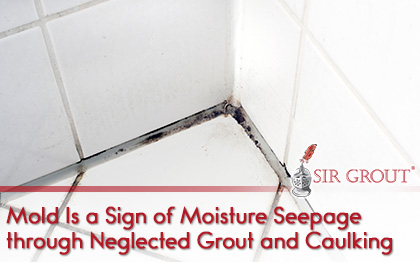
- Inspect the Caulking: Next, inspect the caulking around the shower edges, corners, and where the tiles meet the shower pan. Over time, caulk can degrade, resulting in gaps that allow water to escape. Look for signs of peeling, cracking, or mold growth, as these are indications of a faulty caulk seal.
- Test the Shower Pan: A faulty shower pan can also be the cause of a leaking shower tile floor. To check this, plug the drain and fill the shower basin with water. Let it sit for a few minutes and observe if the water level drops. If it does, it suggests that the shower pan is not holding the water properly, leading to leaks.
- Examine the Plumbing: Sometimes, the source of the leak may not be directly related to the tiles or grout. Faulty plumbing connections or pipes behind the shower walls can also cause water to seep into the floor. If you’ve ruled out issues with the grout, caulking, and shower pan, it may be necessary to call a professional plumber to inspect the plumbing system.
- Consider the Surrounding Areas: Lastly, consider the areas surrounding the shower. Look for signs of water damage on the walls, flooring, or adjacent rooms. Water stains, mold growth, or a musty odor could indicate that the leak has spread beyond the shower tile floor. Addressing these issues promptly is crucial to prevent further damage.
Tools and Materials You’ll Need to Fix a Leaking Shower Tile Floor
If you’ve identified the source of the leak in your shower tile floor, it’s time to gather the necessary tools and materials to fix the problem. Here’s a comprehensive list to help you get started.
- Protective Gear: Before you begin any repair work, make sure you have the appropriate protective gear. Safety goggles, gloves, and a dust mask are essential to shield yourself from any potential hazards, such as debris or chemicals.
- Grout Removal Tools: To repair the grout, you’ll need a few specific tools. A grout removal tool or a grout saw will help you remove the damaged or deteriorated grout from between the tiles. Additionally, a utility knife and a small brush will come in handy for cleaning the grout lines.
- Grout Mixing and Application Tools: Once you’ve removed the old grout, you’ll need to mix and apply the new grout. A grout float or a rubber grout float is necessary for spreading the grout evenly, while a grout sponge will help you clean off any excess grout from the tile surfaces.
- Caulk Removal and Application Tools: If the caulking around the shower edges needs to be replaced, you’ll need a caulk removal tool or a utility knife to remove the old caulk. For applying the new caulk, a caulk gun and a smooth-edged caulk finishing tool will ensure a clean and professional-looking finish.
- Tile Replacement Tools: In some cases, you may need to replace damaged tiles. For this, you’ll need a tile cutter or a wet saw to cut the new tiles to size. Additionally, a notched trowel, tile adhesive, and grout will be necessary for installing and grouting the replacement tiles.
Repairing the Grout: Simple Steps to Stop the Leak
Repairing the grout in your shower tile floor is a crucial step in fixing a leak. Here are some simple steps to help you stop the leak and restore the integrity of your shower.
Remove the Damaged Grout: Using a grout removal tool or a grout saw, carefully remove the damaged or deteriorated grout from between the tiles. Be sure to work in small sections and avoid damaging the tiles themselves.
Clean the Grout Lines: After removing the old grout, use a small brush or an old toothbrush to clean the grout lines. Remove any debris, dust, or loose particles to ensure a clean surface for the new grout.
Mix the New Grout: Follow the manufacturer’s instructions to mix the new grout. Use a clean bucket and a grout mixing paddle to achieve a smooth and consistent mixture. Let the grout sit for a few minutes to activate.
Apply the New Grout: Using a grout float or a rubber grout float, spread the new grout diagonally across the tile surface, ensuring that it fills the gaps between the tiles. Hold the float at a 45-degree angle and apply gentle pressure to force the grout into the joints.
Clean-Off Excess Grout: After applying the grout, use a damp grout sponge to clean off any excess grout from the tile surfaces. Rinse the sponge frequently and wipe diagonally across the tiles to avoid removing the grout from the joints.
Allow the Grout to Cure: Let the grout dry for the recommended amount of time specified by the manufacturer. Avoid stepping on or using the shower during this curing period to allow the grout to set properly.
Replacing Damaged Tiles: A Comprehensive Guide for DIYers
If the leak in your shower tile floor is caused by damaged tiles, replacing them is necessary to stop the problem. Here’s a comprehensive guide to help you replace the damaged tiles and restore the functionality of your shower.
- Remove the Damaged Tiles: Start by removing the damaged tiles. Use a grout removal tool or a chisel to carefully chip away the grout around the tile edges. Once the grout is removed, gently pry the tile away from the surface using a putty knife or a flathead screwdriver.
- Prepare the Surface: After removing the damaged tiles, clean the surface thoroughly. Remove any remaining grout or adhesive using a scraper or a wire brush. Ensure the surface is smooth and free of debris before proceeding.
- Cut the Replacement Tiles: Measure the dimensions of the opening left by the removed tiles and transfer those measurements to the replacement tiles. Use a tile cutter or a wet saw to accurately cut the tiles to the desired size. Remember to wear safety goggles and follow the manufacturer’s instructions when using these tools.
- Apply Tile Adhesive: Using a notched trowel, apply a thin layer of tile adhesive to the back of the replacement tile. Make sure the adhesive covers the entire back surface to ensure proper adhesion.
- Install the Replacement Tiles: Carefully place the replacement tiles into the empty spaces, pressing them firmly into the adhesive. Use tile spacers to maintain even spacing between the tiles. Wipe off any excess adhesive immediately with a damp cloth.
- Grout the Tiles: Once the adhesive has dried and the tiles are securely in place, mix the grout according to the manufacturer’s instructions. Apply the grout using a grout float, making sure to fill in the gaps between the tiles completely. Clean off any excess grout using a damp grout sponge.

Maintenance Tips for a Water-Tight Shower Tile Floor
Prevention is key when it comes to avoiding future leaks in your shower tile floor. By following these maintenance tips, you can ensure that your shower remains water-tight and leak-free for years to come.
Regularly Inspect and Repair Grout and Caulking: Inspect the grout lines and caulking around your shower regularly. Look for any cracks, gaps, or signs of deterioration. Repair or replace damaged grout and caulk promptly to prevent water from seeping through.
Keep the Shower Dry: After each use, wipe down the shower walls, floor, and tiles to remove any excess moisture. This helps prevent the growth of mold and mildew, which can weaken the grout and caulking over time.
Use a Shower Liner or Mat: Consider using a shower liner or mat on the shower floor. These can help protect the grout and tiles from excessive moisture and provide an additional layer of waterproofing.
Avoid Harsh Cleaning Products: Some cleaning products can be harsh on grout and caulking, causing them to deteriorate faster. Use mild, non-abrasive cleaners specifically designed for use on tile and grout to preserve their integrity.
Address Plumbing Issues Promptly: If you notice any signs of plumbing issues, such as low water pressure or unusual sounds, have them addressed promptly. Faulty plumbing can lead to leaks and water damage in your shower tile floor.
Schedule Professional Inspections: Consider scheduling regular professional inspections of your shower tile floor. A professional can identify any potential problems early on and provide recommendations for maintenance or repairs.
How to Fix a Leaking Shower Without Removing Tiles
Marble Shower Leak Repair MA RI 508-880-6001

How to Fix A Water Damaged Bathroom Floor – pFOkUS
How to Clean and Repair Custom Tile Shower

Related Posts: