I inherited beautiful marble floors when I purchased my grandfather’s Victorian home, but they looked nothing like the glossy surfaces I remembered from childhood visits. Years of improper cleaning had left them dull, etched, and lifeless. I was determined to restore their original luster without hiring expensive professionals. Through months of research, trial and error, and countless hours on my hands and knees, I discovered the secrets to making marble floors shine like mirrors again.
Understanding Why My Marble Lost Its Shine
My marble floors had lost their luster due to acidic cleaners that previous owners used unknowingly. Common household products like vinegar, lemon juice, and even some commercial cleaners contain acids that etch marble surfaces. Each cleaning session had gradually worn away the polished surface, creating microscopic scratches that trapped dirt and reflected light poorly. I learned this lesson after accidentally using a citrus-based cleaner myself.
The natural calcium carbonate in marble reacts with acids, creating permanent damage that regular cleaning cannot repair. Walking traffic, furniture movement, and grit tracked in from outside had also contributed to the dulling process. I discovered that marble is softer than most people realize, rating only 3-4 on the Mohs hardness scale. This softness makes it vulnerable to scratches from seemingly harmless activities.
Understanding these causes helped me develop a proper maintenance routine. I realized that prevention was more important than restoration for long-term marble care. The expensive lesson taught me to research proper cleaning methods before attempting any maintenance. This knowledge became the foundation for successfully restoring my floors to their original beauty.
Essential Tools and Materials I Discovered
My marble restoration toolkit evolved through experimentation and professional recommendations. Diamond polishing pads became my most valuable investment, available in various grits from coarse to ultra-fine. I purchased a variable-speed floor polisher that could accommodate different pad types. Quality marble polish, pH-neutral cleaners, and microfiber cloths completed my basic arsenal. These tools transformed my restoration from impossible to manageable.
Professional-grade marble cleaner replaced my previous household cleaners entirely. I learned that pH-neutral solutions clean effectively without damaging the stone surface. Crystallization powder became my secret weapon for achieving mirror-like shine. Steel wool grade 0000 proved invaluable for removing stubborn stains without scratching. Each tool served a specific purpose in my restoration process.
The initial investment seemed expensive, but purchasing quality tools saved money long-term. Cheap alternatives often caused more damage than improvement, forcing me to start over multiple times. I learned to view these tools as investments in my home’s value rather than expenses. The results justified every dollar spent on proper equipment and materials.
Step-by-Step Cleaning Process I Perfected
My cleaning routine begins with thorough dust mopping to remove abrasive particles. I use a microfiber mop that captures dirt without scratching the surface. Next, I apply pH-neutral marble cleaner using a spray bottle for even distribution. Working in small sections prevents the cleaner from drying before I can properly remove it. This methodical approach ensures consistent results across the entire floor.
The actual cleaning involves gentle circular motions with a clean microfiber cloth. I avoid excessive pressure that could damage the surface or create streaks. Rinsing with clean water removes cleaner residue that could cause dulling over time. I change cleaning cloths frequently to prevent redistributing dirt across the floor. This attention to detail makes the difference between adequate and exceptional results.
Drying the floor completely prevents water spots and mineral deposits from forming. I use dry microfiber cloths for final buffing, which also helps identify areas needing additional attention. The entire process takes about an hour for my 300-square-foot foyer. Regular weekly cleaning maintains the shine and prevents the buildup of dulling substances. Consistency in this routine keeps my marble looking professionally maintained.

Polishing Techniques That Transformed My Floors
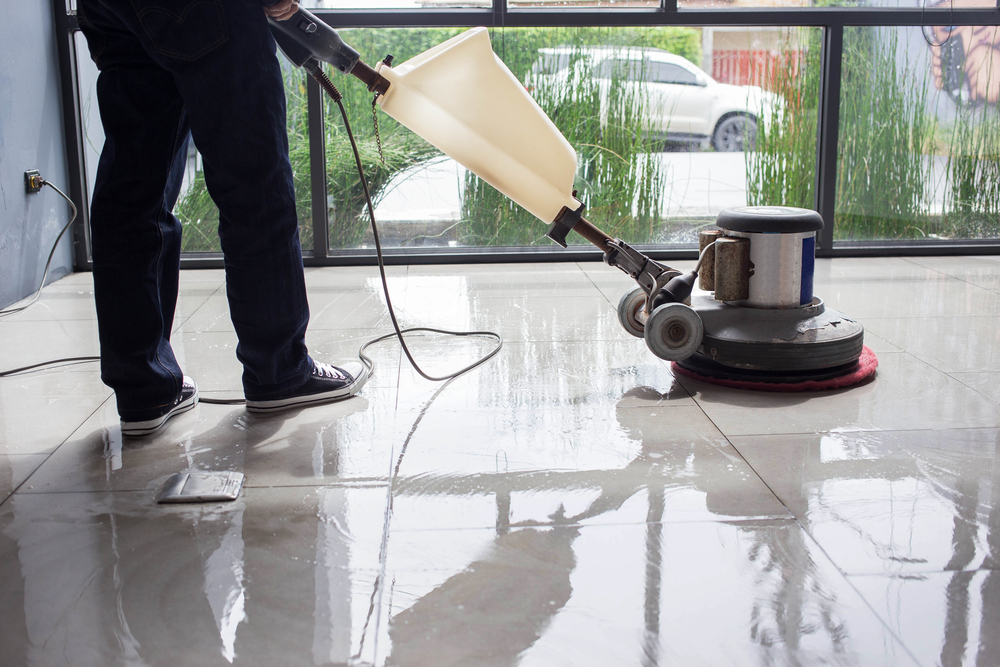
Polishing became necessary when cleaning alone couldn’t restore the shine. I started with 400-grit diamond pads to address surface scratches and etching. The variable-speed polisher allowed me to control the process carefully, starting slowly and increasing speed gradually. Working in overlapping passes ensured even coverage across the entire surface. This initial polishing removed years of accumulated damage.
Progressive polishing with finer grits created increasingly smooth surfaces. I used 800-grit, then 1500-grit, and finally 3000-grit pads in sequence. Each step removed scratches from the previous grit while creating finer ones. The transformation was dramatic as the marble gradually regained its reflective properties. Patience during this process was essential for achieving professional results.
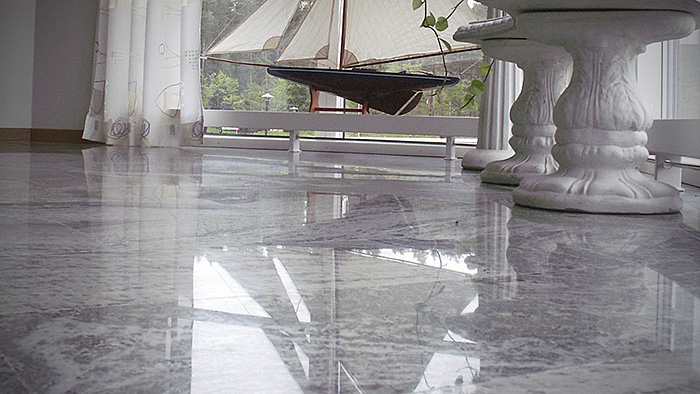
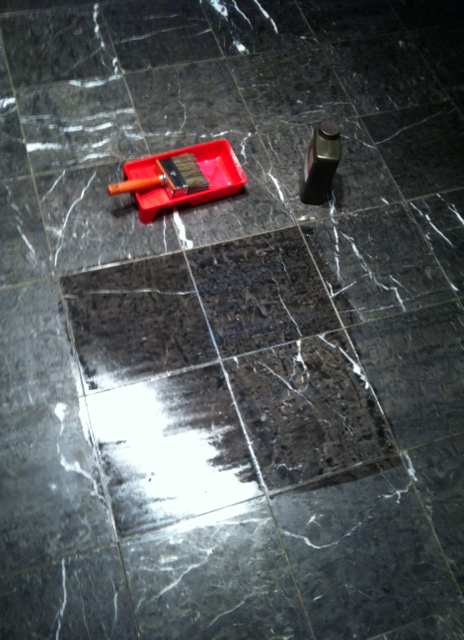
Crystallization powder applied during final polishing created the mirror-like finish I desired. The chemical reaction between the powder and marble surface formed a protective layer that enhanced shine. I worked the powder into the stone using the finest polishing pad, creating heat through friction. The results exceeded my expectations, producing a lustrous finish that reflected light beautifully.
Maintaining That Perfect Shine Long-Term
Daily maintenance became crucial for preserving my restored marble floors. I sweep or dust mop every morning to remove tracked-in dirt and debris. Spills receive immediate attention, as acidic substances can cause permanent damage within minutes. I keep pH-neutral cleaner and microfiber cloths readily available for quick response to accidents. This proactive approach prevents problems before they become serious.
Weekly deep cleaning maintains the shine without excessive effort. I use my established routine of pH-neutral cleaner, gentle scrubbing, thorough rinsing, and complete drying. Monthly polishing with fine-grit pads refreshes the surface and removes minor scratches. This regular maintenance schedule keeps my floors looking showroom-perfect year-round. The investment in proper care pays dividends in preserved beauty.
Professional resealing every 12-18 months protects against stains and etching. I learned to perform this task myself, saving hundreds of dollars annually. Quality marble sealer creates an invisible barrier that repels liquids and reduces maintenance requirements. The sealing process requires complete cleaning and drying before application. This preventive measure extends the time between major restoration projects significantly.
Troubleshooting Common Problems I Encountered
Etching from acidic substances created my biggest challenge during restoration. Light etching responded well to fine polishing compound and elbow grease. Deeper etching required progressive sanding with diamond pads, starting with coarser grits. I learned to identify etching early to prevent extensive damage. The key was addressing problems immediately rather than hoping they would improve with regular cleaning.
Stubborn stains tested my patience and creativity. Oil-based stains required poultice treatments using absorbent materials and appropriate solvents. I created poultices with baking soda for organic stains and hydrogen peroxide for others. The treatment process took 24-48 hours, but eliminated stains that seemed permanent. Each stain type required specific approaches for successful removal.
Dull spots in high-traffic areas needed special attention during maintenance. I increased polishing frequency in these zones and applied crystallization powder more liberally. Strategic placement of area rugs helped reduce wear in vulnerable locations. Understanding traffic patterns allowed me to focus maintenance efforts where needed most. This targeted approach maintained consistent shine across the entire floor surface.
What’s the most important thing to remember when cleaning marble floors?
Never use acidic cleaners on marble surfaces, as they cause permanent etching damage. Stick to pH-neutral cleaners specifically designed for natural stone. Clean spills immediately, especially acidic substances like wine, coffee, or citrus juices. Use microfiber cloths and mops to prevent scratching. Regular dust mopping removes abrasive particles that can dull the surface over time. Prevention is always easier than restoration.
How often should I polish my marble floors to maintain their shine?
Light polishing with fine-grit pads should be done monthly in high-traffic areas. Complete polishing with progressive grits is needed every 6-12 months depending on usage. Daily cleaning and weekly deep cleaning reduce the need for frequent polishing. Watch for signs of dulling and address them promptly. Professional polishing may be needed every 2-3 years for heavily used floors. Consistent maintenance prevents major restoration projects.

Can I restore severely damaged marble floors myself, or do I need professionals?
Minor etching and surface dulling can be restored with proper tools and techniques. Deep scratches, cracks, or extensive etching may require professional intervention. Start with less aggressive methods and progress gradually. Practice on inconspicuous areas first to build confidence. Professional equipment rental makes DIY restoration more feasible. Know your limits and call experts for structural damage or valuable installations.
What’s the difference between marble polish and marble sealer?
Marble polish enhances shine and removes minor scratches through abrasive action. Sealer penetrates the stone to create a protective barrier against stains and etching. Polish is used regularly for maintenance, while sealer is applied annually or bi-annually. Both serve different purposes in marble care. Polish won’t protect against acids, and sealer won’t restore shine. Use them together for complete marble maintenance.

Why do my marble floors look cloudy after cleaning?
Cloudy appearance usually results from cleaner residue or hard water deposits. Rinse thoroughly after cleaning to remove all soap residue. Use distilled water for final rinsing in hard water areas. Buff dry with clean microfiber cloths to prevent water spots. Check your cleaning products for compatibility with marble. Switch to marble-specific cleaners if problems persist. Proper technique prevents clouding issues.
How do I remove tough stains from my marble floors without damaging them?
Create poultices using absorbent materials soaked in appropriate solvents. Cover stains with plastic wrap and tape edges to prevent evaporation. Leave poultices for 24-48 hours for deep penetration. Use baking soda for organic stains, hydrogen peroxide for others. Never use bleach or acidic substances on marble. Test treatments in inconspicuous areas first. Patience and proper technique remove most stains successfully.
Mistakes to avoid when polishing your marble floor

Simple Ways to Polish a Marble Floor by Hand

Clever Ways to Clean Marble Floors
How to make your marble floors shine
How to Polish Marble Floor? All you need to know!
DIY Marble Floor Polishing That Will Kill Your Marble’s Shine

Bring Your Floors Back to Life with Affordable Marble Restoration Designing Spaces
Polishing a marble floor respecting the stone TINO Natural Stone

Related Posts: