Choosing the Right Laminate Flooring for Bathrooms
When considering laminate flooring for your bathroom, it’s crucial to select the right type to ensure durability and aesthetic appeal. Bathrooms are high-moisture areas, and not all laminate flooring options are suitable for such environments. Here are some factors to consider when choosing laminate flooring for your bathroom.
- Water Resistance: The most important feature to look for in laminate flooring for bathrooms is water resistance. Traditional laminate flooring can swell or warp when exposed to moisture. Look for products specifically labeled as water-resistant or waterproof. These types are designed to withstand spills and humidity, making them ideal for bathroom use.
- Thickness and Durability: The thickness of the laminate flooring affects its durability and comfort underfoot. Thicker laminate is generally more durable and can better withstand the wear and tear of a busy bathroom. Opt for laminate that is at least 8mm thick for a more robust and long-lasting floor.
- Surface Texture: Laminate flooring comes in various surface textures, such as embossed, hand-scraped, or smooth finishes. For bathrooms, consider a textured surface that provides better grip and reduces the risk of slipping. Embossed or hand-scraped finishes not only offer a realistic wood appearance but also enhance safety.
- Style and Design: Laminate flooring is available in a wide range of colors, patterns, and finishes that mimic the look of natural wood, stone, or tile. Choose a design that complements your bathroom decor. Darker shades can create a cozy feel, while lighter colors can make a small bathroom appear more spacious.
- Installation Method: Consider the installation method of the laminate flooring. Click-lock systems are easy to install and suitable for DIY projects, whereas glue-down options might offer a more secure fit in high-moisture areas. Evaluate your skill level and the specific needs of your bathroom before making a decision.
- Warranty and Brand Reputation: Finally, consider the warranty and the reputation of the brand. Reputable brands often provide better quality products and longer warranties, which can give you peace of mind. Read customer reviews and do some research to ensure you’re investing in a reliable product.

Preparing the Bathroom for Laminate Installation
Proper preparation of your bathroom is essential for a successful laminate flooring installation. A well-prepared surface ensures a smooth installation process and enhances the durability of the flooring. Here are the steps to get your bathroom ready for laminate flooring.
Remove Existing Flooring: Start by removing the existing flooring material. This could be tile, vinyl, or any other type of flooring. Use appropriate tools to carefully lift and remove the old flooring without damaging the subfloor. This step is crucial for creating a clean, even surface for the new laminate flooring.
Inspect and Repair the Subfloor: Once the old flooring is removed, inspect the subfloor for any damage. Look for signs of mold, mildew, or rot, especially in a bathroom where moisture exposure is common. Repair any damage and ensure the subfloor is dry, clean, and level. Use a leveling compound if necessary to fix any uneven areas.
Clean the Surface Thoroughly: A clean surface is critical for the adhesive properties of the underlayment and laminate planks. Sweep and vacuum the subfloor to remove all debris, dust, and dirt. If there are any grease or oil stains, clean them with a mild detergent and let the subfloor dry completely before proceeding.
Install a Moisture Barrier: Bathrooms are prone to moisture, so installing a moisture barrier is essential. A polyethylene sheet can serve as an effective moisture barrier. Lay the sheet across the subfloor, overlapping the edges by a few inches. Secure the seams with waterproof tape to ensure complete coverage.
Lay the Underlayment: Underlayment provides a cushioning effect and reduces noise, but it also adds an extra layer of protection against moisture. Choose an underlayment suitable for high-moisture areas and roll it out over the moisture barrier. Follow the manufacturer’s instructions for installation, and use a utility knife to trim excess material along the edges.
Acclimate the Laminate Planks: Before installing the laminate planks, allow them to acclimate to the bathroom’s environment. Place the unopened boxes of laminate planks in the bathroom for at least 48 hours. This step helps the planks adjust to the room’s temperature and humidity, reducing the risk of expansion or contraction after installation.

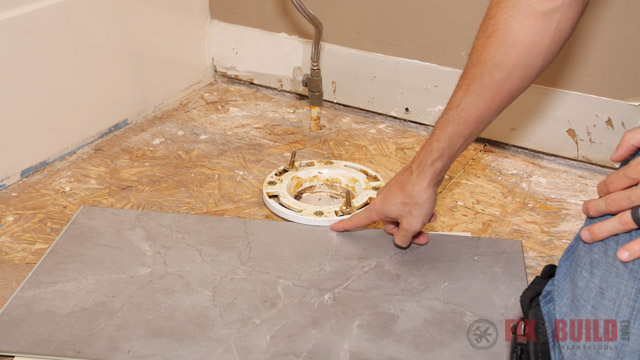
Cutting Laminate to Fit Around the Toilet Base
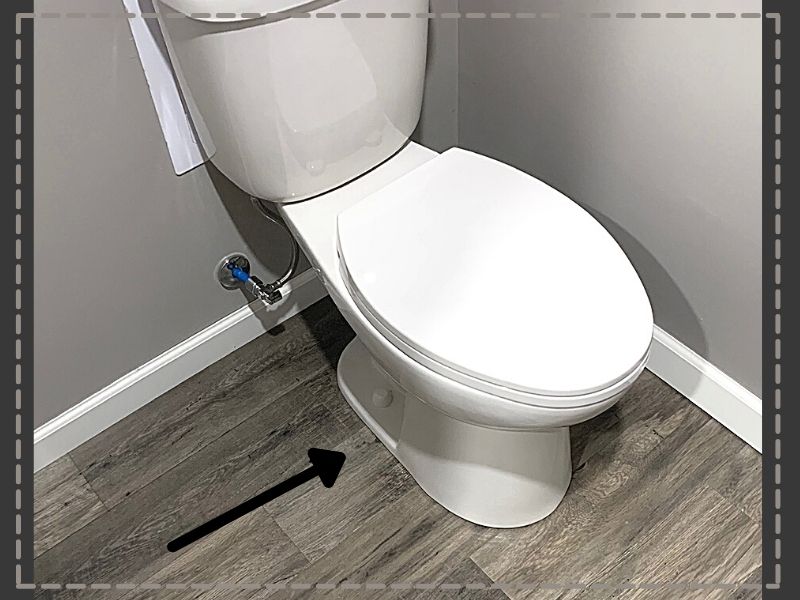
Cutting laminate flooring to fit around the toilet base is a precise task that requires careful measurement and attention to detail. Accurate cutting ensures a clean, professional look and prevents gaps that can allow moisture to seep through. Here’s how to cut laminate flooring to fit perfectly around your toilet.
Measure the Toilet Base: Start by measuring the base of your toilet. Use a tape measure to determine the width and depth of the toilet base, including any curves or irregular shapes. Take multiple measurements at different points to ensure accuracy. Write down these measurements for reference.
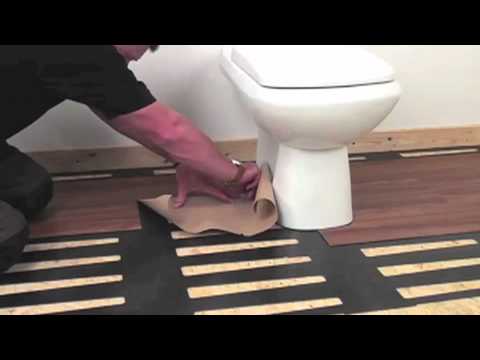
Create a Template: Using your measurements, create a template of the toilet base on a piece of cardboard or stiff paper. Cut out the template and place it around the toilet base to check for accuracy. Adjust the template as needed to ensure a snug fit. This template will serve as a guide for cutting the laminate planks.
Transfer the Template to the Laminate Plank: Lay the laminate plank face down and place the template on top. Use a pencil to trace the outline of the template onto the back of the plank. Double-check your tracing to ensure it matches the dimensions of the toilet base accurately.
Cutting the Laminate: Use a jigsaw with a fine-toothed blade to cut along the traced lines. A jigsaw allows for precise cuts, especially around curves and tight corners. Go slowly and carefully to avoid chipping the laminate surface. Wear safety goggles to protect your eyes from dust and debris.
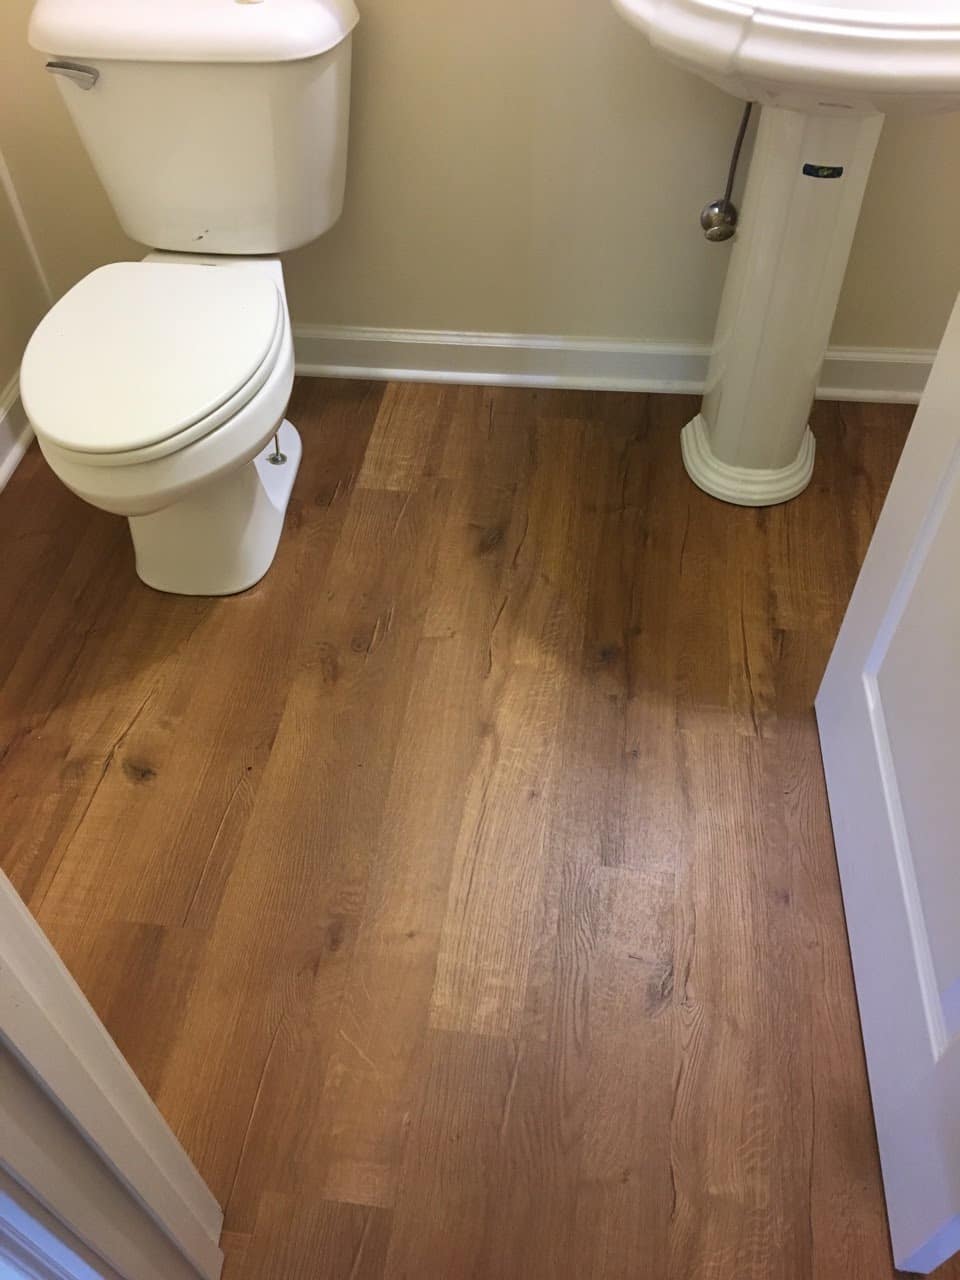
Test Fit and Adjust: After cutting, place the laminate plank around the toilet base to test the fit. It should fit snugly without any gaps. If necessary, make minor adjustments by trimming small amounts until the plank fits perfectly around the toilet base.
Secure the Planks: Once the plank fits correctly, install it as part of the overall laminate flooring layout. Ensure that the plank is securely in place and that the seams align with adjacent planks. Use spacers to maintain an expansion gap around the perimeter of the room, including around the toilet base.

Installing Laminate Flooring Around a Toilet: Step-by-Step Guide
Installing laminate flooring around a toilet can be a challenging task, but with careful planning and execution, it can be done efficiently. Follow these step-by-step instructions to ensure a seamless installation.
Gather Your Tools and Materials: Before you begin, make sure you have all the necessary tools and materials. This includes laminate planks, a jigsaw, a tape measure, spacers, a rubber mallet, a tapping block, a moisture barrier, underlayment, and a pencil.
Prepare the Subfloor: Ensure the subfloor is clean, dry, and level. Remove any old flooring and repair any damage to the subfloor. Install a moisture barrier to protect against bathroom humidity. Lay down the underlayment according to the manufacturer’s instructions.
Acclimate the Laminate Planks: Allow the laminate planks to acclimate to the bathroom’s environment for at least 48 hours. This helps prevent expansion or contraction after installation. Store the unopened boxes in the bathroom during this period.
Lay the First Row of Planks: Start by laying the first row of laminate planks along the longest wall in the bathroom. Use spacers to maintain an expansion gap of 1/4 inch between the planks and the wall. This gap allows for natural expansion and contraction of the flooring.
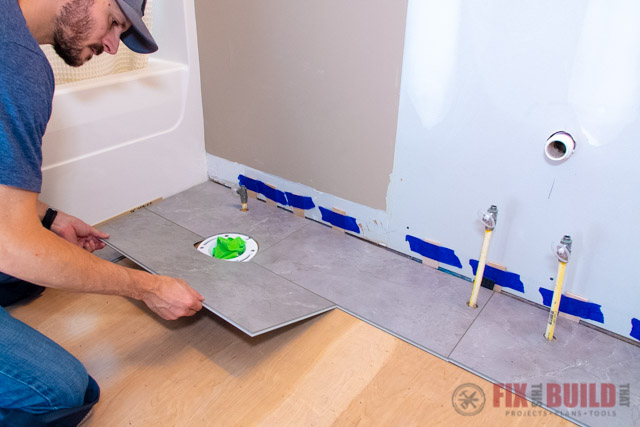
Fit Planks Around the Toilet Base: Refer to the template you created earlier to cut the laminate planks to fit around the toilet base. Use a jigsaw to make precise cuts and test fit the planks before securing them in place. Ensure the planks fit snugly around the base without any gaps.
Continue Laying the Planks: Once the planks around the toilet are in place, continue laying the remaining planks across the floor. Use the tapping block and rubber mallet to ensure the planks click together securely. Stagger the joints between rows for a more natural look and added stability.
Install Transition Moldings: After all the planks are installed, remove the spacers and install transition moldings around the edges of the room. This includes the perimeter of the bathroom and around the toilet base. Transition moldings cover the expansion gap and provide a finished look.
Seal the Edges: To further protect against moisture, apply a silicone sealant around the edges of the laminate flooring, especially around the toilet base and other fixtures. This helps prevent water from seeping under the flooring and causing damage.
Sealing and Waterproofing Tips for Laminate Floors in Bathrooms
Laminate flooring can be a beautiful and practical choice for bathrooms, but it requires proper sealing and waterproofing to withstand the moisture-rich environment. Here are some essential tips for sealing and waterproofing laminate floors in bathrooms.
Use Waterproof Laminate: The first step in waterproofing your laminate floor is to choose a product that is designed for high-moisture areas. Waterproof laminate flooring has a special core and surface coating that can handle spills and humidity better than standard laminate.
Seal the Edges: Water can seep through the edges of laminate flooring, especially around the perimeter of the room and fixtures like toilets and bathtubs. Use a high-quality silicone sealant to seal the expansion gaps around the edges of the floor. Apply the sealant carefully, ensuring a continuous bead without gaps.
Seal Between Planks: For additional protection, consider sealing the seams between the laminate planks. There are specialized joint sealants available that are designed for laminate flooring. Apply the sealant during installation, following the manufacturer’s instructions to ensure a watertight seal.
Use Underlayment with Moisture Barrier: Install an underlayment with an integrated moisture barrier to protect the laminate from moisture rising from the subfloor. This added layer of protection helps prevent damage from any water that may seep through the laminate surface.
Install Baseboards and Moldings: Baseboards and moldings not only add a finished look to your flooring but also help seal the edges. Ensure that baseboards are installed tightly against the wall, and use silicone sealant to fill any gaps between the baseboards and the floor. This prevents water from seeping under the laminate.
Regular Maintenance: Maintaining your laminate floor properly can extend its lifespan in a bathroom setting. Wipe up any spills immediately and avoid using excessive water when cleaning. Use a damp mop with a laminate-friendly cleaner and avoid harsh chemicals that can damage the surface.
Address Humidity Levels: Bathrooms can become very humid, especially after showers. Use exhaust fans or dehumidifiers to control the humidity levels. Proper ventilation reduces the risk of moisture buildup, which can cause the laminate to warp or swell over time.

Maintenance and Care for Laminate Floors in High-Moisture Areas
Maintaining laminate floors in high-moisture areas like bathrooms requires a bit of extra care to ensure they remain in good condition. Proper maintenance can extend the lifespan of your flooring and keep it looking its best. Here are some tips for maintaining and caring for laminate floors in high-moisture areas.
Clean Spills Immediately: One of the most important aspects of maintaining laminate floors in bathrooms is to clean up any spills or splashes immediately. Water left standing on the floor can seep into the seams and cause the laminate to swell or warp. Use a dry or slightly damp cloth to wipe up spills as soon as they occur.
Use a Damp Mop: When cleaning your laminate floor, use a damp mop rather than a soaking wet one. Excess water can damage the laminate surface and seep into the joints. Opt for a laminate-friendly cleaner and avoid using harsh chemicals that can strip the protective layer of the flooring.
Regular Sweeping and Vacuuming: Dust and dirt can scratch the surface of laminate flooring. Regular sweeping or vacuuming with a soft-bristle attachment can prevent this. Ensure you use a vacuum setting suitable for hard floors to avoid damaging the laminate.
Use Mats and Rugs: Place mats and rugs in high-traffic areas and near the sink and bathtub to catch water droplets and prevent them from reaching the laminate floor. Ensure that these mats have a non-slip backing to prevent accidents and that they are kept dry and clean.
Maintain Proper Humidity Levels: Bathrooms can be humid environments, which can affect laminate flooring. Use exhaust fans to reduce humidity levels, especially after taking showers or baths. Consider using a dehumidifier if your bathroom tends to stay humid, as this can help maintain the integrity of the laminate.
Protect the Floor from Heavy Furniture: If you have heavy furniture in your bathroom, such as cabinets or storage units, use felt pads or furniture glides to protect the laminate floor from scratches. Avoid dragging furniture across the floor, as this can cause damage.
Regular Inspections: Periodically inspect your laminate flooring for signs of wear or damage, especially around the edges and seams. Look for any areas where water might be seeping through and address them immediately by resealing or making necessary repairs.
Reapply Sealant: Over time, the sealant around the edges and seams of your laminate flooring may wear down. Reapply silicone sealant as needed to maintain a watertight barrier. This is particularly important around the toilet base, bathtub, and sink.
How to Lay Laminate Flooring Hunker Laminate flooring bathroom

How to Install Vinyl Plank Flooring in a Bathroom FixThisBuildThat
Awkward Areas – 30 Second Guide
Laminate flooring for bathroom? : r/HomeImprovement
How to Install Vinyl Plank Flooring in a Bathroom FixThisBuildThat
Toilet on Laminate Floor. Пол ламинат под унитазом

Can I Install Laminate Under A Bathroom Toilet and Sink?
Ways to Cut Tile Around a Toilet

Master Bedroom and Bathroom Flooring Nightmare

Related Posts: