Benefits of Laying Vinyl Floor Tiles Over Ceramic Tile
When it comes to renovating or updating your flooring, you may be considering laying vinyl floor tiles over your existing ceramic tile. This approach offers several advantages that make it a popular choice among homeowners. Below are the benefits of choosing vinyl floor tiles as a solution for upgrading your ceramic tile floors.
- Enhanced Durability: One of the key benefits of laying vinyl floors over ceramic tiles is the enhanced durability they offer. Vinyl tiles are designed to withstand heavy foot traffic, making them a suitable option for high-traffic areas such as kitchens and bathrooms. The wear layer on vinyl tiles protects against scratches, stains, and fading, ensuring that your floors maintain their pristine appearance for years to come.
- Cost-Effective Solution: Vinyl floor tiles are a cost-effective alternative to replacing your ceramic tile altogether. By installing vinyl tiles over your existing ceramic tile, you can save on the expenses associated with removing and disposing of the old tile, as well as the labor costs involved in installing new tile. Additionally, vinyl tiles are available in a wide range of price points, allowing you to find an option that fits your budget without compromising on quality.
- Easy Installation: Another advantage of laying vinyl floor tiles over ceramic tiles is the ease of installation. Vinyl tiles are typically designed to be self-adhesive, allowing for a straightforward installation process. With a bit of preparation and the right tools, you can transform your space in no time. This DIY-friendly approach saves you time and money that would otherwise be spent on professional installation.
- Versatile Design Options: Vinyl floor tiles come in a vast array of colors, patterns, and textures, giving you the freedom to choose a design that suits your style and complements your existing decor. Whether you prefer a classic, elegant look or a more modern, trendy aesthetic, there is a vinyl tile option available to meet your needs. The versatility of vinyl tiles allows you to create a personalized and visually appealing space.
- Low Maintenance: Maintaining vinyl floor tiles is a breeze compared to ceramic tiles. Vinyl tiles are resistant to moisture, making them ideal for areas prone to spills or humidity. Regular cleaning with a mild detergent and a damp mop is usually sufficient to keep your vinyl floors looking pristine. Additionally, unlike ceramic tile, vinyl does not require periodic resealing, saving you both time and money in the long run.
How to Lay Vinyl Floor Tiles Over Ceramic Tile
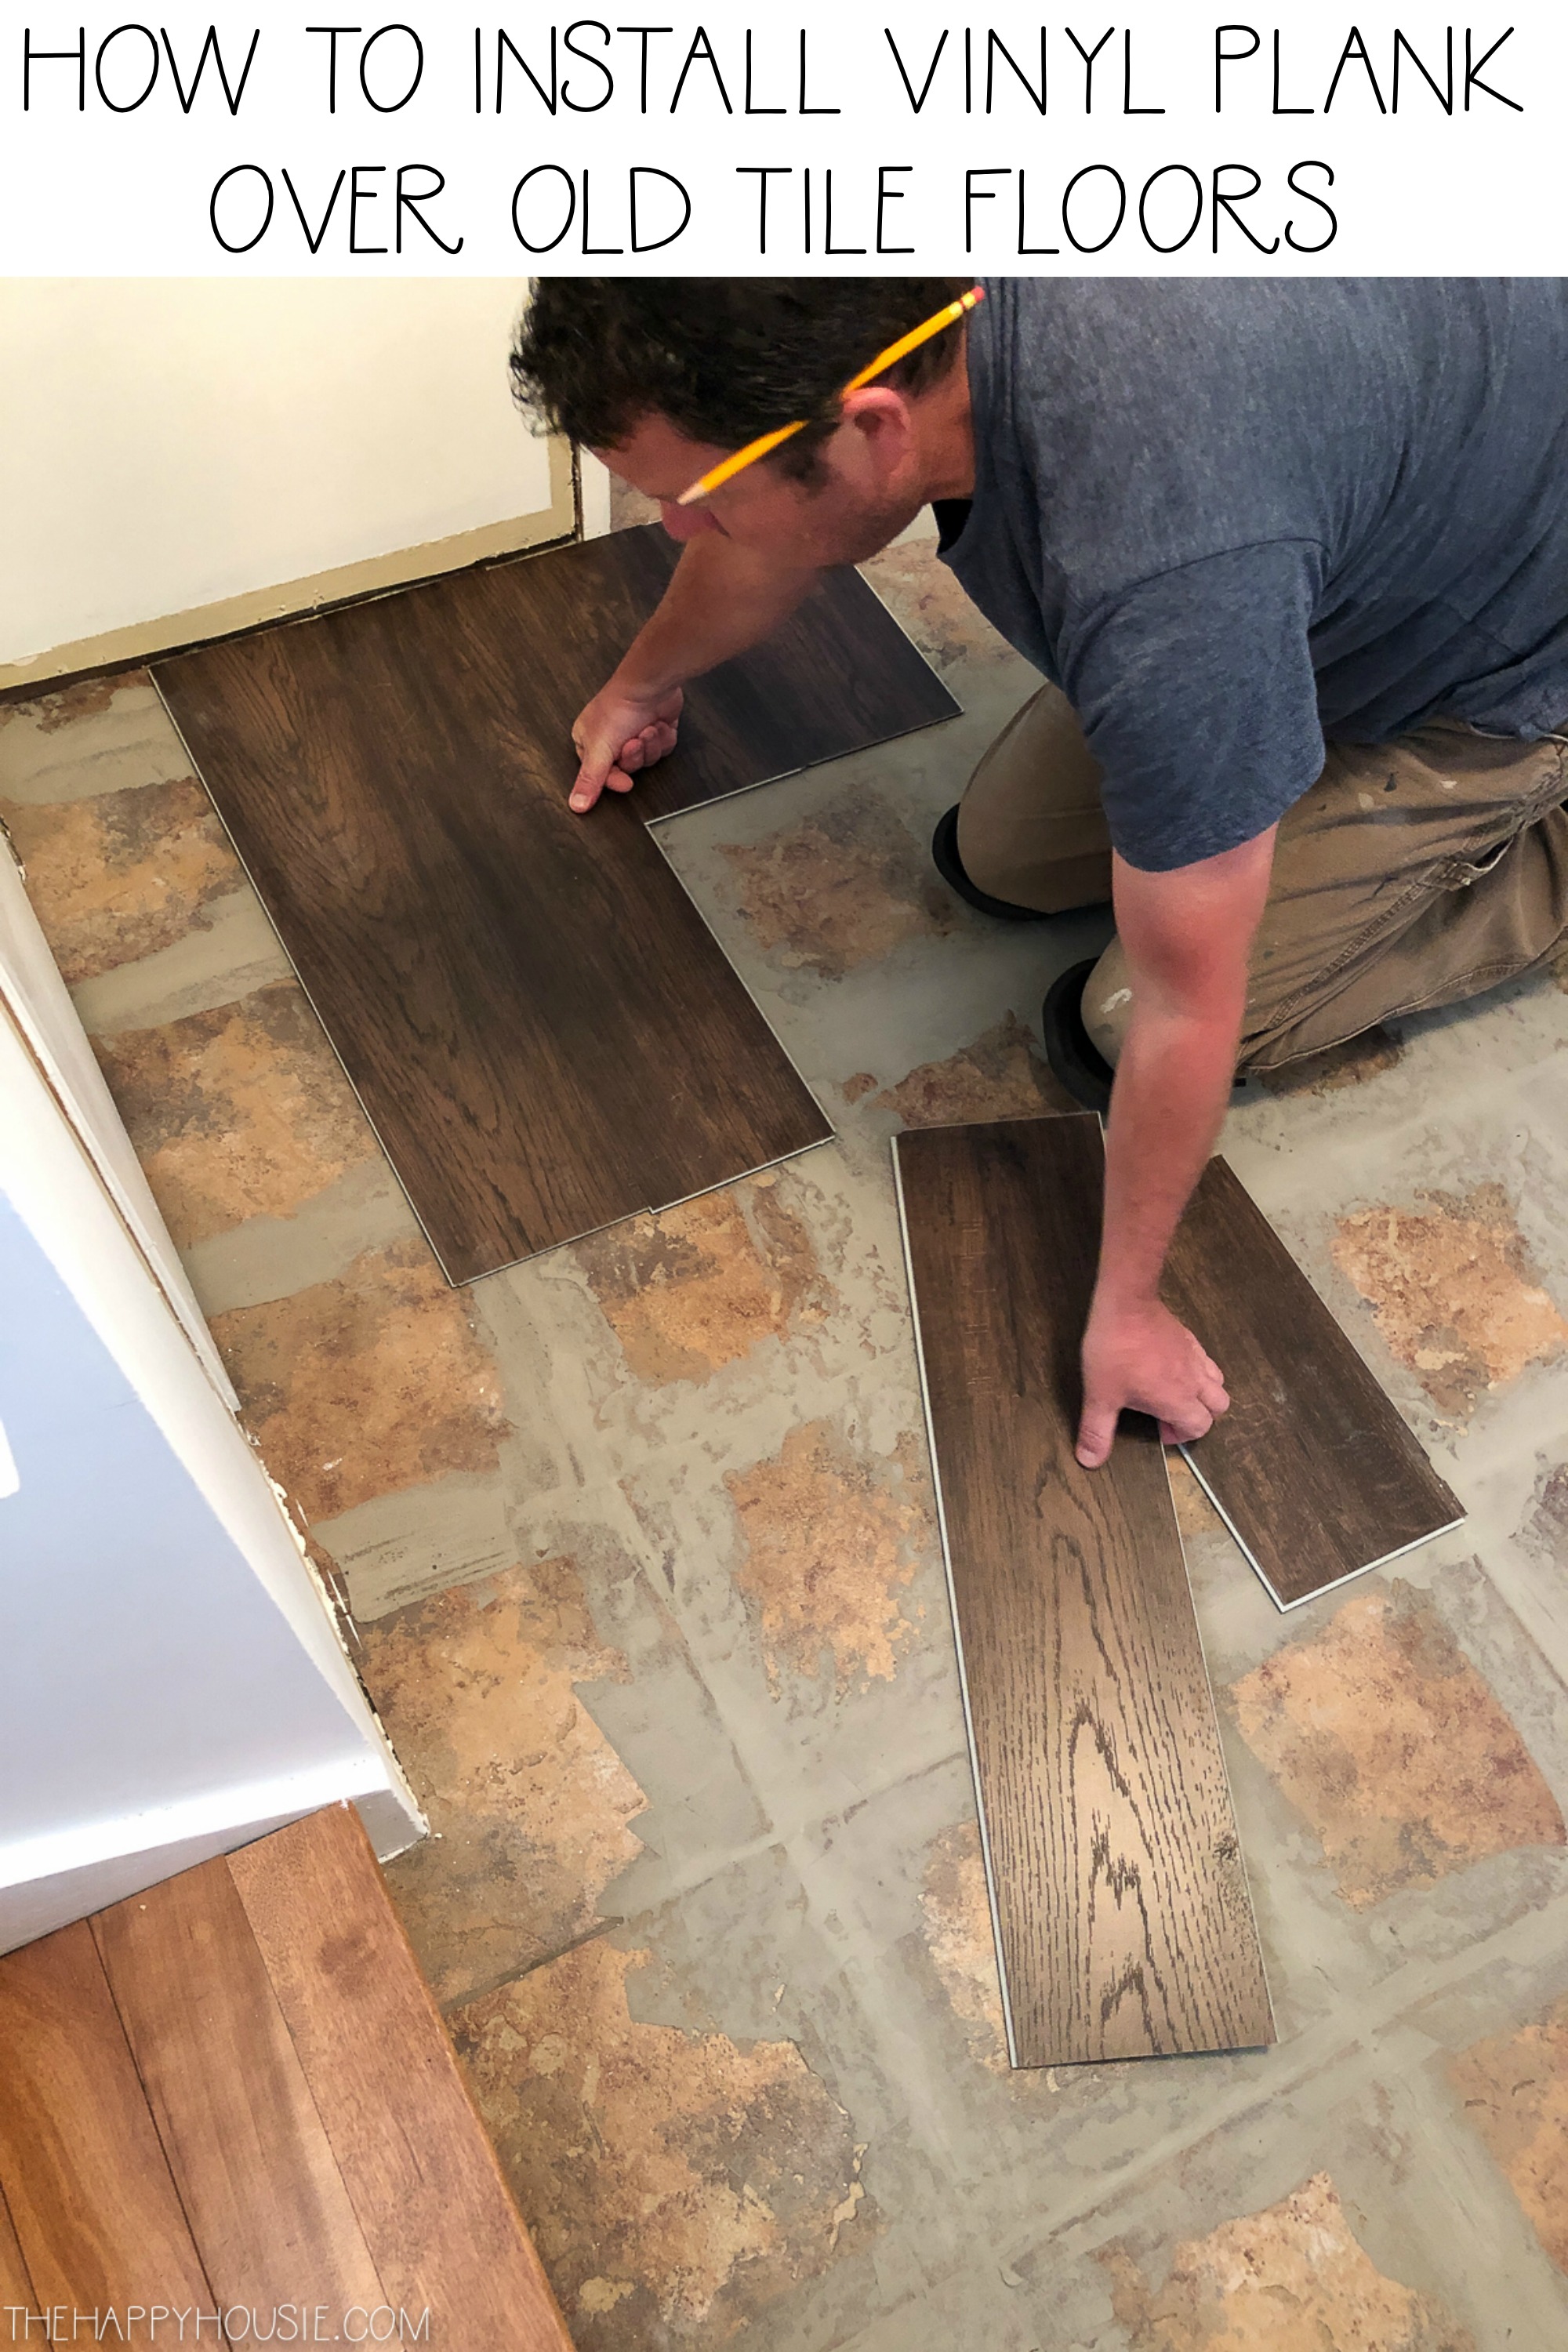
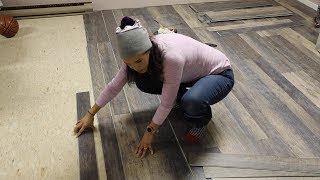
Are you considering laying vinyl floor tiles over your existing ceramic tile? With the right tools and a systematic approach, you can complete this DIY project. We will provide you with a step-by-step guide on how to lay vinyl floor tiles over ceramic tiles, ensuring a smooth and professional-looking installation.
Gather the Necessary Tools and Materials: Before you begin, gather all the tools and materials you’ll need for the installation process. This includes vinyl floor tiles, a measuring tape, a utility knife, adhesive, a trowel, a straight edge, a roller, and a notched trowel.
Prepare the Ceramic Tile Surface: Start by thoroughly cleaning the ceramic tile surface to remove any dirt, dust, or debris. Use a mild detergent and water to ensure a clean and dry base for the vinyl tiles. If there are any loose or damaged tiles, repair or replace them before proceeding.
Measure and Plan: Measure the dimensions of the room to determine the number of vinyl tiles needed. It’s essential to plan the layout and consider any obstacles or irregularities in the room. Start from the center of the room and work your way outwards for a balanced and visually pleasing installation.
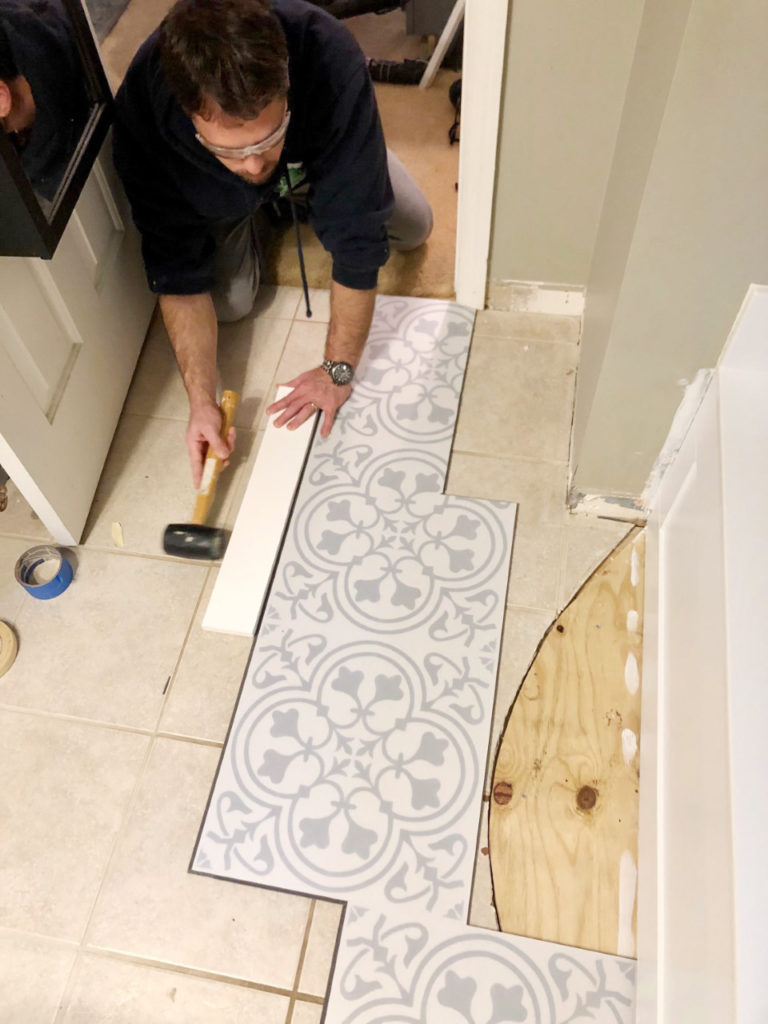
Apply Adhesive and Lay the Tiles: Using a trowel, apply adhesive to the ceramic tile surface. Spread the adhesive evenly, ensuring full coverage. Begin laying the vinyl tiles, starting from the center and working towards the edges. Press each tile firmly into place, using a rolling pin to ensure proper adhesion.
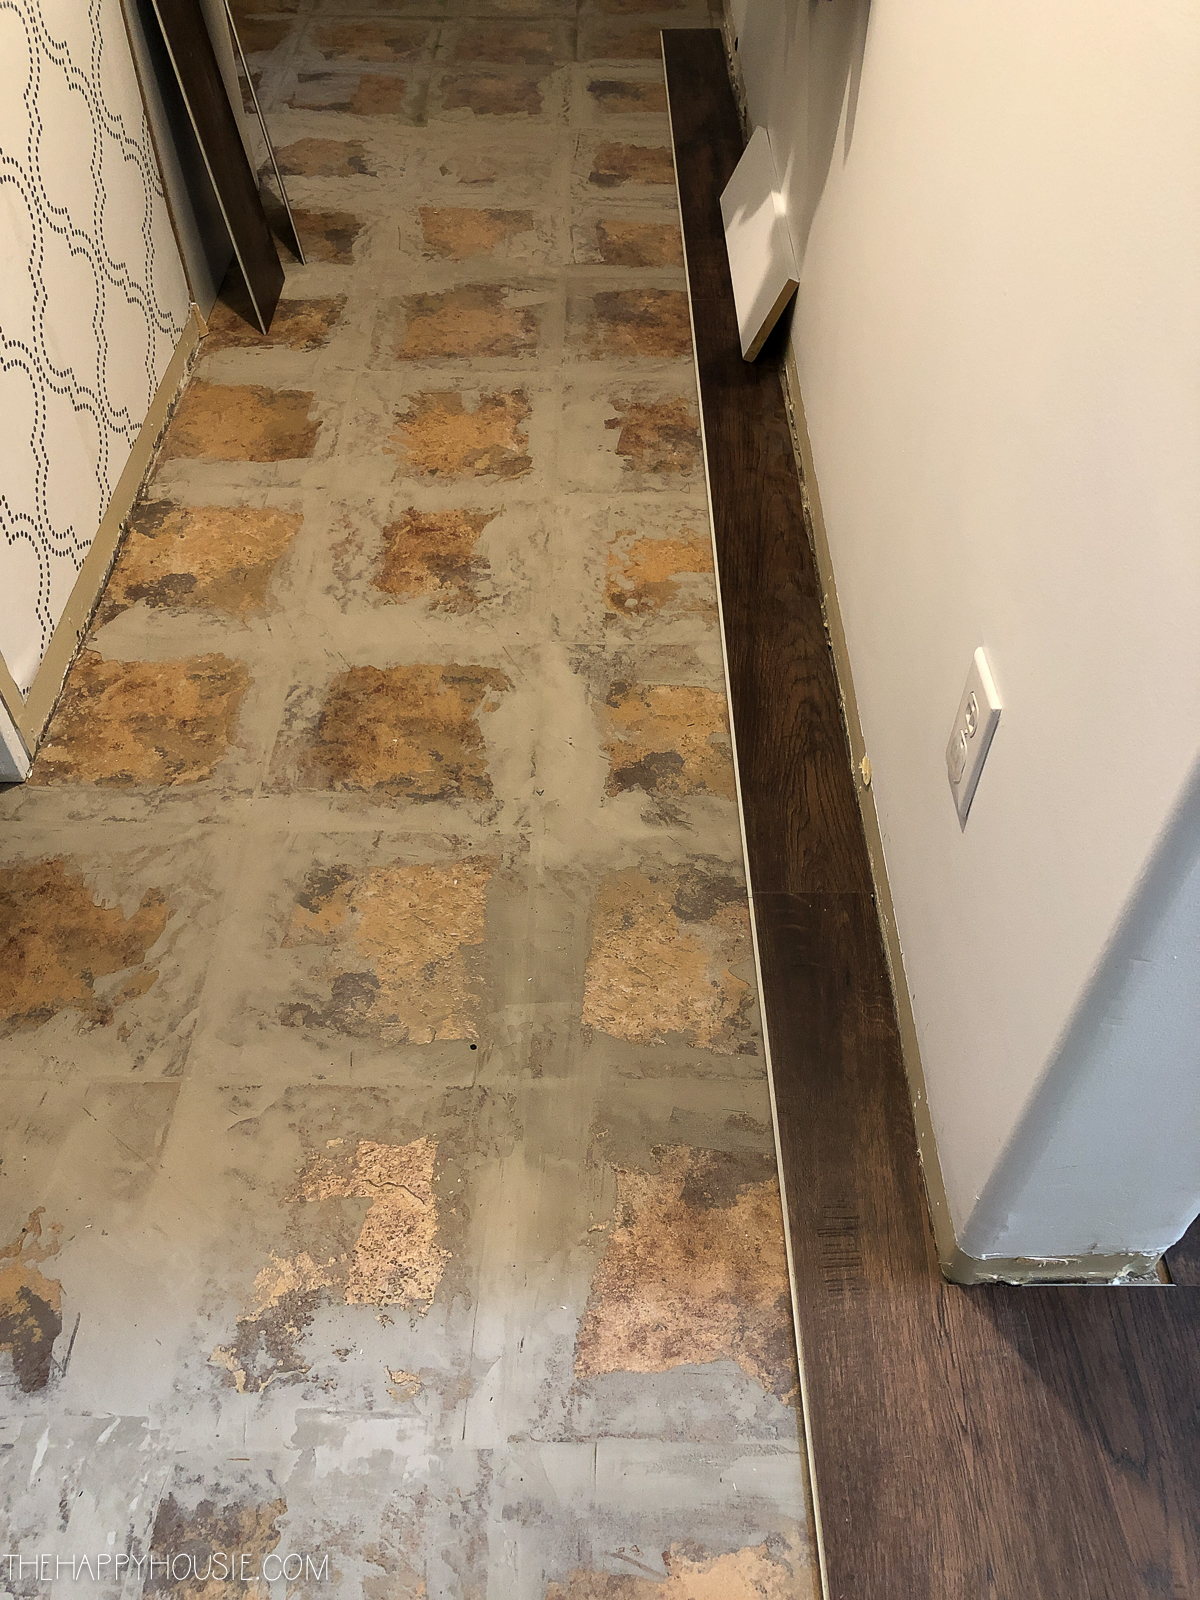
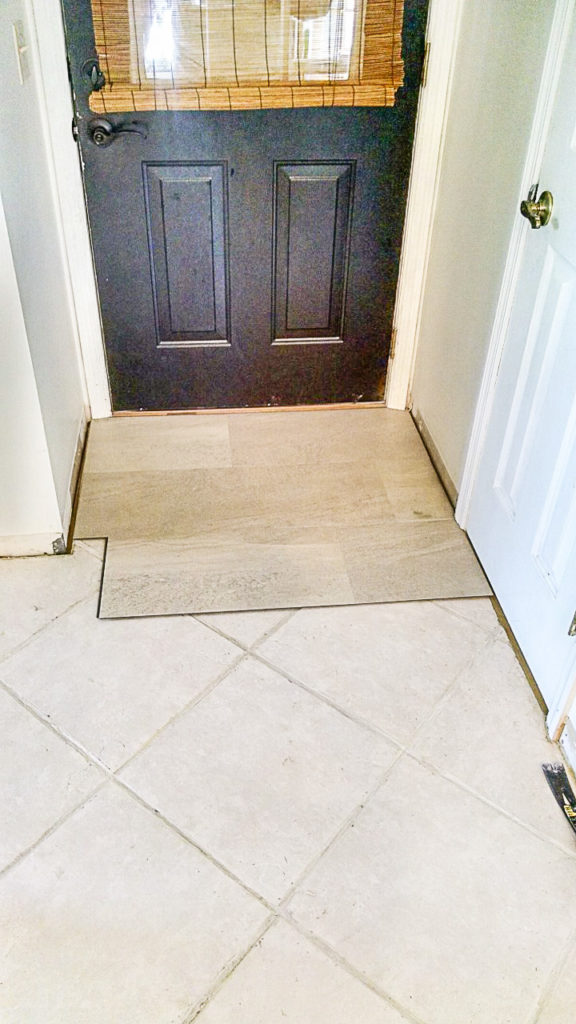
Trim and Fit: As you reach the edges of the room, you may need to trim the vinyl tiles to fit. Use a straight edge and a utility knife to carefully cut the tiles to the desired size. Ensure a snug fit by leaving a small gap between the tiles and the wall to accommodate for expansion.
Allow for Proper Adhesion and Finishing Touches: Once all the vinyl tiles are laid, allow the adhesive to dry according to the manufacturer’s instructions. This may take a few hours or even a day. Afterward, you can install baseboards or transition strips to give your new floor a polished and finished look.
Choosing the Right Vinyl Floor Tiles for Your Ceramic Tile Base
When it comes to laying vinyl floor tiles over ceramic tiles, selecting the right vinyl tiles is crucial for a successful installation. We will guide you through the process of choosing the perfect vinyl floor tiles that will complement your ceramic tile base, ensuring a seamless and visually appealing result.
Consider the Thickness: The thickness of the vinyl tiles is an important factor to consider. While thicker tiles offer enhanced durability and better sound absorption, they may require additional preparation of the subfloor. Thinner tiles, on the other hand, are easier to install but may not provide the same level of durability. Evaluate the condition of your ceramic tile base and choose the thickness that best suits your needs.
Assess the Wear Layer: The wear layer is the protective coating on top of the vinyl tiles that determines their resistance to scratches, stains, and fading. A thicker wear layer offers better durability and longevity. If you anticipate heavy foot traffic or have pets, opt for vinyl tiles with a thicker wear layer to ensure they can withstand daily wear and tear.
Consider the Style and Design: Vinyl floor tiles come in a wide variety of styles, colors, and patterns. Consider the overall aesthetic and design of your space when choosing the right vinyl tiles. If you want a seamless transition between your ceramic tile base and the vinyl tiles, opt for vinyl tiles that mimic the appearance of ceramic or natural stone. Alternatively, you can choose a contrasting design to create a unique and visually striking look.
Evaluate the Installation Method: Vinyl floor tiles are available in various installation methods, including peel-and-stick, click-lock, and glue-down. The installation method you choose should align with your skill level and preferences. Peel-and-stick tiles are the easiest to install, requiring minimal tools and expertise. Click-lock tiles offer a floating floor installation, while glue-down tiles provide a more permanent and secure option.
Consider Maintenance and Longevity: Vinyl floor tiles are known for their low maintenance requirements. However, some tiles may require occasional waxing or polishing to maintain their shine. Consider the maintenance needs of the vinyl tiles you are considering and choose a product that aligns with your lifestyle and preferences. Additionally, look for vinyl tiles that come with a warranty, as this indicates the manufacturer’s confidence in the product’s longevity.
Preparing Your Ceramic Tile Surface for Vinyl Floor Tile Installation
Preparing your ceramic tile surface properly is essential before laying vinyl floor tiles over it. Adequate preparation ensures a smooth and long-lasting installation. We will guide you through the steps to prepare your ceramic tile surface for vinyl floor tile installation, allowing for optimal adhesion and a professional finish.
Clean the Surface: Begin by thoroughly cleaning the ceramic tile surface to remove any dirt, dust, or debris. Use a mild detergent and warm water, and scrub the surface with a soft-bristle brush or sponge. Pay special attention to grout lines, as they can accumulate dirt over time. Rinse the surface with clean water and allow it to dry completely before proceeding.
Repair Any Damaged Areas: Inspect the ceramic tile surface for any damaged or loose tiles. Remove any loose tiles and replace them with new ones. If there are any cracks or chips in the tiles, repair them using ceramic tile filler or adhesive. Ensure that the surface is smooth and even before proceeding.
Sand the Surface: To improve the adhesion of the vinyl floor tiles, it is recommended to lightly sand the ceramic tile surface. Use a fine-grit sandpaper or sanding block and gently sand the surface, focusing on any glossy or glazed areas. This step helps create a rougher texture, allowing the adhesive to bond more effectively.
Remove Grout Lines (Optional): If the grout lines between the ceramic tiles are deep, you may choose to fill them in to create a smooth, level surface. There are grout fillers available specifically for this purpose. Follow the manufacturer’s instructions to fill in the grout lines and ensure a level surface for the vinyl floor tiles.
Clean and Prime the Surface: After sanding and filling (if necessary), clean the surface once again to remove any dust or debris. Use a damp cloth or sponge to wipe down the entire surface. Once the surface is dry, apply a primer suitable for ceramic tiles. The primer helps create a strong bond between the ceramic tile surface and the adhesive used for the vinyl floor tiles.
Allow for Sufficient Drying Time: After priming, allow the surface to dry completely according to the manufacturer’s instructions. This may take a few hours or even overnight. It is essential to ensure that the surface is completely dry before proceeding with the vinyl floor tile installation.

Tips and Tricks for a Successful Vinyl Floor Tile Installation Over Ceramic Tile
Installing vinyl floor tiles over ceramic tiles requires careful planning and execution to achieve a successful result. Below we share some valuable tips and tricks to ensure a smooth and professional installation of vinyl floor tiles over your ceramic tile base. By following these guidelines, you can overcome common challenges and achieve a stunning transformation for your floors.
Measure and Plan Carefully: Before you begin the installation process, take accurate measurements of the room and plan the layout of the vinyl floor tiles. Start from the center of the room and work your way outwards for a balanced and visually appealing result. Consider any obstacles, patterns, or irregularities in the room, and adjust the layout accordingly. This careful planning will help minimize waste and ensure a seamless installation.
Use Proper Adhesive: Choosing the right adhesive is crucial for a secure and long-lasting installation. Ensure that the adhesive you select is suitable for bonding vinyl tiles to ceramic tile surfaces. Follow the manufacturer’s instructions for the adhesive application, including the recommended trowel size and adhesive coverage. Using the correct adhesive in the appropriate amount will ensure proper adhesion and prevent issues such as loose or lifted tiles.
Take Time for Alignment: Achieving proper alignment is key to a professional-looking installation. Take the time to align each vinyl floor tile accurately with the adjacent tiles. Use a straight edge or a chalk line to ensure straight lines and consistent spacing between the tiles. Proper alignment will enhance the overall aesthetic of the floor and create a cohesive look.
Trim Tiles with Precision: When trimming vinyl floor tiles to fit along walls or obstacles, ensure precision to achieve a seamless finish. Use a sharp utility knife or a tile cutter to make clean and accurate cuts. Take measurements carefully and double-check before cutting to avoid any mistakes. A precise and snug fit will give your installation a polished and professional appearance.
Allow for Expansion: Vinyl floor tiles, like any other flooring material, need room for expansion and contraction with temperature and humidity changes. Leave a small gap, typically 1/8 inch, between the tiles and the walls or other fixed surfaces. This gap will accommodate the natural movement of the floor and prevent buckling or warping over time.
Apply Even Pressure during Installation: When installing vinyl floor tiles, apply even pressure to ensure proper adhesion and eliminate air bubbles. Use a roller or a rolling pin to roll over each tile after placement. This step helps to remove air pockets and ensures a firm bond between the tile and the adhesive. Be thorough and consistent in applying pressure to all the tiles for a uniform and secure installation.
How to Install Vinyl Flooring Over Tiles (Over Linoleum Tiles) – Thrift Diving
Can You Install Vinyl Plank over Ceramic Tile – Ready To DIY

How to Install Sheet Vinyl Flooring Over Tile – Blessu0027er House

Can You Put Vinyl Flooring Over Tile?

Can You Put Vinyl Flooring Over Tile?

Related Posts: