When I first heard about metallic epoxy flooring, I thought it sounded like something straight out of a futuristic design magazine. It wasn’t until I saw one in person that I truly understood the allure. The shimmering, liquid-like surface caught the light and danced across the room, creating an effect that was both modern and luxurious. Metallic epoxy isn’t just a trend; it’s a statement. Whether you’re renovating your home or designing a commercial space, selecting the right floor color can significantly impact the atmosphere of a room. In this piece, I’ll walk you through six key aspects of metallic epoxy floor colors that helped me make an informed decision when upgrading my own space.
Choosing the Right Base Tone
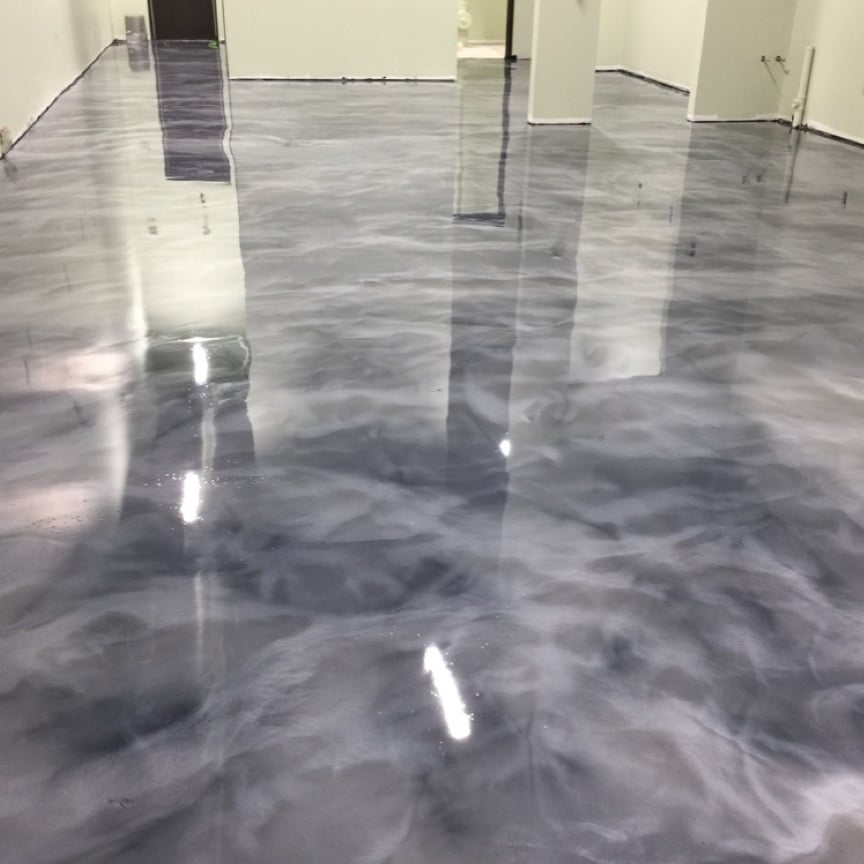
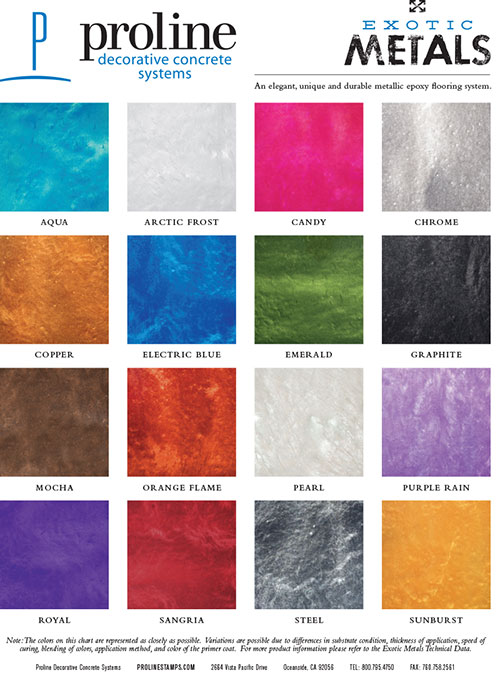
When I started exploring metallic epoxy options, the first thing I realized was how important the base tone is. Unlike regular paint, where you simply pick a color, metallic epoxy involves blending pigments to create depth and movement. I learned that lighter base tones, such as silver or pearl, tend to reflect more light, making a space feel larger and airier. This was perfect for my smaller basement, which lacked natural light.
On the other hand, darker bases such as charcoal or midnight blue add drama and sophistication. They work well in open spaces where lighting can be controlled. I considered using a dark base in my living area, but worried it might make the room feel too heavy. Instead, I opted for a soft gunmetal shade that balanced elegance with brightness.
What surprised me most was how much the base tone influenced the final look of the metallic finish. Even subtle variations could completely change the mood of a room. After experimenting with samples, I realized that choosing the right base tone wasn’t just about aesthetics; it was about setting the emotional tone of the space.
Adding Metallic Flakes for Depth
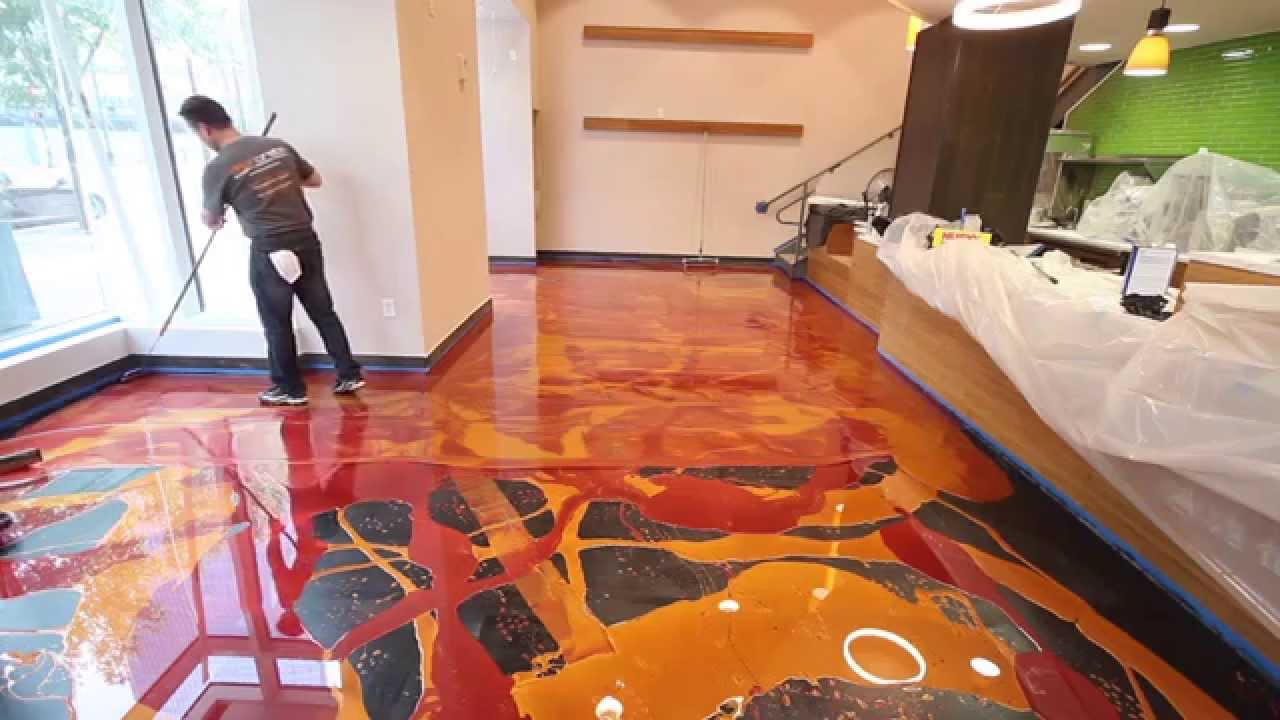
Once I settled on the base color, I moved on to the fun part: adding metallic flakes. These tiny particles are what give the floor its shimmering, multidimensional look. I found that the type, size, and color of flakes significantly impacted the visual appeal. Fine silver flakes gave a sleek, polished effect, while larger gold ones created a bolder, almost artistic finish.
I also discovered that mixing different flake colors could produce stunning results. A blend of copper and bronze added warmth to my cooler-toned floors, making the entire space feel more inviting. Experimenting with combinations allowed me to customize the floor to match my interior style. I even tried layering flakes in different densities to create a sense of motion.
One thing I didn’t anticipate was how much the lighting would affect the appearance of the flakes. Under LED lights, they sparkled subtly, but under natural sunlight, they practically glowed. This made me rethink the placement of certain fixtures to enhance the overall effect. In the end, metallic flakes were the secret ingredient that transformed my floor from ordinary to extraordinary.
Understanding Light Reflection and Movement
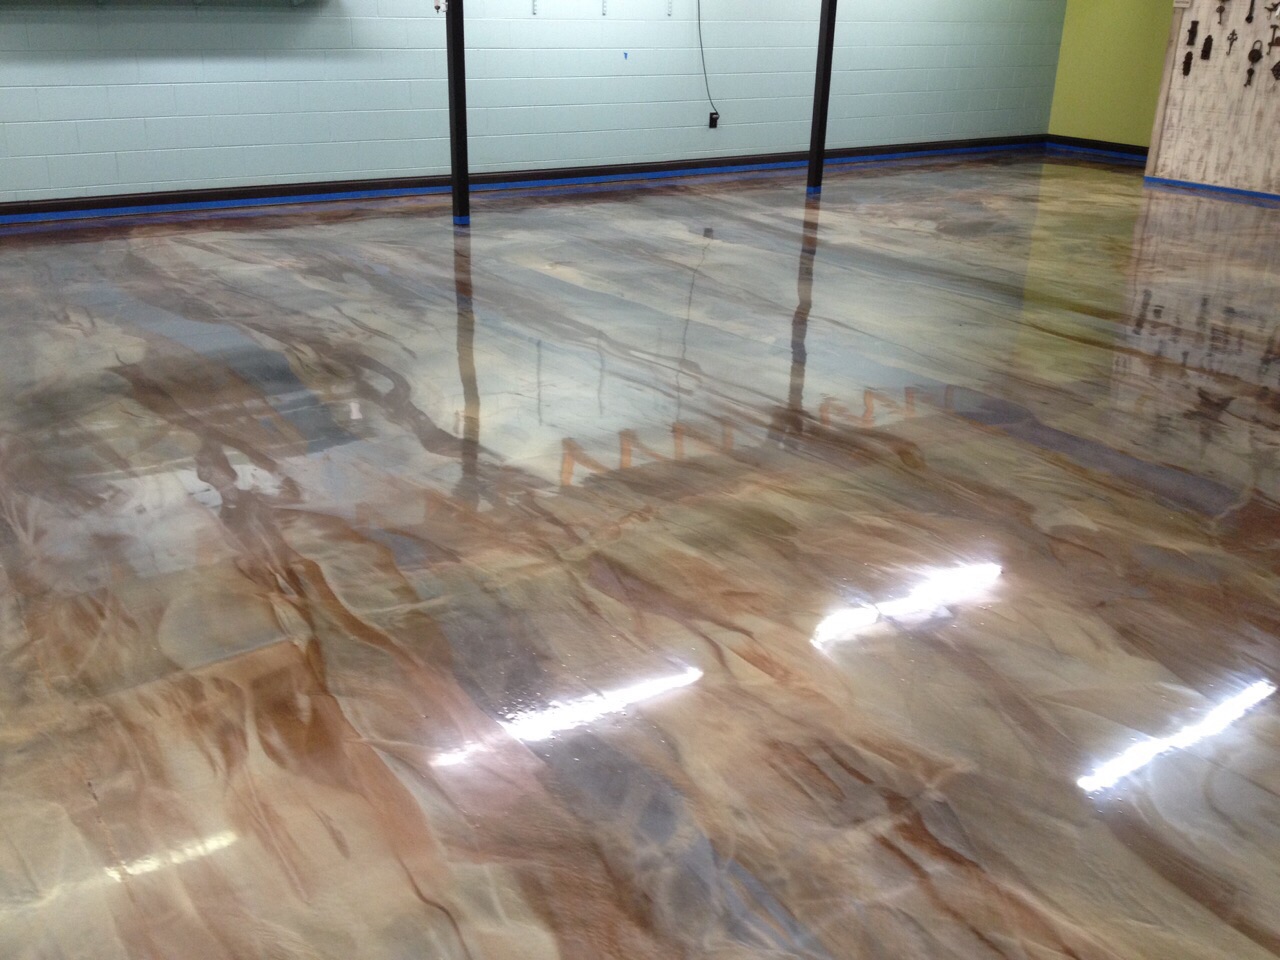
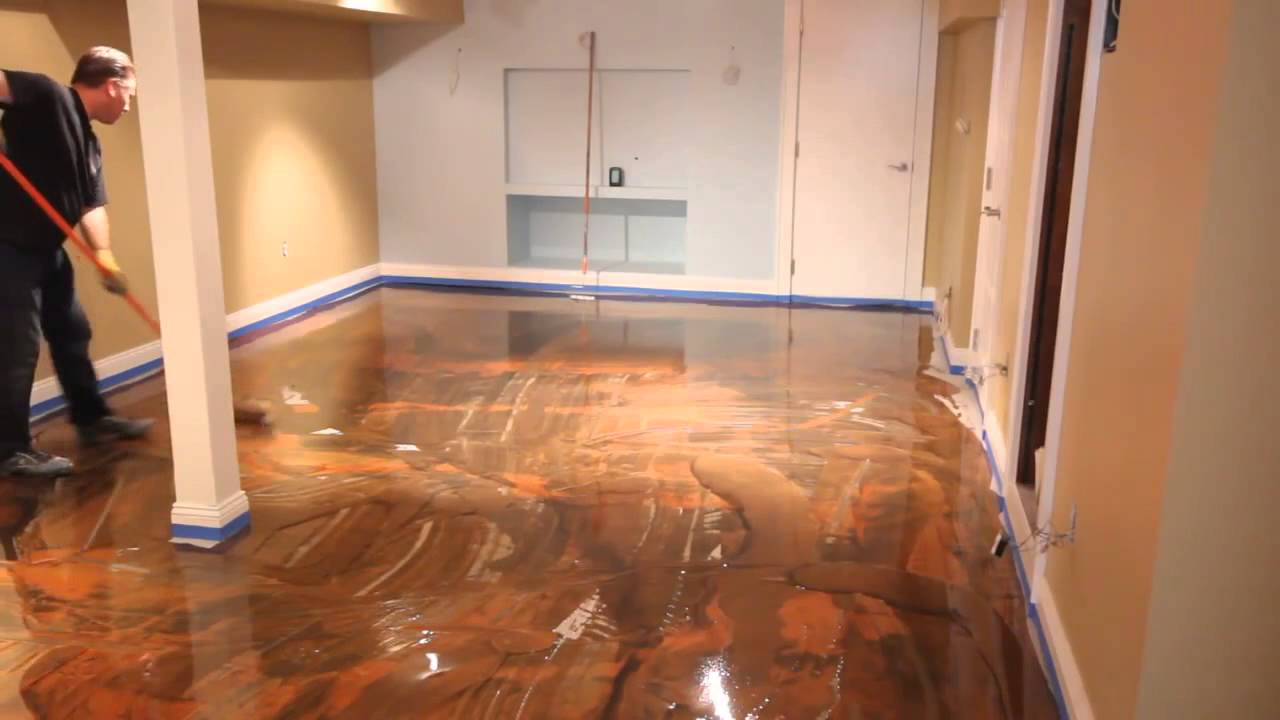
As I applied the first coat, I noticed how the metallic epoxy responded to light. Unlike traditional flooring, which has a flat appearance, metallic epoxy creates a dynamic surface that changes throughout the day. Morning light brought out cool undertones, while evening lamps highlighted warmer hues. This interplay fascinated me and made me appreciate the material’s complexity.
I quickly realized that movement played a role in how the floor looked. As people walked across it, the reflection shifted, creating a ripple effect similar to water. This made the space feel alive and constantly evolving. I placed mirrors strategically around the room to amplify the reflections, enhancing the illusion of depth and space.
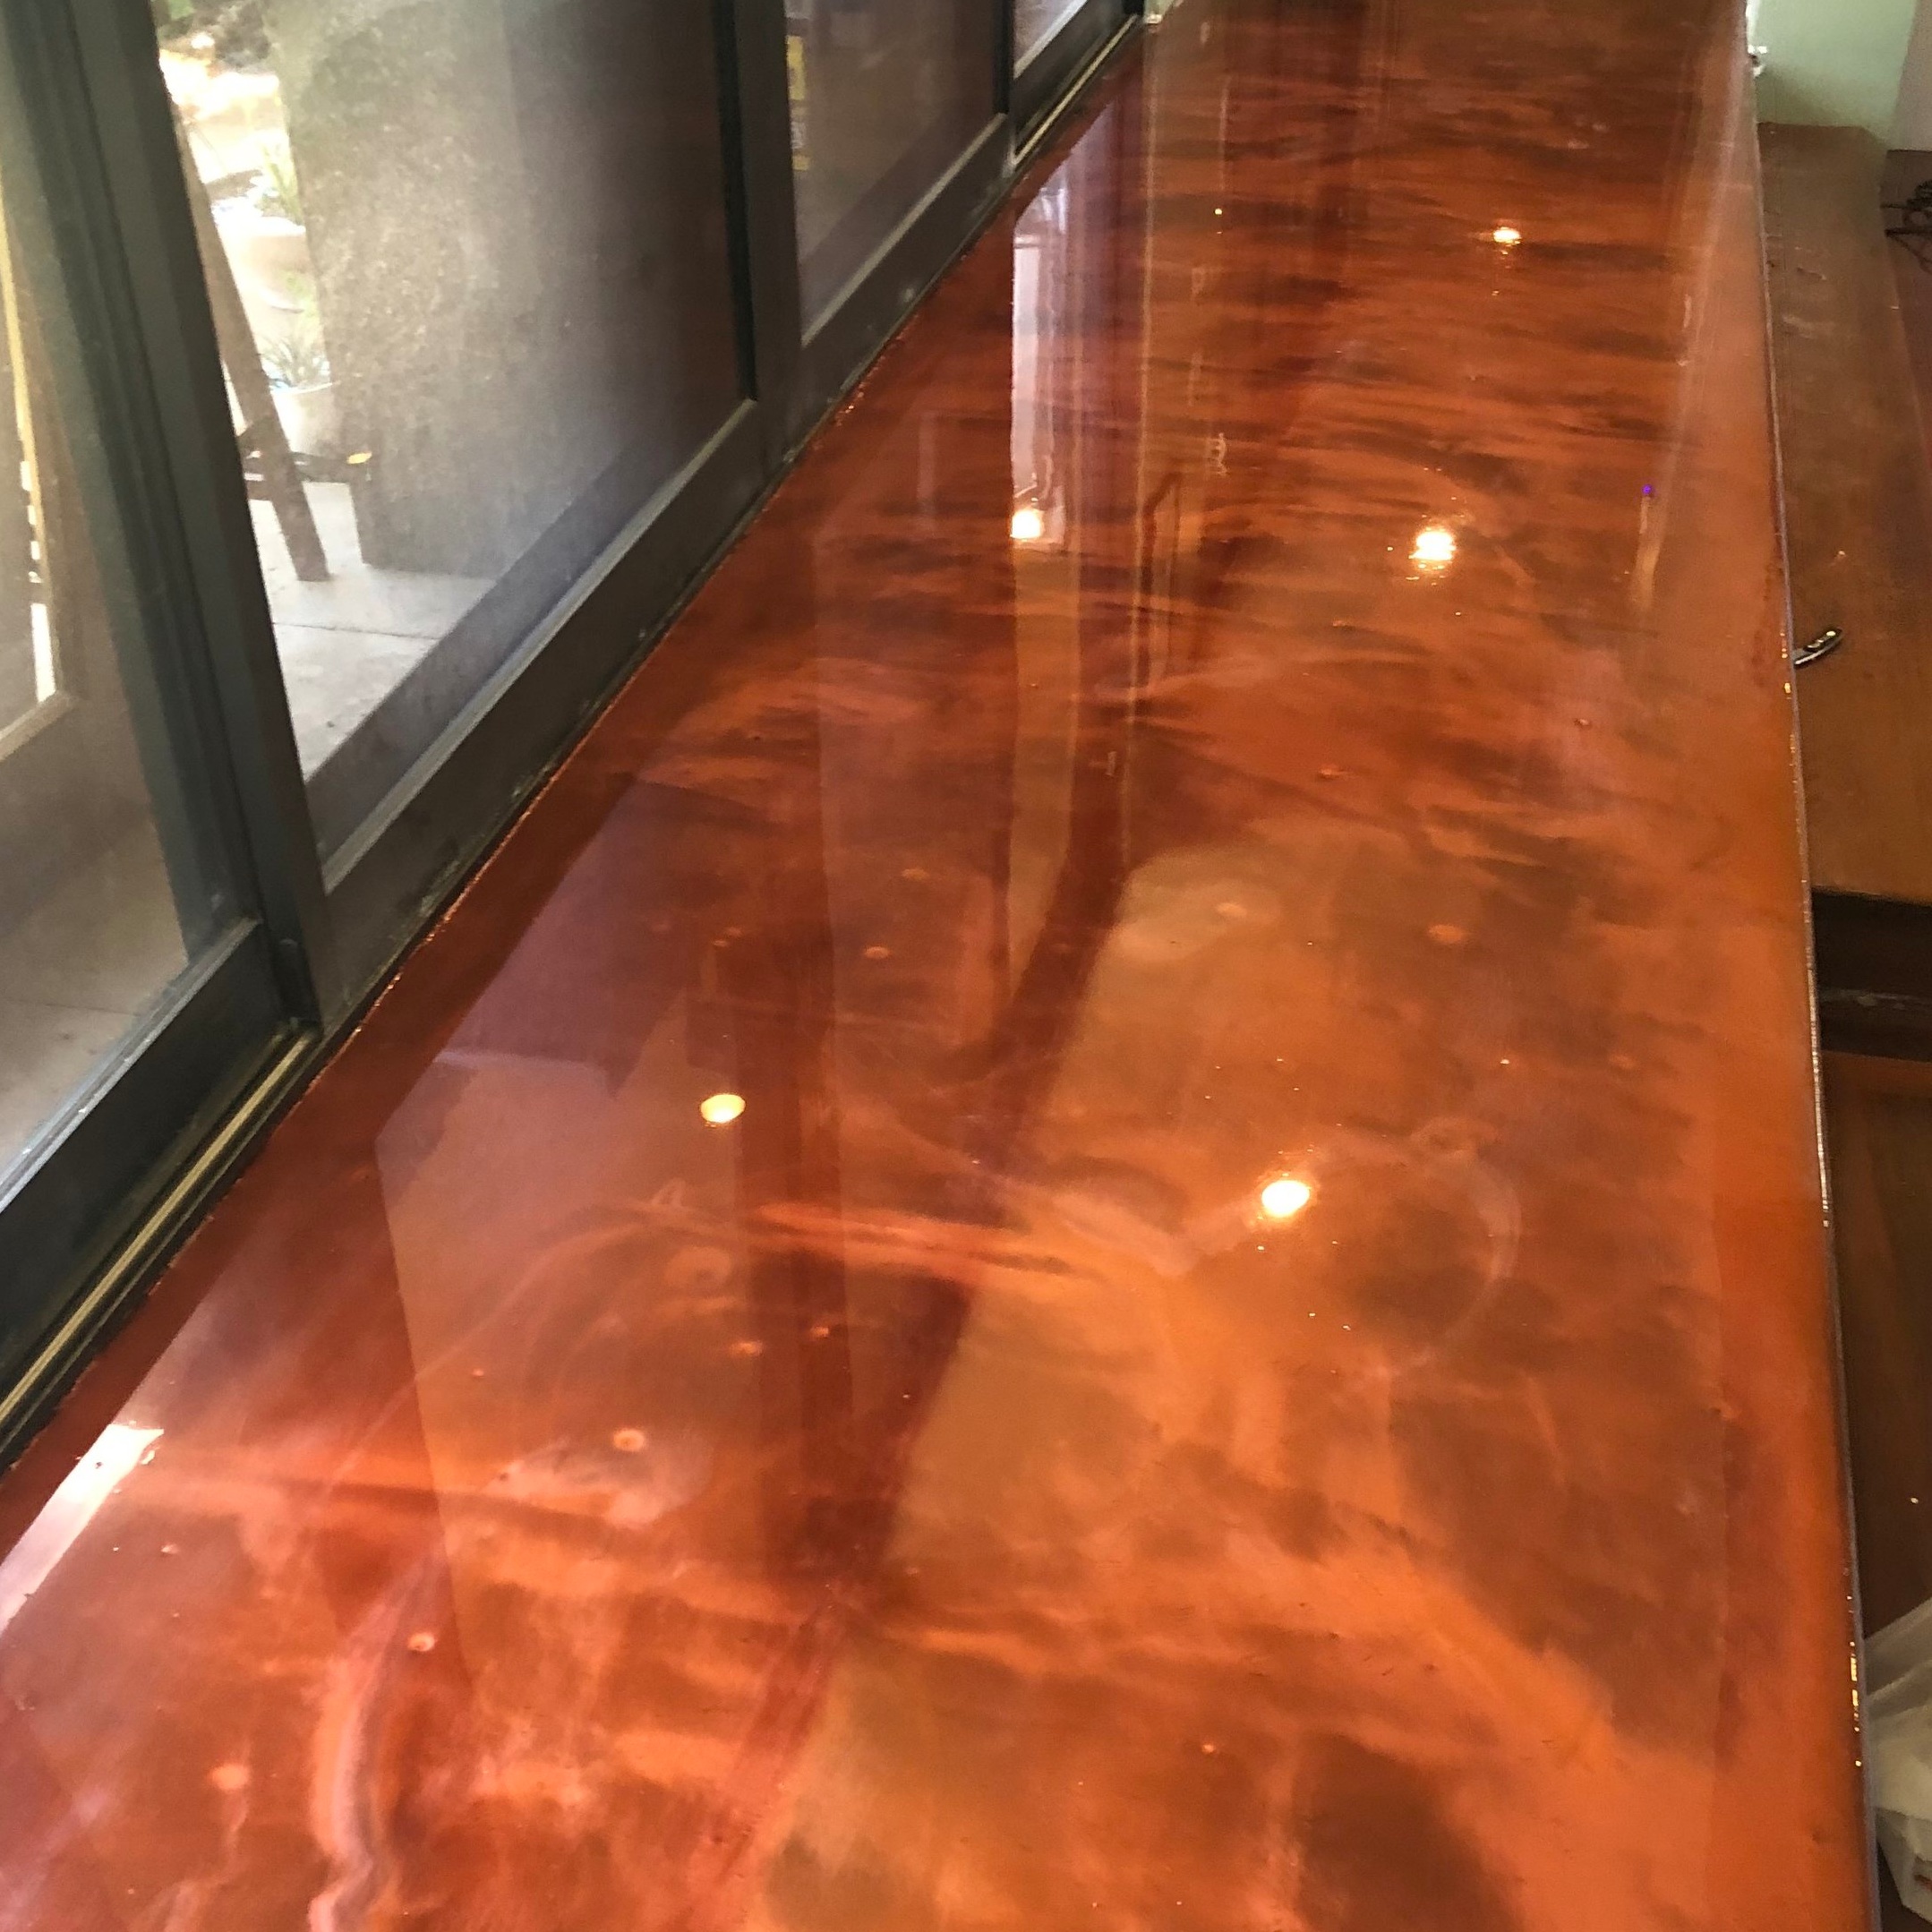
The reflective nature of metallic epoxy also affected the perception of color. In areas where light hit directly, the floor appeared lighter, almost translucent. In shadowed corners, it deepened into rich, saturated tones. This variation added a level of sophistication that no static floor could achieve. Understanding these nuances helped me plan the layout and decor accordingly.
Customizing Color Blends
One of the most exciting parts of working with metallic epoxy was the ability to mix custom color blends. I had assumed I’d have to stick to pre-made formulas, but my contractor explained that we could tweak the ratios of pigment and resin to create unique effects. We experimented with several small batches before settling on a combination that felt just right.
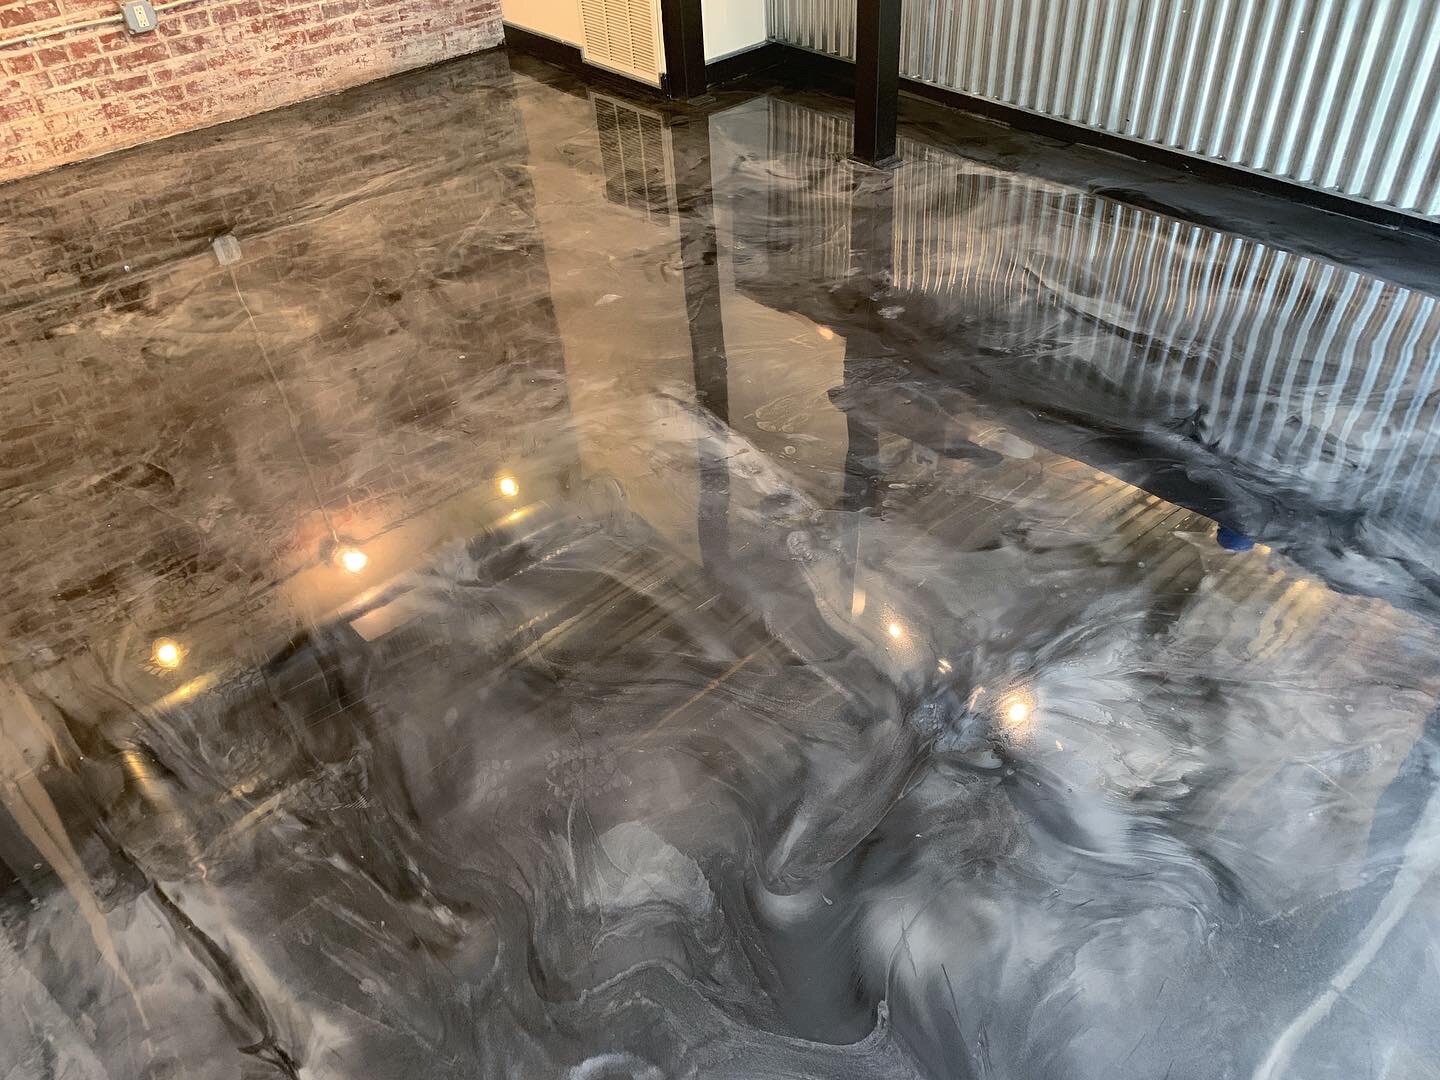
We started by blending two primary colors, slate gray and storm blue, to create a moody yet elegant base. Then, we introduced hints of iridescent white to lighten the mixture slightly without losing depth. Each adjustment changed the character of the floor, so precision was key. We used tinted rollers to test patterns and gradients before committing to the full application.
What amazed me most was how the same color could look entirely different depending on the angle and time of day. A hue that seemed neutral at noon transformed into a vibrant jewel tone in the late afternoon sun. This flexibility allowed me to personalize the space in a way that felt uniquely mine. By the end of the process, I had a floor that wasn’t just functional, it was expressive.
Balancing Warm and Cool Tones
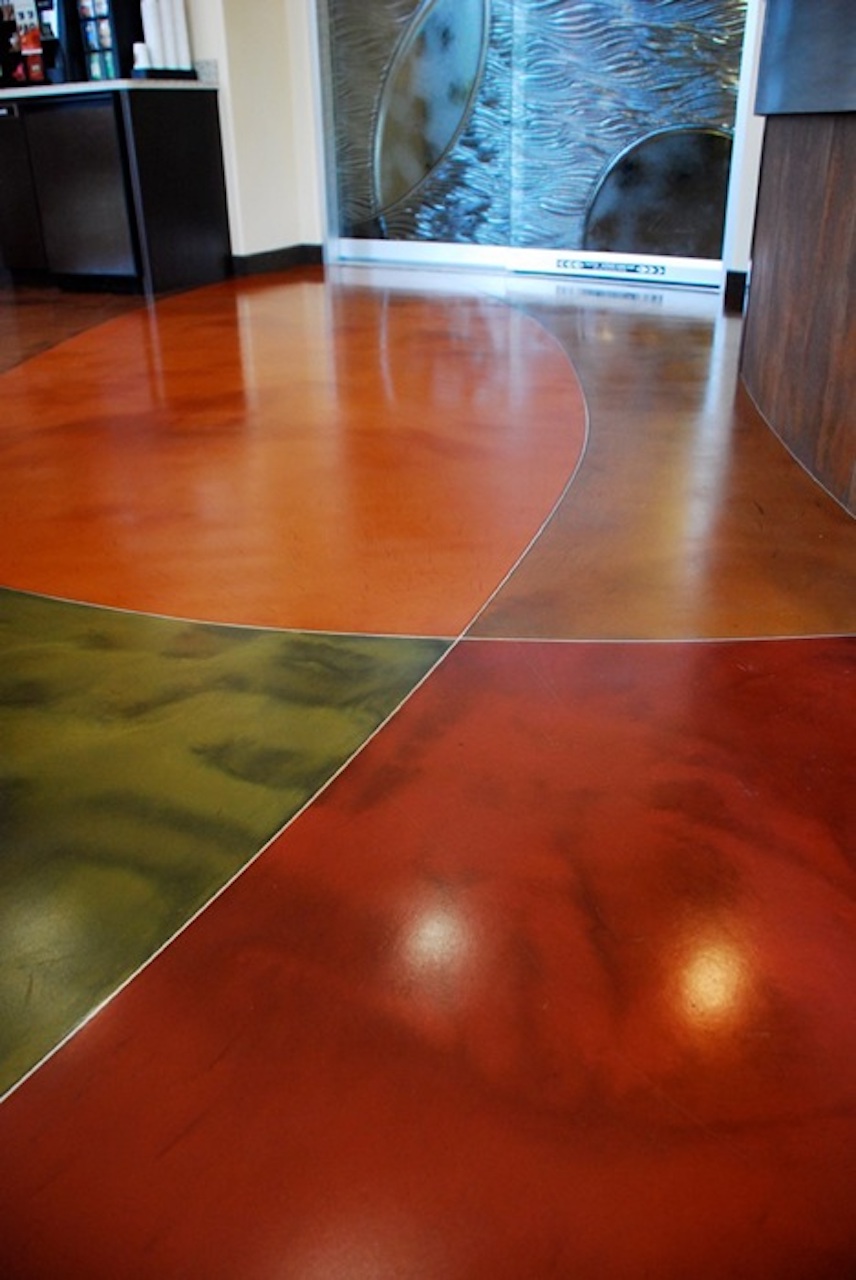
During the mixing phase, I learned that balancing warm and cool tones was essential to achieving the desired ambiance. Too many cool tones could make a space feel cold and impersonal, while an excess of warm shades risks overwhelming the eye. I wanted something harmonious, so I tested various combinations until I found the sweet spot.
I began with a cool foundation, something reminiscent of steel or mercury. Then, I introduced subtle warm accents using amber and rose-gold flakes. This contrast added richness without clashing. The result was a floor that felt both modern and welcoming, with just enough warmth to keep the space from feeling sterile.
Lighting played a major role in maintaining this balance. I installed dimmable bulbs so I could adjust the temperature of the room depending on the occasion. During dinner parties, I lowered the lights to emphasize the golden undertones, while during the day, I let natural light highlight the cooler elements. This adaptability made the floor feel like a living part of the environment rather than just a backdrop.

Final Touches and Protective Coatings
After the epoxy dried, it was time for the final step, applying a clear topcoat to protect the surface and enhance its shine. I chose a high-gloss urethane finish, which deepened the colors and amplified the reflective qualities. Watching the transformation was like seeing the floor come to life under a new lens.
I was initially concerned about durability, but the protective coating made the floor incredibly resilient. It resisted scratches, stains, and even minor impacts. I tested it by dragging furniture across the surface and was relieved to see no damage. Cleaning became effortless, just a quick sweep and occasional mop kept it looking pristine.
In the weeks following installation, I noticed how much the floor elevated the entire space. Friends commented on how it looked professionally designed, and I took pride in knowing I had chosen every detail. The final touches weren’t just about protection; they were about preserving the beauty of the floor for years to come.

Can metallic epoxy floors be customized to match any interior design?
Absolutely. One of the biggest advantages of metallic epoxy is its versatility. From rich jewel tones to muted metallics, you can tailor the color and finish to complement your existing decor. I worked closely with my contractor to develop a unique blend that matched my furniture and wall colors perfectly. Whether your style leans toward minimalist, rustic, or contemporary, there’s a metallic epoxy option that will fit seamlessly into your vision. The key is to experiment with different pigments and metallic flakes to find the right balance between texture and tone.
How do lighting conditions affect the appearance of metallic epoxy floors?
Metallic epoxy reacts strongly to light, which means the same floor can look dramatically different throughout the day. Natural sunlight brings out the brightest highlights and deepest shadows, while artificial lighting emphasizes specific hues depending on the bulb’s color temperature. When I installed mine, I noticed that LED lights enhanced the cooler tones, while warm incandescent bulbs brought out the gold and copper flecks. To maintain consistency, I adjusted my lighting setup and even added accent lights to highlight the floor’s reflective qualities. Proper lighting planning ensures your floor looks stunning at all times.
Are metallic epoxy floors durable enough for high-traffic areas?
Yes, especially when sealed properly. After applying multiple layers of epoxy and a strong topcoat, my floor became highly resistant to scratches, stains, and wear. I have kids and pets, so durability was a top priority. I’ve dragged furniture across it, dropped glass bottles, and even spilled wine without leaving permanent marks. Regular maintenance is simple, just sweeping and mopping keep it looking fresh. The protective coating plays a big role in longevity, so investing in a high-quality sealant is essential if you want your floor to withstand daily use without losing its luster.
What maintenance is required for metallic epoxy floors?
Maintenance is surprisingly easy once the floor is fully cured. I clean mine with a microfiber mop and mild detergent, avoiding harsh chemicals that could dull the finish. Spills should be wiped up immediately to prevent staining, but thanks to the non-porous surface, most liquids bead up and don’t penetrate. I avoid using abrasive scrubbers since they can scratch the top layer. Occasionally, I apply a thin coat of wax to maintain the glossy sheen, though it’s not necessary unless you want extra shine. Overall, the low-maintenance nature of metallic epoxy makes it ideal for busy households.
Is metallic epoxy suitable for both residential and commercial spaces?
Definitely. I originally installed mine in my home, but I’ve since seen them in cafes, boutiques, and even office lobbies. The seamless, high-gloss finish adds a touch of luxury that appeals to both homeowners and business owners. Commercial settings benefit from the durability and ease of cleaning, while residential applications allow for greater personalization. The only difference is the level of foot traffic and the need for additional protective coatings in high-use areas. Whether you’re designing a living room or a retail space, metallic epoxy offers a stylish, long-lasting solution that stands out.
How long does it take to install a metallic epoxy floor?
From start to finish, my project took about five days. The timeline included surface preparation, primer application, epoxy coats, metallic flake dispersion, and the final protective topcoat. Drying time between each layer was crucial to ensure a flawless finish. While some contractors may offer quicker turnaround times, rushing the process can lead to imperfections like bubbles or uneven texture. I recommend allowing ample drying time between coats to achieve the best results. Once complete, the floor needed another 72 hours to fully cure before I could move furniture back in. The wait was worth it—the final product looked professionally finished and stunning.

Learn to install metallic epoxy – Orange Gold & Wine Red
Know more about Designer Metallic Epoxy Floor Installation
Epoxy Floor Coatings in Lehi, Utah Lifetime Epoxy
Metallic Epoxy By Colored Epoxies Metallic epoxy floor, Epoxy

Related Posts: