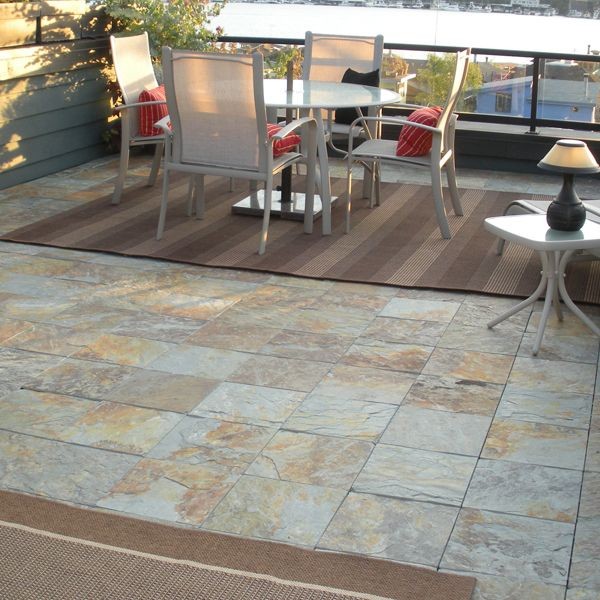
Choosing the Best Outdoor Tile Material for Your Climate
When I decided to tile my outdoor spaces, one of the first things I learned was how crucial it is to choose the right material for the climate. Your outdoor tile choice can make or break the longevity and functionality of your patio, deck, or walkway, especially when dealing with varying weather conditions. Here’s what I discovered in my journey to find the perfect outdoor tile material.
- Understanding Your Climate Living in an area with unpredictable weather, I quickly realized that not all tiles are created equal. In regions with harsh winters, for instance, freeze-thaw cycles can cause some tiles to crack or break apart. Conversely, in hot climates, certain materials can fade under constant sun exposure or become uncomfortably hot to walk on. Before making a decision, I made sure to take a close look at my local climate patterns—this helped narrow down my options to materials that could withstand the elements.
- The Benefits of Porcelain Tiles Porcelain quickly became a top contender for my outdoor project. Known for its durability and low water absorption rate, porcelain is less likely to crack in freezing conditions. It’s also resistant to fading, which is a huge plus in sunny areas. I found that porcelain tiles come in a variety of finishes, from smooth to textured, allowing me to choose a style that matched both the aesthetics and practical needs of my outdoor space.
- Considering Natural Stone Natural stone was another option I considered, especially for its timeless and rustic appeal. However, not all stones are suitable for every climate. For example, while granite is incredibly durable and can handle extreme temperatures, softer stones like limestone or sandstone might not fare as well in regions with heavy rainfall or freezing conditions. I did some research and found that sealing natural stone can help protect it from the elements, making it a viable option even in less-than-ideal climates.
- Exploring Concrete Tiles Concrete tiles were also on my radar because of their versatility and strength. They can be molded into various shapes and finishes, mimicking the look of natural stone or wood. I was particularly drawn to concrete because it can handle a wide range of weather conditions, from intense heat to freezing temperatures. The only downside I found was that concrete might require more maintenance, such as sealing and cleaning, to keep it looking its best.
- Weighing the Pros and Cons of Ceramic Tiles Ceramic tiles are another popular choice for outdoor spaces, but I discovered that they’re not always the best option for every climate. While ceramic is generally more affordable and comes in a wide array of designs, it’s not as durable as porcelain or natural stone. In areas with frequent freeze-thaw cycles or heavy rainfall, ceramic tiles might be prone to cracking or absorbing moisture. This led me to consider ceramic tiles more for covered or semi-covered outdoor spaces where they wouldn’t be directly exposed to the elements.
- Making the Final Decision After weighing all these options, I ended up choosing a combination of porcelain and natural stone tiles for my outdoor spaces. Porcelain tiles provided the durability I needed for areas exposed to the elements, while natural stone added the rustic charm I was looking for in more sheltered spots. The key takeaway from my experience was that understanding your climate is essential to making the right choice in outdoor tile materials. By selecting tiles that are suited to your specific weather conditions, you can ensure that your outdoor flooring will remain beautiful and functional for years to come.
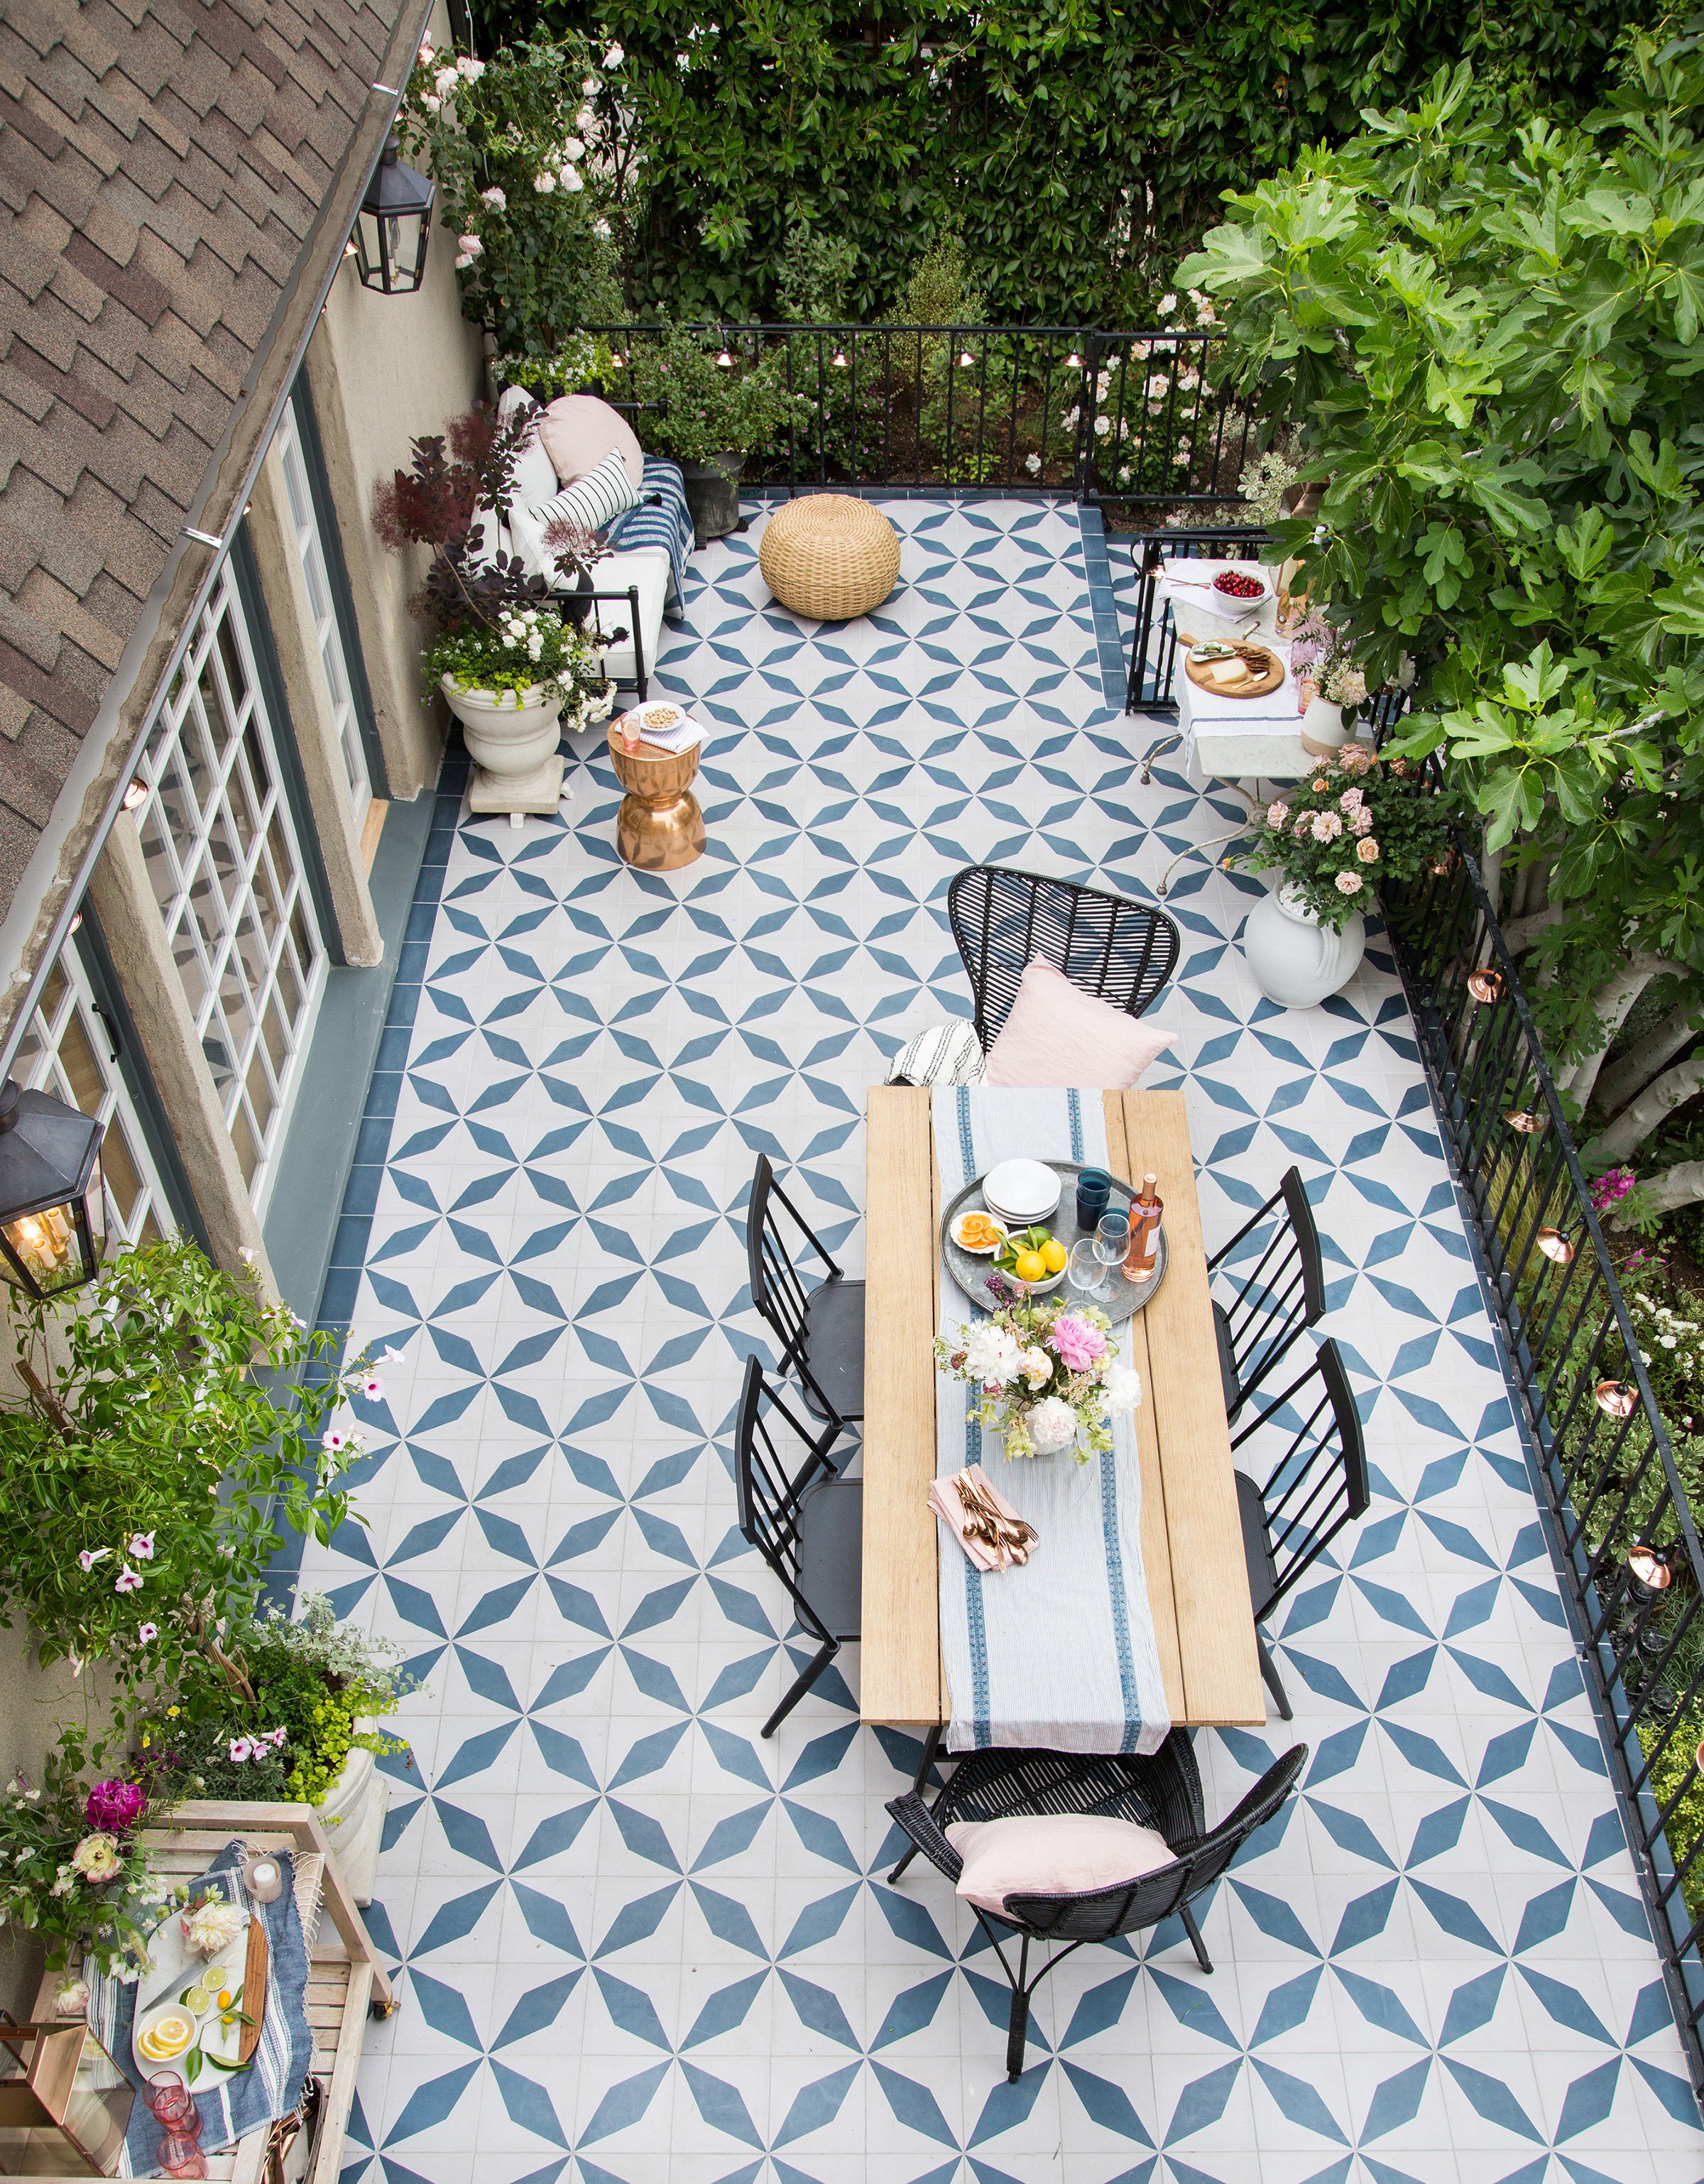
Creative Patterns and Layouts for Outdoor Tile Flooring
When I first started planning my outdoor tile project, I quickly realized that choosing the right material was just the beginning. The way the tiles are laid out can dramatically impact the overall look and feel of the space. With a little creativity and some planning, I was able to turn a simple outdoor area into a stylish, eye-catching space. Here’s how I approached creating unique patterns and layouts for my outdoor tile flooring.
The Classic Running Bond Pattern One of the first patterns I considered was the running bond, also known as the brick pattern. It’s a classic choice where tiles are laid in an offset manner, similar to how bricks are stacked in a wall. This pattern is incredibly versatile and works well with rectangular tiles. I chose this pattern for a walkway, as it created a sense of movement and direction. It’s also forgiving when it comes to slight imperfections in the tile alignment, making it a great choice for DIY projects.
Experimenting with Herringbone The herringbone pattern caught my eye for its dynamic and elegant appearance. It involves laying rectangular tiles in a zigzag pattern, creating a sense of depth and texture. Although it requires a bit more precision during installation, the result is well worth the effort. I used this pattern in a smaller, more intimate outdoor seating area where I wanted to create a focal point. The herringbone layout added a touch of sophistication and made the space feel more refined.
Creating Visual Interest with Diagonal Layouts Laying tiles diagonally was another technique I explored to add visual interest to my outdoor space. This layout involves placing tiles at a 45-degree angle rather than the traditional horizontal or vertical alignment. I found that this pattern works particularly well in larger areas, such as patios or courtyards, where it can make the space feel more expansive. The diagonal lines draw the eye across the surface, creating a more dynamic and engaging look.
Combining Different Tile Sizes Mixing tiles of different sizes was a creative way to add variety and texture to my outdoor flooring. I experimented with a modular pattern, combining large square tiles with smaller rectangular ones. This approach allowed me to play with scale and proportion, giving the floor a more custom, designer feel. It’s important to plan this layout carefully to ensure that the different tile sizes fit together seamlessly, but the end result is a truly unique and personalized outdoor floor.
Incorporating Borders and Accents To add a finishing touch to my outdoor tile design, I considered incorporating borders and accent tiles. Borders can be created using a contrasting tile color or a different material altogether, such as natural stone or mosaic tiles. I used a darker tile to create a border around the edge of a patio, which helped define the space and gave it a more polished appearance. Accent tiles, placed sporadically within the main pattern, added pops of color and interest without overwhelming the design.
Playing with Color and Texture Color and texture play a significant role in the overall impact of an outdoor tile layout. I chose to mix tiles with different finishes—some smooth and polished, others rough and textured—to create a more tactile and visually engaging surface. Combining different shades of the same color family can also add depth and dimension to the floor. I found that these subtle variations in texture and color brought the design to life, making the outdoor space feel both cohesive and interesting.
Slip-Resistant Tile Options for Safe Outdoor Spaces
As I planned my outdoor tile project, one of my top priorities was safety. I wanted to create a beautiful outdoor space, but I also needed it to be practical and safe, especially since wet surfaces can become slippery and hazardous. That’s when I started researching slip-resistant tile options, and I was pleasantly surprised by the variety of choices available. Here’s what I discovered about creating a safe yet stylish outdoor space with slip-resistant tiles.
Understanding Slip Resistance Ratings The first thing I learned was that tiles come with slip resistance ratings, often referred to as the Coefficient of Friction (COF). This rating indicates how much friction the tile surface provides, with higher numbers offering better slip resistance. For outdoor areas, especially those prone to getting wet, like around pools or patios, it’s important to choose tiles with a high COF rating. This gave me peace of mind that I was choosing materials that would help prevent accidents.
Exploring Textured Tiles Textured tiles quickly became a top choice for my project. These tiles have a rougher surface that provides more grip underfoot, reducing the risk of slipping. I found that natural stone tiles, such as slate or granite, naturally offer this kind of texture. Additionally, some porcelain and ceramic tiles are specifically designed with a textured finish for outdoor use. I opted for a slightly roughened porcelain tile for my patio, which blended aesthetics with functionality.
Considering Wood-Look Tiles Another option I explored was wood-look tiles, which are typically made from porcelain or ceramic. These tiles mimic the appearance of natural wood but offer better durability and slip resistance, especially when they come with a textured surface. I loved the idea of having a wood-like aesthetic without the maintenance concerns of real wood. For areas like the deck or porch, where I wanted a cozy, natural feel, wood-look tiles provided both style and safety.
Choosing Rubber Tiles for High-Traffic Areas In high-traffic areas or spaces used by children or elderly family members, I considered rubber tiles for their exceptional slip resistance. Rubber tiles are softer underfoot and provide excellent grip, even when wet. While they may not have the same aesthetic appeal as stone or porcelain, they’re incredibly practical for certain areas like play zones or near pools. I decided to use rubber tiles around the pool area, where safety was a top priority.
Mosaic Tiles for Slip Resistance and Style Mosaic tiles offered an interesting option that combined safety with style. The small size of mosaic tiles means there are more grout lines, which naturally increases slip resistance. I found that using mosaic tiles in a specific area, like steps or a landing, added both visual interest and an extra layer of safety. Plus, the variety of colors and patterns available in mosaic tiles allowed me to get creative with the design.
Testing the Tiles Before Installation Before making a final decision, I took the time to test the tiles myself. I brought a few samples home, wet them, and walked on them to see how they felt underfoot. This hands-on approach helped me choose the tiles that offered the best combination of safety, comfort, and aesthetic appeal. It’s a step I highly recommend to anyone planning an outdoor tile project, as it ensures you’re making the right choice for your specific needs.
Incorporating Natural Stone Tiles for a Rustic Outdoor Look
When it came to creating a rustic, earthy vibe in my outdoor spaces, natural stone tiles were the perfect choice. They offer a timeless appeal that’s hard to replicate with other materials, and they blend seamlessly with the natural surroundings. Here’s how I incorporated natural stone tiles into my outdoor design to achieve a rustic, inviting look.
The Appeal of Natural Stone Tiles The first thing that drew me to natural stone tiles was their inherent beauty and uniqueness. Each stone tile is slightly different from the next, with variations in color, texture, and pattern that create a one-of-a-kind surface. This natural variation is exactly what I wanted for my outdoor space—it added character and warmth that felt organic and unpretentious. Whether it was slate, limestone, or travertine, the earthy tones and rough textures of natural stone tiles perfectly complemented the outdoor environment.
Choosing the Right Type of Stone With so many types of natural stone available, selecting the right one for my project was a crucial step. I considered factors like durability, maintenance, and slip resistance. For a patio that would see a lot of foot traffic, I leaned towards slate, which is known for its strength and weather resistance. In contrast, for a more decorative area, I chose travertine for its softer, more luxurious appearance. The choice of stone can greatly influence the overall feel of the space, so it’s important to consider both the practical and aesthetic aspects.
Creating a Natural Transition One of the things I loved about using natural stone tiles was how they allowed me to create a seamless transition between the indoor and outdoor areas. By using similar tones and textures inside and outside, I was able to blur the lines between the two spaces, making the outdoors feel like an extension of my home. This is especially effective when the interior has stone or wood elements that can be echoed in the outdoor flooring, creating a cohesive, flowing design.
Enhancing the Rustic Aesthetic with a Rough Finish To amplify the rustic vibe, I opted for stone tiles with a rough, unpolished finish. These tiles had a more textured surface, which not only added to the rustic charm but also improved slip resistance—an important consideration for outdoor flooring. The rough finish of the stone tiles made the space feel more natural and grounded, as if the materials had been there for centuries. It was the perfect way to achieve an authentic, lived-in look.
Pairing Stone Tiles with Natural Elements To fully embrace the rustic theme, I paired the stone tiles with other natural elements in the design. I incorporated wooden furniture, lush greenery, and gravel walkways to complement the stone. The combination of these materials created a harmonious, earthy environment that felt both welcoming and timeless. The key was to keep the design simple and let the natural beauty of the materials take center stage.
Maintaining the Natural Stone Look While natural stone tiles are beautiful, they do require some maintenance to keep them looking their best. I learned that sealing the stone is essential to protect it from stains, weather, and wear. Depending on the type of stone, the sealer may need to be reapplied every couple of years. I also found that regular sweeping and occasional washing with a stone-specific cleaner were necessary to maintain the appearance of the tiles. Although it requires a bit more effort than other materials, the stunning result is well worth it.
Using Porcelain Tiles for Durable and Stylish Outdoor Floors
As I continued my search for the perfect outdoor flooring, porcelain tiles emerged as a strong contender. Known for their durability and versatility, porcelain tiles offer a combination of style and practicality that’s hard to beat. Here’s why I decided to use porcelain tiles for my outdoor spaces and how they transformed the area.
The Durability of Porcelain Tiles One of the standout features of porcelain tiles is their incredible durability. Porcelain is fired at higher temperatures than ceramic, making it denser, less porous, and more resistant to wear and tear. I knew that choosing porcelain tiles would mean my outdoor flooring could withstand the elements—whether it was rain, sun, or snow—without deteriorating over time. This durability gave me confidence that my investment would pay off in the long run.
A Wide Range of Styles and Finishes What sold me on porcelain tiles was the wide variety of styles, colors, and finishes available. Whether I wanted the look of natural stone, wood, or even concrete, there was a porcelain tile that could mimic that appearance. For my patio, I chose porcelain tiles that looked like aged wood planks, which provided the rustic charm I was after without the maintenance issues associated with real wood. The ability to choose a style that matched my aesthetic preferences made porcelain tiles a versatile and appealing option.
Slip Resistance and Safety Safety was a major concern for me, especially in outdoor areas that could become slippery when wet. I was pleased to find that many porcelain tiles are available with textured finishes specifically designed for outdoor use. These tiles offer excellent slip resistance, making them a safe choice for spaces like pool decks, walkways, and patios. I opted for a textured finish that not only provided grip but also added a subtle visual interest to the surface.
Low Maintenance Requirements Another major advantage of porcelain tiles is their low maintenance needs. Unlike natural stone, which requires regular sealing and special cleaning products, porcelain tiles are relatively easy to care for. I found that a simple routine of sweeping and occasional mopping with water or a mild cleaner was enough to keep them looking pristine. The tiles are also resistant to staining, fading, and scratching, which meant I didn’t have to worry about them losing their luster over time.
Porcelain Tiles in All Climates One of the reasons I felt confident in choosing porcelain tiles was their suitability for all climates. Whether you live in a region with harsh winters, hot summers, or heavy rainfall, porcelain tiles are up to the task. They don’t absorb water, which means they won’t crack in freezing temperatures, and they’re resistant to UV damage, so they won’t fade in the sun. This all-weather performance made porcelain tiles an ideal choice for my outdoor flooring project.
Installation Considerations While porcelain tiles are an excellent choice for outdoor spaces, I learned that proper installation is key to ensuring their longevity. Because they’re dense and heavy, they require a solid, stable base, such as a concrete slab, to prevent shifting or cracking. Additionally, it’s important to use a high-quality adhesive and grout that are designed for outdoor use. I made sure to work with a professional installer who was experienced with outdoor porcelain tile installations, which gave me peace of mind that the job would be done right.
Combining Different Tile Types for a Unique Outdoor Design
When it came to designing my outdoor space, I didn’t want to limit myself to just one type of tile. Instead, I decided to get creative by combining different tile types to create a unique, personalized design. Mixing and matching tiles allowed me to play with textures, colors, and patterns, resulting in a one-of-a-kind outdoor floor that truly reflects my style.
Mixing Textures and Finishes The first thing I did was experiment with different textures and finishes. For example, I combined smooth porcelain tiles with rough-textured natural stone to create contrast and visual interest. The smooth tiles provided a sleek, modern feel, while the rough stone added a rustic, earthy element. This mix of textures not only made the design more dynamic but also helped define different areas within the space, such as seating areas versus walkways.
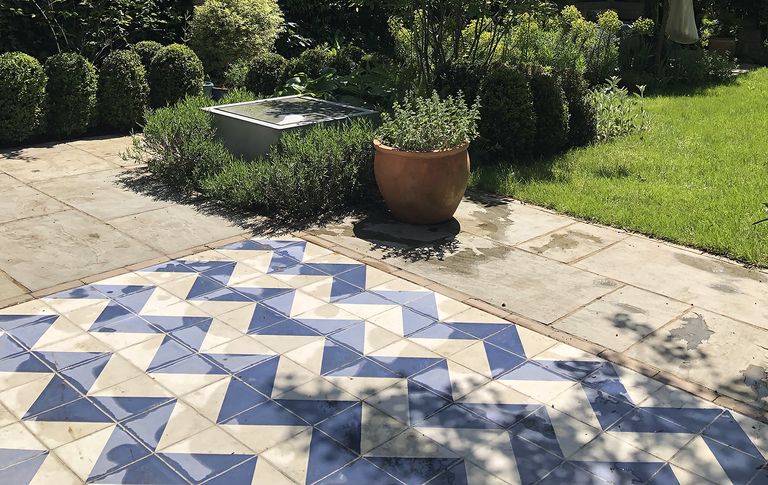
Playing with Color and Pattern Color was another tool I used to enhance my outdoor design. I chose tiles in complementary colors—such as neutral tones with pops of vibrant hues—to create a balanced yet eye-catching floor. For instance, I used a neutral gray porcelain tile as the base and added mosaic tiles in shades of blue and green as accents. These colorful tiles were strategically placed to create patterns that drew the eye and added a playful touch to the design.
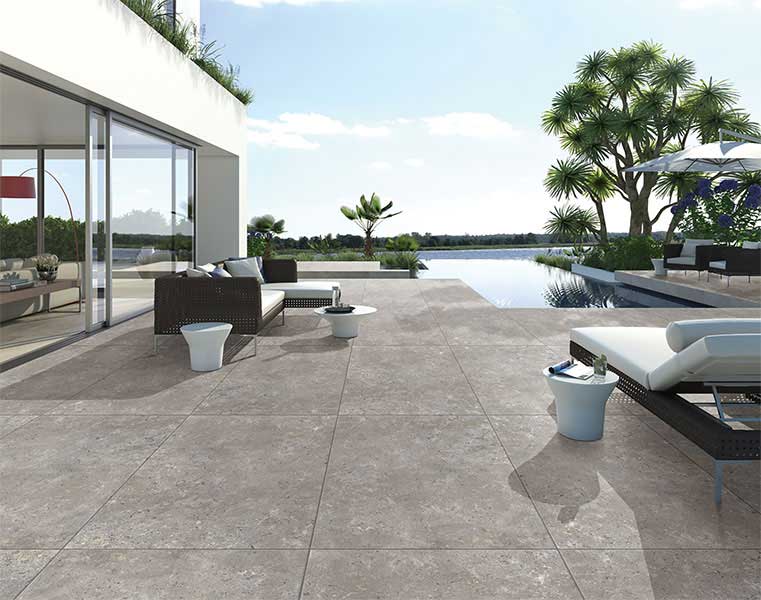
Zoning with Different Tile Types One of the most effective ways I used different tile types was to create distinct zones within my outdoor space. For example, I used large-format stone tiles in the main patio area, which gave it a grand, expansive feel. In contrast, I chose smaller, patterned tiles for a more intimate seating nook, creating a cozy, inviting atmosphere. This zoning not only added functionality to the space but also made it visually interesting by breaking up the monotony of a single tile type.
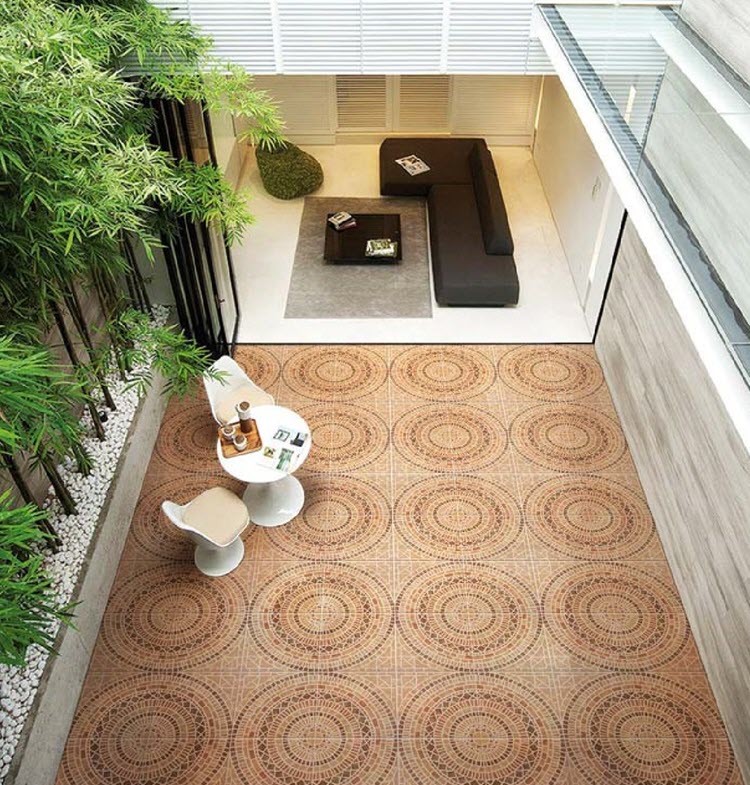
Incorporating Borders and Inlays Borders and inlays became key elements in my design. I used contrasting tiles to create borders around certain areas, such as the edge of the patio or the perimeter of a dining area. Inlays—such as a mosaic medallion in the center of the patio—added a decorative focal point that tied the different elements of the design together. These details elevated the overall look and made the space feel more custom and luxurious.
Combining Tiles with Different Shapes and Sizes Another way I added variety to my outdoor floor was by mixing tiles of different shapes and sizes. I used large rectangular tiles alongside smaller square and hexagonal tiles to create a geometric pattern that was both modern and artistic. This approach allowed me to experiment with scale and proportion, resulting in a floor that was not only functional but also a true work of art.
Practical Considerations for Mixed Tile Designs While combining different tile types can create a stunning design, I also had to consider the practical aspects. It’s important to choose tiles with similar thicknesses to avoid uneven surfaces and tripping hazards. Additionally, I made sure to select tiles that were all suitable for outdoor use and could withstand the local climate. By paying attention to these details, I was able to create a cohesive, beautiful design that’s also safe and durable.
Patio flooring ideas – design for backyards large and small
Outdoor Patio Tiles: 10 Best Ideas The Family Handyman
Best Outdoor Tile Ideas & Designs
Outdoor Slate Floor Tiles – Contemporary – Patio
Best Outdoor Tile Ideas & Designs
Exterior outdoor flooring tile design ideas Modern backyard floor tile designs
Outdoor Flooring & Tile Wayfair
Outdoor Patio Tiles: Best Ideas The Family Handyman
Related Posts:
- Dining Room Tile Floor Designs
- Budget Tile Flooring
- Cheap Tile Flooring Ideas
- Restore Tile Floor Shine
- How To Clean Tile Floors With Bleach
- Traditional Bathroom Tile Floor
- Natural Ceramic Tile Floor Cleaner
- Bedroom Tile Floor Ideas
- Commercial Grade Tile Flooring
- Faux Stone Tile Flooring
Outdoor Tile Flooring Ideas: Transform Your Patio Into a Beautiful Oasis
Outdoor tile flooring is an excellent way to transform your patio into a functional and stylish oasis. With a wide variety of colors, textures, and shapes available, you can easily find the perfect tile to suit any aesthetic. Whether you’re looking for something modern or classic, there are several outdoor tile flooring ideas to choose from.
Subtle Yet Bold: Stone Tile Flooring
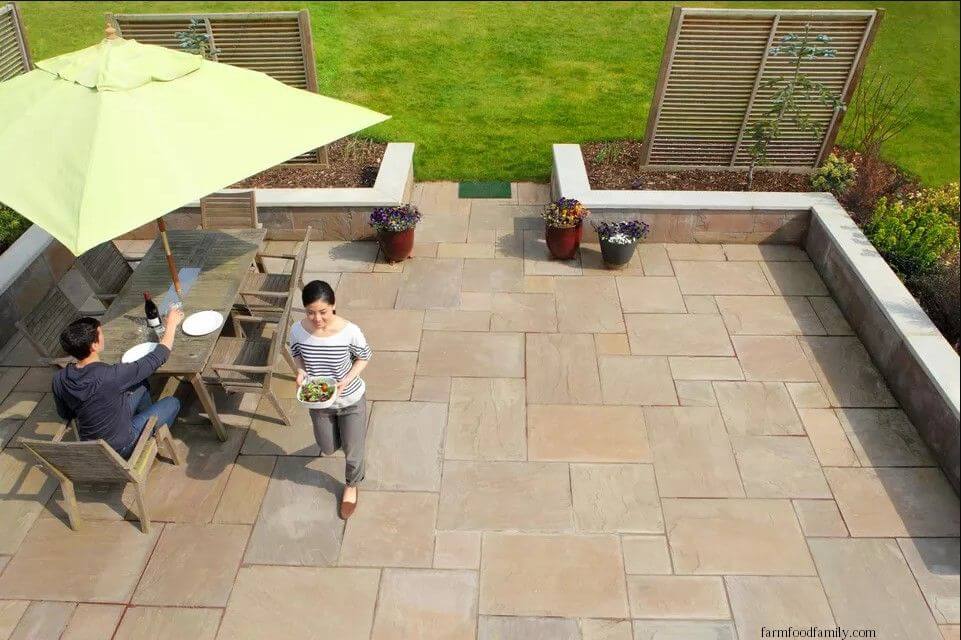
Stone tile flooring is a timeless choice for outdoor spaces. It has a natural look that is subtle yet bold enough to make a statement. You can choose from a range of materials including sandstone, slate, quartzite, limestone, and travertine. Stone tiles are durable and can withstand the elements, so they’re perfect for patios and other outdoor living spaces.
Modern and Sleek: Ceramic Tile Flooring
Ceramic tile flooring is perfect for modern outdoor spaces. With its smooth texture and sleek lines, ceramic tiles add a contemporary touch to any patio. Plus, ceramic tiles come in a wide range of colors and patterns, making it easy to match your outdoor furniture and decor. This type of tile is also very durable and easy to maintain, making it an ideal choice for outdoor spaces.
Bring Color Into Your Space: Porcelain Tile Flooring
Porcelain tile flooring is an excellent option if you want to bring color into your patio. Porcelain tiles come in a variety of hues and shades, so you can easily find one that fits your style. Additionally, porcelain tiles are highly durable and easy to clean, making them a great option for outdoor living areas.
Natural Vibes: Wood Tile Flooring
Wood tile flooring is the perfect choice for those who want to bring natural vibes into their outdoor space. Wood tile flooring looks just like real wood but without the hassle of maintenance or upkeep. Plus, it’s incredibly durable and resistant to moisture, making it ideal for patios and other outdoor areas.
What type of tile is best for outdoor use?
The best type of tile for outdoor use is one that is both durable and stylish. Natural stone tiles such as sandstone, slate, quartzite, limestone, or travertine are all excellent choices as they are highly durable and come in a variety of colors and textures to suit any aesthetic. Ceramic and porcelain tiles are also great options as they are easy to clean and maintain. Wood tiles are also a popular choice for outdoor spaces as they bring natural vibes without the upkeep of real wood.
How do I prepare my patio for outdoor tile flooring?
Preparing your patio for outdoor tile flooring is relatively straightforward. First, you need to make sure your patio surface is even and level. If not, consider using leveling compound or self-leveling concrete before laying down the tiles. Secondly, make sure all existing cracks or gaps in the patio surface are filled before laying down the tiles as this will help ensure the tiles stay in place over time. Finally, ensure the area has been thoroughly cleaned before laying down the tiles to remove any dirt or debris that could interfere with proper adhesion.
How do I maintain my outdoor tile floor?
Maintaining your outdoor tile floor is fairly simple. First, sweep or vacuum regularly to remove any dirt or debris that could build up over time. Secondly, mop with warm water and a mild detergent every few weeks to keep your tiles looking fresh and clean. Finally, check regularly for any cracks or chips in the tile that may need repair or replacement as these can cause tripping hazards over time.

