Sealing the basement floor to wall joint is a crucial step in maintaining the structural integrity and overall health of your basement space. This joint is particularly vulnerable to water intrusion, as it represents the point where the basement floor meets the foundation walls. Failing to properly seal this joint can lead to various issues, such as moisture problems, mold growth, and even structural damage over time. Therefore, it’s essential to understand the significance of this sealing process and the methods involved.
Understanding the Importance of Sealing the Basement Floor to Wall Joint
The basement floor to wall joint is a critical area that requires proper sealing. This joint is where the basement floor meets the basement walls, and if not properly sealed, it can lead to a variety of issues.
One of the main reasons why it is important to seal the basement floor to wall joint is to prevent water infiltration. If water is able to seep into this joint, it can lead to water damage and mold growth. Water can easily find its way into the basement through cracks and gaps in the joint, especially during heavy rainfall or when the ground is saturated. By sealing this joint, you can effectively prevent water from entering the basement, protecting your belongings and preventing costly water damage repairs.
In addition to preventing water infiltration, sealing the basement floor to wall joint also helps to improve energy efficiency. Gaps and cracks in the joint can allow cold air to enter the basement, making it harder to heat and regulate the temperature. By sealing these gaps, you can create a more energy-efficient space and potentially lower your heating and cooling costs.
Furthermore, sealing the basement floor to wall joint helps to prevent the entry of pests and insects. Small cracks and gaps in the joint can provide an entry point for pests such as rodents, ants, and spiders. These pests can cause damage to the basement and potentially spread diseases. By sealing the joint, you can effectively block their entry and create a pest-free environment.
Overall, understanding the importance of sealing the basement floor to wall joint is crucial for maintaining a dry, energy-efficient, and pest-free basement. By investing in proper sealing techniques and materials, you can protect your basement from water damage, improve energy efficiency, and create a more comfortable living space.
Step-by-Step Guide to Effectively Seal the Basement Floor to Wall Joint
Prepare the area: Before starting the sealing process, it is essential to clean and dry the basement floor and wall joint thoroughly. Remove any debris, dirt, or loose material using a broom or vacuum cleaner. This step ensures better adhesion of the sealant.
Choose the right sealant: Select a high-quality sealant suitable for basement applications. Look for sealants specifically designed for concrete or masonry surfaces. It is recommended to use a flexible sealant that can withstand the movement caused by settling or temperature changes.
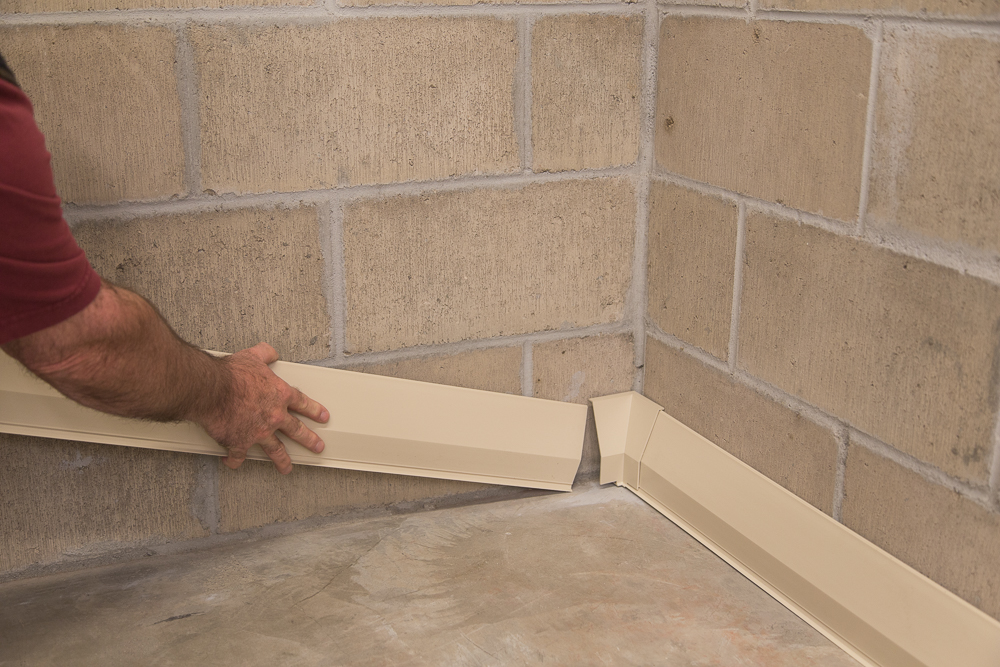
Apply masking tape: To achieve a neat and professional finish, apply masking tape along the edges of the joint. This will prevent the sealant from spreading onto the floor or wall surfaces, ensuring a clean seal.
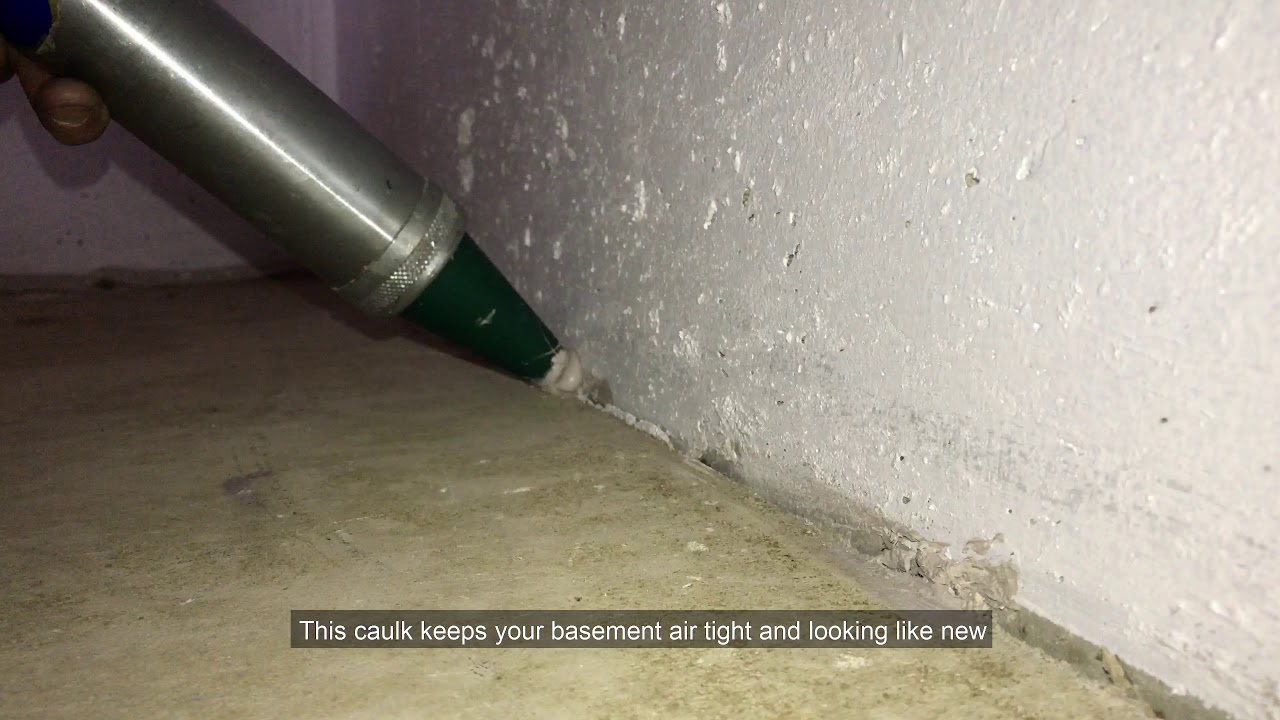
Load the sealant: Load the sealant cartridge into a caulking gun. Cut the tip of the cartridge at a 45-degree angle to create an opening of the desired size. Insert a long nail or wire into the cartridge nozzle to puncture the inner seal.
Start sealing: Begin sealing the basement floor to wall joint by applying a thin bead of sealant along the joint. Hold the caulking gun at a 45-degree angle and apply even pressure to ensure a consistent application. Move slowly and steadily along the joint to achieve a continuous seal.
Smooth the sealant: Once the sealant is applied, use a caulk finishing tool or a wet finger to smooth the sealant. This will create a clean and professional-looking finish. Make sure to remove any excess sealant from the joint and the surrounding surfaces.
Remove the masking tape: Carefully remove the masking tape before the sealant fully cures. Pull the tape away at a 45-degree angle to avoid disturbing the freshly applied sealant. Removing the tape at the right time will leave behind crisp edges and a seamless seal.
Allow curing time: Give the sealant adequate time to cure and dry as per the manufacturer’s instructions. Avoid walking or placing any objects on the sealed joint until it is fully cured. This will ensure the effectiveness and durability of the seal.
Monitor and maintain: Regularly inspect the sealed basement floor to wall joint for any signs of damage or deterioration. Address any cracks or gaps promptly to prevent water leakage or structural issues. Periodically check the sealant for wear and tear and reapply if necessary.
Donu0027t Seal the Gap Between Your Basement Floor u0026 Wall EverDry Toledo
Sealing Basement Floor To Wall Joint
When it comes to home improvement projects, there are few tasks more important than properly sealing the basement floor to wall joint. This is a crucial step in preventing water and other contaminants from entering the basement, which can cause costly damage and lead to health risks. The key to successful sealing of a basement floor to wall joint is understanding the best materials and techniques for the job, and following these steps carefully.
Materials Needed For Sealing
Before beginning any sealing project, it is important to ensure that you have all the necessary materials on hand. For this particular job, you will need a variety of items, including:
– Caulk
– Caulk gun
– Putty knife
– Protective gloves
– A bucket of warm water with mild detergent
– Scrub brush
– Masking tape
– Painter’s tape
– Sandpaper
– A damp cloth or sponge
Preparation for Sealing
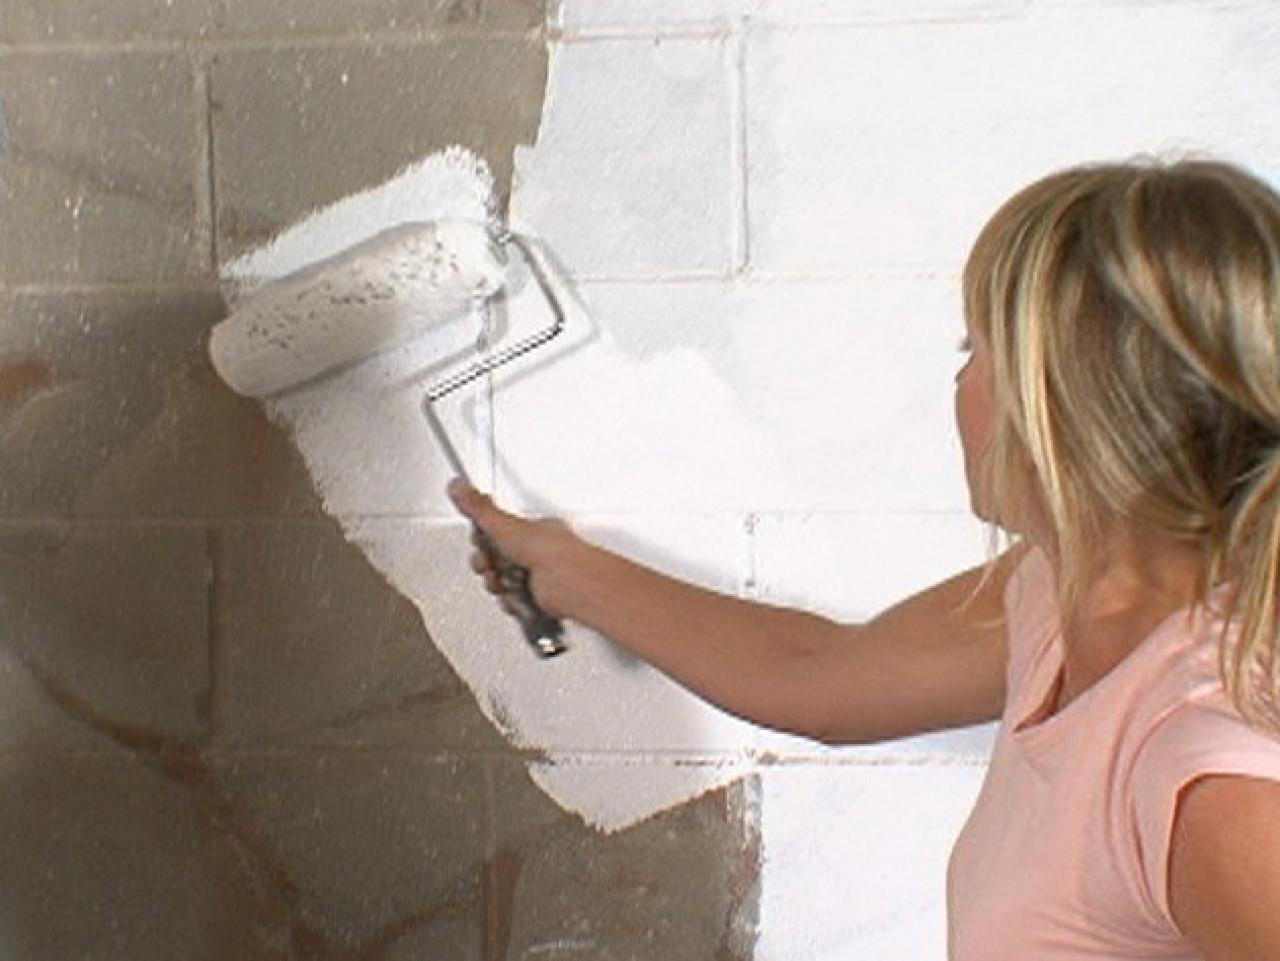
Before any sealant is applied, it is essential to properly prepare the area for sealing. This includes removing any existing sealant from around the joint, as well as cleaning the area thoroughly. Start by using a putty knife to scrape away any old sealant that may be present. You may also need to use sandpaper or a scrub brush to remove any residue or debris. Be sure to wear protective gloves while completing this task. Once the area is clear of debris, clean it with a damp cloth or sponge and a bucket of warm water with mild detergent. This will help remove any dirt or grime that has built up over time, ensuring that the surface is completely clean before applying the sealant.
Applying Sealant To Joint
Once the area is prepped and clean, it is time to apply the sealant. Begin by using masking tape and painter’s tape to protect any nearby surfaces from being affected by the sealant. Then, cut off a section of caulk from the tube, and insert it into a caulk gun. Apply an even bead of caulk around the joint in question, making sure to press down firmly as you go. If necessary, use a damp cloth or sponge to smooth out any rough areas or bumps in the caulk. Finally, allow the sealant to dry overnight before moving on to any other tasks related to this project.
FAQs About Sealing Basement Floor To Wall Joint
Q: How often should I reseal my basement floor to wall joint?
A: The frequency with which you should reseal your basement floor to wall joint depends on several factors, including how much foot traffic goes through your basement and whether or not your walls are exposed to moisture or humidity. Generally speaking, it is recommended that you reseal this joint every three to five years in order to maintain its effectiveness in keeping out water and other contaminants.
Q: What type of sealant should I use for this project?
A: The type of sealant you should use for this project will depend largely on your particular needs and preferences. It is generally recommended that you use a silicone caulk for this job as it is highly durable and long-lasting. However, some people may prefer alternative sealants such as latex or acrylic caulk, depending on their budget and specific needs.
Q: Is there anything I need to do after applying the sealant?
A: After applying the sealant, it is important that you allow it ample time to dry before walking on it or putting anything heavy on top of it. Depending on the type of sealant used, drying time can range anywhere from two hours up to 24 hours. Be sure to read the directions carefully before beginning any work so that you know exactly how long your particular sealant needs in order to dry properly.
We use cookies on our website to give you the most relevant experience by remembering your preferences and repeat visits. By clicking “Accept All”, you consent to the use of ALL the cookies. However, you may visit "Cookie Settings" to provide a controlled consent.
This website uses cookies to improve your experience while you navigate through the website. Out of these, the cookies that are categorized as necessary are stored on your browser as they are essential for the working of basic functionalities of the website. We also use third-party cookies that help us analyze and understand how you use this website. These cookies will be stored in your browser only with your consent. You also have the option to opt-out of these cookies. But opting out of some of these cookies may affect your browsing experience.
Necessary cookies are absolutely essential for the website to function properly. These cookies ensure basic functionalities and security features of the website, anonymously.
Cookie
Duration
Description
cookielawinfo-checkbox-analytics
11 months
This cookie is set by GDPR Cookie Consent plugin. The cookie is used to store the user consent for the cookies in the category "Analytics".
cookielawinfo-checkbox-functional
11 months
The cookie is set by GDPR cookie consent to record the user consent for the cookies in the category "Functional".
cookielawinfo-checkbox-necessary
11 months
This cookie is set by GDPR Cookie Consent plugin. The cookies is used to store the user consent for the cookies in the category "Necessary".
cookielawinfo-checkbox-others
11 months
This cookie is set by GDPR Cookie Consent plugin. The cookie is used to store the user consent for the cookies in the category "Other.
cookielawinfo-checkbox-performance
11 months
This cookie is set by GDPR Cookie Consent plugin. The cookie is used to store the user consent for the cookies in the category "Performance".
viewed_cookie_policy
11 months
The cookie is set by the GDPR Cookie Consent plugin and is used to store whether or not user has consented to the use of cookies. It does not store any personal data.
Functional cookies help to perform certain functionalities like sharing the content of the website on social media platforms, collect feedbacks, and other third-party features.
Performance cookies are used to understand and analyze the key performance indexes of the website which helps in delivering a better user experience for the visitors.
Analytical cookies are used to understand how visitors interact with the website. These cookies help provide information on metrics the number of visitors, bounce rate, traffic source, etc.
Advertisement cookies are used to provide visitors with relevant ads and marketing campaigns. These cookies track visitors across websites and collect information to provide customized ads.


 Related Posts:
Sealing Basement Floor To Wall Joint
When it comes to home improvement projects, there are few tasks more important than properly sealing the basement floor to wall joint. This is a crucial step in preventing water and other contaminants from entering the basement, which can cause costly damage and lead to health risks. The key to successful sealing of a basement floor to wall joint is understanding the best materials and techniques for the job, and following these steps carefully.
Materials Needed For Sealing
Before beginning any sealing project, it is important to ensure that you have all the necessary materials on hand. For this particular job, you will need a variety of items, including:
– Caulk
– Caulk gun
– Putty knife
– Protective gloves
– A bucket of warm water with mild detergent
– Scrub brush
– Masking tape
– Painter’s tape
– Sandpaper
– A damp cloth or sponge
Preparation for Sealing
Before any sealant is applied, it is essential to properly prepare the area for sealing. This includes removing any existing sealant from around the joint, as well as cleaning the area thoroughly. Start by using a putty knife to scrape away any old sealant that may be present. You may also need to use sandpaper or a scrub brush to remove any residue or debris. Be sure to wear protective gloves while completing this task. Once the area is clear of debris, clean it with a damp cloth or sponge and a bucket of warm water with mild detergent. This will help remove any dirt or grime that has built up over time, ensuring that the surface is completely clean before applying the sealant.
Applying Sealant To Joint
Once the area is prepped and clean, it is time to apply the sealant. Begin by using masking tape and painter’s tape to protect any nearby surfaces from being affected by the sealant. Then, cut off a section of caulk from the tube, and insert it into a caulk gun. Apply an even bead of caulk around the joint in question, making sure to press down firmly as you go. If necessary, use a damp cloth or sponge to smooth out any rough areas or bumps in the caulk. Finally, allow the sealant to dry overnight before moving on to any other tasks related to this project.
FAQs About Sealing Basement Floor To Wall Joint
Q: How often should I reseal my basement floor to wall joint?
A: The frequency with which you should reseal your basement floor to wall joint depends on several factors, including how much foot traffic goes through your basement and whether or not your walls are exposed to moisture or humidity. Generally speaking, it is recommended that you reseal this joint every three to five years in order to maintain its effectiveness in keeping out water and other contaminants.
Q: What type of sealant should I use for this project?
A: The type of sealant you should use for this project will depend largely on your particular needs and preferences. It is generally recommended that you use a silicone caulk for this job as it is highly durable and long-lasting. However, some people may prefer alternative sealants such as latex or acrylic caulk, depending on their budget and specific needs.
Q: Is there anything I need to do after applying the sealant?
A: After applying the sealant, it is important that you allow it ample time to dry before walking on it or putting anything heavy on top of it. Depending on the type of sealant used, drying time can range anywhere from two hours up to 24 hours. Be sure to read the directions carefully before beginning any work so that you know exactly how long your particular sealant needs in order to dry properly.
Related Posts:
Sealing Basement Floor To Wall Joint
When it comes to home improvement projects, there are few tasks more important than properly sealing the basement floor to wall joint. This is a crucial step in preventing water and other contaminants from entering the basement, which can cause costly damage and lead to health risks. The key to successful sealing of a basement floor to wall joint is understanding the best materials and techniques for the job, and following these steps carefully.
Materials Needed For Sealing
Before beginning any sealing project, it is important to ensure that you have all the necessary materials on hand. For this particular job, you will need a variety of items, including:
– Caulk
– Caulk gun
– Putty knife
– Protective gloves
– A bucket of warm water with mild detergent
– Scrub brush
– Masking tape
– Painter’s tape
– Sandpaper
– A damp cloth or sponge
Preparation for Sealing
Before any sealant is applied, it is essential to properly prepare the area for sealing. This includes removing any existing sealant from around the joint, as well as cleaning the area thoroughly. Start by using a putty knife to scrape away any old sealant that may be present. You may also need to use sandpaper or a scrub brush to remove any residue or debris. Be sure to wear protective gloves while completing this task. Once the area is clear of debris, clean it with a damp cloth or sponge and a bucket of warm water with mild detergent. This will help remove any dirt or grime that has built up over time, ensuring that the surface is completely clean before applying the sealant.
Applying Sealant To Joint
Once the area is prepped and clean, it is time to apply the sealant. Begin by using masking tape and painter’s tape to protect any nearby surfaces from being affected by the sealant. Then, cut off a section of caulk from the tube, and insert it into a caulk gun. Apply an even bead of caulk around the joint in question, making sure to press down firmly as you go. If necessary, use a damp cloth or sponge to smooth out any rough areas or bumps in the caulk. Finally, allow the sealant to dry overnight before moving on to any other tasks related to this project.
FAQs About Sealing Basement Floor To Wall Joint
Q: How often should I reseal my basement floor to wall joint?
A: The frequency with which you should reseal your basement floor to wall joint depends on several factors, including how much foot traffic goes through your basement and whether or not your walls are exposed to moisture or humidity. Generally speaking, it is recommended that you reseal this joint every three to five years in order to maintain its effectiveness in keeping out water and other contaminants.
Q: What type of sealant should I use for this project?
A: The type of sealant you should use for this project will depend largely on your particular needs and preferences. It is generally recommended that you use a silicone caulk for this job as it is highly durable and long-lasting. However, some people may prefer alternative sealants such as latex or acrylic caulk, depending on their budget and specific needs.
Q: Is there anything I need to do after applying the sealant?
A: After applying the sealant, it is important that you allow it ample time to dry before walking on it or putting anything heavy on top of it. Depending on the type of sealant used, drying time can range anywhere from two hours up to 24 hours. Be sure to read the directions carefully before beginning any work so that you know exactly how long your particular sealant needs in order to dry properly.