Benefits of Using Stencils for Tile Floors
Versatility: Stencils offer a wide range of designs and patterns that can be used to create unique and personalized tile floors. Whether you prefer a geometric pattern, floral design, or intricate motif, stencils provide endless possibilities for customization.
Cost-effective: Redoing an entire tile floor can be expensive, especially if you opt for high-quality tiles. Stencils offer a cost-effective alternative by allowing you to transform your existing tiles into a brand-new design without the need for replacement. This can save you a significant amount of money while still achieving a fresh and updated look.
Easy to use: Stencils are designed to be user-friendly, even for those with limited artistic skills. With clear and precise guidelines, anyone can achieve professional-looking results. Simply secure the stencil in place, apply the paint, and remove the stencil to reveal the intricate design. It’s a straightforward process that anyone can master.
Time-saving: Painting a stencil design onto your tile floor is a relatively quick process compared to other methods of floor customization. Once you have chosen your stencil design and gathered the necessary supplies, you can complete the project in a matter of hours, depending on the size of the area. This makes stenciling a great option for those who want to update their tile floors without investing a significant amount of time.
Easy to maintain: Stenciled tile floors are surprisingly durable and easy to maintain. Once the paint has dried and cured, it becomes resistant to water, stains, and everyday wear and tear. Regular cleaning with a mild detergent is usually sufficient to keep the floor looking its best. Additionally, in the event of any damage or wear, it is easy to touch up or re-stencil the affected areas without the need for extensive repairs or replacement.

How to Choose the Right Stencil for Your Tile Floor
When it comes to transforming your tile floor, using stencils can be a cost-effective and creative solution. However, with so many stencil options available, it can be overwhelming to choose the right one for your specific needs. This section will guide you through the process of selecting the perfect stencil for your tile floor.
Consider the Tile Size:
The first step in choosing the right stencil is to consider the size of your tiles. Stencils are available in various sizes, so it is important to select one that matches the dimensions of your tiles. This will ensure that the stencil pattern fits perfectly and creates a cohesive look on your floor.
Determine the Design:
Next, think about the design you want to achieve on your tile floor. Stencils come in a wide range of designs, from simple geometric patterns to intricate floral motifs. Consider the overall style and theme of your space to select a stencil design that complements your existing decor.
Evaluate the Material:
Stencils for tile floors are typically made from either plastic or mylar. Plastic stencils are more affordable and suitable for one-time or occasional use. On the other hand, mylar stencils are more durable and can be reused multiple times, making them a better choice if you plan to stencil multiple areas or if you want to keep the stencil for future projects.
Assess the Complexity:
The complexity of the stencil pattern should also be considered. If you are new to stenciling or prefer a simple design, opt for stencils with larger and fewer elements. These stencils are easier to work with and require less time and effort to achieve a satisfactory result. However, if you are experienced or looking for a more intricate design, select stencils with smaller and more detailed elements.
Read Reviews and Recommendations:
Before making a final decision, it is helpful to read reviews and recommendations from other homeowners or professionals who have used the stencils you are considering. This can provide valuable insights into the quality, ease of use, and overall satisfaction of a particular stencil brand or design.
Test the Stencil:
If possible, it is recommended to test the stencil on a small area of your tile floor before committing to the entire project. This will allow you to assess how the stencil pattern looks on your specific tiles and ensure that you are satisfied with the result before dedicating time and effort to stencil the entire floor.
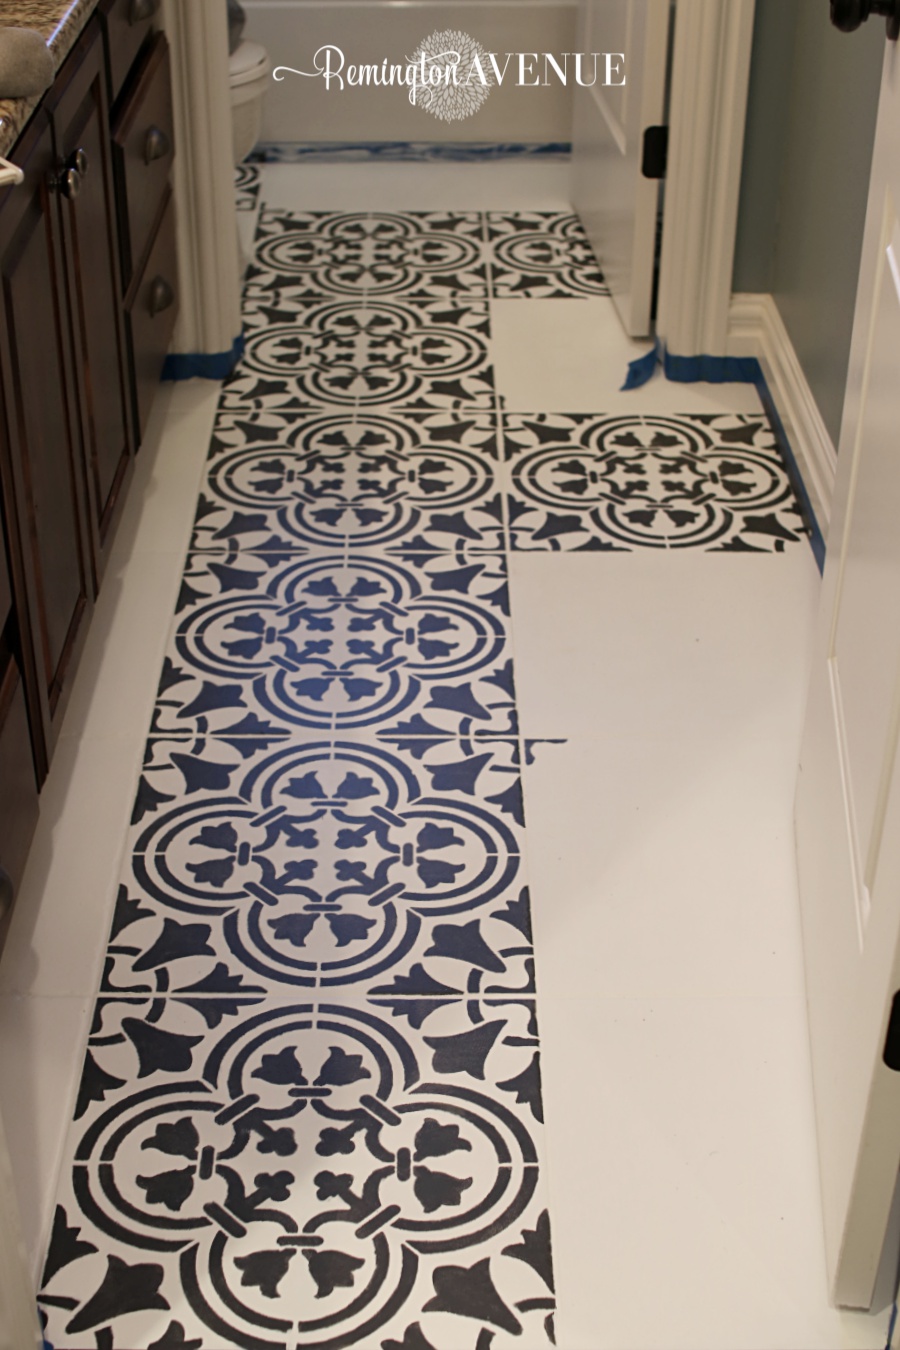
Step-by-Step Guide to Stenciling Your Tile Floor
1. Gather Materials: Before beginning the stenciling process, it is important to gather all the necessary materials. This includes stencils for tile floors, painter’s tape, stencil adhesive, a stencil brush, a foam roller, paint, and a tray for the paint.
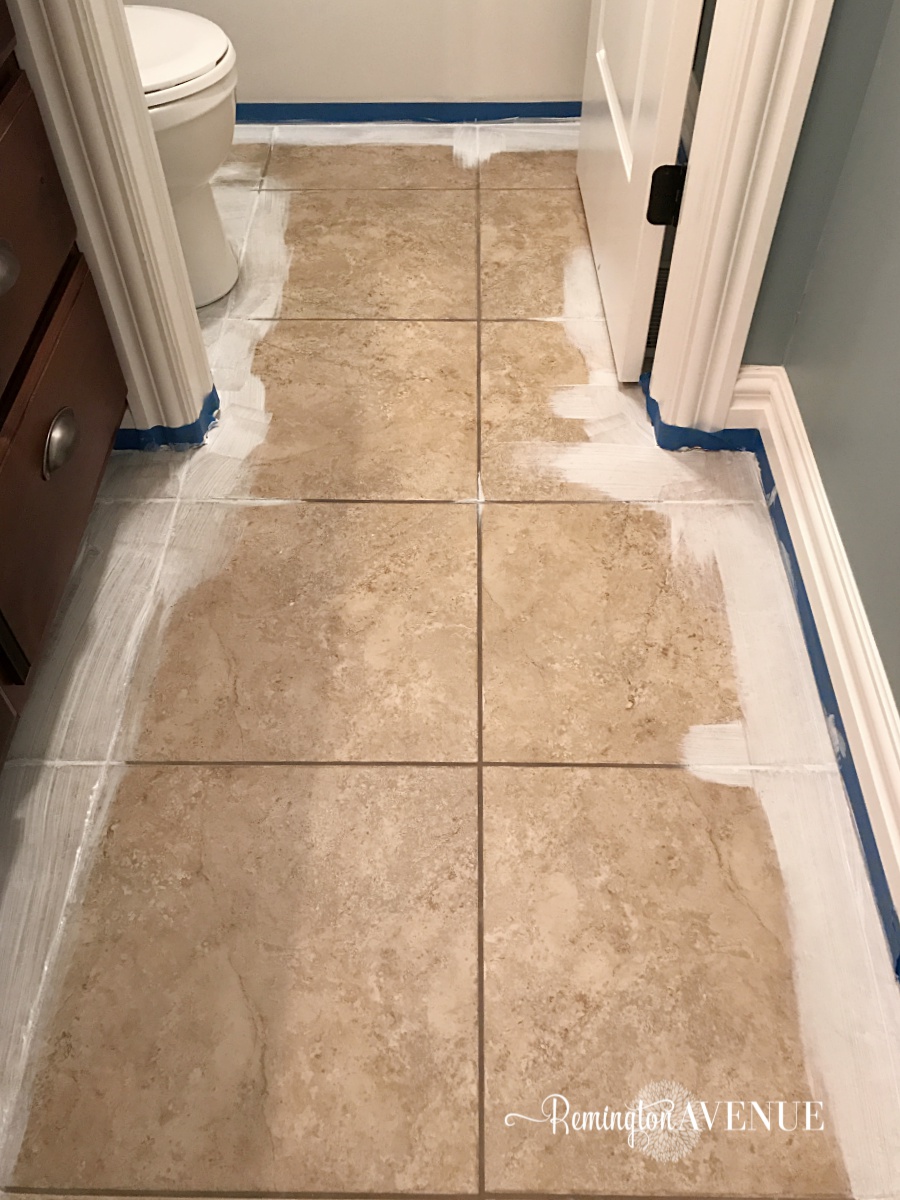
2. Clean and Prepare the Tile Floor: Thoroughly clean the tile floor to remove any dirt, dust, or grease. This will ensure that the stencils adhere properly to the surface. Use a mild cleaning solution and a mop or cloth to clean the floor. Allow the floor to dry completely before moving on to the next step.
3. Choose the Stencil Design: Select a stencil design that complements your desired aesthetic. There are various stencil designs available for tile floors, ranging from intricate patterns to simple geometric shapes. Consider the size of the stencil in relation to the size of your tiles for the best results.
4. Secure the Stencil: Use painter’s tape to secure the stencil onto the tile floor. Make sure it is positioned correctly and tightly secured to prevent any shifting during the painting process. For added stability, apply stencil adhesive to the back of the stencil before attaching it to the floor.
5. Apply Paint: Pour a small amount of paint into a tray and load the stencil brush or foam roller with paint. Start by gently dabbing or rolling the paint onto the stencil, ensuring an even and consistent application. Be careful not to apply too much pressure or paint, as this can cause bleed-through or smudging.
6. Remove the Stencil: Once the paint has dried for a few minutes, carefully remove the stencil from the tile floor. Peel it off slowly and evenly to avoid any smearing or smudging of the paint. If using multiple stencils to create a pattern, repeat steps 4 to 6 for each stencil.
7. Let the Paint Dry: Allow the paint to dry completely before walking on or placing any objects on the stenciled tile floor. This will prevent any accidental smudging or damage to the design. Refer to the paint manufacturer’s instructions for the recommended drying time.
8. Seal the Design (Optional): For added durability and protection, consider applying a sealant or clear coat over the stenciled design. This will help to prevent chipping, fading, or peeling of the paint over time. Follow the instructions provided with the sealant product for proper application.
Creative Ideas and Designs for Stenciled Tile Floors
Stencils for tile floors offer a cost-effective and creative way to transform any space. Whether you want to add a touch of personality to your kitchen, bathroom, or any other room, stenciled tile floors can be the perfect solution. This section explores various creative ideas and designs that can be achieved using stencils, allowing you to elevate the aesthetic appeal of your floors.
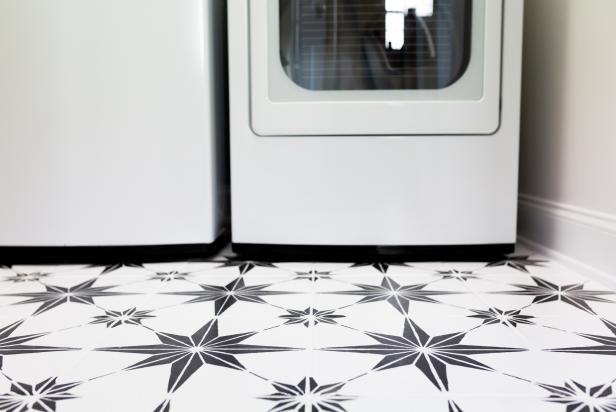
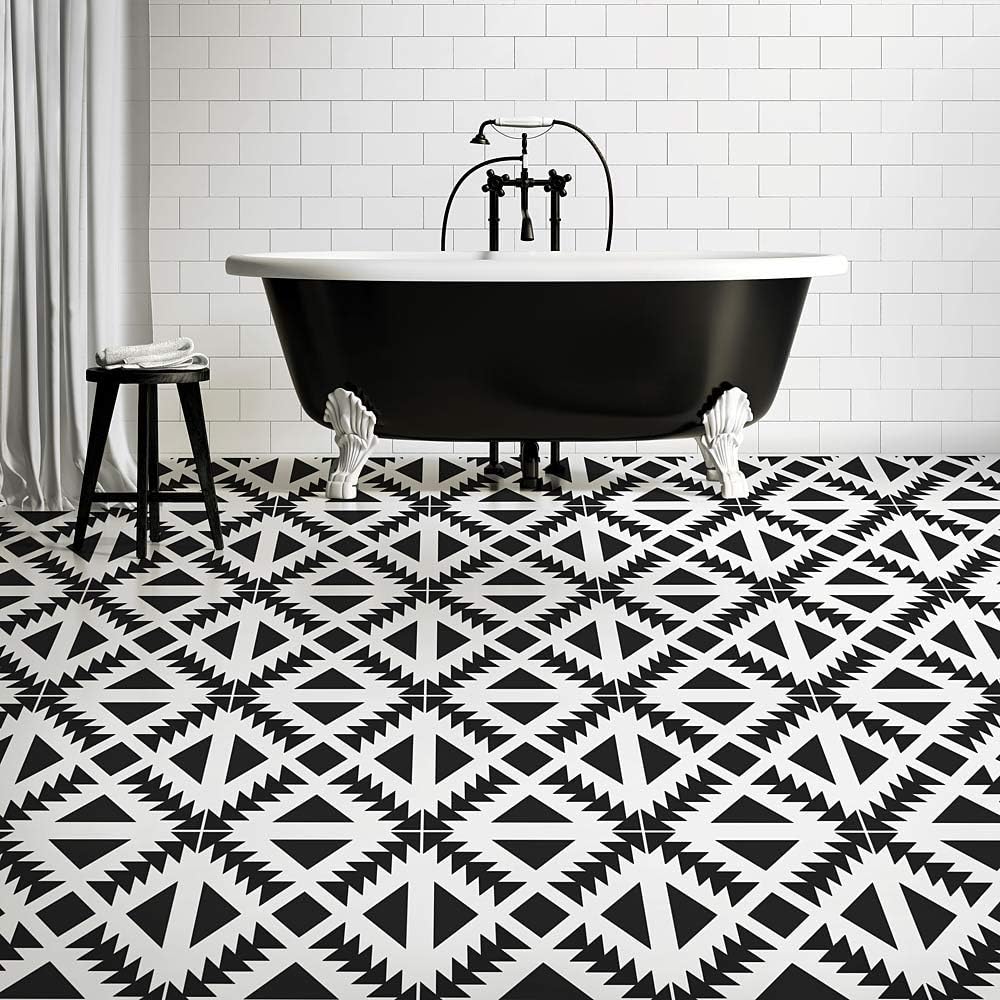
Geometric Patterns
If you’re looking to create a modern and stylish look, geometric patterns are an excellent choice. Stencils allow you to easily achieve precise lines and shapes, ensuring a professional finish. Consider using stencils to create intricate geometric patterns, such as herringbone, chevron, or Moroccan-inspired designs. These patterns can add depth and visual interest to your tile floors, making them a focal point of the room.
Floral and Nature-inspired Designs
For a more whimsical and organic feel, floral and nature-inspired designs are ideal. Stencils can help you create beautiful floral motifs, leaves, or even delicate vines that can be scattered or arranged in a repeating pattern. Whether you prefer a subtle and minimalist approach or a bold and vibrant look, stenciled floral designs can bring a touch of nature indoors and create a serene atmosphere.
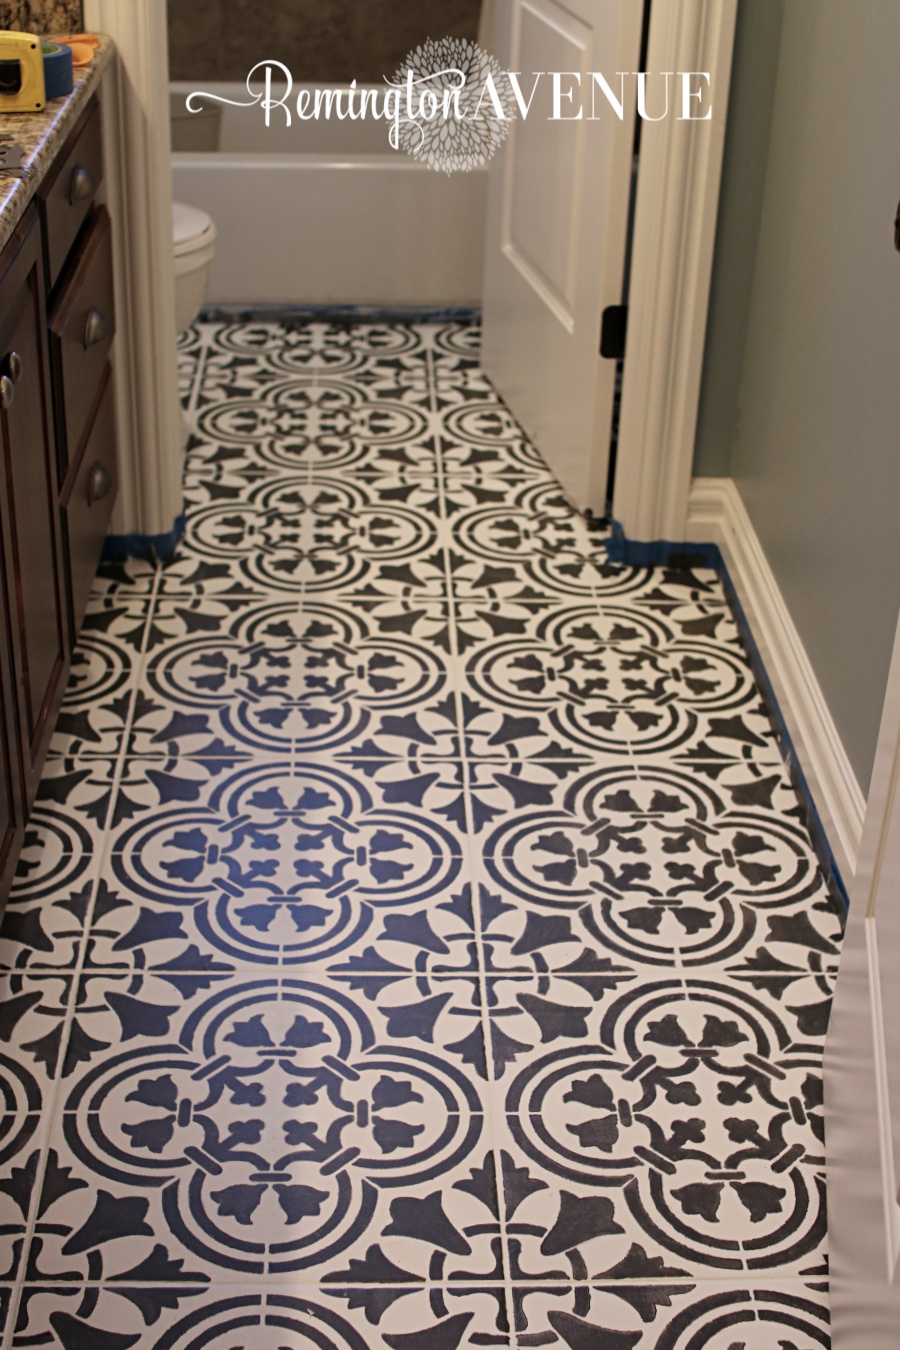
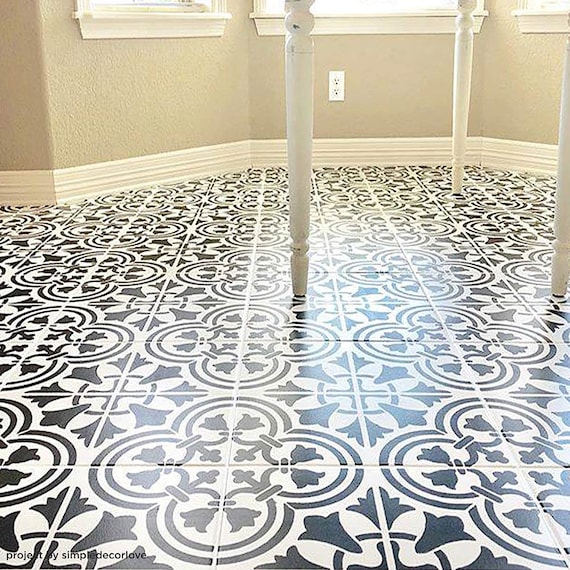
Mediterranean and Moroccan Influences
If you’re a fan of Mediterranean or Moroccan aesthetics, stenciled tile floors can help you achieve that exotic look. Stencils featuring intricate patterns and motifs inspired by these cultures can instantly transport you to a different world. Consider using stencils to create a Moroccan-inspired mosaic design, or opt for Mediterranean-inspired patterns like quatrefoil or arabesque. These designs will add a touch of timeless elegance and cultural richness to your space.
Custom Designs and Personalization
One of the greatest advantages of stencils for tile floors is the ability to create custom designs and personalize your space. Whether you want to incorporate your initials, a favorite quote, or a unique pattern, stencils can help you achieve a one-of-a-kind look. With the vast array of stencil designs available, or even by creating your own, you can add a personal touch and infuse your space with your own creativity.

How to Paint u0026 Stencil Tile – Remington Avenue
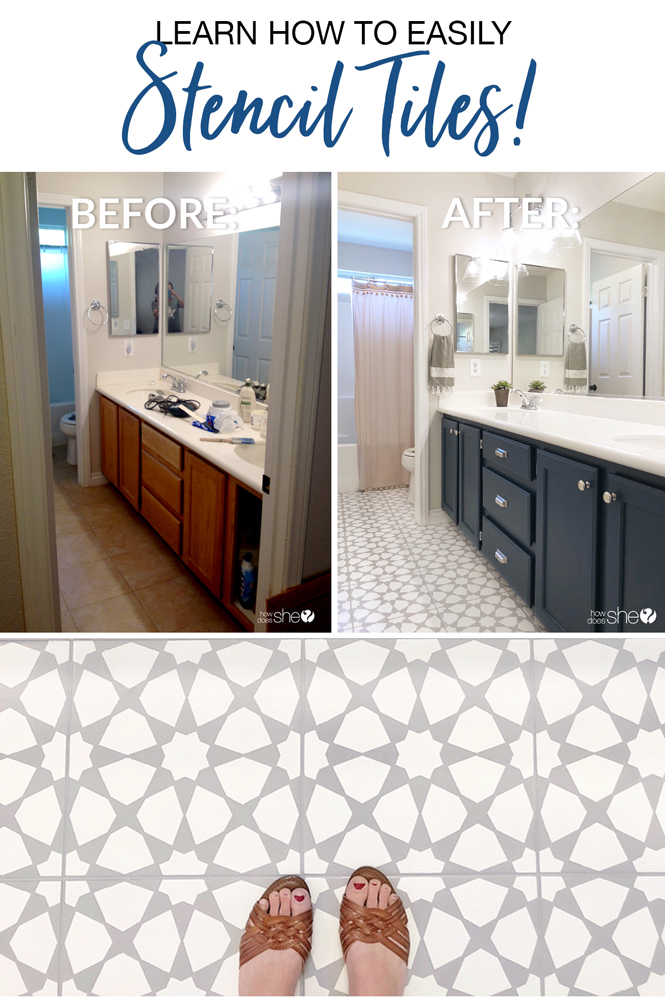
Learn How To Easily Stencil Floor Tiles! How Does She
How to Stencil a Tile Floor in 10 Steps – Kitchen u0026 Bathroom Floor

Aztec Tile Stencil – Tile Stencils for Painting Tile Floor – Reusable Tile Stencils for Linoleum and Cement Floors
Palladium Tile Stencil

Augusta Tile Stencil Large Stencil Tile Stencils for Etsy
Pin on Stenciled u0026 Painted Floors

How To Stencil Tile u2014 Lauren Koster Creative

DIY Painted Tile Floor with Stencil – Bathroom Makeover with Paint

How to Paint u0026 Stencil Tile – Remington Avenue
Related Posts: