Vinyl floor coverings have become a popular choice for kitchens due to their durability, affordability, and aesthetic versatility. This article will discuss various aspects of vinyl flooring for kitchens, providing detailed insights into why it’s an excellent choice, how to select the right type, installation tips, maintenance strategies, and addressing common concerns. By the end of this article, you will have a thorough understanding of vinyl floor coverings and be equipped to make informed decisions for your kitchen flooring project.
Why Choose Vinyl Floor Covering for Your Kitchen?
Durability and Longevity
Vinyl flooring is renowned for its durability, making it a suitable option for high-traffic areas such as kitchens. Vinyl is resistant to scratches, stains, and dents, which are common in busy kitchens. The top layer of vinyl, often referred to as the wear layer, protects against daily wear and tear. Modern vinyl floors can last up to 20 years with proper care, making them a cost-effective long-term solution.
Additionally, vinyl flooring is water-resistant, which is a crucial feature for kitchen environments prone to spills and splashes. Some luxury vinyl options offer waterproof capabilities, ensuring that moisture does not seep through and damage the subfloor. This feature not only enhances the longevity of the floor but also prevents the growth of mold and mildew.
Aesthetic Variety
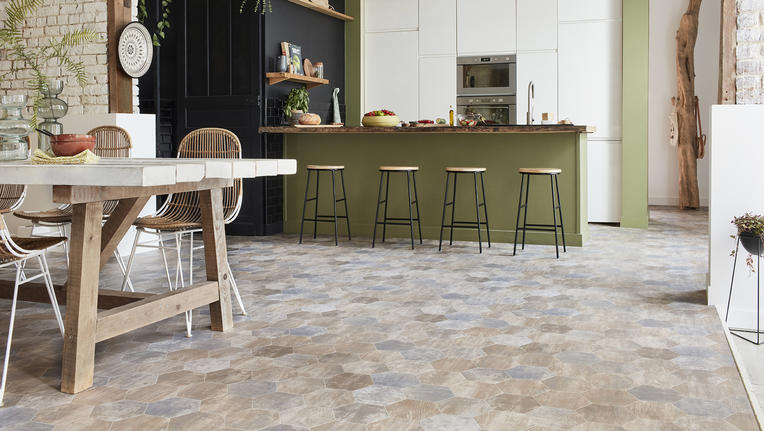
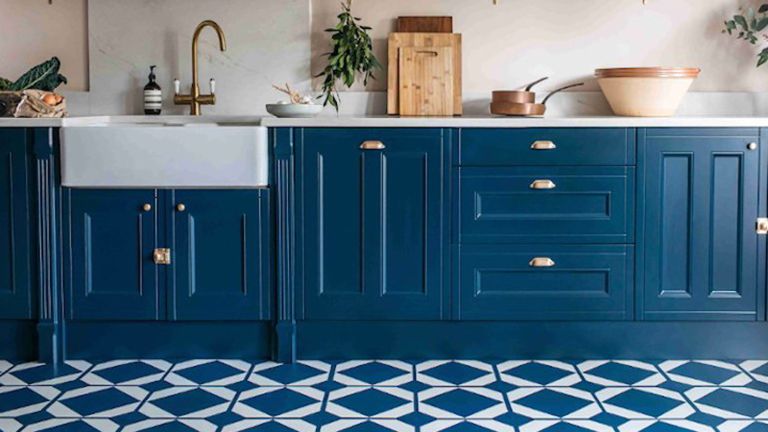
One of the significant advantages of vinyl flooring is its aesthetic versatility. Vinyl is available in a wide range of colors, patterns, and textures, allowing homeowners to achieve virtually any look they desire. From mimicking the appearance of natural wood and stone to showcasing bold, contemporary designs, vinyl flooring can complement any kitchen decor.
Manufacturers utilize advanced printing techniques to create realistic visuals on vinyl planks and tiles. This technology has evolved to the point where it can replicate intricate details and textures, providing an authentic look and feel. This variety ensures that there is a vinyl option suitable for every style preference and design vision.
Affordability
Compared to other flooring options, vinyl is relatively affordable. It offers the look of high-end materials such as hardwood and stone without the associated costs. Vinyl flooring comes in different price ranges, allowing homeowners to choose options that fit their budget without compromising on quality.
Furthermore, the installation costs of vinyl flooring are typically lower than those of other materials. Vinyl can often be installed over existing floors, reducing the need for extensive preparation and demolition. This makes vinyl an attractive choice for those looking to renovate their kitchens without breaking the bank.
Comfort and Safety
Vinyl flooring provides a comfortable surface to stand on, which is essential for kitchens where people spend a lot of time cooking and cleaning. The softness of vinyl reduces fatigue and strain on the feet and back. Some vinyl floors have additional cushioning layers, enhancing comfort further.
Safety is another critical consideration, and vinyl flooring delivers in this aspect as well. Many vinyl options come with slip-resistant surfaces, reducing the risk of accidents in a kitchen environment where spills are common. The water-resistant nature of vinyl also contributes to a safer kitchen by preventing water damage that could lead to structural issues.
Easy Maintenance
Vinyl flooring is easy to clean and maintain, making it ideal for kitchens. Regular sweeping and occasional mopping are usually sufficient to keep the floor looking its best. Unlike natural wood or stone, vinyl does not require special cleaners or treatments. This ease of maintenance saves time and effort, allowing homeowners to focus on other tasks.
Spills and stains can be easily wiped away without leaving permanent marks, thanks to the protective wear layer. Additionally, vinyl is resistant to most household chemicals, so cleaning agents will not damage the surface. This low-maintenance aspect makes vinyl flooring a practical choice for busy households.

Types of Vinyl Flooring for Kitchens
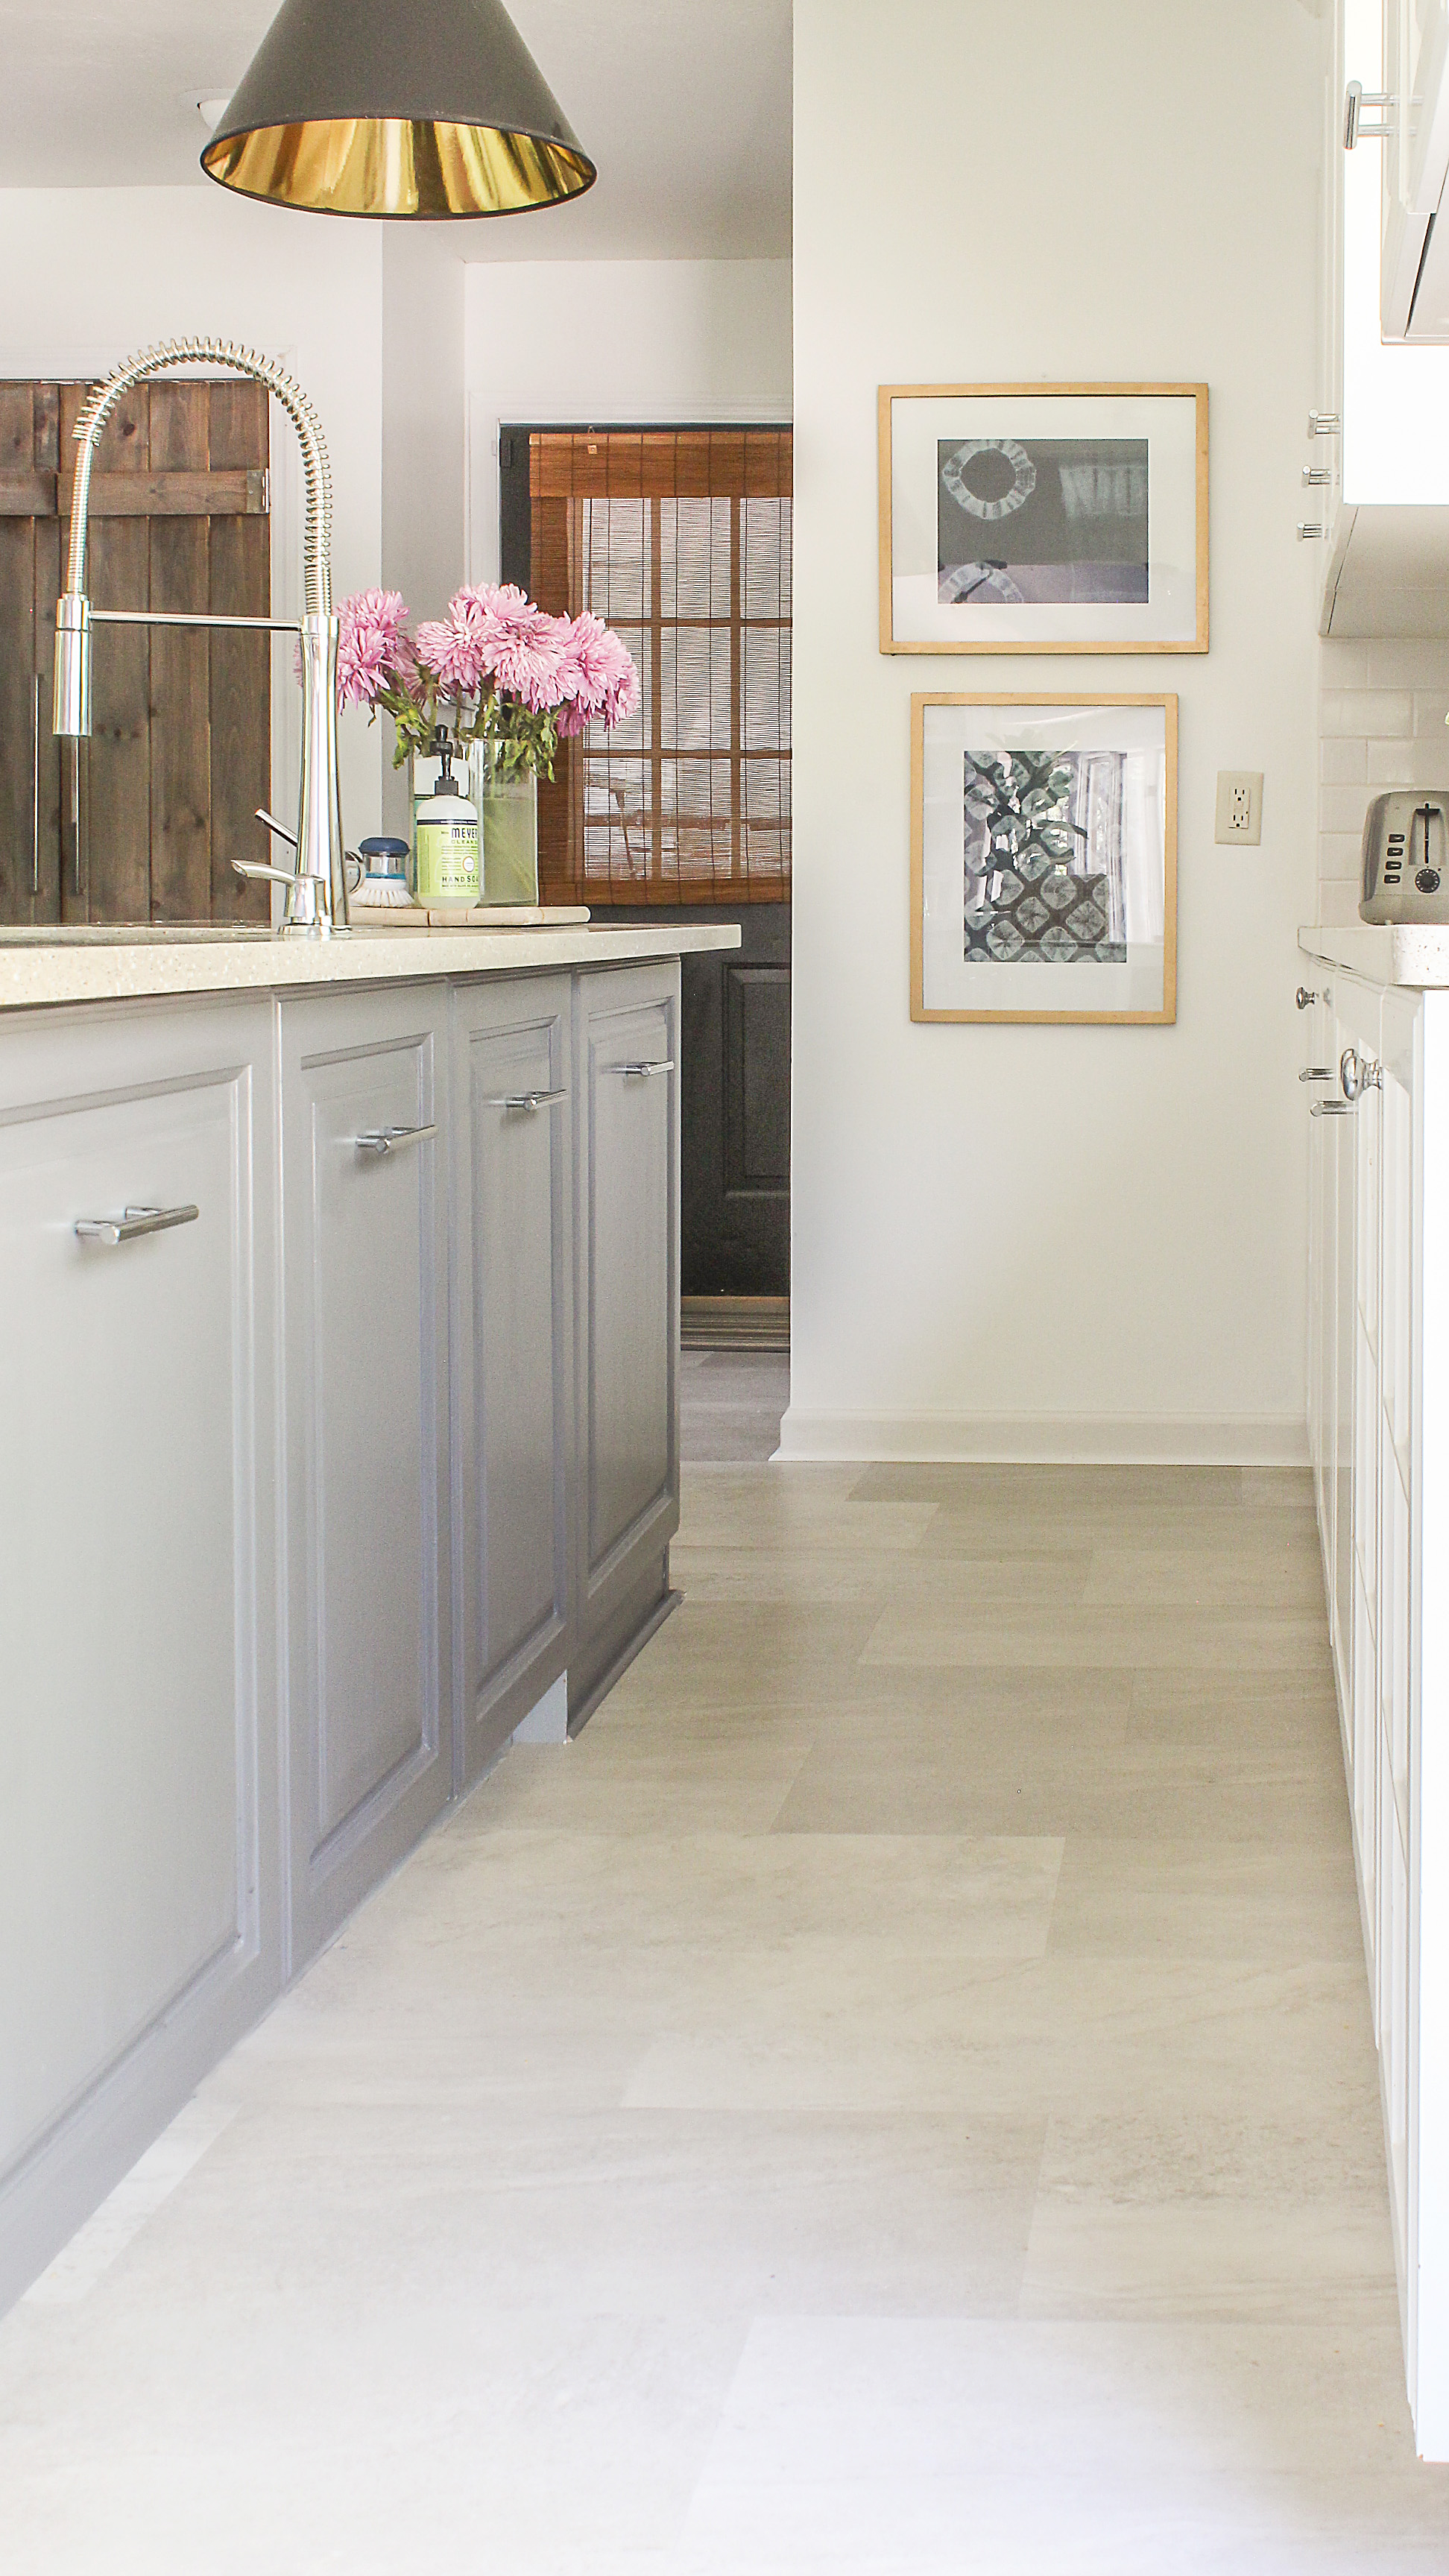
Vinyl Plank Flooring
Vinyl plank flooring is designed to mimic the look of hardwood. It comes in long, narrow strips that resemble wooden planks. This type of vinyl flooring is popular for kitchens because it combines the aesthetic appeal of wood with the durability and water resistance of vinyl.
Vinyl planks are available in various styles, including different wood species, colors, and textures. This variety allows homeowners to choose a look that matches their kitchen decor. The installation process for vinyl planks is straightforward, often utilizing a click-lock system that makes it a suitable DIY project.
One of the key benefits of vinyl plank flooring is its ability to withstand moisture. Unlike natural wood, vinyl planks do not warp or swell when exposed to water. This makes them an excellent choice for kitchens, where spills and splashes are inevitable. Additionally, vinyl planks are easy to clean, requiring only regular sweeping and occasional mopping.
Vinyl planks are also known for their comfort underfoot. They provide a softer surface compared to natural wood, which can help reduce fatigue during long cooking sessions. Some vinyl planks come with an additional cushioning layer, enhancing comfort and sound absorption.
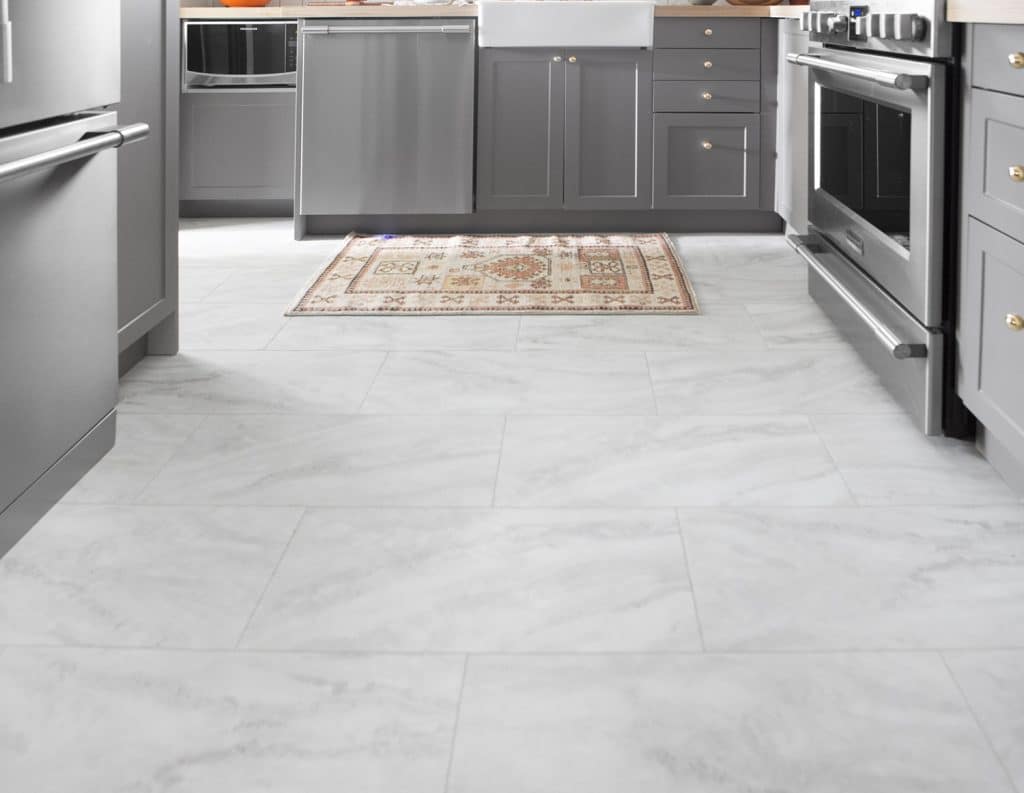
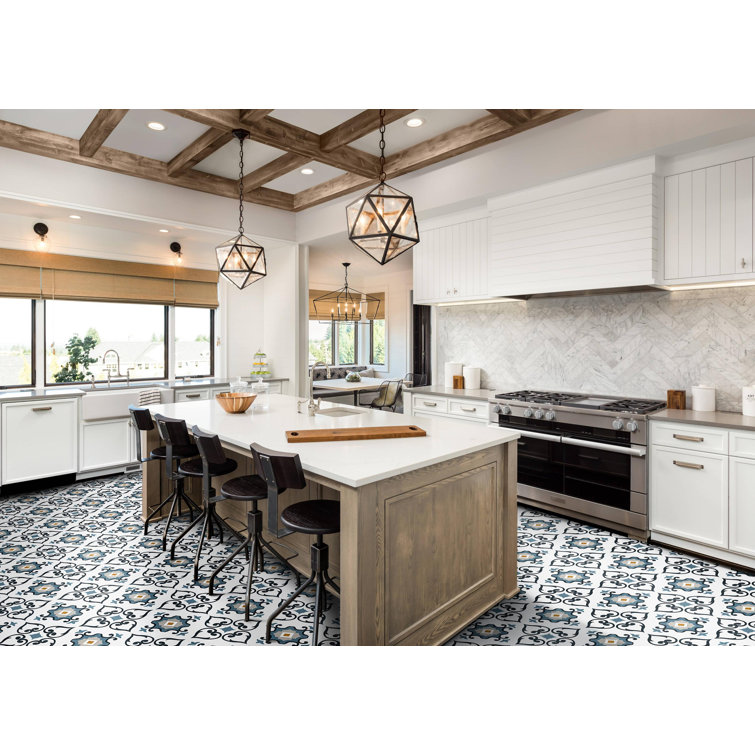
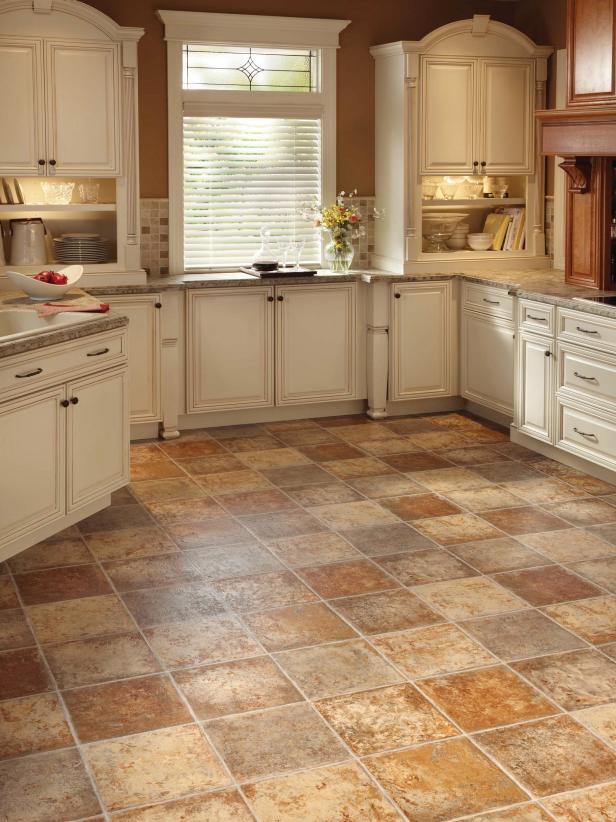
Vinyl Tile Flooring
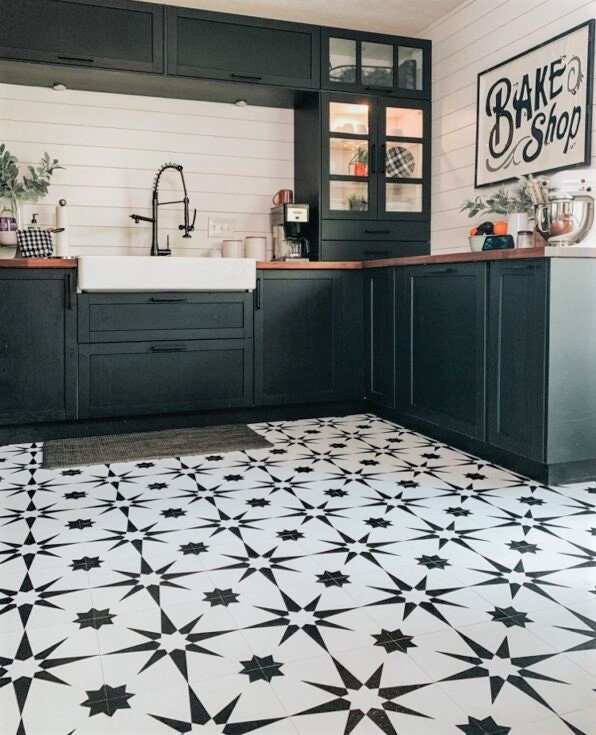
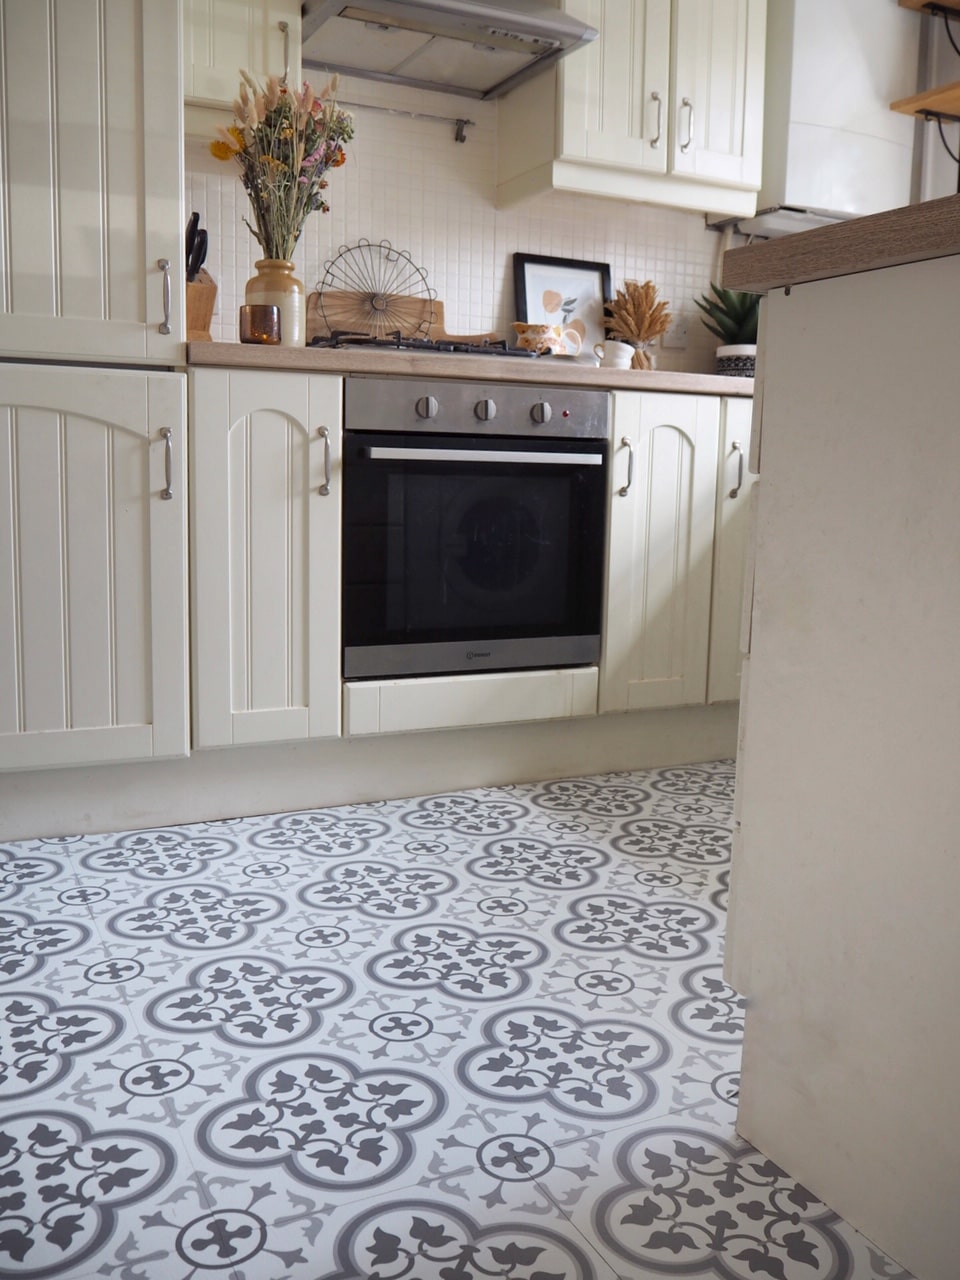
Vinyl tile flooring is another popular option for kitchens. These tiles come in various sizes and can mimic the look of ceramic or stone tiles. Vinyl tiles offer a versatile and customizable flooring solution, allowing for creative patterns and designs.
One of the advantages of vinyl tile flooring is its ease of installation. The tiles can be installed using adhesive or a click-lock system, making it possible for homeowners to undertake the project themselves. Vinyl tiles are also easy to replace, so if a tile gets damaged, it can be swapped out without affecting the entire floor.
Vinyl tiles are highly durable and resistant to stains, scratches, and moisture. This makes them ideal for the kitchen environment, where heavy foot traffic and spills are common. The tiles’ water resistance ensures that they do not absorb moisture, preventing damage and mold growth.
Vinyl tile flooring is also known for its comfort and safety features. The tiles provide a cushioned surface that is more forgiving on the feet and joints compared to harder materials like ceramic or stone. Many vinyl tiles come with slip-resistant surfaces, enhancing safety in the kitchen.
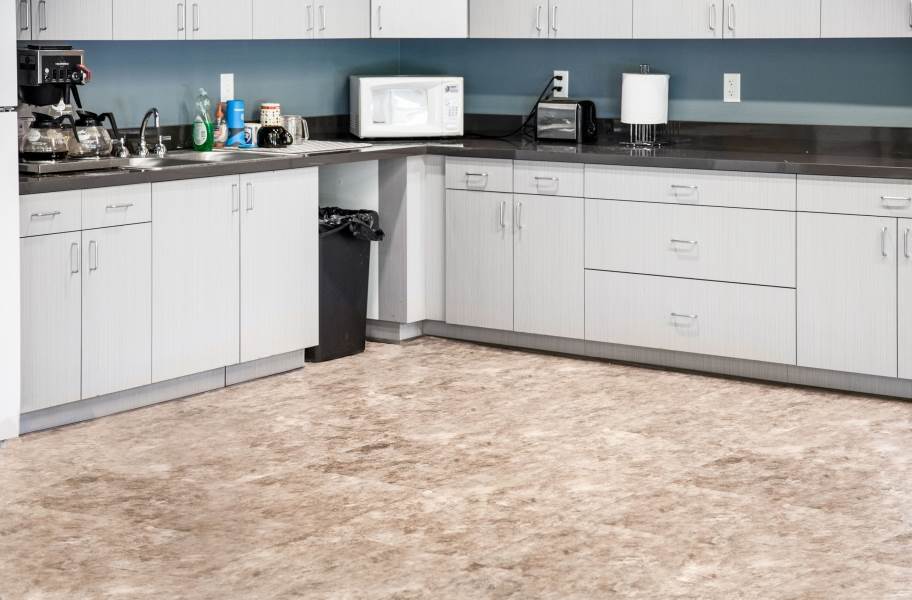
Sheet Vinyl Flooring
Sheet vinyl flooring is available in large, continuous rolls, making it an excellent choice for kitchens where a seamless look is desired. This type of vinyl flooring is often used in commercial kitchens due to its durability and ease of maintenance.
One of the main advantages of sheet vinyl is its ability to cover large areas without seams. This creates a smooth, uniform surface that is easy to clean and maintain. The absence of seams also means there are fewer places for dirt and moisture to accumulate, enhancing hygiene in the kitchen.
Sheet vinyl is highly durable and resistant to scratches, stains, and moisture. It is available in various designs, including patterns that mimic natural materials like wood and stone. This variety allows homeowners to achieve the look they want without the drawbacks of natural materials.
The installation of sheet vinyl can be more challenging than other types of vinyl flooring due to its size and weight. Professional installation is often recommended to ensure a smooth, even finish. Once installed, sheet vinyl requires minimal maintenance, making it a practical choice for busy kitchens.
Luxury Vinyl Flooring
Luxury vinyl flooring (LVF) is a high-end option that combines the best features of vinyl planks and tiles. LVF is designed to provide a premium look and feel, with enhanced durability and water resistance. This type of flooring is ideal for homeowners who want a high-quality, long-lasting solution for their kitchen.
LVF is available in both plank and tile formats, offering a wide range of design options. It can mimic the appearance of natural materials with remarkable realism, thanks to advanced printing and embossing techniques. This allows homeowners to achieve a luxurious look without the high cost and maintenance associated with natural materials.
One of the key benefits of LVF is its durability. It features a thicker wear layer than standard vinyl, providing enhanced resistance to scratches, stains, and moisture. LVF is also more comfortable underfoot, with some options offering additional cushioning layers for improved comfort and sound absorption.
The installation of LVF is similar to that of vinyl planks and tiles, with click-lock systems being the most common. This makes it a suitable option for DIY projects. LVF is also easy to maintain, requiring only regular sweeping and occasional mopping to keep it looking its best.
Self-Adhesive Vinyl Flooring
Self-adhesive vinyl flooring, also known as peel-and-stick vinyl, is an easy-to-install option that is ideal for DIY enthusiasts. This type of flooring comes with an adhesive backing that allows the tiles or planks to be easily applied to the subfloor.
One of the main advantages of self-adhesive vinyl flooring is its simplicity. The peel-and-stick installation process eliminates the need for additional adhesives or tools, making it a straightforward project for homeowners. This ease of installation also means that damaged tiles or planks can be quickly replaced without affecting the rest of the floor.
Self-adhesive vinyl flooring is available in various designs, including options that mimic natural materials. This variety allows homeowners to achieve a stylish look in their kitchen without the complexity of traditional flooring installation methods.
While self-adhesive vinyl flooring is not as durable as luxury vinyl, it still offers good resistance to moisture, stains, and scratches. This makes it a practical choice for kitchens, where spills and heavy foot traffic are common. Regular maintenance involves sweeping and mopping to keep the floor clean and looking its best.
![]()
Installation Tips for Vinyl Flooring in Kitchens
Preparing the Subfloor
Proper preparation of the subfloor is crucial for the successful installation of vinyl flooring. The subfloor should be clean, dry, and level to ensure a smooth and even finish. Any debris, dust, or grease on the subfloor can interfere with the adhesive and affect the installation process.
Start by thoroughly cleaning the subfloor to remove any dirt or debris. Use a vacuum or broom to ensure that the surface is free of dust and particles. If there are any stains or spills, clean them with a suitable cleaner and allow the subfloor to dry completely before proceeding with the installation.
Next, check the level of the subfloor. Use a spirit level to identify any uneven areas. If the subfloor is not level, you may need to use a self-leveling compound to create a smooth, even surface. This step is particularly important for sheet vinyl and luxury vinyl installations, where a flat subfloor is essential for a professional finish.
Finally, ensure that the subfloor is dry. Moisture can cause vinyl flooring to warp or peel, so it is essential to check for any signs of dampness. Use a moisture meter to measure the moisture levels in the subfloor. If the levels are too high, address the source of the moisture and allow the subfloor to dry completely before installing the vinyl flooring.
Choosing the Right Adhesive
The choice of adhesive is critical for the successful installation of vinyl flooring. Different types of vinyl flooring require specific adhesives, so it is essential to select the right one for your project. Manufacturers usually provide recommendations for the appropriate adhesive to use with their products.
For self-adhesive vinyl flooring, the adhesive is already applied to the back of the tiles or planks, so no additional adhesive is needed. Simply peel off the backing paper and press the tiles or planks onto the subfloor. Ensure that the surface is clean and dry before applying the self-adhesive vinyl.
For other types of vinyl flooring, such as sheet vinyl and luxury vinyl, you will need to use a suitable adhesive. There are different types of adhesives available, including pressure-sensitive adhesives, which allow for some repositioning of the vinyl during installation, and permanent adhesives, which provide a strong, long-lasting bond.
Apply the adhesive according to the manufacturer’s instructions, using a notched trowel to spread it evenly over the subfloor. Allow the adhesive to set for the recommended time before laying the vinyl flooring. This step is crucial to ensure a strong bond and prevent the vinyl from shifting or lifting over time.
Cutting and Fitting Vinyl Flooring
Accurate cutting and fitting of vinyl flooring are essential for achieving a professional finish. Measure the area of the kitchen carefully to determine the amount of vinyl flooring needed. Add an extra 5-10% to account for waste and cuts.
Use a utility knife and a straightedge to cut the vinyl flooring to the required size and shape. For sheet vinyl, roll out the material and make precise cuts to fit around cabinets, appliances, and other obstacles. For vinyl planks or tiles, measure and mark the pieces that need to be cut and use a utility knife to make clean, straight cuts.
When fitting the vinyl flooring, start from one corner of the kitchen and work your way across the room. Lay the pieces tightly together, ensuring there are no gaps or overlaps. For click-lock vinyl planks, ensure that the seams are properly aligned and locked in place. For sheet vinyl, use a roller to smooth out any air bubbles and ensure a flat, even surface.
Take extra care when fitting vinyl flooring around obstacles such as cabinets and appliances. Use templates or cardboard cutouts to create accurate patterns for cutting the vinyl. This step will help ensure a precise fit and a seamless appearance.
Sealing the Edges
Sealing the edges of vinyl flooring is essential to prevent water and dirt from seeping underneath. This step is particularly important in kitchens, where spills and splashes are common. Use a high-quality sealant or caulk to seal the edges around the perimeter of the room and along the seams.
Apply the sealant evenly, using a caulking gun to create a smooth, continuous bead. Pay special attention to areas where the vinyl flooring meets walls, cabinets, and appliances. Use a damp cloth or your finger to smooth out the sealant and create a neat, professional finish.
Sealing the edges of vinyl flooring not only enhances its water resistance but also helps to prevent dirt and debris from accumulating underneath. This step contributes to the overall durability and longevity of the floor, ensuring that it remains in good condition for years to come.
Allowing for Expansion and Contraction
Vinyl flooring can expand and contract with changes in temperature and humidity. It is essential to allow for this movement during installation to prevent buckling or gaps. Most manufacturers recommend leaving a small expansion gap around the perimeter of the room to accommodate this movement.
Use spacers to create a consistent gap between the edges of the vinyl flooring and the walls. This gap will be covered by baseboards or moldings after the installation is complete. Ensure that the gap is wide enough to allow for expansion but not so wide that it affects the appearance of the floor.
If installing vinyl planks or tiles with a click-lock system, follow the manufacturer’s guidelines for expansion and contraction. Some systems are designed to accommodate movement within the locking mechanism, while others may require additional expansion gaps.
By allowing for expansion and contraction, you can ensure that your vinyl flooring remains stable and secure, even with changes in temperature and humidity. This step is essential for maintaining the integrity and appearance of the floor over time.
Maintaining Your Vinyl Kitchen Floor
Regular Cleaning
Regular cleaning is essential to maintain the appearance and longevity of vinyl kitchen floors. A consistent cleaning routine helps prevent dirt, dust, and grime from accumulating on the surface, keeping the floor looking its best.
Start by sweeping or vacuuming the floor regularly to remove loose dirt and debris. Use a soft-bristle broom or a vacuum with a hard floor attachment to avoid scratching the vinyl surface. Pay special attention to corners and edges where dirt can accumulate.
For more thorough cleaning, use a damp mop with a mild, pH-neutral cleaner specifically designed for vinyl floors. Avoid using abrasive cleaners or harsh chemicals, as these can damage the vinyl surface. Mop the floor in sections, ensuring that the mop is wrung out well to prevent excess water from sitting on the floor.
Spills should be wiped up immediately to prevent staining and water damage. Use a soft cloth or paper towel to blot the spill, and then clean the area with a damp cloth and a mild cleaner. For stubborn stains, use a non-abrasive sponge and a gentle scrubbing motion.
Preventing Scratches and Scuffs
Preventing scratches and scuffs is crucial for maintaining the appearance of vinyl flooring. While vinyl is resistant to minor damage, heavy furniture, sharp objects, and abrasive materials can cause scratches and scuffs.
Place felt pads or furniture coasters under the legs of chairs, tables, and other heavy furniture to prevent them from scratching the floor. When moving furniture, lift it rather than dragging it across the floor. This will help avoid gouges and scratches that can mar the vinyl surface.
Use area rugs or mats in high-traffic areas, such as near the sink and stove, to protect the floor from wear and tear. Choose rugs with non-slip backing to prevent them from sliding and causing accidents. Avoid using rugs with rubber backing, as they can cause discoloration on vinyl floors.
Keep pet nails trimmed to prevent them from scratching the floor. Encourage pets to use designated scratching posts and pads to minimize damage to the flooring. Additionally, avoid walking on vinyl floors with high heels or shoes with sharp edges that can cause scratches.
Dealing with Stains and Spills
Dealing with stains and spills promptly is essential to keep vinyl kitchen floors looking clean and new. While vinyl is resistant to most stains, certain substances can cause discoloration if not addressed quickly.
For liquid spills, blot the area with a clean, absorbent cloth or paper towel to remove as much liquid as possible. Avoid rubbing the spill, as this can spread the liquid and cause it to penetrate the vinyl surface. After blotting, clean the area with a damp cloth and a mild cleaner.
For food stains, use a soft cloth or sponge with a mild cleaner to gently scrub the affected area. Avoid using abrasive pads or brushes, as these can scratch the vinyl surface. For stubborn stains, a mixture of water and baking soda can be used to create a gentle abrasive paste. Apply the paste to the stain and scrub lightly before rinsing with water.
For oil or grease stains, use a soft cloth or sponge with mild dish soap to break down the grease. Rinse the area with water and dry it with a clean cloth. Avoid using solvents or harsh chemicals, as these can damage the vinyl surface.
Protecting Against Sunlight
Prolonged exposure to direct sunlight can cause vinyl flooring to fade and discolor over time. Protecting your vinyl kitchen floor from sunlight is essential to maintain its appearance and prevent premature aging.
Use window treatments such as blinds, curtains, or shades to block direct sunlight from entering the kitchen. Close the blinds or curtains during peak sunlight hours to minimize exposure. Consider using UV-protective film on windows to reduce the amount of harmful UV rays that can penetrate and damage the floor.
Rearrange furniture and rugs periodically to ensure that the entire floor receives even exposure to sunlight. This will help prevent uneven fading and discoloration. Additionally, using area rugs and mats in areas that receive direct sunlight can provide extra protection for the vinyl flooring.
Periodic Deep Cleaning
Periodic deep cleaning is essential to maintain the cleanliness and appearance of vinyl kitchen floors. While regular cleaning helps keep the surface clean, deep cleaning addresses dirt and grime that can accumulate over time.
To deep clean vinyl floors, start by sweeping or vacuuming to remove loose dirt and debris. Use a damp mop with a vinyl-specific cleaner or a mixture of water and white vinegar to clean the floor thoroughly. Mop in sections, ensuring that the mop is wrung out well to prevent excess water from sitting on the floor.
For stubborn dirt and grime, use a soft brush or non-abrasive scrub pad to scrub the affected areas gently. Avoid using abrasive pads or brushes, as these can scratch the vinyl surface. Rinse the floor with clean water and dry with a soft cloth or mop to prevent water spots and streaks.
Periodically, consider using a commercial vinyl floor cleaner or polish to restore the floor’s shine and protect the surface. Follow the manufacturer’s instructions for application and use products specifically designed for vinyl flooring to avoid damage.
Common Mistakes to Avoid
Skipping Subfloor Preparation
One of the most common mistakes when installing vinyl flooring is skipping proper subfloor preparation. A clean, dry, and level subfloor is essential for a successful installation. Failing to prepare the subfloor can result in uneven surfaces, poor adhesion, and reduced durability of the vinyl flooring.
Before installing vinyl flooring, thoroughly clean the subfloor to remove any dirt, dust, or debris. Check for any signs of moisture and allow the subfloor to dry completely. Address any uneven areas by using a self-leveling compound to create a smooth, flat surface.
Using the Wrong Adhesive
Using the wrong adhesive can lead to installation issues and reduce the longevity of vinyl flooring. Different types of vinyl flooring require specific adhesives, so it is crucial to follow the manufacturer’s recommendations. Using the wrong adhesive can result in poor adhesion, causing the vinyl to lift or shift over time.
For self-adhesive vinyl flooring, no additional adhesive is needed. For other types of vinyl flooring, use a suitable adhesive that matches the manufacturer’s specifications. Apply the adhesive evenly and allow it to set for the recommended time before laying the vinyl flooring.
Incorrect Cutting and Fitting
Incorrect cutting and fitting can lead to visible gaps, uneven edges, and an unprofessional finish. Accurate measurements and precise cuts are essential to ensure that the vinyl flooring fits properly and looks seamless.
Measure the area carefully and add extra material to account for waste and cuts. Use a utility knife and a straightedge to make clean, precise cuts. Take extra care when fitting vinyl around obstacles such as cabinets and appliances to ensure a perfect fit.

Ignoring Expansion and Contraction
Ignoring the expansion and contraction properties of vinyl flooring can result in buckling or gaps. Vinyl flooring can expand and contract with changes in temperature and humidity, so it is essential to allow for this movement during installation.
Leave a small expansion gap around the perimeter of the room to accommodate movement. Use spacers to create a consistent gap and cover it with baseboards or moldings after installation. Follow the manufacturer’s guidelines for expansion and contraction to ensure the floor remains stable and secure.
Neglecting Maintenance
Neglecting maintenance can lead to a buildup of dirt, stains, and damage, reducing the lifespan and appearance of vinyl flooring. Regular cleaning and periodic deep cleaning are essential to keep vinyl floors looking their best and ensure their longevity.
Sweep or vacuum the floor regularly to remove loose dirt and debris. Clean spills promptly to prevent staining and water damage. Use a damp mop with a mild, pH-neutral cleaner for regular cleaning, and avoid abrasive cleaners or harsh chemicals. Periodically deep clean the floor to address dirt and grime that can accumulate over time.
Is Vinyl Flooring Suitable for Kitchens?
Yes, vinyl flooring is an excellent choice for kitchens due to its durability, water resistance, and easy maintenance. Vinyl is resistant to scratches, stains, and moisture, making it ideal for high-traffic areas like kitchens. It is also available in various designs, allowing homeowners to achieve the desired look without compromising on functionality.
How Long Does Vinyl Flooring Last in a Kitchen?
Vinyl flooring can last up to 20 years with proper care and maintenance. The longevity of vinyl flooring depends on factors such as the quality of the material, the installation process, and the level of foot traffic. Regular cleaning, preventing scratches, and addressing spills promptly can help extend the life of vinyl flooring in a kitchen.
Can I Install Vinyl Flooring Myself?
Yes, vinyl flooring is relatively easy to install, making it a suitable project for DIY enthusiasts. Self-adhesive vinyl flooring, in particular, is straightforward to install with a peel-and-stick process. For other types of vinyl flooring, proper subfloor preparation, accurate cutting and fitting, and following the manufacturer’s guidelines can help ensure a successful DIY installation.
How Do I Clean and Maintain Vinyl Kitchen Floors?
Cleaning and maintaining vinyl kitchen floors involve regular sweeping or vacuuming to remove loose dirt and debris, and damp mopping with a mild, pH-neutral cleaner for more thorough cleaning. Promptly wipe up spills to prevent staining, and use area rugs or mats in high-traffic areas to protect the floor. Periodically deep clean the floor and avoid using abrasive cleaners or harsh chemicals.
Are There Any Disadvantages to Vinyl Flooring in Kitchens?
While vinyl flooring offers many benefits, there are some disadvantages to consider. Vinyl can be prone to fading with prolonged exposure to direct sunlight, and it may not have the same high-end appearance as natural materials like hardwood or stone. Additionally, vinyl flooring can be susceptible to dents from heavy objects, and lower-quality vinyl may not be as durable as higher-end options. However, these drawbacks can be mitigated with proper care and by choosing high-quality vinyl flooring.
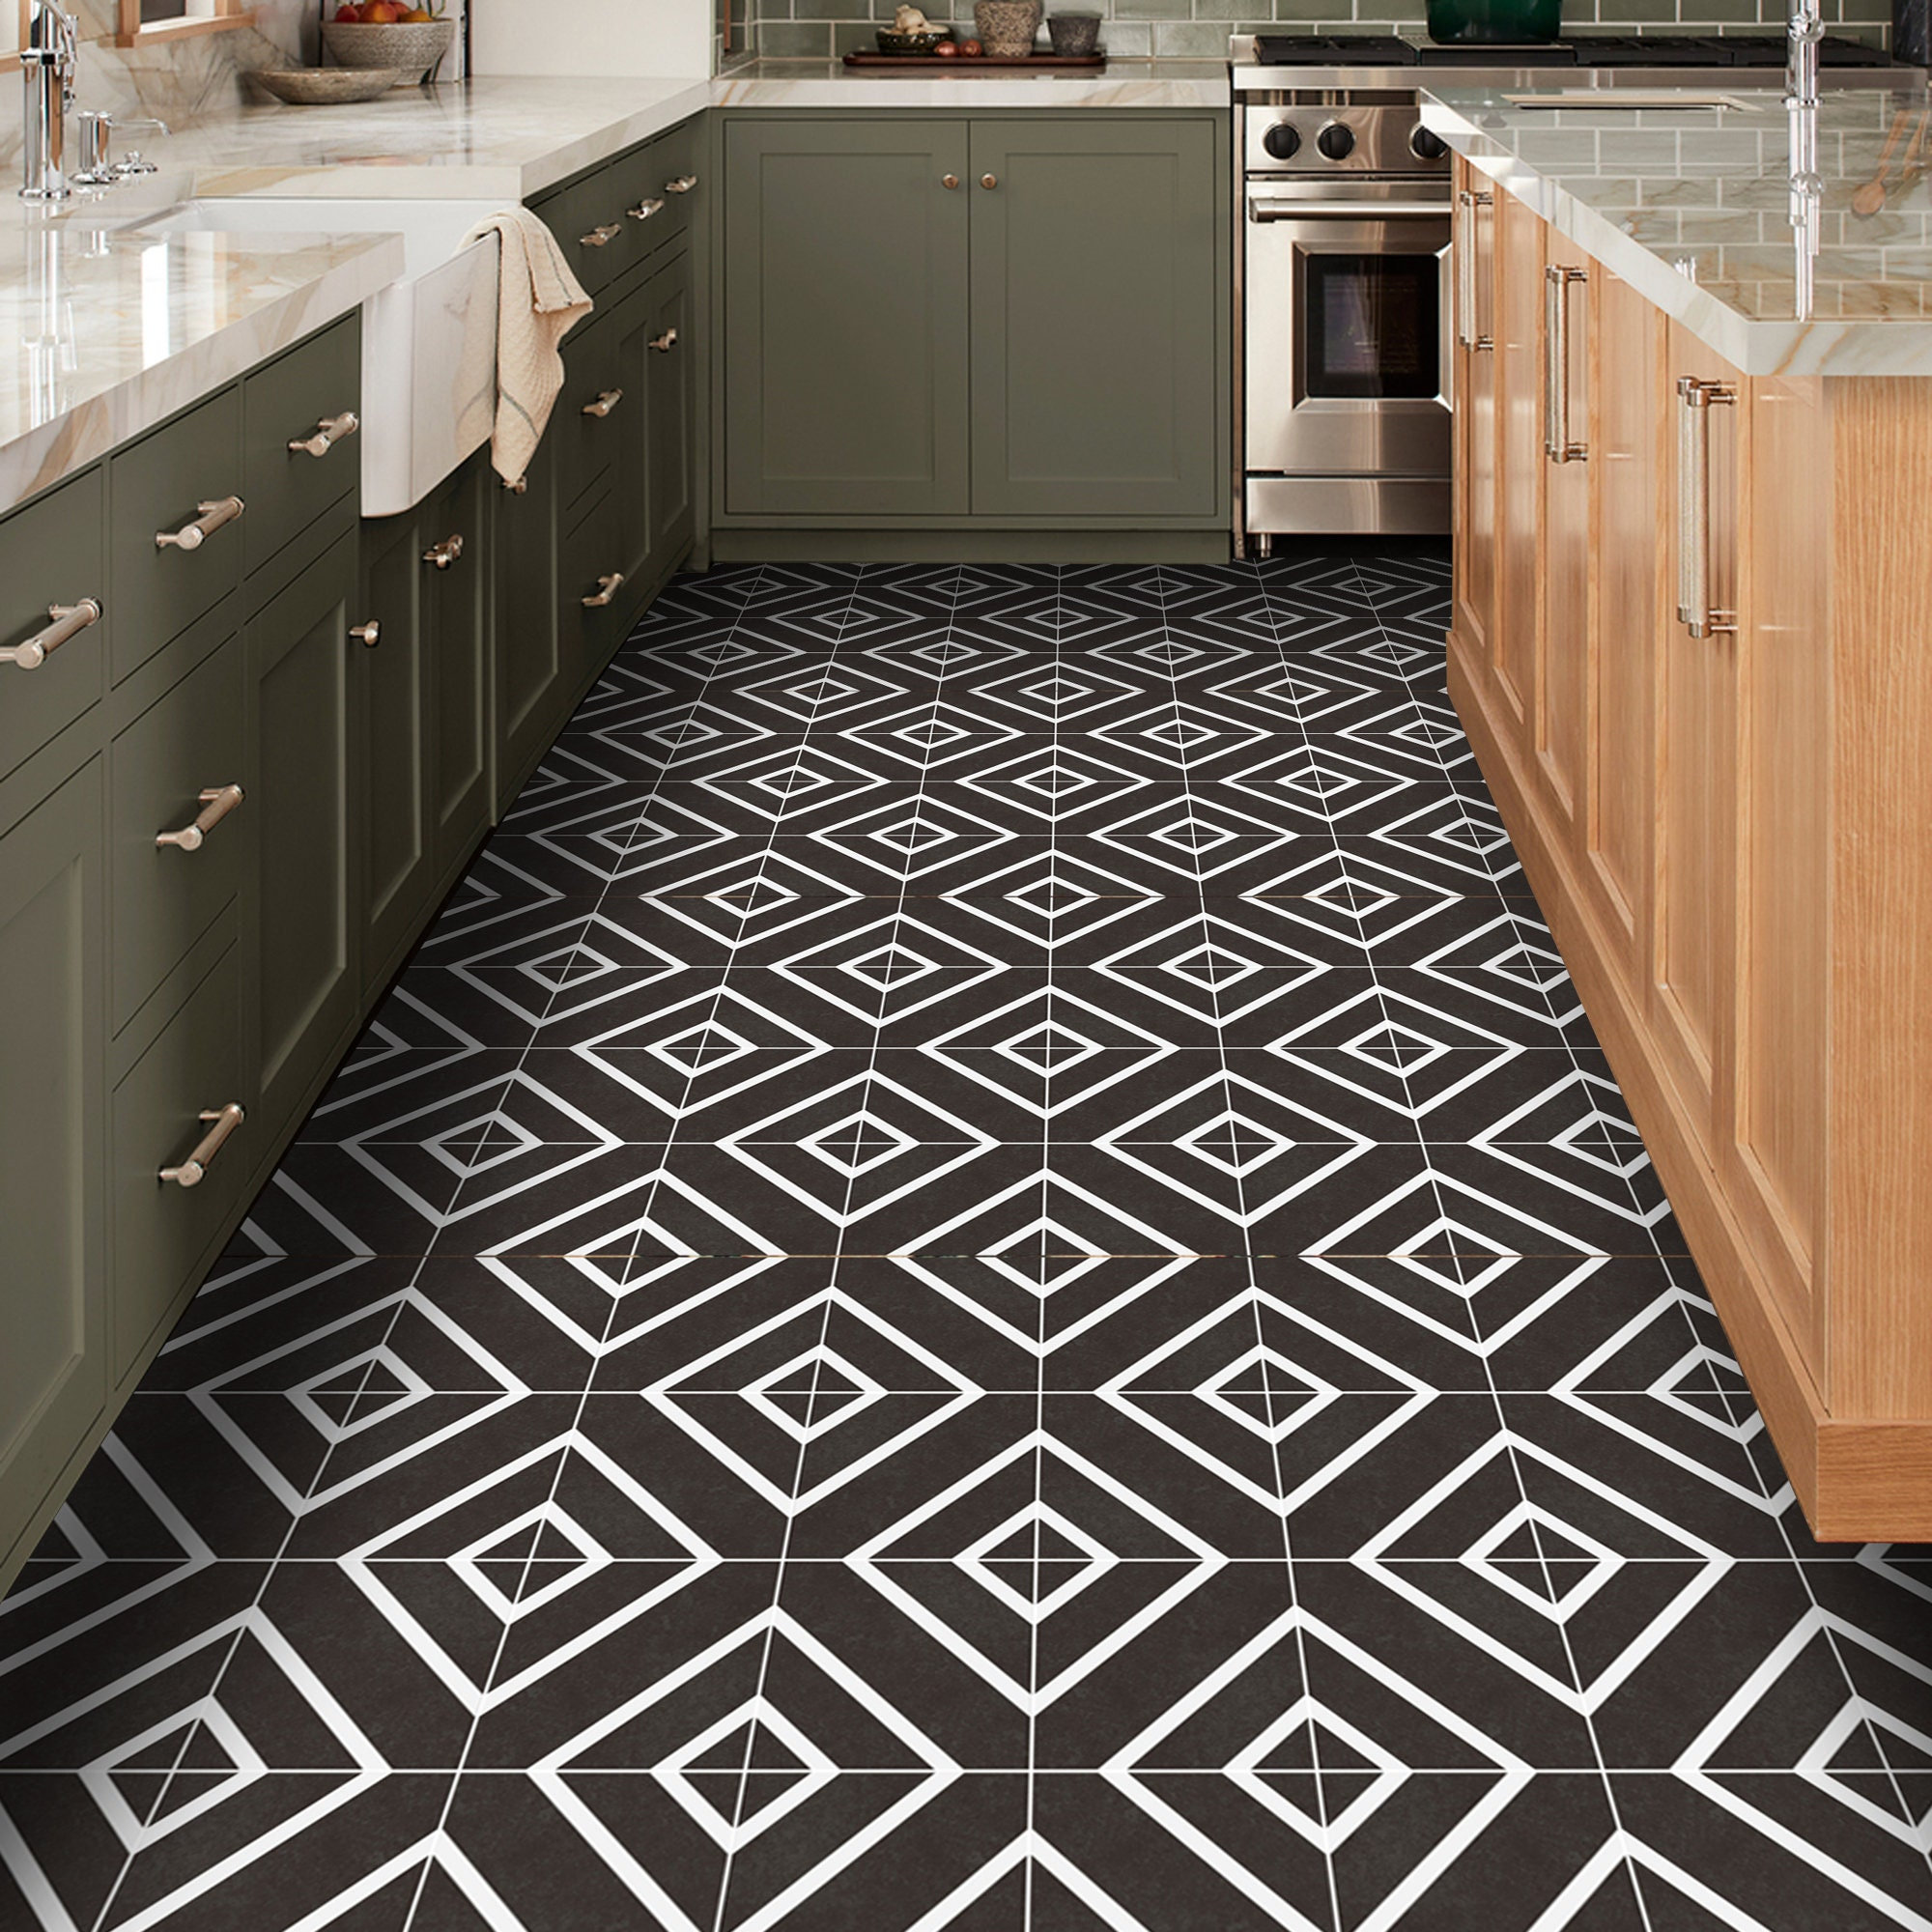
Black Diamond Vinyl Floor Tile Sticker Pack Director Tile Etsy
Vinyl Flooring in the Kitchen
Tips For Installing A Kitchen Vinyl Tile Floor

Kitchen Flooring Ideas LVT Flooring

Stone Flex Tiles – Classic Collection
Related Posts: