Identifying Common Types of Wood Floor Damage
Wood floors are a timeless and elegant feature in any home but are not immune to damage. From minor scratches to severe structural issues, understanding the different types of wood floor damage is essential for proper repair and maintenance. Each type of damage requires a unique approach, and early identification can save you time, money, and effort in the long run. Let’s find out the most common types of wood floor damage and how to recognize them.
- Scratches and Surface Scuffs: One of the most frequent issues with wood floors is scratches caused by everyday use, pets, or moving furniture. While surface scuffs are shallow and mostly aesthetic, they can make floors look dull and aged. Identifying these marks is relatively simple, as they don’t penetrate the wood deeply and are usually confined to the finish layer.
- Dents and Gouges: Heavy furniture, dropped items, or high heels can leave dents and gouges in wood floors. These are deeper than scratches and may expose raw wood beneath the finish. Gouges can accumulate dirt and moisture if left untreated, leading to further damage.
- Water Damage: Water damage is a serious issue for wood floors, often resulting in warping, discoloration, or mold growth. Signs of water damage include raised edges, cupping, or buckling boards. Early detection is key, as prolonged exposure to moisture can compromise the floor’s structural integrity.
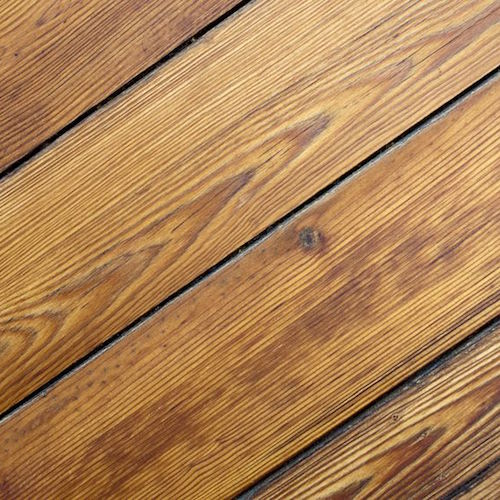
- Cracks and Splits: Changes in humidity or improper installation can cause wood planks to crack or split. These issues range from small hairline cracks to significant splits requiring immediate attention. Checking for gaps between boards or along the grain is crucial to spotting this type of damage.
- Stains and Discoloration: Spills, pet accidents, or prolonged exposure to sunlight can leave unsightly stains on wood floors. Dark spots often indicate water damage or mildew, while sun-bleached areas appear lighter and may require refinishing.
- Squeaky or Loose Boards: Over time, wood floors may develop squeaks or feel loose underfoot due to age or shifting subfloors. These issues often indicate underlying problems, such as nail pops, uneven subfloors, or deterioration of adhesives.

Essential Tools and Materials for Wood Floor Repairs
Repairing wood floors can be a manageable DIY project with the right tools and materials. Having a well-equipped toolkit allows you to address scratches, dents, cracks, and other issues efficiently and effectively. Below, we’ll explore the essential items you’ll need for a variety of wood floor repair tasks.
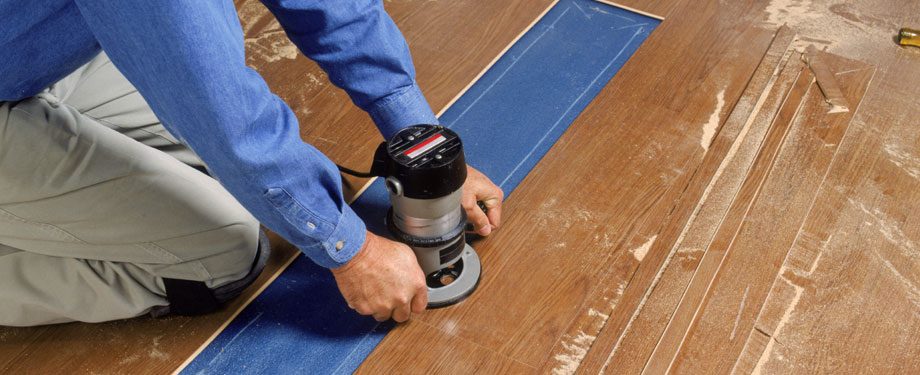
Basic Hand Tools: A toolkit for wood floor repairs should include basic hand tools like a hammer, screwdriver, and pry bar. These are essential for removing damaged boards, tightening loose ones, or replacing nails and screws. A utility knife is also handy for precise cuts and cleaning edges.
Sanding Equipment: Sandpaper in various grits (from coarse to fine) is critical for smoothing scratches and preparing surfaces for refinishing. For larger areas, a handheld or orbital sander will save time and provide even results. Sanding blocks are useful for smaller, hard-to-reach areas.
Wood Filler and Putty Knife: Wood filler is a go-to material for repairing cracks, gouges, and other imperfections. It comes in different shades to match your floor’s finish. A putty knife is essential for applying the filler smoothly and evenly, ensuring a seamless repair.
Flooring Adhesives and Nails: For loose or squeaky boards, having the right adhesives and nails is key. Wood glue or construction adhesive can secure planks to the subfloor, while flooring nails or staples are ideal for reinforcing stability.
Protective Equipment: Safety is paramount when working on repairs. Protective gear, such as gloves, safety goggles, and a dust mask, will keep you safe from splinters, dust, and chemical fumes. Knee pads are also helpful for prolonged kneeling.
Finishing Supplies: To restore your floor’s appearance, you’ll need wood stain, finish, and a brush or applicator pad. Polyurethane or other sealants protect repaired areas and blend them with the rest of the floor. A clean microfiber cloth or mop is essential for the final touches.
Having these tools and materials at your disposal ensures you’re prepared to tackle any wood floor repair project with confidence. Investing in quality equipment will also make future maintenance tasks easier and more effective.
Repairing Scratches: Quick Fixes for Surface Imperfections
Scratches on wood floors are a common issue, but they don’t always require professional intervention. Surface imperfections, whether caused by pets, moving furniture, or general wear and tear, can be addressed with relatively simple techniques. With a bit of effort, you can restore the polished appearance of your floors without breaking the bank.
Assess the Depth of the Scratch
The first step in repairing scratches is determining their depth. Superficial scratches only affect the floor’s finish, while deeper ones penetrate the wood itself. For surface-level damage, the repair is quicker and easier, whereas deeper scratches may need filler or refinishing.
Use Wood Floor Repair Markers
For light scratches, wood floor repair markers or crayons are effective tools. Available in a variety of wood tones, these products help mask imperfections by blending the scratch with the surrounding area. Apply the marker over the scratch, wipe off excess, and let it dry for a seamless finish.
Apply a Protective Coating
After treating scratches, it’s important to restore the protective layer on the wood. Use a clear wood floor polish or a small amount of polyurethane to seal the repaired area, preventing further wear and tear.
Buffing Out Minor Scuffs
For very light scuffs, a microfiber cloth and a wood floor cleaner can often do the trick. Gently buff the area in the direction of the wood grain, and the scuffs will diminish or disappear entirely.
Sand and Refinish for Deep Scratches
Deeper scratches require more intensive treatment. Sand the affected area lightly with fine-grit sandpaper until smooth. Follow this with a matching wood stain and a topcoat of finish to restore the floor’s original look.
Prevent Future Scratches
Preventative measures like adding furniture pads, using rugs, and trimming pet nails can reduce the risk of future scratches. Routine maintenance, including regular sweeping and mopping, will also help keep your wood floors looking their best.
By following these steps, you can easily tackle scratches and maintain the polished beauty of your wood floors.
Addressing Water Damage: Restoring Wood Floors After Moisture Issues
Water damage is one of the most challenging problems for wood floors. It can result in warping, discoloration, or even structural issues if left unaddressed. Tackling water damage effectively involves identifying the severity of the issue, repairing the damage, and preventing future occurrences.
Identify the Extent of Water Damage
The first step is to assess the damage. Look for signs like cupping (raised edges), buckling, or discoloration. Light water exposure may only affect the finish, while prolonged exposure can damage the wood and subfloor.
Dry the Affected Area
If water exposure is recent, act quickly to dry the floor. Use fans, dehumidifiers, or a wet vacuum to remove moisture. Avoid applying heat directly to the floor, as it can worsen warping.
Repair Warped Boards
Mild warping can sometimes be fixed by applying pressure or weights to the affected area. For severe cases, the damaged boards may need to be replaced entirely. Pry out the warped planks carefully, ensuring the subfloor is dry before installing replacements.
Remove and Prevent Mold
Water exposure can lead to mold growth, especially in hidden areas. Clean the affected area with a mixture of water and vinegar or a commercial mold remover. Take precautions by wearing gloves and a mask during this process.
Refinish the Damaged Area
After repairs, the floor may need refinishing to restore its appearance. Sand down the affected area, apply a matching stain and seal it with a protective topcoat to blend with the rest of the floor.
Prevent Future Water Damage
Use area rugs in high-moisture areas like kitchens or entryways. Ensure spills are wiped up promptly, and consider using a waterproof finish to protect the wood.
With the right approach, you can restore your floors to their former glory and safeguard them against future water damage.
Fixing Cracks and Splits in Hardwood Flooring
Cracks and splits in hardwood flooring are a natural consequence of aging, humidity changes, or improper installation. While they may seem like a major problem, most cracks can be repaired without professional help. Here’s a step-by-step guide to fixing them.
Identify the Cause of the Cracks
Cracks caused by seasonal humidity changes are usually minor and close on their own. Persistent cracks, however, may indicate issues like poor installation or excessive dryness in the home. Addressing the root cause is essential for lasting repairs.
Clean the Affected Area
Before starting repairs, clean the crack thoroughly to remove dirt and debris. This ensures that any filler or adhesive will bond effectively with the wood.
Use Wood Filler for Small Cracks
For hairline cracks, a high-quality wood filler is often sufficient. Choose a filler that matches your floor’s color, apply it with a putty knife, and smooth it out. Once dry, sand the area lightly for a seamless finish.
Insert Wood Splines for Larger Cracks
For larger splits, wood splines can provide a sturdy solution. Cut a thin strip of wood to fit the crack, apply wood glue, and press it into place. Sand and stain the area once the glue has dried.
Replace Severely Damaged Planks
In cases where cracks have compromised the structural integrity of the plank, replacement is the best option. Carefully remove the damaged board and install a new one, ensuring it fits snugly and aligns with the surrounding floor.
Control Humidity Levels
Prevent future cracks by maintaining consistent indoor humidity levels. Use a humidifier during dry months and a dehumidifier in damp conditions to protect your wood floors.
Cracks and splits can be a manageable issue with the right approach and tools, ensuring your floors stay beautiful and durable.
Refinishing Techniques for Deeply Damaged Wood Floors
When your wood floors have sustained deep scratches, extensive wear, or significant discoloration, refinishing is often the most effective solution. Refinishing restores the floor’s surface, bringing it back to its original luster. Here’s a detailed guide to the refinishing process.
Evaluate the Condition of Your Floors
Determine if refinishing is necessary by examining the level of damage. Floors with deep scratches, dull finishes, or uneven stains are good candidates for refinishing. If the wood is severely damaged, replacement might be a better option.
Prepare the Area
Clear the room of furniture and thoroughly clean the floors. Ensure the area is well-ventilated, as sanding and finishing can produce dust and fumes.
Sand the Surface
Use a drum sander or orbital sander to remove the old finish and smooth the surface. Begin with coarse-grit sandpaper and gradually move to finer grits for a polished base. Pay attention to edges and corners with a sanding block.
Repair Imperfections
Fill any cracks, gaps, or gouges with wood filler. Sand the area again once the filler dries to ensure a smooth, even surface.
Apply Stain and Finish
Choose a stain that matches your desired aesthetic and apply it evenly with a brush or applicator. Once the stain dries, seal the floor with a protective finish like polyurethane to enhance durability and shine.
Let the Floor Cure
Allow the finish to cure fully before moving furniture back into the room. Depending on the product used, this may take several days. Protect the floor during this time to avoid dents or scratches.
Refinishing is a labor-intensive process but offers transformative results, giving your wood floors a new lease on life.
Preventative Measures to Protect Your Wood Floors from Future Damage
Wood floors are an investment that enhances the beauty and value of any home. However, they require consistent care to maintain their appearance and functionality over time. By adopting preventative measures, you can minimize wear and tear, extend the lifespan of your floors, and reduce the need for costly repairs. Below are some practical and effective strategies to protect your wood floors from future damage.
Use Furniture Pads and Rugs
Furniture legs are one of the most common culprits of scratches and dents on wood floors. To prevent this, attach felt pads or rubber caps to the bottom of chairs, tables, and other heavy furniture. Rugs and mats in high-traffic areas, such as hallways, entryways, and dining tables, can also provide an extra layer of protection. Choose rugs with non-slip backings to avoid sliding and potential scuffing.
Control Indoor Humidity Levels
Wood is sensitive to changes in humidity, expanding in damp conditions and contracting in dry environments. These fluctuations can cause cracks, warping, or gaps between planks. Maintain indoor humidity levels between 35% and 55% using a humidifier during winter and a dehumidifier in humid seasons. Monitoring devices can help ensure consistent conditions.
Establish a Regular Cleaning Routine
Dirt, dust, and grit act like sandpaper on wood floors, gradually wearing away the finish. Sweep or vacuum regularly using a soft-bristle broom or a vacuum with a hardwood floor attachment. For deeper cleaning, use a damp mop with a wood-specific cleaner. Avoid overly wet mopping, as excess water can seep into the wood and cause damage.
Protect Floors from Sunlight
Prolonged exposure to sunlight can fade or discolor wood floors over time. Use curtains, blinds, or UV-blocking window films to reduce direct sunlight. Rotating furniture and rugs periodically can also help prevent uneven fading.
Prevent Moisture Damage
Spills and leaks are among the biggest threats to wood floors. Wipe up spills immediately with a soft cloth to prevent the wood from absorbing moisture. In areas prone to spills, like kitchens or bathrooms, consider using water-resistant mats or rugs. Ensure proper sealing around appliances and plumbing fixtures to reduce the risk of water damage.
Invest in a Durable Finish
A high-quality finish acts as a protective barrier against scratches, stains, and moisture. Reapply finish as needed, typically every 3-5 years, depending on foot traffic and wear. Options like polyurethane or oil-based finishes offer excellent durability, while wax finishes provide a more traditional look.
7. Educate Household Members
Preventing damage is a collective effort. Encourage family members and guests to follow simple rules, such as removing shoes indoors, avoiding dragging heavy objects across the floor, and keeping pet nails trimmed. Setting these habits early can significantly reduce daily wear and tear.
8. Seasonal Maintenance Tips
Adapt your floor care routine to seasonal changes. In winter, use door mats to catch snow, salt, and grit from footwear. In summer, watch for excess humidity and adjust your dehumidifier settings accordingly. Regular inspections for signs of damage, like scratches or warping, can also help you address issues early.
By following these preventative measures, you can keep your wood floors looking pristine for years to come. With a bit of proactive care, you’ll ensure your investment continues to add warmth and elegance to your home without frequent repairs or refinishing.
How To Make Old Hardwood Floors Shine Like New
How To Repair Damage In Your Wooden Floor? » ESB Flooring
How To Fix Gouges, Dents, And Deep Scratches In Hardwood Floors
Quick & Easy Wood Floor Repair – The Craftsman Blog
Related Posts:

