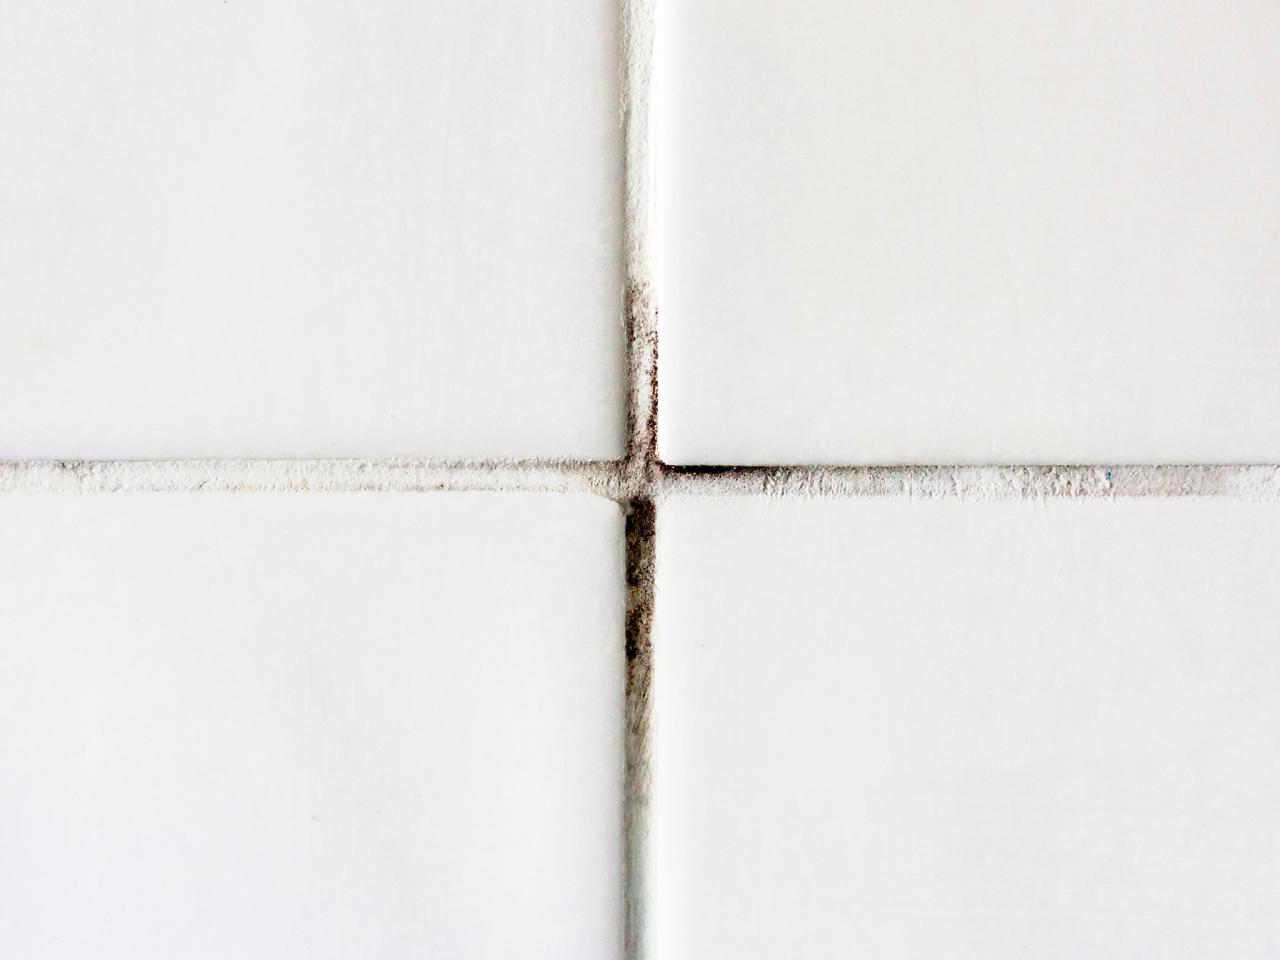
What Causes Grout to Get Dirty?
Grout is the unsung hero holding your bathroom tiles together, but over time, it can turn into an eyesore if not properly maintained. Unlike tiles, grout is porous, which means it readily absorbs dirt, moisture, and bacteria. Understanding why grout gets dirty can help you figure out the best way to clean and maintain it. Below are several reasons why grout often looks grimy and unattractive.
- Porous Nature of Grout
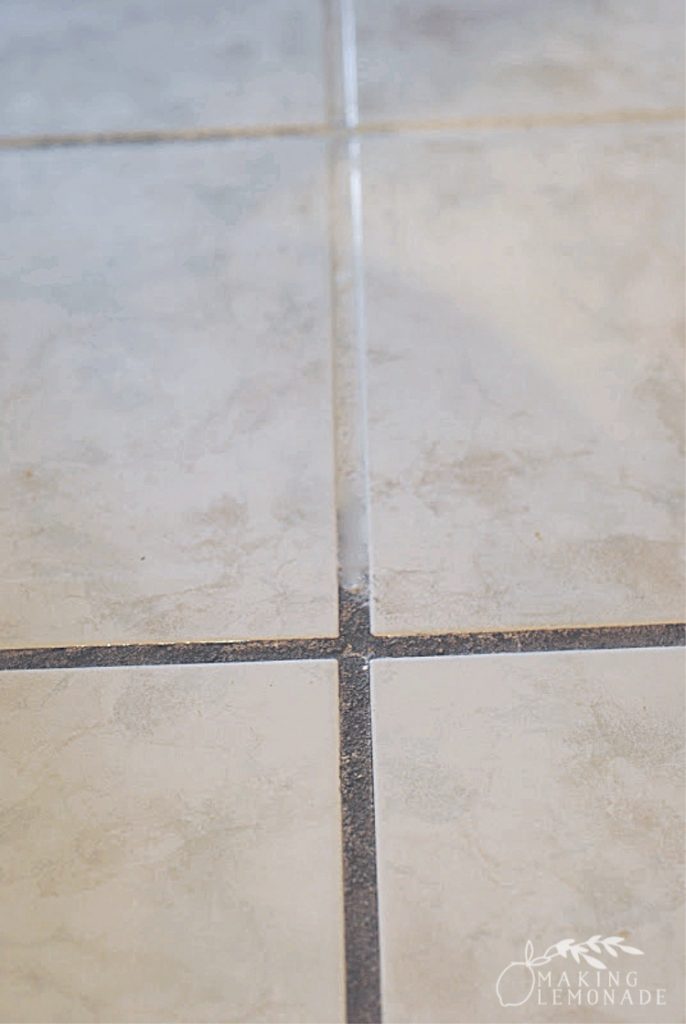
Grout is naturally porous, which means it easily absorbs liquids, dirt, and oils. Every time water, soap, or shampoo runs over the grout, it can seep in and settle deep into the material. This trapped moisture and dirt eventually led to the grout looking dingy. - Bathroom Humidity
Bathrooms are constantly exposed to moisture and humidity, making them a prime location for mold and mildew to grow. Since grout lines are often in direct contact with water, especially in the shower or around sinks, it becomes a hotspot for mildew to flourish. - Foot Traffic and Dirt
If you have grout on your bathroom floor, the constant foot traffic adds to its grime buildup. Dirt, oils, and particles from your feet or shoes settle into the grout, especially if it’s not cleaned regularly. - Soap Scum and Product Residue
Residue from soap, shampoo, body wash, and other personal care products doesn’t just stick to tiles but also clings to grout. This film of soap scum can gradually discolor the grout, making it appear cloudy or stained over time. - Hard Water Deposits
Homes with hard water often deal with mineral buildup, especially in areas like the bathroom. These mineral deposits can accumulate in the grout, creating a chalky or dull appearance that’s hard to clean with regular products. - Lack of Proper Sealing
Grout needs to be sealed to protect it from absorbing moisture and dirt. If your grout hasn’t been sealed or the sealer has worn off, it’s far more likely to become stained and dirty. Without a sealer, every drop of water or bit of dirt will seep right into the grout, making cleaning much harder.
Essential Tools and Supplies for Cleaning Grout
Cleaning grout can feel like an overwhelming task if you’re not properly equipped. The good news is that with the right tools and supplies, it’s much easier to tackle dirty grout lines effectively. Whether you prefer natural remedies or commercial cleaners, the right tools can make the job quicker and more efficient. Let’s break down what you need in your grout-cleaning toolkit.
Stiff-Bristled Grout Brush
One of the most essential tools is a stiff-bristled brush, designed specifically for scrubbing grout lines. Unlike regular brushes, grout brushes can dig into the narrow grooves between tiles, ensuring a deep clean that removes embedded dirt.
Grout Cleaner or Natural Alternatives
You’ll need a cleaning solution designed for grout. Commercial grout cleaners can be effective, but if you prefer a natural approach, a mixture of baking soda and vinegar or hydrogen peroxide can work wonders. These natural alternatives are safe, non-toxic, and powerful enough to break down dirt and grime.
Steam Cleaner
For a chemical-free option, a steam cleaner is a fantastic tool. Steam cleaners use high-pressure steam to loosen and dissolve dirt, killing bacteria and mold in the process. This is especially useful for those looking for an eco-friendly and efficient cleaning solution.
Microfiber Cloths
After scrubbing the grout, it’s important to wipe away the residue. Microfiber cloths are great for this purpose because they’re highly absorbent and soft enough to avoid scratching tiles while picking up grime.
Grout Sealer
After cleaning the grout, applying a sealer is crucial for maintaining its cleanliness over time. Grout sealer forms a protective barrier that prevents moisture, dirt, and stains from penetrating the porous material. Reapplying a sealer every six months can significantly extend the cleanliness of your grout.
Rubber Gloves and Eye Protection
When dealing with cleaning chemicals, even natural ones, it’s important to protect your skin and eyes. Gloves and eye protection can shield you from irritants, especially if you’re using stronger commercial cleaners.
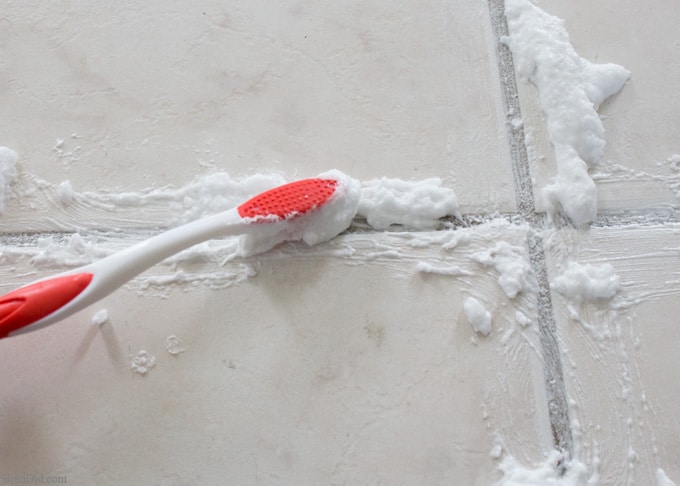
Using Baking Soda and Vinegar for Natural Grout Cleaning
Looking for a natural way to clean your bathroom grout? Baking soda and vinegar are a dynamic duo when it comes to eco-friendly cleaning. Both are non-toxic, readily available in most households and work wonders on grout without the need for harsh chemicals. Let’s explore how to use this effective combination to clean bathroom grout.
Why Baking Soda and Vinegar Work
Baking soda is mildly abrasive, making it ideal for scrubbing away grime, while vinegar is acidic, which helps dissolve dirt and bacteria. When combined, these two create a fizzing reaction that helps break down even the toughest grime lodged in the grout lines.
Mixing the Baking Soda Paste
Start by mixing baking soda with a little water to form a thick paste. This paste should be spread directly onto the grout lines, ensuring it sticks without running. Allow the paste to sit for 10 to 15 minutes, giving it time to loosen any dirt.
Spraying the Vinegar Solution
Once the baking soda paste has had time to work, spray vinegar onto the grout. The vinegar will react with the baking soda, causing a fizz that further helps to lift grime from the grout. Let the mixture sit for a few minutes as it continues to clean.
Scrubbing the Grout Lines
After the fizzing subsides, use a stiff-bristled brush to scrub the grout lines. The baking soda provides gentle abrasion to scrub away dirt without damaging the grout itself. Focus on any heavily stained areas and scrub in circular motions for the best results.
Wiping Away Residue
Once you’ve scrubbed all the grout, wipe away the excess baking soda and vinegar with a damp microfiber cloth. This will remove both the cleaning mixture and the dirt that’s been lifted from the grout.
Final Rinse and Seal
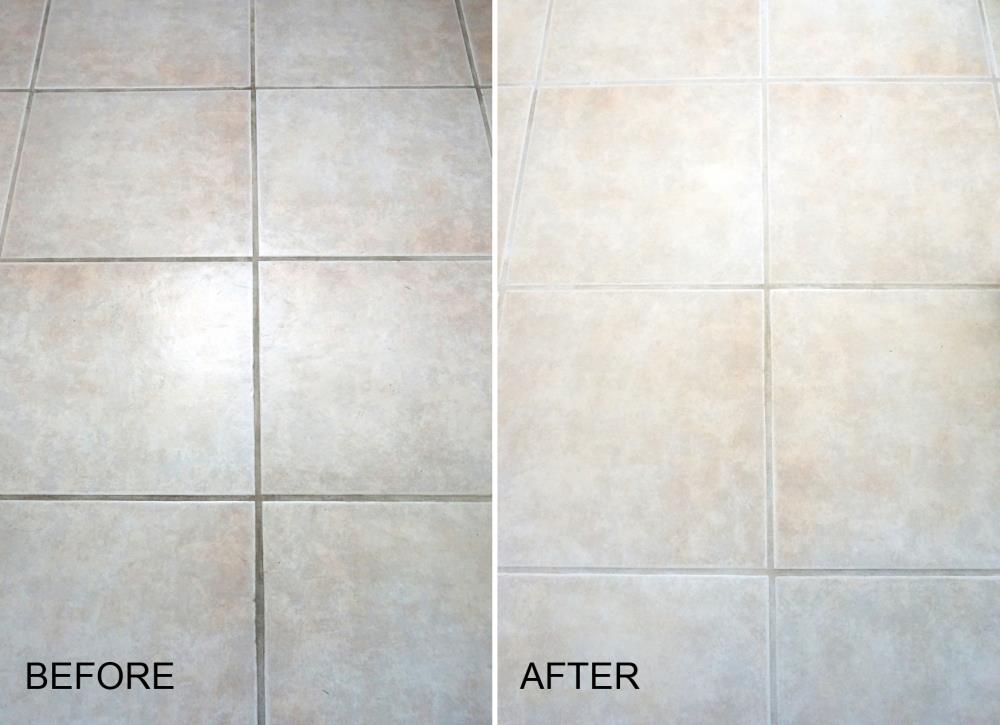
After wiping down the grout, give the tiles a final rinse to ensure no residue remains. If desired, apply a grout sealer to protect the grout from future stains and moisture. This simple, natural cleaning method leaves your grout looking fresh and helps maintain its cleanliness.
How to Clean Grout with Hydrogen Peroxide and Baking Soda
For a deeper clean, especially on grout that’s heavily stained or discolored, hydrogen peroxide and baking soda make a powerful combination. This method not only cleans but also disinfects the grout, making it ideal for areas prone to mold and mildew. If your grout needs a deep refresh, this solution is highly effective.
Why Hydrogen Peroxide and Baking Soda Work
Hydrogen peroxide is a mild antiseptic, which makes it perfect for tackling mold, mildew, and tough stains. Combined with the abrasiveness of baking soda, it penetrates deep into the porous grout, lifting grime and killing bacteria at the same time.
Mixing the Paste
To start, mix hydrogen peroxide with baking soda to form a thick paste. This should be applied directly to the grout lines. The paste will begin to foam slightly as the hydrogen peroxide reacts with dirt, which helps to break it down and lift it away.
Let the Paste Sit
Allow the paste to sit for about 10 to 15 minutes. This gives the hydrogen peroxide time to disinfect the grout and the baking soda time to loosen dirt and stains. The foaming action helps ensure the cleaner penetrates deep into the grout lines.
Scrubbing with a Brush
After the paste has had time to work, take a stiff-bristled brush and scrub the grout lines thoroughly. The scrubbing action, combined with the foaming hydrogen peroxide, will help lift out stubborn stains and deep-seated grime.
Wiping and Rinsing
Once you’ve finished scrubbing, wipe away the remaining paste with a damp cloth. Be sure to rinse the grout lines well to remove any residual baking soda or hydrogen peroxide, which can leave a powdery film if left behind.
Sealing the Grout
For long-term results, consider sealing the grout after cleaning. A grout sealer will protect against future staining, making it easier to maintain the cleanliness of your bathroom floor. Reapply the sealer every six months for the best results.
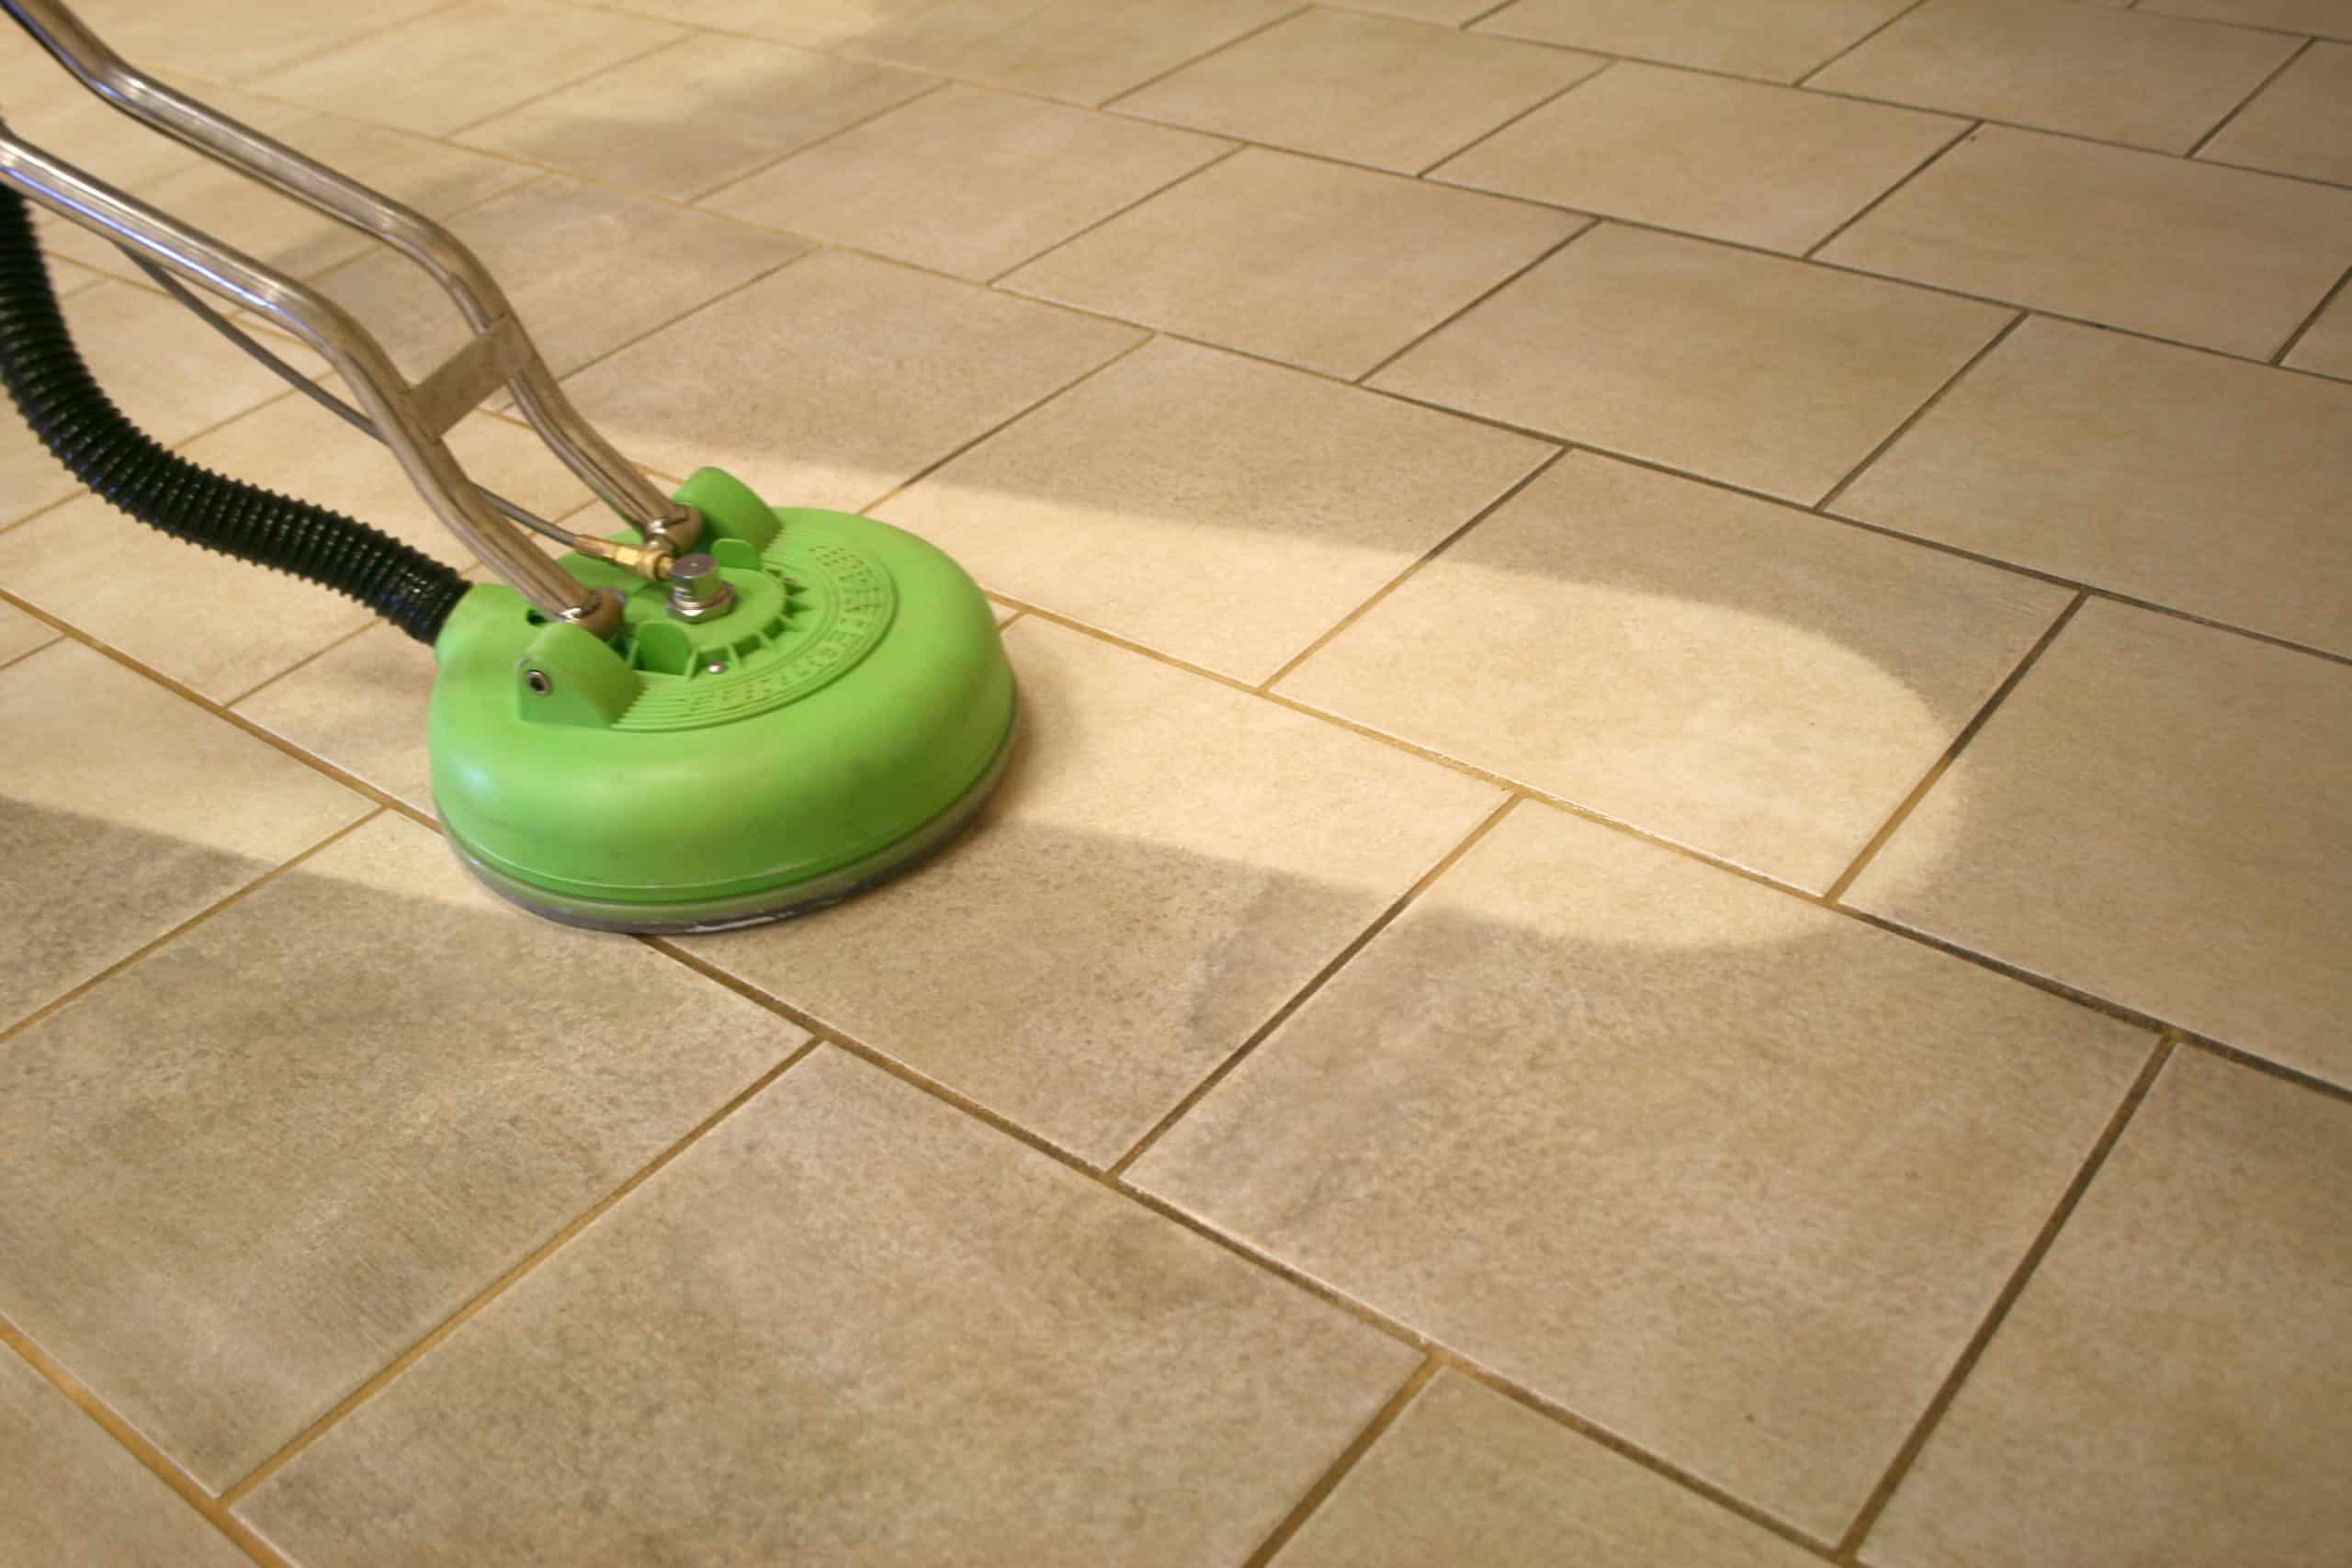
The Benefits of Using a Steam Cleaner for Grout
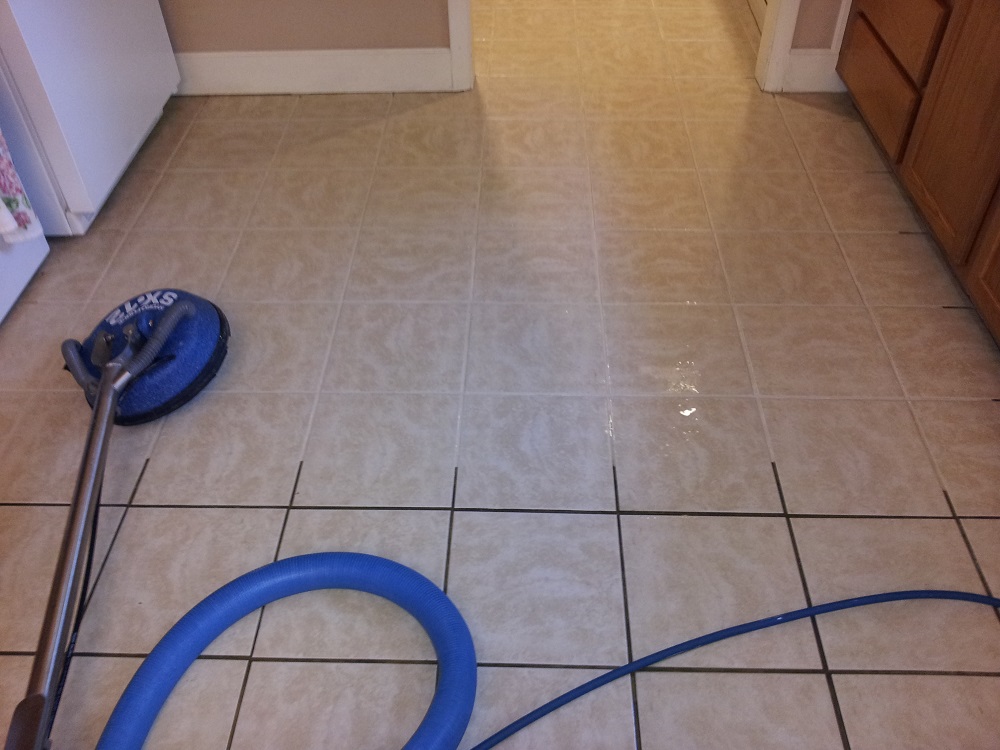
Steam cleaning is a game-changer when it comes to cleaning grout. This method is not only chemical-free but also highly effective in removing dirt, mold, and bacteria from deep within the grout lines. If you’re looking for a thorough clean without the use of harsh chemicals, investing in a steam cleaner might be the best option.
Why Steam Cleaning Works
Steam cleaning works by using high-temperature steam to break down dirt, grime, and bacteria. The heat from the steam kills bacteria and mold while loosening the grime lodged in the porous grout. This makes it a perfect choice for bathrooms, which are often breeding grounds for mold and mildew.
Chemical-Free Cleaning
One of the biggest advantages of using a steam cleaner is that it requires no chemicals. This makes it a safer choice for households with children or pets, as there are no harsh fumes or residues left behind. The steam is enough to clean and disinfect the grout, providing a fresh and sanitary result.
Deep Penetration for Stubborn Stains
Steam can penetrate deep into the grout, reaching places that traditional scrubbing might miss. For stubborn stains that have set into the grout, steam can help break them down without the need for heavy-duty cleaners. This makes it especially effective for older grout that hasn’t been cleaned in a while.
Kills Mold and Mildew
Bathrooms are notorious for harboring mold and mildew, especially in the grout lines. The high temperature of the steam is hot enough to kill mold spores on contact, making steam cleaning one of the best methods for preventing mold from spreading in your bathroom.
Ease of Use
Using a steam cleaner is relatively easy. Most steam cleaners come with attachments specifically designed for grout, allowing you to direct the steam right where it’s needed. Plus, you won’t need to spend as much time scrubbing, as the steam does most of the work for you.
Environmentally Friendly
Since steam cleaning uses only water, it’s one of the most eco-friendly cleaning methods available. There’s no need for disposable wipes or harsh cleaning chemicals, making it a sustainable option for keeping your bathroom grout clean.
How to Prevent Mold and Mildew Buildup in Bathroom Grout
Preventing mold and mildew in bathroom grout is key to maintaining a clean and healthy bathroom environment. Mold and mildew not only cause grout to discolor but can also lead to health problems like allergies and respiratory issues. The good news is that with a few preventative measures, you can stop mold and mildew from taking hold of your grout.
Improve Bathroom Ventilation
Mold and mildew thrive in moist environments, so improving your bathroom’s ventilation is crucial. Make sure to use an exhaust fan during and after showers to reduce humidity. If your bathroom doesn’t have a fan, consider installing one or simply leaving the windows open to allow moisture to escape.
Wipe Down Wet Surfaces
After showers or baths, take a few moments to wipe down wet surfaces like tiles and grout with a squeegee or towel. Removing excess water helps reduce the amount of moisture that can seep into the grout, preventing the growth of mold and mildew.
Use a Mold-Resistant Grout Sealer
Applying a grout sealer can provide a protective barrier against moisture and mildew. Be sure to choose a mold-resistant sealer that’s designed for bathroom use. Reapply the sealer every six months to ensure your grout remains protected.
Clean Regularly with Mild Cleaners
Regular cleaning helps prevent the buildup of soap scum, dirt, and mildew. Use a mild cleaner or a mixture of vinegar and water to wipe down your grout weekly. This simple routine can keep mold from gaining a foothold in your bathroom.
Keep Shower Curtains or Doors Open After Use
Leaving your shower curtain or door open after use allows the area to dry out faster. Mold thrives in dark, moist environments, so allowing air to circulate helps prevent mildew from forming.
Inspect and Repair Leaks Promptly
Leaky faucets or pipes can introduce excess moisture into your bathroom, leading to mold growth in grout. Regularly inspect your bathroom for leaks and repair any issues promptly to prevent water from accumulating in unwanted areas.

Maintaining Clean Grout: Tips for Long-Term Care
Once you’ve cleaned your grout, the key to keeping it looking fresh is proper maintenance. Grout is prone to absorbing dirt and moisture, but with a few easy steps, you can maintain its cleanliness for the long haul. By establishing a regular cleaning routine and applying protective measures, your grout can stay looking pristine for longer.
Seal the Grout Regularly
Sealing your grout is one of the most effective ways to protect it from moisture, dirt, and stains. Apply a high-quality grout sealer every six to twelve months, depending on the traffic in your bathroom. Sealing helps prevent grime from penetrating the porous grout, making future cleanings much easier.
Incorporate Weekly Wipe Downs
A weekly wipe-down with a mild cleaner can go a long way in maintaining clean grout. Use a mixture of water and vinegar or a commercial grout cleaner to keep dirt and soap scum from building up. Regular maintenance prevents stains from setting in and reduces the need for deep cleaning.
Address Spills and Stains Immediately
The longer a stain sits on grout, the harder it becomes to remove. Whether it’s spilled shampoo, soap scum, or dirt from shoes, addressing spills as soon as they happen will help prevent permanent discoloration. A quick wipe-down with a damp cloth can keep stains from setting in.
Keep Humidity in Check
Since moisture is one of the main culprits of dirty grout, managing bathroom humidity levels is crucial. Always use an exhaust fan or open a window during and after showers to let out excess moisture. This helps keep the grout dry, preventing mold and mildew from forming.
Use Grout-Friendly Cleaners
Avoid using harsh chemicals or abrasive cleaners that can damage grout over time. Stick to grout-friendly products or natural solutions like baking soda and vinegar. These gentle cleaning agents help preserve the integrity of the grout while effectively removing dirt and grime.
Inspect and Repair Grout as Needed
Over time, grout can crack or wear down, especially in high-traffic areas. Regularly inspect your grout for any signs of damage, and repair it as needed. Promptly addressing small cracks can prevent water from seeping in and causing more serious damage to your tiles or flooring.
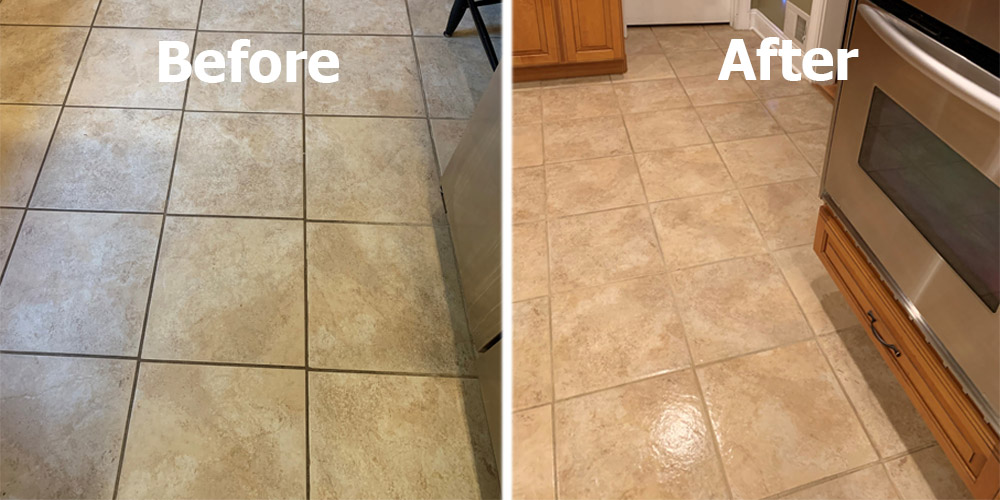
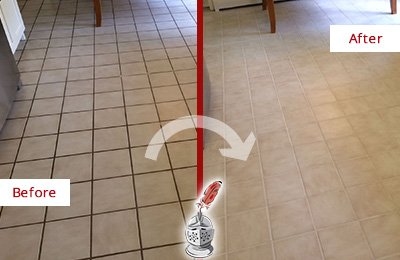
Cypress Grout Cleaning, Grout Cleaning
How to Clean Grout (Easy Household Cleaning Ideas That Save Time u0026 Money) Clean My Space

The Ultimate Guide to Cleaning Grout
How to Clean Grout Cleaning Grout Stains
Related Posts: