Why Concrete is the Best Choice for Garage Flooring
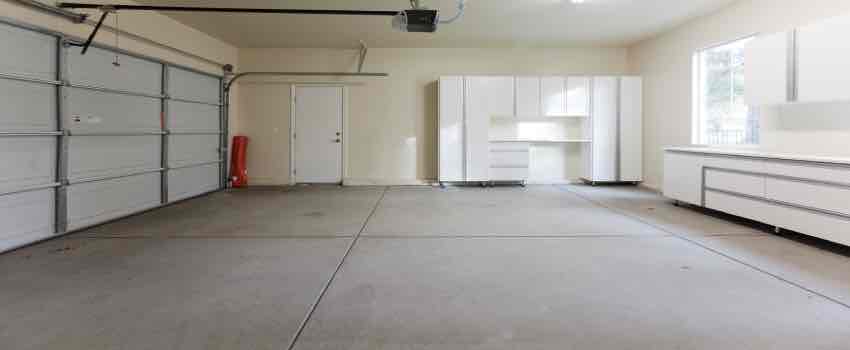
When it comes to garage flooring, concrete is often the go-to choice, and for good reason. Concrete is incredibly durable, low-maintenance, and versatile, making it ideal for a space that endures heavy foot and vehicle traffic. Whether you’re renovating your garage or planning one from scratch, here’s why concrete stands out as the best choice.
- Unmatched Durability
One of the biggest advantages of concrete is its resilience. Concrete can handle the weight of multiple vehicles, tool benches, and even heavy-duty equipment without cracking or sagging. It’s built to last decades, especially when maintained properly, which makes it a long-term investment for your garage. - Low Maintenance Requirements
Once installed, a concrete garage floor requires minimal upkeep. Unlike other materials that need regular refinishing or special cleaning, concrete can be swept, mopped, or even pressure-washed with ease. Adding a sealer makes it stain-resistant, further reducing the amount of maintenance needed. - Cost-Effective Solution
Concrete is often more affordable than many alternative flooring options, especially when you factor in its longevity and minimal upkeep. This cost-effectiveness makes concrete ideal for budget-conscious homeowners who want a durable floor without frequent repair or replacement costs. - Versatile Design Options
Concrete offers a surprising range of design possibilities. With various finishes, stains, and textures, you can customize the floor to match your garage’s look. Whether you prefer a sleek, polished finish or a more rugged, textured surface, concrete can be tailored to meet your design preferences. - Enhanced Safety with Slip Resistance
For a garage that may get wet or experience oil spills, a slip-resistant concrete finish can add an important layer of safety. By opting for a textured surface, you can reduce the risk of slipping, making the garage safer for walking, working, and even kids playing nearby. - Eco-Friendly Flooring Option
Concrete is a sustainable choice because it lasts so long and doesn’t require frequent replacement. Plus, materials like fly ash can be used to enhance the concrete mixture, making it even more eco-friendly. By choosing concrete, you’re opting for a durable, sustainable flooring option that has a smaller environmental footprint.
Planning Your Garage Concrete Floor: Key Factors to Consider
Before pouring a concrete floor into your garage, there are several key factors to plan out to ensure you get the results you want. From budgeting to environmental considerations, taking time to plan out the project can save time, money, and hassle in the long run.
Set Your Budget for the Project
Budgeting is the first step in planning any home improvement project, and a concrete floor is no different. Consider factors like the cost of materials, labor (if you’re hiring professionals), and any added finishes. A well-planned budget will help you manage expectations and avoid unexpected costs.
Consider the Thickness of the Concrete
The thickness of your concrete floor affects both its durability and cost. For most residential garages, a thickness of four inches is typically sufficient. However, if you plan to use heavy machinery or vehicles, consider a thicker slab for added strength and durability.
Choose the Right Type of Concrete Mix
Concrete comes in various mixes, each with different strengths and curing times. A standard mix might work well for light use, but a high-strength mix is better for durability and heavy loads. Work with a contractor or supplier to determine the best mix for your garage’s needs.
Decide on Insulation and Vapor Barriers
Adding insulation or a vapor barrier beneath the concrete can help control moisture and temperature. This is particularly useful if you plan to spend significant time in your garage or if it’s attached to your home. A vapor barrier is essential to prevent moisture from seeping up through the floor, which can weaken the concrete over time.
Plan for Any Desired Finishes or Sealants
Finishes, such as polishing or staining, can be applied after the concrete is poured and cured. Decide in advance if you want a specific finish so you can budget and plan for the necessary materials and techniques. Adding a sealant, for instance, can make the floor easier to clean and more resistant to stains.
Prepare for Drainage Needs
Consider how you’ll manage any water that might end up on your garage floor. If you live in an area with heavy rainfall or snow, or if you plan to wash cars or equipment in the garage, consider installing a drain or sloping the floor slightly to allow water to flow outside.
Preparing Your Garage Space for Concrete Floor Installation
Preparing the garage space properly is crucial to ensure the concrete bonds well and lasts for years. A well-prepared area will also help the concrete pour go smoothly and prevent common installation issues. Here’s how to get your garage ready for the concrete installation.
Clear Out the Garage
Begin by removing everything from the garage, including vehicles, shelves, and storage items. Make sure you have a completely empty space to work with, as this will make it easier to measure, level, and pour the concrete without obstructions.
Check for Level and Evenness
An uneven surface can lead to issues with cracking and durability in the future. Use a level to check the current floor surface, and if there are any significant dips or slopes, you may need to fill or level the area first. This will ensure a stable base for your concrete.
Install a Gravel or Crushed Stone Base
A layer of gravel or crushed stone helps with drainage and provides a stable foundation for the concrete. Spread a four to six-inch layer of gravel evenly across the surface, compacting it down to create a solid base that will prevent the concrete from shifting.
Lay Down a Vapor Barrier
A vapor barrier is essential to prevent moisture from coming up through the concrete, especially if your garage floor is close to the water table or experiences frequent dampness. Lay the barrier over the gravel layer, ensuring it covers the entire floor area with no gaps or overlaps.
Set Up Forms to Contain the Concrete
Forms are wooden frames that will hold the concrete in place as it sets. Use stakes to secure the forms along the perimeter of your garage, ensuring they’re straight and level. Properly installed forms prevent the concrete from spreading too thin or thick in any area.
Add Reinforcement for Durability
If your concrete will support heavy loads, add a reinforcement grid-like rebar or wire mesh. This will strengthen the concrete and prevent cracking over time. Place the rebar or mesh in the middle of the concrete slab, ensuring it’s held in place by supports or spacers.
Types of Concrete Finishes for Your Garage: Which One is Right for You?
Concrete isn’t just a flat, gray slab; there are various finishes you can choose from to customize the look and function of your garage floor. From polished surfaces to textured options, each finish offers unique benefits depending on your needs.
Polished Concrete for a Sleek Look
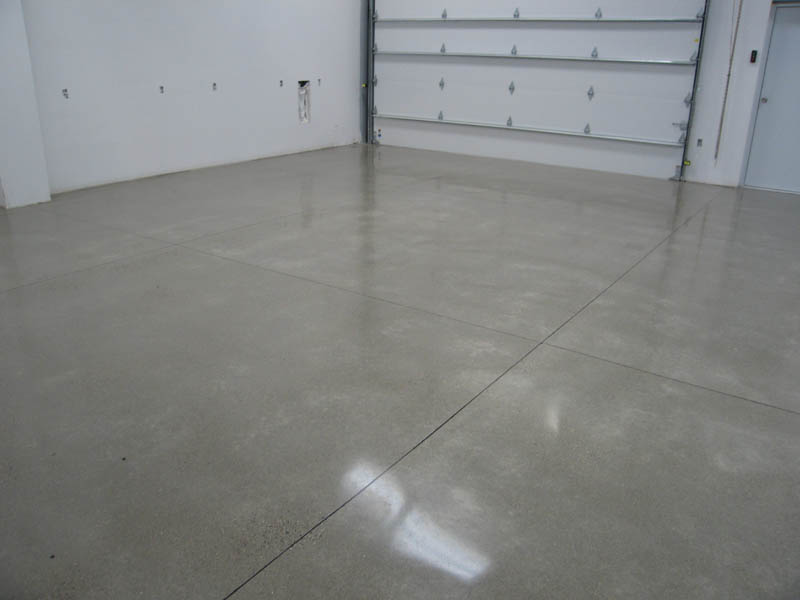
Polished concrete is perfect for those who want a sleek, glossy surface that’s easy to clean. This finish involves grinding the concrete to a smooth surface and applying a sealant, resulting in a reflective, high-end look. It’s a great option if you’re turning your garage into a multipurpose space.
Stained Concrete for Added Color
If you’re looking to add color, stained concrete is a popular choice. Stains penetrate the concrete surface, creating rich hues that range from earth tones to vibrant colors. This finish is ideal for those who want to blend their garage floor with the overall aesthetic of their home.
Epoxy Coating for Maximum Durability
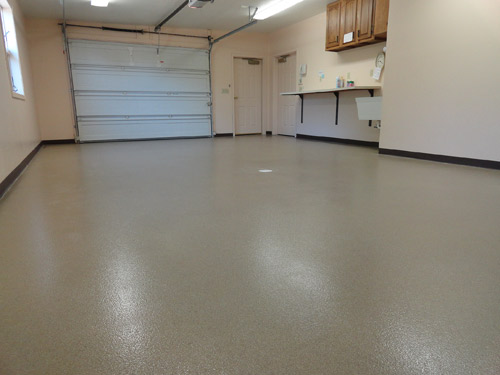
Epoxy coatings add a layer of protection to your concrete and provide a glossy finish that’s resistant to chemicals and stains. This option is ideal for heavy-use garages or those with frequent exposure to oil or chemicals. Epoxy can also come in various colors and textures, allowing for some customization.
Textured or Broom Finish for Slip Resistance
A broom finish adds texture to the concrete by dragging a broom over the surface before it sets. This creates a slip-resistant finish that’s perfect if you live in an area with wet or snowy weather. This finish is functional and practical for those prioritizing safety.
Aggregate Finish for a Unique Look
An exposed aggregate finish involves embedding small stones into the surface of the concrete. The top layer is then washed away to reveal the stones beneath. This option is durable and offers a unique, textured look, although it requires more maintenance than smooth finishes.
Stamped Concrete for a Customized Design
Stamped concrete can mimic the look of stone, brick, or even wood. This decorative option is perfect for homeowners looking to add visual appeal to their garage. However, it’s generally more expensive and may require resealing to maintain its appearance.
Step-by-Step Guide to Pouring and Finishing a Garage Concrete Floor
Pouring and finishing a concrete garage floor may seem like a big task, but with the right preparation and tools, it’s very achievable as a DIY project. This guide will walk you through each step, from preparing the site to getting a smooth, professional finish on your concrete.
Prepare the Site
Start by thoroughly preparing the garage floor area. Clear out everything from the garage, and make sure the floor is completely clean and level. Check for any low or high spots; a level surface is essential for an even pour. If needed, add a gravel or crushed stone base for stability, then compact it down to create a solid foundation for the concrete.
Set Up the Forms
Concrete forms are wooden frames that hold the concrete in place as it sets. Secure the forms around the perimeter of the area you’re pouring, making sure they’re level and straight. Use stakes to anchor the forms, and reinforce them to prevent the concrete from pushing them out of place during the pour. Properly set forms will help give your floor clean, precise edges.
Mix the Concrete
If you’re using a concrete mixer, follow the instructions on the concrete mix bag. Generally, you’ll add water and mix until you get a thick, smooth consistency. Be careful not to overwater the mix, as this can weaken the concrete. Alternatively, you can have ready-mixed concrete delivered if you’re covering a large area, which is often more convenient for garage floors.
Pour the Concrete
Start pouring the concrete at one corner of the garage and work your way across, filling the space within the forms. Use a shovel to distribute the concrete evenly, and make sure it reaches every edge and corner. Once poured, use a screed (a straight piece of wood or metal) to level the surface by dragging it across the top of the concrete forms.
Smooth the Surface
After leveling, use a bull float to smooth the surface of the concrete. Move the float back and forth across the surface to remove any ridges or bumps. If you want a textured, slip-resistant surface, this is the time to add it using a broom finish. For a smooth finish, use a trowel to achieve a polished, flat surface, being careful not to overwork the concrete.
Let the Concrete Cure
Curing is a critical step for a strong, long-lasting concrete floor. Cover the floor with a plastic sheet or a curing blanket, and let it sit for at least 24–48 hours. After that, lightly mist the floor with water daily for the next week to ensure a gradual cure. Avoid placing heavy objects on the floor or using the garage until the concrete is fully cured, which can take up to 28 days.
Common Mistakes to Avoid
Installing a concrete garage floor can be straightforward, but there are common mistakes that can lead to poor results or structural issues. Avoiding these pitfalls will ensure you end up with a smooth, durable floor that looks professional.
Skipping the Sub-Base Preparation
One of the most frequent mistakes is skipping the gravel or crushed stone sub-base. This base provides essential stability and drainage for the concrete. Without it, the floor is more prone to cracking due to ground shifts or water buildup. Take the time to compact a four to six-inch base before pouring the concrete.
Ignoring Temperature and Weather Conditions
Concrete is highly sensitive to temperature. If it’s too hot, the concrete can dry too quickly, leading to cracks. Cold weather, on the other hand, can slow down curing. Ideally, pour concrete when temperatures are between 50°F and 75°F, and avoid rainy days as moisture can weaken the curing process.
Overwatering the Concrete Mix
Adding too much water to the concrete mix can make it easier to pour, but it compromises the strength of the finished floor. Follow the instructions on your concrete mix carefully, adding water gradually to reach the right consistency. A proper mix is thick and smooth, but not runny.
Rushing the Curing Process
Curing concrete is essential for strength and durability. Some homeowners make the mistake of using the floor too soon, which can result in damage. Give the concrete enough time to cure by covering it and keeping it moist for the first 7 days, then avoid placing heavy items or vehicles on it for at least 28 days.
Neglecting Reinforcement
For garages where the concrete will bear heavy loads, reinforcement is key. Installing rebar or wire mesh within the slab can prevent cracking and structural weaknesses over time. Skipping this step could lead to cracks that are difficult to repair once the floor is in use.
Forgetting to Level the Surface
Uneven concrete is not only unsightly but also a tripping hazard and can affect drainage. Make sure to level the concrete using a screed and smooth it with a float to avoid any dips or high spots. Taking the time to get an even surface will pay off in terms of durability and aesthetics.
Tips for Longevity and Care
Concrete garage floors are known for their durability, but regular maintenance can help extend their lifespan and keep them looking their best. Here’s how to care for your concrete floor to keep it clean, safe, and in great shape for years.
Sweep and Mop Regularly
Keeping your concrete floor clean is the first step to long-term maintenance. Sweep away dirt and debris regularly, as buildup can eventually scratch or dull the surface. Use a damp mop with mild soap for deeper cleaning, and avoid harsh chemicals that can damage the floor over time.
Apply a Protective Sealant
A sealant is a protective layer that shields concrete from stains, chemicals, and moisture. Applying a sealant every couple of years can make cleaning easier and extend the floor’s life. Choose a sealer specifically designed for garage floors, as these offer added protection against oil and other automotive fluids.
Clean Up Spills Promptly
While concrete is durable, it’s not entirely stain-proof. Oil, gasoline, and other automotive fluids can seep into the concrete, causing discoloration. Clean up spills as soon as they happen to prevent stains, and consider using a degreaser for any tougher stains that have set in.
Use Mats or Rugs in High-Traffic Areas
Placing mats or rugs in high-traffic areas can help protect the concrete from excessive wear, especially if you frequently drive vehicles in and out or work on projects in the garage. This is especially helpful during the winter months, as mats can catch salt and moisture that might otherwise damage the floor.
Address Cracks Immediately
Cracks in concrete floors are inevitable over time, but addressing them promptly can prevent them from worsening. Use a concrete patching compound to fill small cracks, which will help maintain the floor’s strength. For larger cracks, consider consulting a professional to ensure the repair is done properly.
Reseal or Polish as Needed
Over time, your concrete floor may lose its shine or become susceptible to wear. If your floor has a polished finish, consider having it repolished every few years to restore its appearance. For sealed floors, a fresh coat of sealer can bring back the glossy finish and strengthen its resistance to stains.
Painting Your Garage Floors
Garage Floor Concrete Repair in Minnesota – Concrete Coating
Pristine Concrete Garage floor
Garage Floor Coating & Concrete Finishes
Related Posts:


