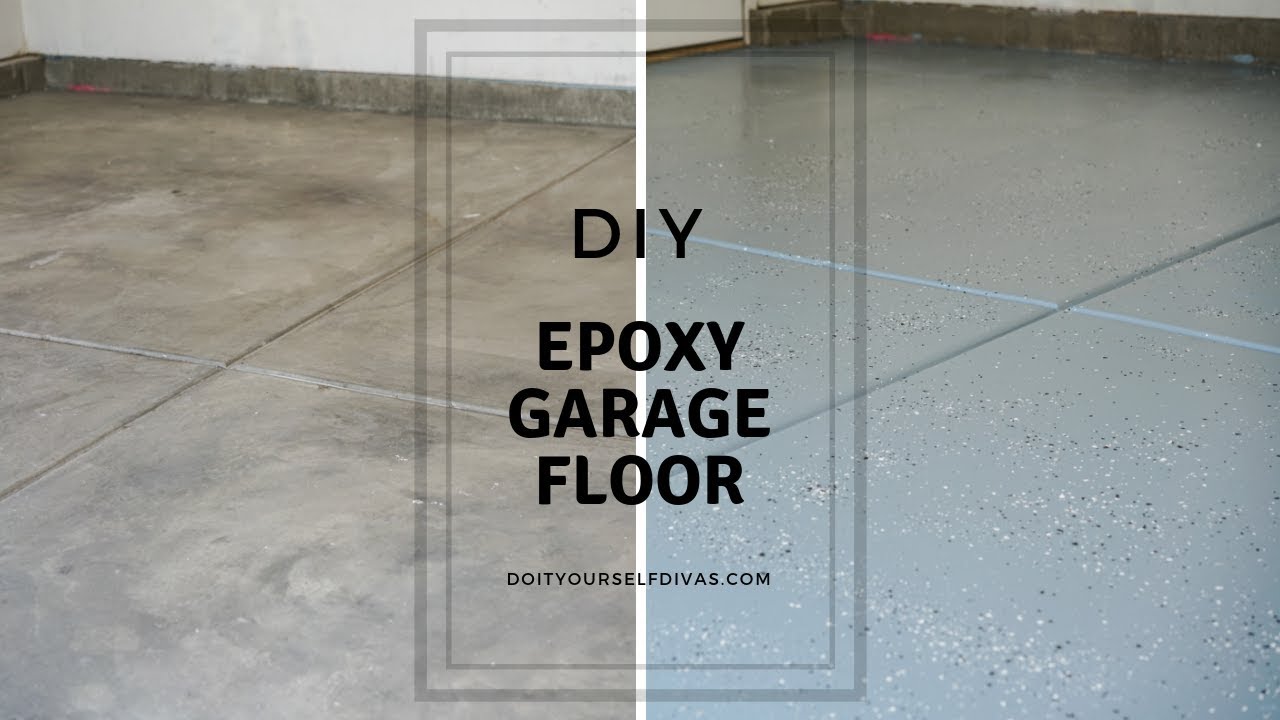
Epoxy Garage Floor: The Benefits of Durability and Aesthetics
Upgrading your garage with an epoxy floor isn’t just about looks—it’s about getting the best out of your space. If you’ve been considering this DIY project, knowing the key benefits can help you understand why epoxy is the perfect choice for transforming your garage into a durable and stylish environment. Here’s why an epoxy garage floor can elevate both form and function.
- Exceptional Durability for Everyday Use One of the most significant reasons people choose epoxy flooring is its unmatched durability. Garage floors often bear the brunt of heavy vehicles, tools, and frequent traffic, but epoxy stands up to all of it. The hardened coating is impact-resistant, making it difficult to crack or chip. Even after years of use, you’ll find that an epoxy floor remains intact, helping to extend the life of your garage.
- Resistance to Chemicals and Stains Let’s face it—garages can get messy. Oil spills, gasoline drips, and household chemicals are common hazards in this space. With an epoxy floor, you don’t have to worry about stains seeping into your concrete. Epoxy’s non-porous surface resists chemical spills, keeping your garage floor looking clean and pristine. Any spills can be easily wiped away without long-term damage.
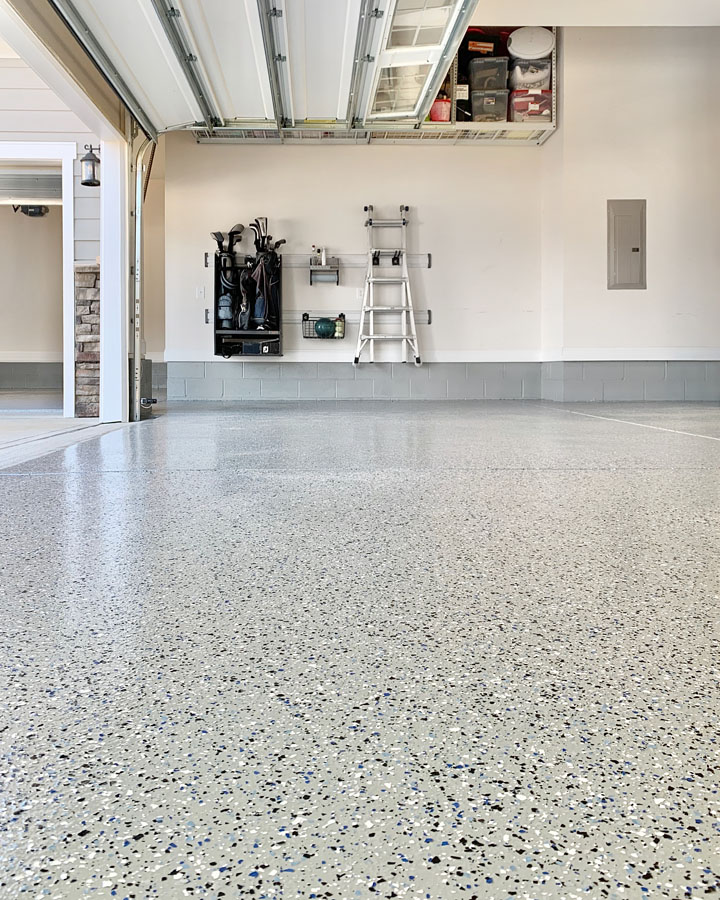
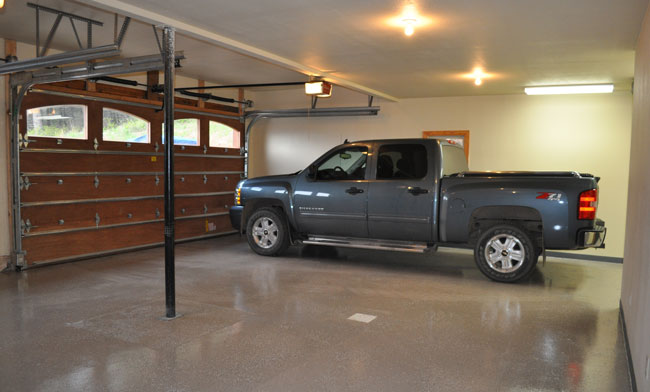
- Improved Aesthetic Appeal A concrete floor can make your garage feel unfinished or cold, but epoxy transforms it into a polished, professional-looking space. You can choose from a variety of colors, patterns, and even metallic finishes. I opted for a sleek gray with speckles of blue, and now my garage feels more like an extension of my home, rather than just a place to store tools and vehicles.
- Customizable Designs for a Personal Touch One of the best things about epoxy flooring is the range of customization options. From decorative flakes to glossy finishes, you can create a design that matches your style. Whether you want a sleek monochrome look or something that adds a pop of color, epoxy offers endless possibilities. My favorite part was adding a sprinkle of decorative flakes—it added texture and dimension to an otherwise flat surface.
- Easy Maintenance and Cleaning A well-installed epoxy floor requires minimal maintenance. Gone are the days of scrubbing oil stains from porous concrete. Thanks to its smooth surface, an epoxy-coated floor is incredibly easy to clean. You can sweep, mop, or hose it down, and it will look as good as new. I love how effortlessly it stays clean even after my car leaves dirt and debris behind.
- Enhanced Safety Features Believe it or not, an epoxy floor can make your garage a safer space. Some epoxy coatings have anti-slip additives that provide extra grip, which can be especially useful in wet or oily conditions. This means fewer slips and falls, especially if your garage doubles as a workshop or storage area. It’s peace of mind knowing the floor can handle a little extra wear and tear while keeping everyone safe.

Gathering Your Tools and Materials
Getting ready to tackle a DIY epoxy floor project requires more than just enthusiasm—you need the right tools and materials to make the process as smooth as possible. Before you dive in, let’s go over the essential supplies you’ll need to ensure everything goes off without a hitch. Trust me, gathering everything beforehand will make your project a lot less stressful.
Epoxy Kit: The Foundation of Your Project The first thing you’ll need is a high-quality epoxy kit. These kits typically come with epoxy resin, hardener, and sometimes decorative flakes or a primer. Make sure to calculate the square footage of your garage so you buy enough product to cover the entire floor. I found that having extra epoxy on hand was a lifesaver in case I needed to touch up areas.
Concrete Cleaner and Degreaser Before applying epoxy, your garage floor needs to be spotless. A good concrete cleaner or degreaser will help remove any oils, stains, or residue that could prevent the epoxy from adhering properly. You’ll want to give your floor a thorough scrubbing, and in some cases, a power wash might be necessary. Cleanliness is key to ensuring a smooth, long-lasting finish.
Crack Filler and Concrete Patching Compound Inspect your floor for any cracks or chips before you begin. Even small imperfections can show through the epoxy and compromise the finish. Use a crack filler or concrete patching compound to fill in these gaps and allow enough time for it to dry. This step ensures that your epoxy will have a level and even surface to adhere to, creating a more professional-looking result.
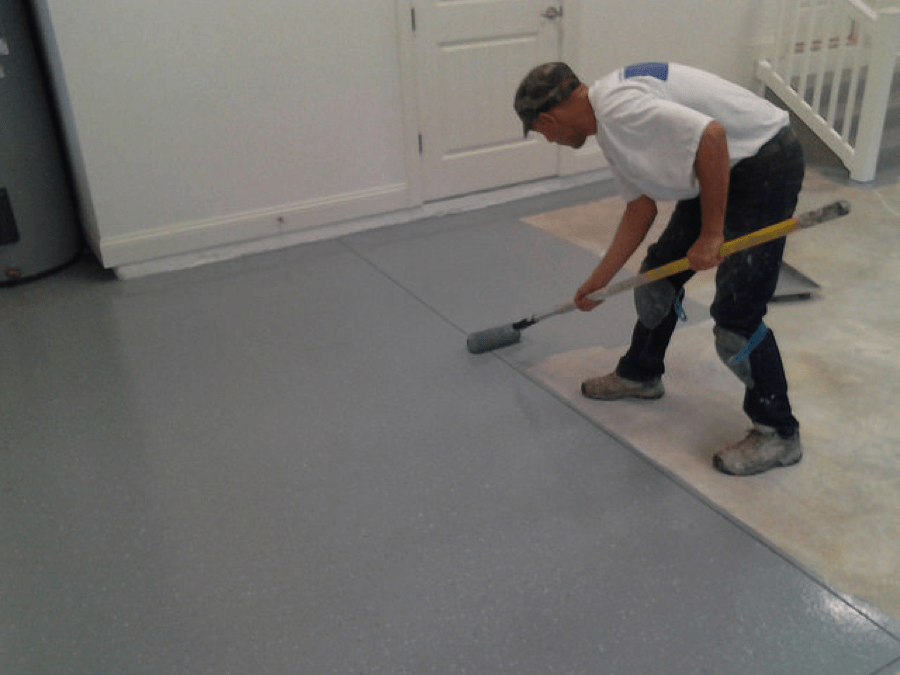
Epoxy Roller and Extension Handle Applying epoxy requires a specific type of roller—usually a 3/8-inch or 1/2-inch nap roller. These are designed to handle the viscosity of the epoxy and spread it evenly across the floor. An extension handle is also a must, as it will allow you to apply the epoxy without constantly bending over, saving your back during the process. Having this tool made my experience much smoother and less physically taxing.
Mixing Bucket and Stirring Stick You’ll need a sturdy bucket to mix the epoxy and hardener together. It’s important to mix the components thoroughly to activate the epoxy properly. I recommend using a drill with a mixing attachment to ensure you get a consistent blend without any lumps. This small investment makes the mixing process faster and much more effective than doing it manually with a stick.
Safety Gear: Gloves, Goggles, and a Respirator Safety is key when working with chemicals like epoxy. Always wear protective gloves, goggles, and a respirator mask to avoid inhaling fumes during the application. Trust me, you don’t want to skimp on this part. The fumes can be quite strong, and the last thing you want is to be sidelined halfway through your project because you didn’t take proper precautions.
Preparing Your Garage Floor
Preparation is everything when it comes to applying epoxy. You can’t just jump in and start painting; the key to a long-lasting, beautiful floor is in the prep work. Here’s a breakdown of how to get your garage floor prepped and ready for epoxy application.
Clearing the Garage: Remove All Items Before anything, you’ll need a completely clear workspace. This means removing every tool, box, and vehicle from your garage. It’s also a good idea to cover any outlets or light switches to prevent accidental spills from getting into areas they shouldn’t. I set aside a whole day just to organize and remove items from the garage, which made the process much easier.
Thoroughly Clean the Floor The cleaner your garage floor, the better your epoxy will adhere. Start by sweeping away dirt, debris, and dust. Then, use a high-quality degreaser to tackle any oil stains or tough spots. For particularly dirty areas, a power washer can be a game-changer. I found that taking the extra time to get the floor spotless made a huge difference in the final product.
Inspect for Cracks and Chips Once your floor is clean, it’s time to inspect for imperfections. Even the smallest cracks or chips can affect the epoxy’s adherence, so it’s important to address them. Fill these imperfections with a concrete patching compound and allow it to dry fully. I was surprised by how many small cracks I found once the floor was clean, but patching them up was straightforward.
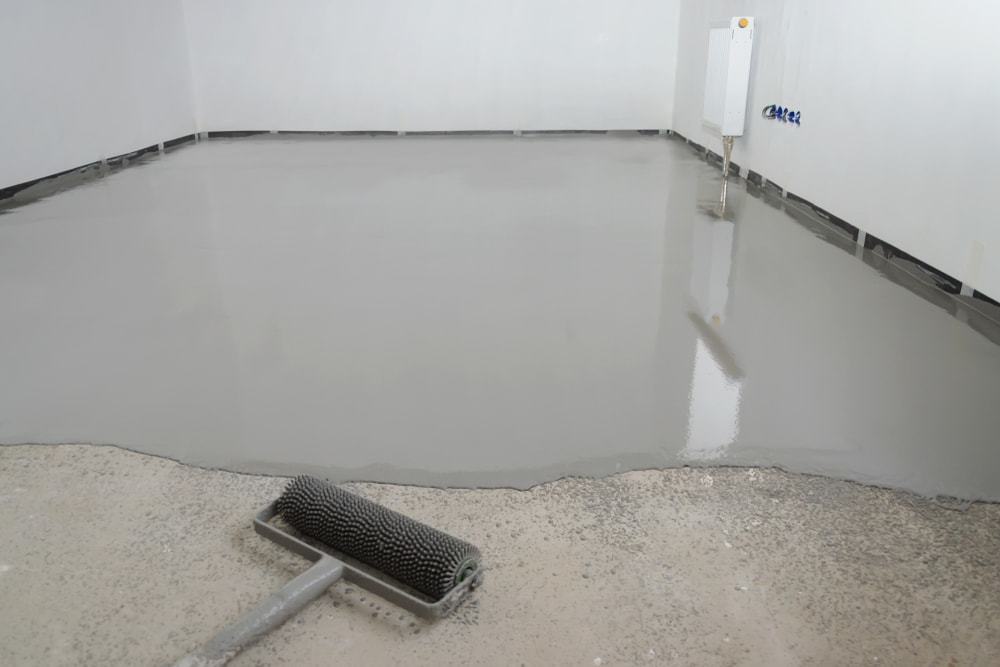
Etch the Floor for Better Adhesion To help the epoxy bond to the concrete, you’ll need to etch the floor. You can use an acid-based solution or a mechanical grinder to lightly roughen the surface. This step opens up the pores of the concrete, allowing the epoxy to penetrate and create a stronger bond. I went with an acid etching kit that was easy to apply and rinsed away quickly.
Rinse and Dry the Surface Completely After etching, it’s crucial to rinse the floor thoroughly to remove any remaining chemicals or debris. Once rinsed, allow the floor to dry completely. I left my garage to air out for a full 24 hours to ensure there was no residual moisture. Remember, epoxy and water don’t mix, so this drying step is critical to avoid any bubbles or imperfections later on.
Prime the Floor for a Professional Finish Applying a primer isn’t always necessary, but I highly recommend it for the best results. A primer coat helps the epoxy stick better and creates an even surface for the final coat. It also fills in any remaining pores in the concrete. I found that adding this step gave my floor a more professional, even finish.
Mixing the Epoxy: Tips for Getting the Perfect Consistency
Mixing epoxy is a crucial step that can make or break your project. It’s not as simple as just stirring two ingredients together; there’s an art to getting the consistency just right. Follow these tips to ensure your epoxy is properly mixed and ready for application.
Understand the Two-Part Epoxy System Epoxy consists of two components: resin and hardener. These two parts need to be mixed in precise ratios to activate the chemical reaction that allows the epoxy to harden. Make sure to read the instructions on your epoxy kit carefully and measure the amounts accurately. Eyeballing it can lead to issues like slow curing or a tacky finish.
Use a Sturdy Mixing Bucket You’ll need a heavy-duty mixing bucket that can handle the thick consistency of epoxy. Make sure it’s large enough to accommodate both the resin and hardener with room to stir. I recommend using a separate bucket for each batch you mix to avoid contamination. The last thing you want is any residue from previous batches affecting your new mix.
Mix Thoroughly for a Consistent Blend Once the resin and hardener are in the bucket, it’s time to mix. Using a drill with a mixing attachment ensures you get an even blend without air pockets. Stir the epoxy slowly but consistently, scraping the sides of the bucket to make sure everything is well incorporated. Mixing too quickly can introduce bubbles into the epoxy, so take your time.
Watch the Clock: Pot Life is Key One thing I learned the hard way is that epoxy has a limited “pot life,” or the amount of time you have to work with it before it starts to harden in the bucket. Once mixed, you typically have 30 to 45 minutes to apply the epoxy, depending on the temperature and humidity. Keep an eye on the time and work efficiently to avoid wasting any product.
Check for a Uniform Appearance As you mix, pay attention to the consistency and color of the epoxy. It should have a uniform appearance with no streaks or lumps. If you notice any inconsistencies, keep mixing until they’re fully blended. I found that spending an extra minute or two on this step saved me a lot of trouble later when applying the epoxy.
Divide Your Batches for Large Areas If you’re covering a large garage, it’s best to mix your epoxy in smaller batches. This prevents the epoxy from setting in the bucket before you’ve had a chance to apply it. I divided my garage into sections and mixed fresh batches as I moved along, which made the process much more manageable and ensured a consistent application.
Applying the Epoxy: Techniques for a Smooth, Professional-Looking Finish
Once you’ve prepped and mixed your epoxy, it’s time for the fun part—applying it to your garage floor! This step requires patience and attention to detail, but with the right techniques, you can achieve a smooth, professional finish that will last for years.
Work in Small Sections Applying epoxy in sections helps you control the spread and ensures a consistent thickness. Start in the farthest corner of your garage and work your way toward the exit, so you don’t accidentally trap yourself in a corner. I divided my floor into manageable 3×3-foot sections and focused on one area at a time.
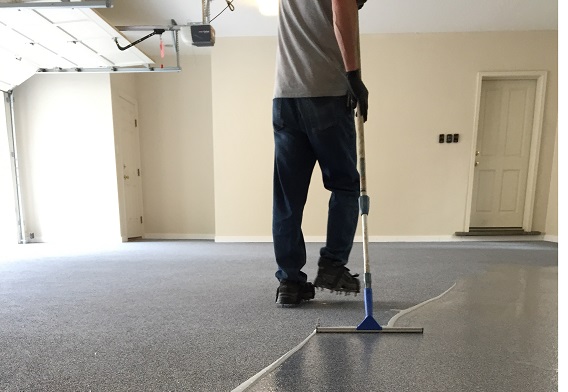
Use an Epoxy Roller for Even Application A roller with a 3/8-inch nap works best for spreading epoxy. Dip the roller in the mixed epoxy and apply it in long, even strokes. Avoid overworking the material, as this can introduce bubbles or create an uneven finish. I found that using a roller with an extension handle made the job much easier and allowed me to cover more ground quickly.
Maintain a Wet Edge to Avoid Overlapping Marks One of the most important techniques when applying epoxy is keeping a wet edge. This means that each section should overlap slightly with the previous one while the epoxy is still wet. This prevents lap marks and ensures a smooth, seamless finish. I kept a steady pace and continuously checked to make sure I wasn’t leaving any dry patches behind.
Watch Out for Air Bubbles Bubbles can form in epoxy during application, but they’re easy to fix if you catch them early. After rolling out the epoxy, go over the surface with a spiked roller or a torch to remove any bubbles. I had a few spots where bubbles formed, but using the torch helped them rise to the surface and pop without damaging the finish.
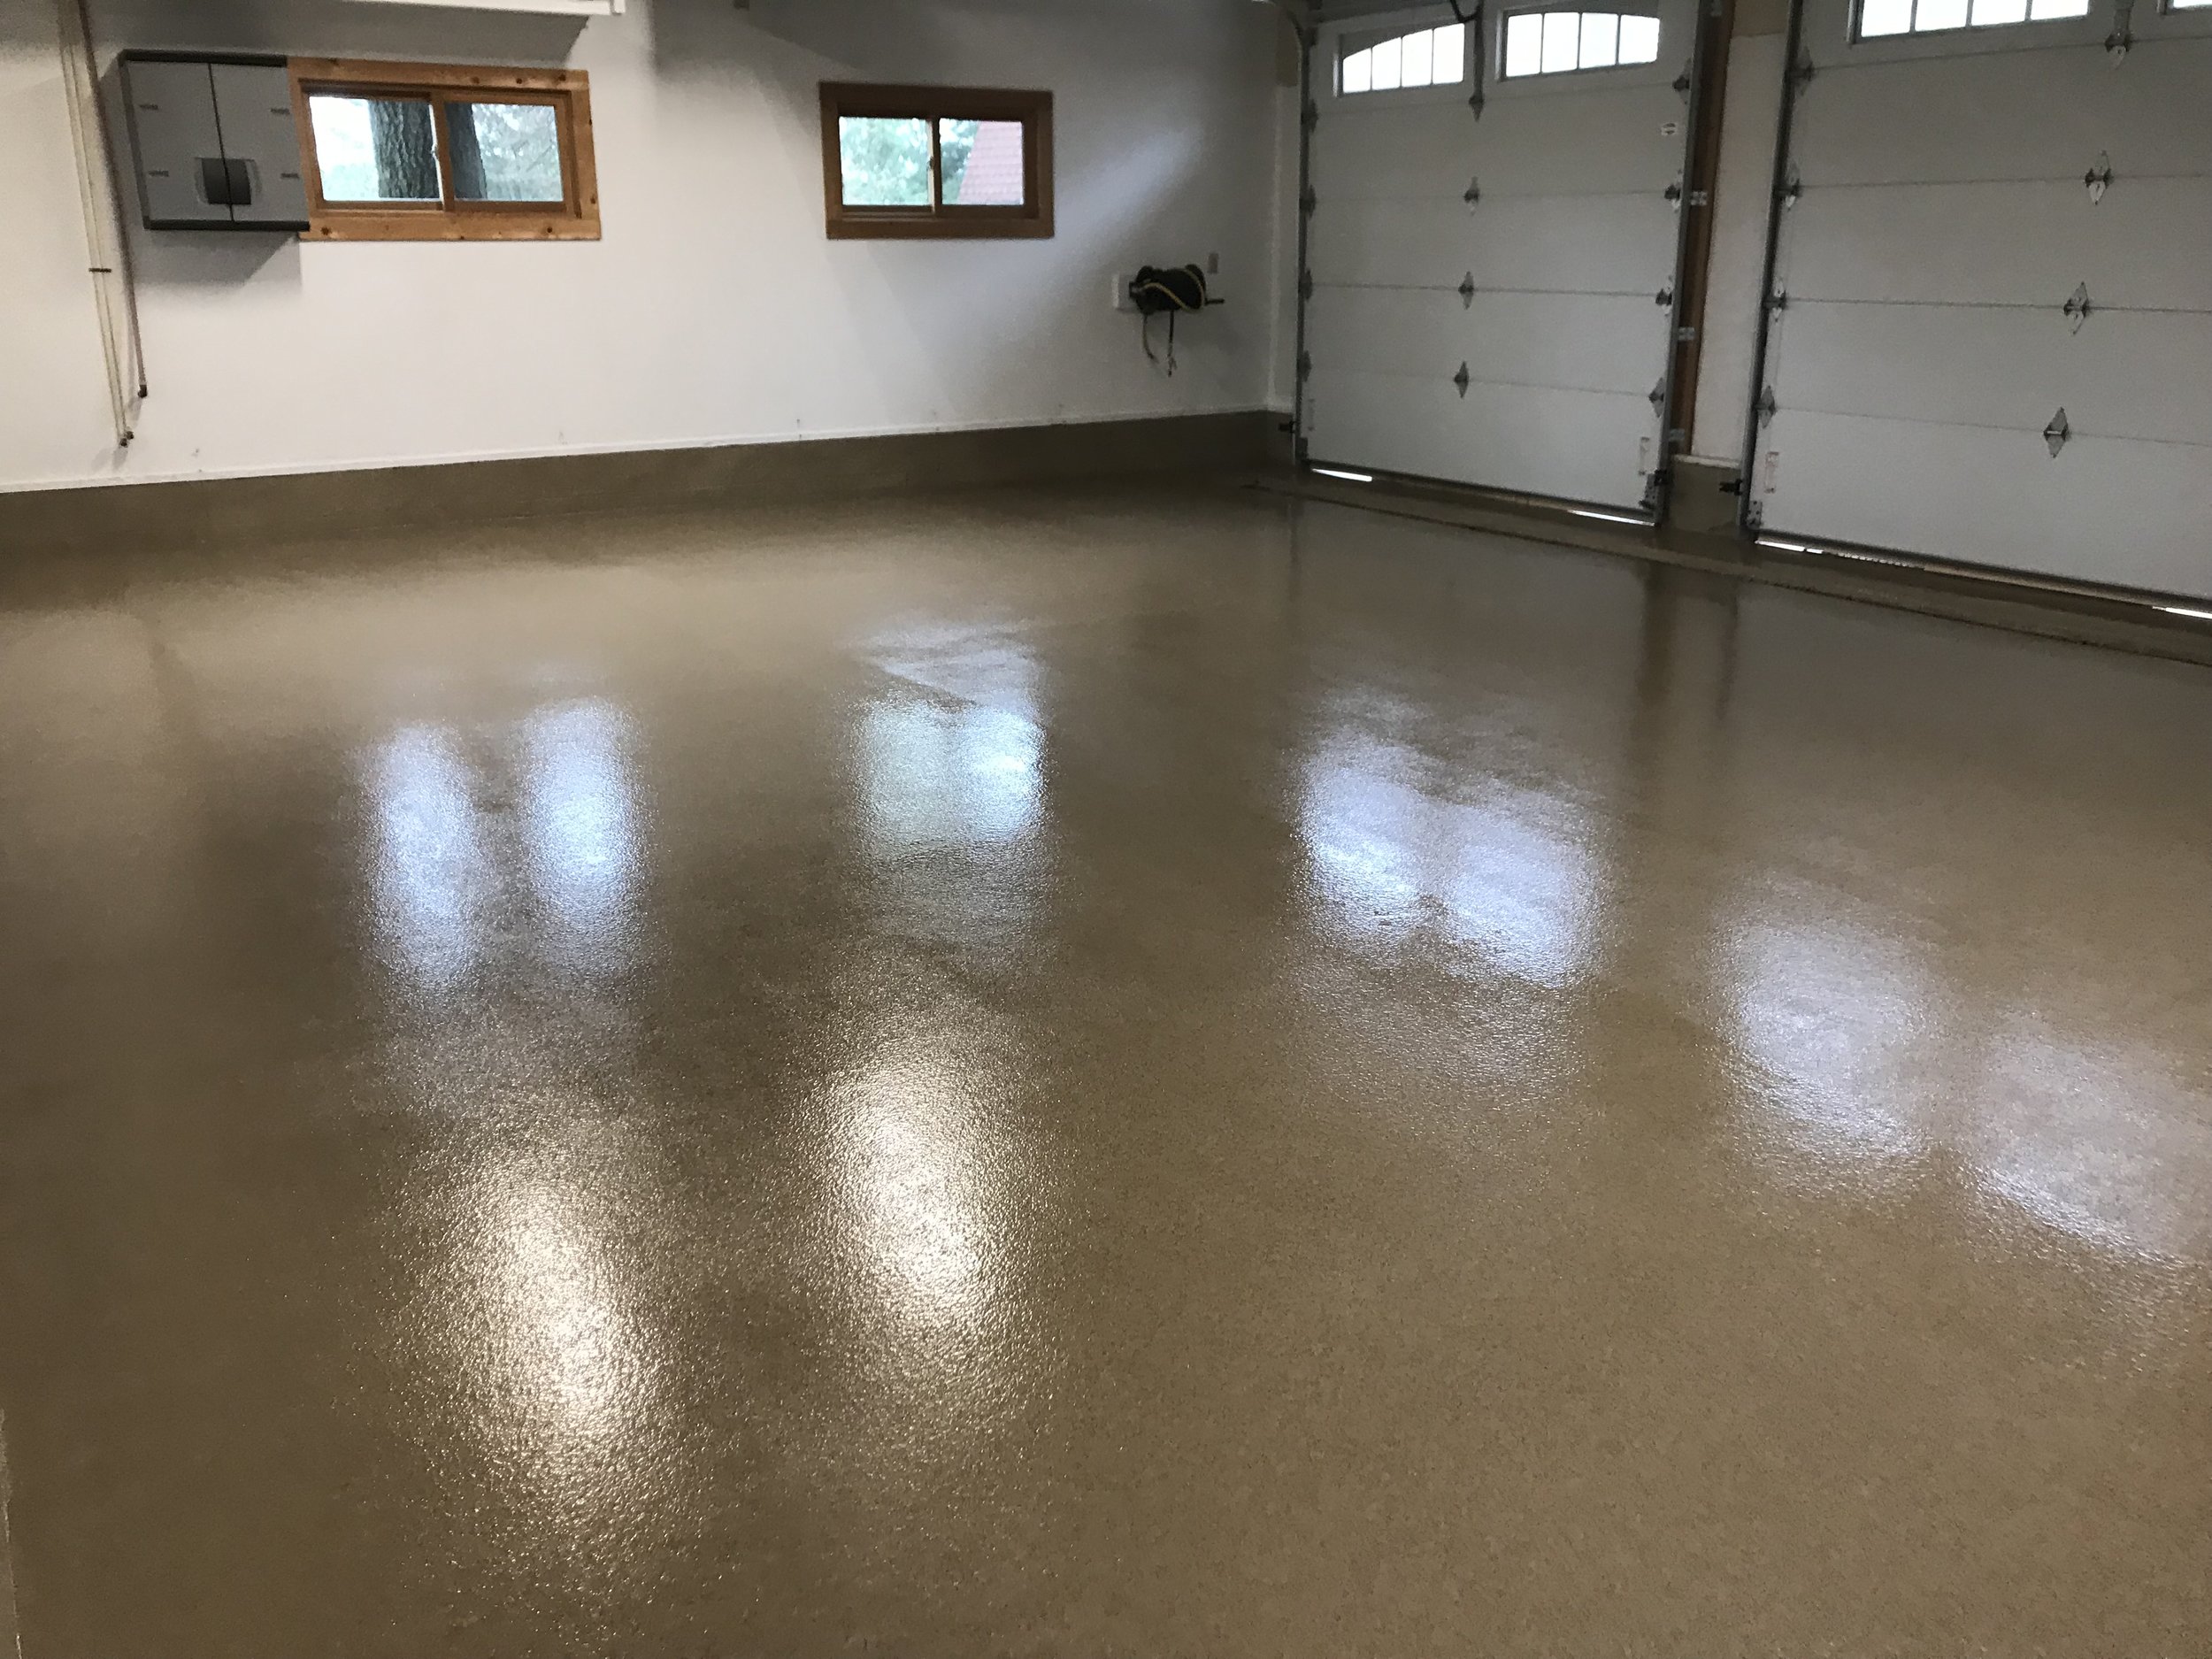
Apply Multiple Coats for Added Durability For the best results, consider applying multiple coats of epoxy. The first coat serves as the base layer, and subsequent coats add durability and depth. I applied two coats, waiting for the first to dry completely before starting the second. This added thickness made the floor more resistant to damage and gave it a high-gloss finish that looked fantastic.
Allow Ample Drying Time Between Coats Patience is key when applying epoxy. After the first coat, allow the floor to dry for at least 24 hours before applying a second coat or walking on it. Rushing this process can lead to imperfections or soft spots in the epoxy. I let my floor cure for 48 hours before moving any heavy items back into the garage, and it was well worth the wait.
Adding Decorative Flakes and Finishing Touches: Customizing Your Epoxy Floor
Adding decorative flakes is one of the best ways to personalize your epoxy garage floor and give it a unique touch. Not only do they enhance the look, but they also provide a bit of texture, which can improve traction. Here’s how you can add some flair to your floor while ensuring it still looks professional.
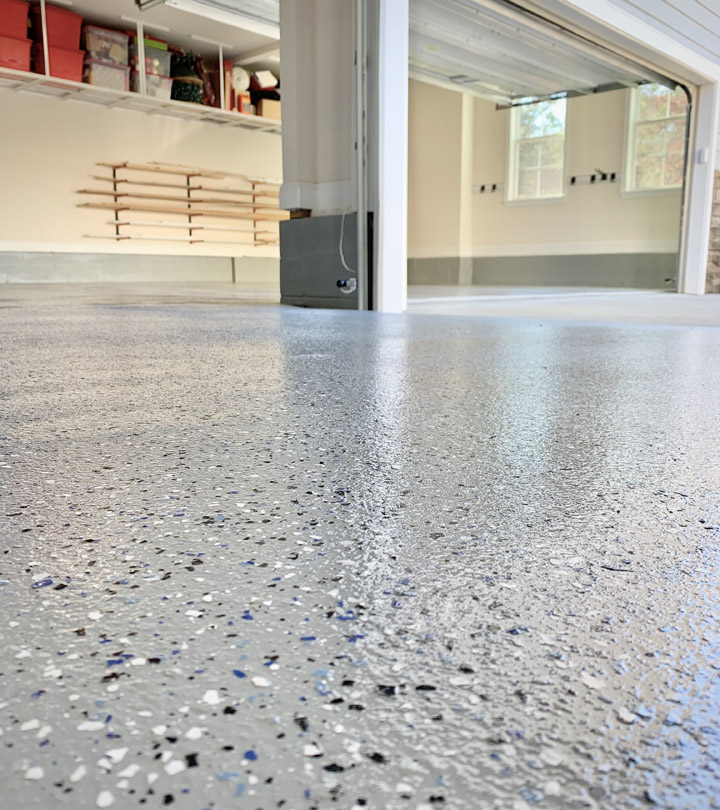
Choose Your Decorative Flakes Decorative flakes come in a variety of colors, sizes, and finishes. You can opt for subtle tones that complement the base color of your epoxy or go bold with bright, contrasting shades. I chose a combination of blue, gray, and white flakes to match the overall aesthetic of my garage, and it turned out beautifully.
Broadcast Flakes While the Epoxy Is Wet The trick to applying decorative flakes is timing. You’ll want to broadcast them over the wet epoxy while it’s still tacky, so the flakes stick properly. I recommend starting with a small amount and gradually adding more until you reach the desired coverage. I went for a medium coverage, where the flakes were noticeable but not overwhelming.
Apply Flakes Evenly for a Balanced Look Even distribution is key to achieving a professional look. To avoid clumping or bare spots, gently toss the flakes up in the air and let them fall naturally onto the floor. This technique helps them spread more evenly than if you try to place them directly on the surface. I found that taking my time with this step resulted in a balanced, cohesive design.
Press the Flakes Into the Epoxy Once you’ve applied the flakes, use a spiked roller or a broom to lightly press them into the epoxy. This ensures they bond well with the surface and prevents them from lifting later on. I gently pressed mine down after about 15 minutes of applying them, which helped them settle into the epoxy without disrupting the smooth finish.
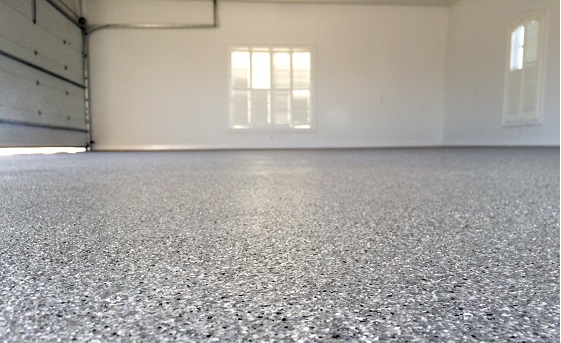
Add a Topcoat for a Polished Finish To seal in the flakes and give your floor a glossy, polished finish, you’ll need to apply a clear topcoat. This not only enhances the appearance of the flakes but also adds an extra layer of protection to your floor. I used a high-gloss topcoat, which made the colors of the flakes pop and gave the entire floor a mirror-like sheen.
Customize Further with Metallic Finishes or Logos If you want to take customization to the next level, consider adding metallic finishes or even custom logos to your epoxy floor. Metallic epoxy gives a marbled, high-end look, while logos can add a personal or branded touch. I didn’t go this route, but I’ve seen garages where these additions really stand out and add a wow factor.
Curing and Maintenance: How to Care for Your New Epoxy Garage Floor for Long-Term Durability
After all the hard work of installing your epoxy garage floor, you’ll want to make sure it lasts for years to come. Proper curing and maintenance are key to ensuring the durability and longevity of your new floor. Here’s how to care for your epoxy-coated garage and keep it looking like new.
Allow Sufficient Curing Time The curing process is critical to the success of your epoxy floor. While the surface may feel dry to the touch within 24 hours, the epoxy needs a full 72 hours to cure completely. During this time, avoid placing heavy objects or vehicles on the floor to prevent any dents or imperfections. I gave my floor a full week to cure, just to be safe, and it’s been rock solid ever since.
Sweep and Mop Regularly One of the best things about epoxy floors is how easy they are to clean. Regular sweeping or vacuuming will help prevent dirt and debris from scratching the surface. For deeper cleaning, a mop with mild soap and water will do the trick. I make it a habit to mop my garage floor once a month, and it stays looking as shiny as the day I installed it.
Avoid Harsh Chemicals While epoxy is highly resistant to chemicals, it’s still a good idea to avoid using harsh cleaning agents like bleach or ammonia, as they can dull the finish over time. Stick to mild cleaners, and if you have a spill, clean it up as soon as possible. I keep a bottle of simple dish soap and water nearby for any quick clean-ups.
Use Felt Pads on Heavy Items To protect your epoxy floor from scratches or gouges, place felt pads under the legs of heavy furniture, tool chests, or workbenches. This small step prevents damage when moving items around your garage. I’ve noticed that felt pads not only protect the floor but also make it easier to slide heavy objects when needed.
Reapply a Topcoat Every Few Years Depending on the amount of traffic in your garage, it’s a good idea to reapply a clear topcoat every few years. This will refresh the glossy finish and add another layer of protection against wear and tear. I plan on applying a new topcoat after three years to keep my floor looking fresh and extend its life.
Address Any Damage Immediately If you notice any chips or cracks in the epoxy, it’s best to address them as soon as possible to prevent further damage. Small repairs can usually be done with a patch kit, but for larger issues, you may need to consult a professional. I haven’t had any issues so far, but I keep a repair kit on hand just in case.

What Are the Differences Between DIY Garage Floor Coating and

DIY Epoxy Garage Floors
Coatings Pro v. DIY Epoxy Garage Floor Kits CoatingsPro Magazine
How Much Does It Cost To Epoxy Garage Floor?

Do-It-Yourself Epoxy Floor Coating
DIY Epoxy Garage Floor Tutorial – How to make your garage look
Related Posts: