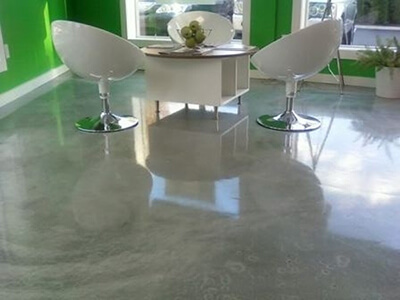
Key Benefits of Choosing an Epoxy Floor Finish
Every time I walk into a room with an epoxy floor finish, I can’t help but appreciate its sleek and polished look. But aesthetics are just the tip of the iceberg. Let’s talk about some of the standout benefits that come with choosing an epoxy floor finish.
- Durability: Epoxy floors are incredibly durable. They’re designed to withstand heavy traffic and resist wear and tear, making them a popular choice for both commercial and residential spaces. I’ve seen epoxy floors in warehouses that look just as good after years of use as they did on day one.
- Easy Maintenance: Keeping an epoxy floor clean is a breeze. Spills and stains don’t easily penetrate the surface, so a simple wipe is often all it takes. This is one of the main reasons I love recommending epoxy floors to families with kids and pets – it makes life just a little bit easier.
- Chemical Resistance: If you’re like me and you enjoy DIY projects, you’ll appreciate epoxy’s resistance to chemicals. Whether it’s oil spills in the garage or cleaning agents in your kitchen, an epoxy floor can handle it without getting damaged.
- Aesthetic Appeal: Epoxy floors offer a high-gloss finish that can instantly elevate the look of any space. But that’s not all – they come in a variety of colors and designs, so you can customize your floor to match your personal style.
- Safety Features: One lesser-known benefit of epoxy flooring is its safety features. You can add slip-resistant additives to ensure your floor remains safe, even when it’s wet. This is a huge plus for commercial spaces or homes with young children or elderly residents.
- Cost-Effective: When you look at the longevity and low maintenance of epoxy floors, they’re actually quite cost-effective. They might have a higher upfront cost compared to other flooring options, but they pay for themselves over time with their durability and low upkeep requirements.
Surface Preparation: The Foundation of Success
Preparing the surface before applying an epoxy floor finish is crucial. In my experience, a well-prepared surface can make all the difference between a long-lasting floor and one that peels off in no time. Here’s how to get it right.
Cleaning: The first step in surface preparation is thorough cleaning. Any dust, dirt, or debris left on the surface can prevent the epoxy from adhering properly. I always make sure to sweep and mop the floor multiple times and use a strong cleaner to remove any stubborn grease or oil stains.
Repairing Cracks and Holes: Any imperfections in the floor must be fixed before applying epoxy. Cracks and holes can cause the epoxy to bubble or peel. I use a high-quality patching compound to fill any gaps and ensure the surface is smooth and even.
Etching the Surface: Etching the concrete is an essential step. This process creates a rough texture that allows the epoxy to bond better with the surface. I usually use an etching solution or a mechanical grinder to achieve the desired roughness.
Moisture Testing: Moisture is the enemy of epoxy flooring. Before applying the coating, I always perform a moisture test to ensure the surface is dry. This involves taping plastic sheets to the floor and checking for condensation after 24 hours. Any sign of moisture, and I know further drying is needed.
Priming: Applying a primer coat can enhance the bonding of the epoxy. Primers also help in creating a uniform base, which improves the overall finish. I often use a high-quality epoxy primer that is compatible with the surface and the epoxy coating I plan to use.
Final Inspection: Before moving on to the application stage, I conduct a thorough inspection of the surface to ensure it’s completely clean, dry, and free of any imperfections. This final check is crucial because any overlooked issues at this stage can jeopardize the entire project.
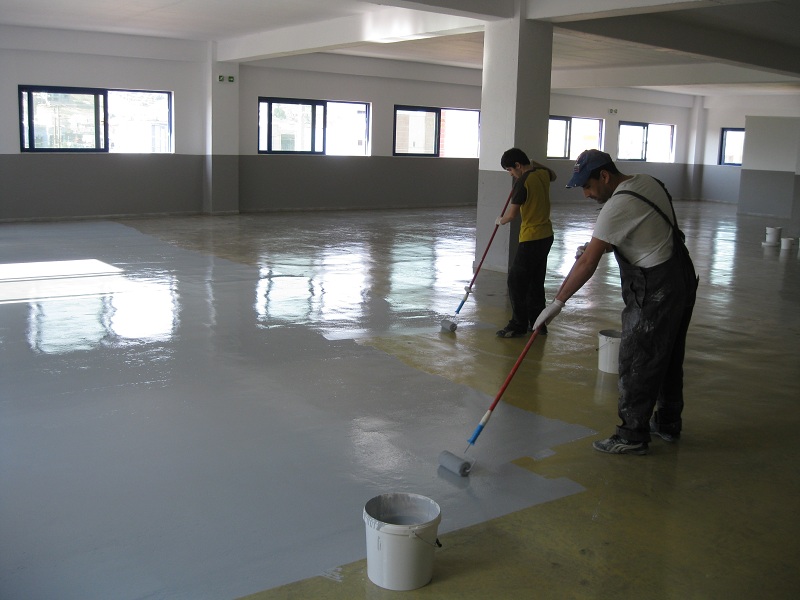
Application Process and Essential Techniques
Applying an epoxy floor finish might sound intimidating, but with the right techniques and a bit of patience, it’s definitely manageable. I’ve broken down the steps to simplify the process.
Mixing Epoxy Resin and Hardener: The first step is to mix the epoxy resin and hardener. It’s crucial to follow the manufacturer’s instructions for the correct ratio. I mix the components thoroughly to ensure a consistent blend – even a slight deviation can affect the curing process.
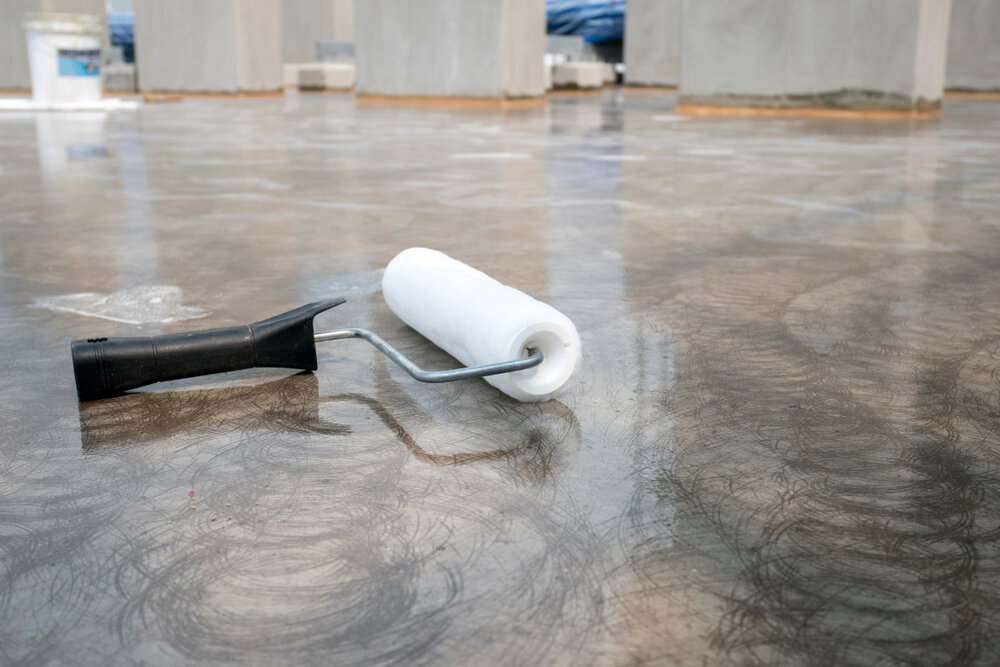
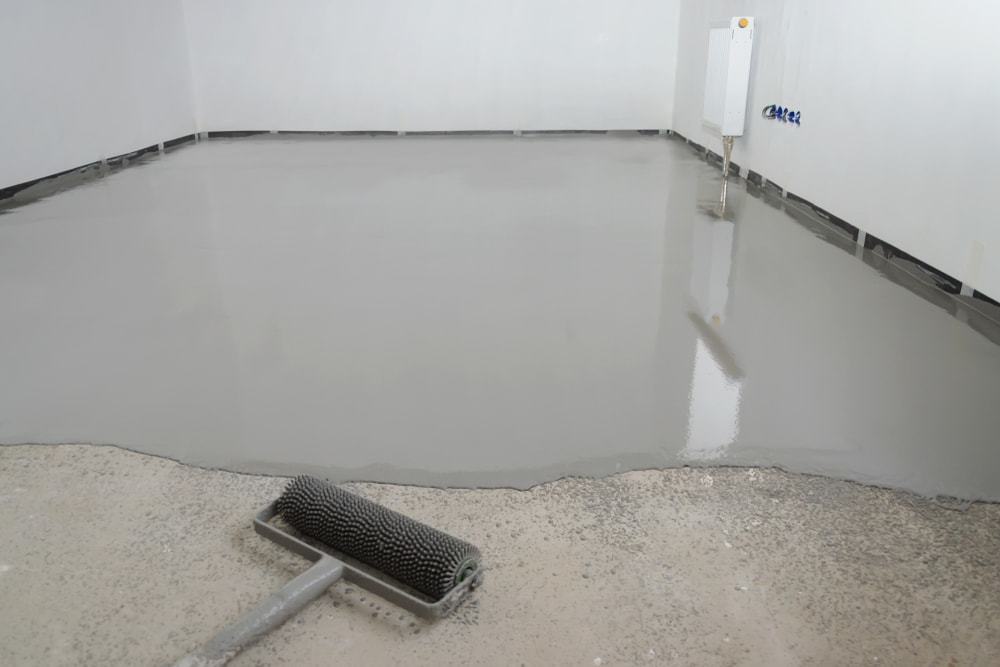
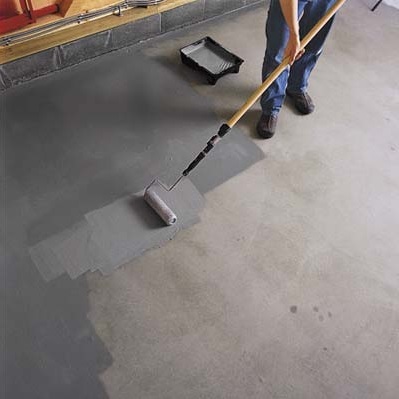
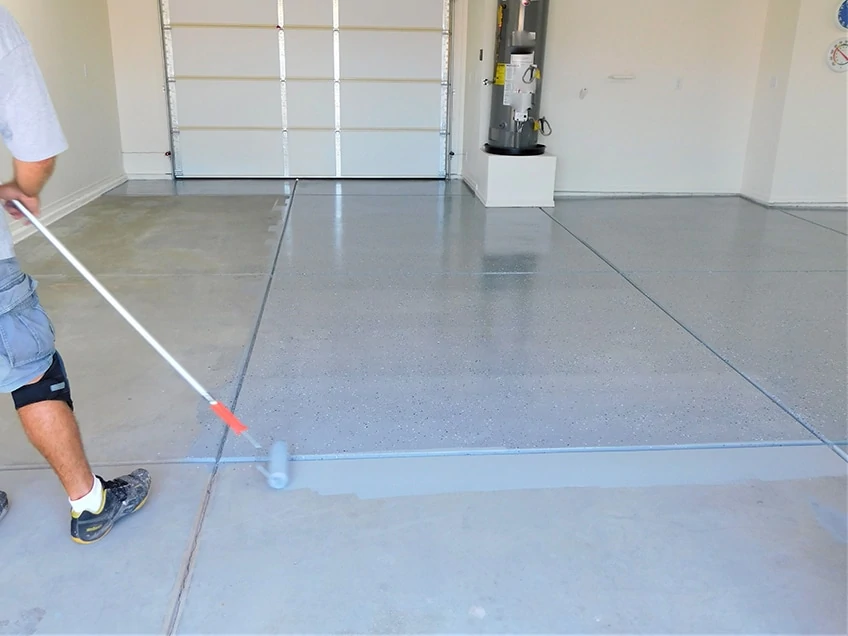
Applying the Primer: After mixing, I start by applying the primer coat. Using a roller, I spread the primer evenly across the surface. It helps to work in small sections and maintain a wet edge to avoid uneven patches. I give ample time for the primer to dry before moving to the next step.
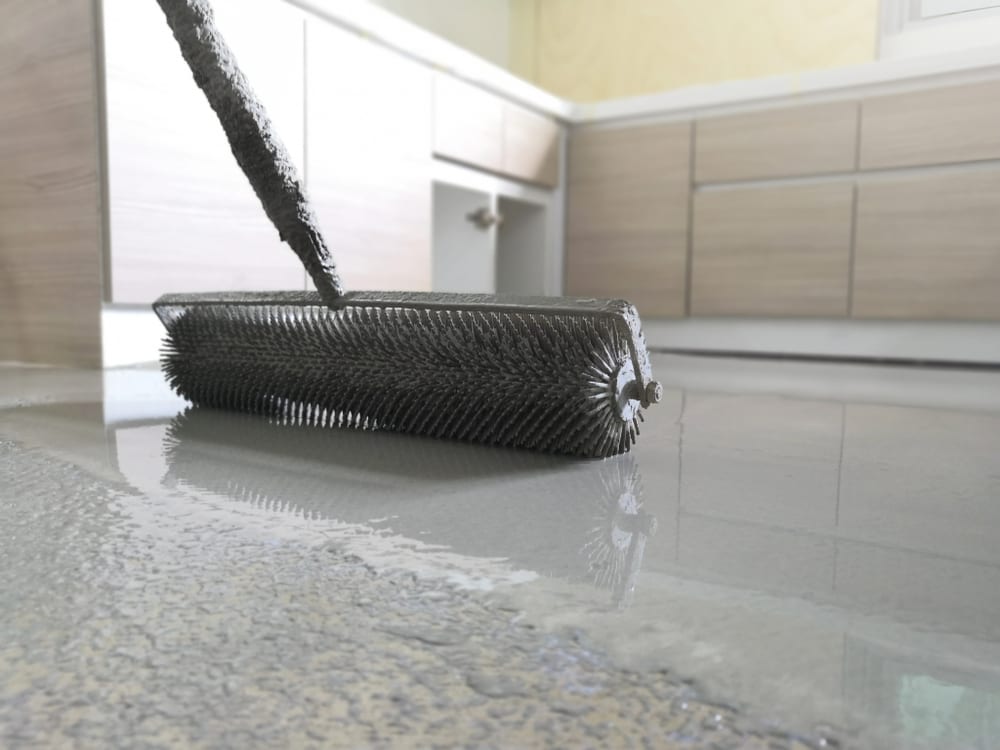
Rolling on the Base Coat: Once the primer is dry, I apply the base coat. I pour the epoxy mixture onto the floor and use a roller with an extension pole to spread it evenly. It’s essential to work quickly because the epoxy starts to thicken as it cures. I use a paintbrush to handle edges and corners.
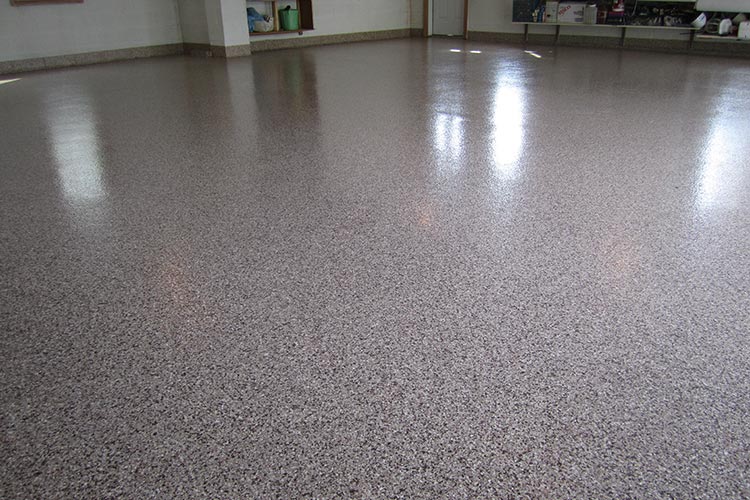
Adding Decorative Elements: If you want to add some flair to your epoxy floor, now’s the time to do it. Metallic pigments, colored quartz, or flakes can be sprinkled onto the base coat while it’s still wet. I find that experimenting with different colors and designs can create stunning and unique results.
Applying the Topcoat: Once the base coat is dry, I apply the topcoat. This coat is vital for sealing the floor and providing additional protection. It’s applied in the same manner as the base coat, ensuring even coverage and a smooth finish.
Curing Time: After the topcoat is applied, it’s time to let the epoxy cure. This can take anywhere from 24 to 72 hours, depending on the room’s temperature and humidity. I always advise avoiding foot traffic during this period to ensure the finish sets properly and achieves maximum durability.
Common Mistakes to Avoid During Installation
During my experience with epoxy floor installations, I’ve come across several mistakes that can easily derail a project. Here are some common pitfalls and how to avoid them.
Inadequate Surface Preparation: One of the biggest mistakes is failing to prepare the surface properly. Skimping on cleaning, repairing, or etching can lead to poor adhesion and eventual peeling of the epoxy. Always take the time to prep the surface thoroughly.
Incorrect Mixing Ratios: Another frequent misstep is not following the correct mixing ratios of epoxy resin and hardener. This can result in improper curing and a weak finish. I always double-check the instructions and use precise measurements.
Ignoring Moisture Levels: Applying epoxy to a damp surface is a recipe for disaster. Moisture can cause the epoxy to bubble or fail to adhere correctly. Always conduct a moisture test before starting the application process.
Rushing the Application: Patience is key when applying epoxy. Rushing through the steps can result in an uneven finish or missed spots. Take your time and ensure each layer is applied smoothly and evenly.
Overlooking Safety Precautions: Epoxy application involves chemicals that can be hazardous if not handled properly. Always wear protective gear, ensure proper ventilation, and follow all safety guidelines to avoid any health risks.
Misjudging Curing Time: Allowing adequate curing time is crucial for a durable finish. Walking on the floor too soon can damage the surface. I always recommend waiting at least 24 to 72 hours before using the floor, depending on the manufacturer’s instructions.
Maintenance and Long-Term Care
An epoxy floor is an investment, and like any investment, it requires proper care to maintain its appearance and functionality. Here’s how I keep my epoxy floor looking pristine.
- Regular Sweeping and Mopping: Regular cleaning is essential to keep the surface free from dust, dirt, and debris. I usually sweep the floor daily and mop it weekly using a soft mop and a mild detergent. Abrasive cleaners are a no-go, as they can damage the epoxy finish.
- Prompt Spill Cleanup: While epoxy floors are resistant to spills, it’s best to clean them up quickly to avoid potential staining or damage. I always have a soft cloth or paper towel handy to wipe up any spills as soon as they happen.
- Using Protective Mats: In high-traffic areas or under heavy furniture, I use protective mats to prevent scratching or scuffing. These mats can also help in trapping dirt and moisture, preventing them from spreading across the floor.
- Avoiding Harsh Chemicals: Household cleaners with harsh chemicals can deteriorate the epoxy finish over time. I stick to pH-neutral cleaners specifically designed for epoxy floors or simple soap and water solutions. Avoid cleaners containing citrus, vinegar, or bleach as these can dull the finish.
- Preventive Maintenance: I regularly inspect the floor for any signs of wear, scratches, or damage. Early detection of issues allows for prompt repairs before they become major problems. This includes checking for any peeling or chipping, particularly in high-traffic areas.
- Professional Deep Cleaning: Once or twice a year, I schedule a professional deep cleaning to maintain the floor’s shine and protective properties. This helps remove any stubborn stains and restores the floor’s original luster.
- Temperature Considerations: I’m careful about extreme temperature changes, as they can affect the epoxy coating. In spaces with direct sunlight, I use window treatments to prevent UV damage and maintain consistent temperatures, which helps preserve the floor’s integrity.
With proper maintenance, an epoxy floor can maintain its beautiful appearance and durability for many years, making it a worthwhile investment for any space. The key is consistency in care and being proactive about preventing damage rather than dealing with repairs after the fact.

Epoxy Floor Thickness – Understanding how thick an epoxy floor
Epoxy Paint: What Is It Used For?
Epoxy Floor Coating – Change your Floor from Dreary to Wow!
Epoxy Flooring Finishes vs. Floor Paint – Zenith Painting & Coatings

Best Epoxy Floor Paint – Complete Guide for Epoxy Painting
Related Posts: