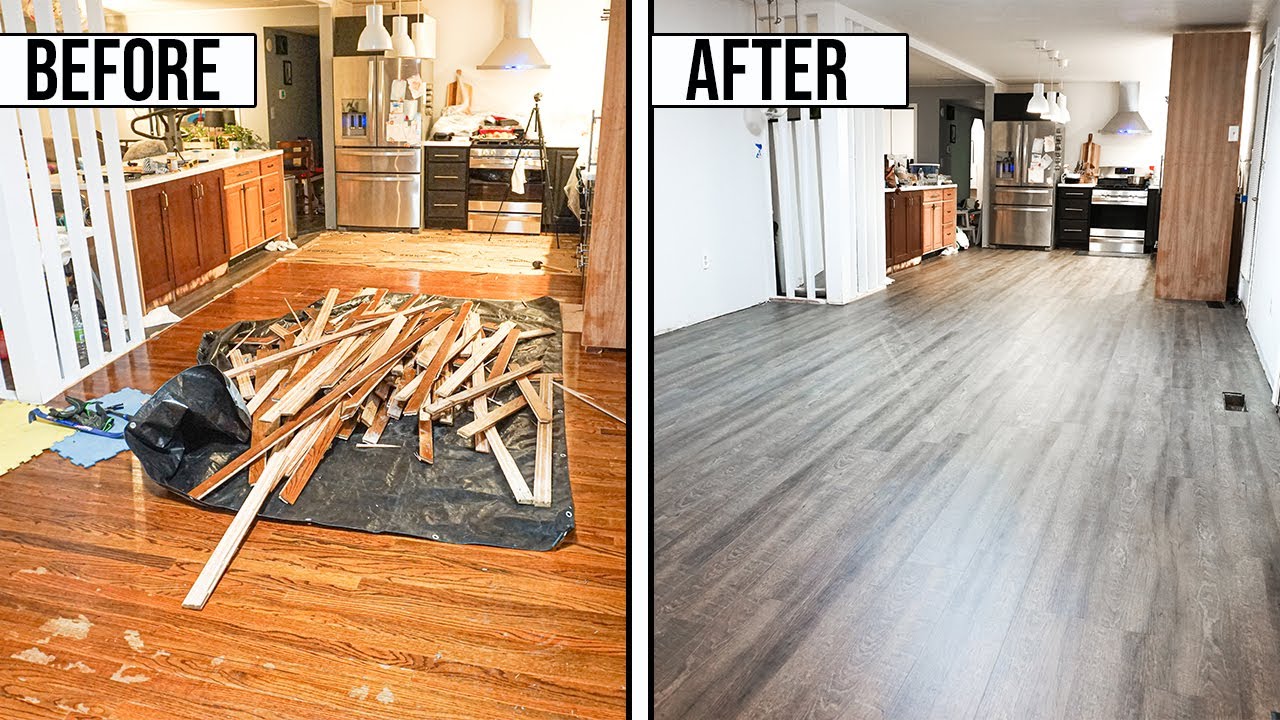
Installing wood flooring in a kitchen involves careful planning and preparation to ensure a successful and durable result. First, it’s essential to select the right type of wood flooring that can withstand the high traffic and occasional spills common in kitchens. Engineered hardwood is often recommended over solid hardwood due to its superior stability and resistance to moisture. Before beginning the installation, thoroughly inspect the subfloor for any signs of damage, unevenness, or moisture issues. The subfloor should be clean, dry, and level. If necessary, use a self-leveling compound to address any uneven areas. Additionally, allow the wood flooring to acclimate to the kitchen environment for at least 48 to 72 hours. This helps prevent issues like warping or buckling post-installation due to changes in humidity and temperature.
Images about How To Install Wood Flooring In Kitchen
How To Install Wood Flooring In Kitchen
Tools and Materials Required for Installation
Having the right tools and materials is crucial for the efficient installation of wood flooring. Essential tools include a tape measure, chalk line, moisture meter, saw (preferably a miter saw for precise cuts), rubber mallet, tapping block, spacers, and a pneumatic flooring nailer or stapler. You’ll also need a high-quality underlayment, which acts as a moisture barrier and provides a cushioned surface for the wood flooring. When choosing the adhesive, ensure it is suitable for wood flooring and appropriate for the kitchen environment. For kitchens, a waterproof adhesive or glue is ideal to prevent moisture from seeping through. Additionally, gather all necessary safety equipment, such as gloves, safety goggles, and knee pads, to protect yourself during the installation process.
Step-by-Step Installation Process
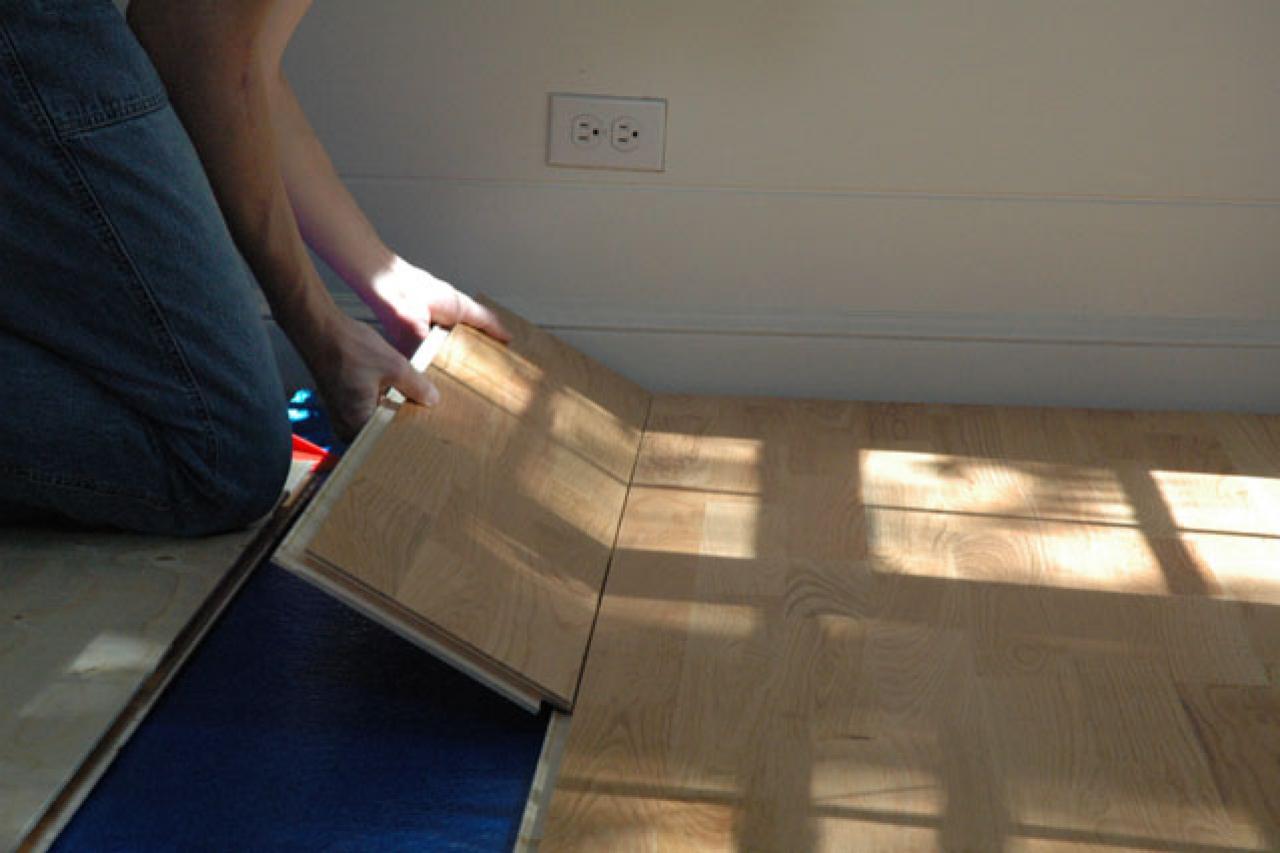
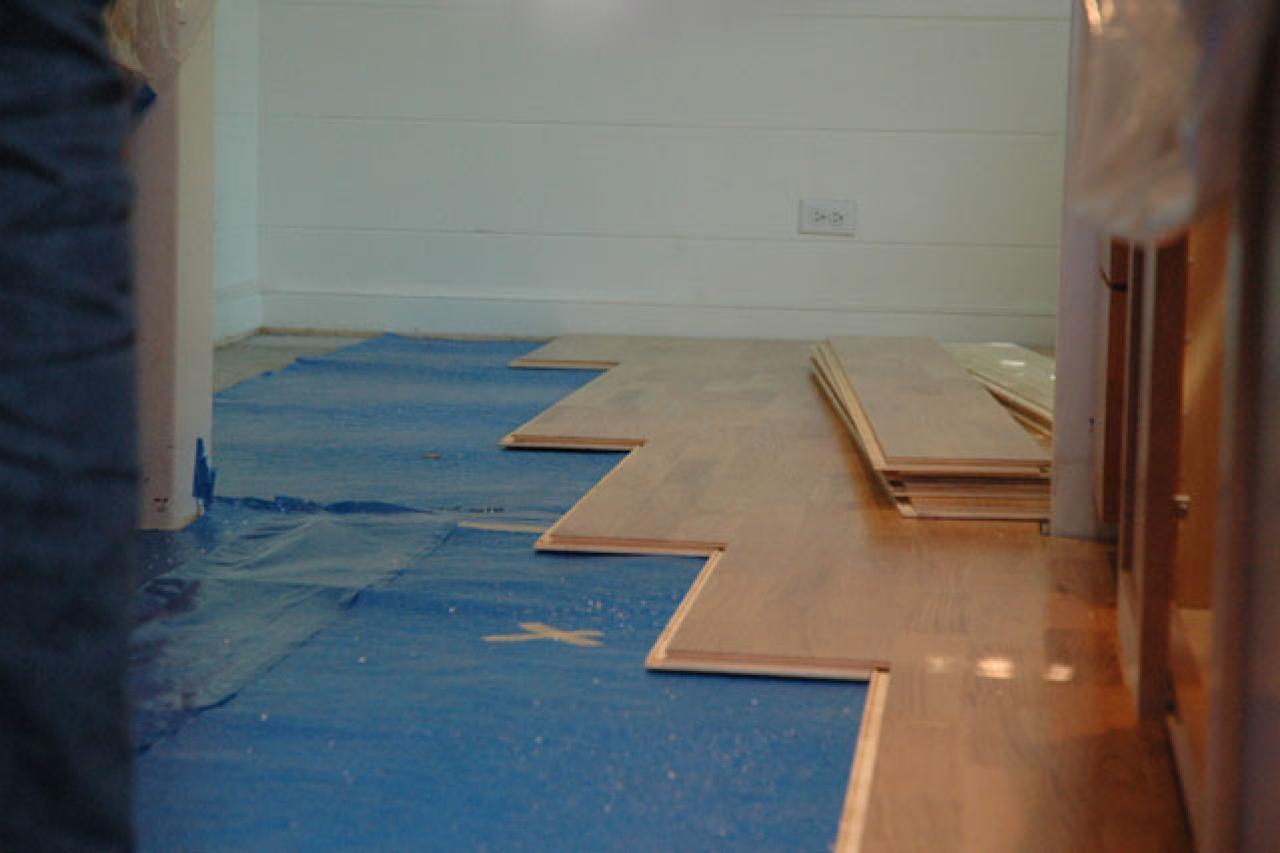
The installation process begins with laying the underlayment over the subfloor. This step is crucial as it helps with moisture control and provides a smooth surface for the wood planks. Roll out the underlayment, ensuring it covers the entire floor area and overlaps slightly at the seams. Secure it in place with tape. Next, start laying the wood planks, beginning from one corner of the room, preferably along the longest wall. Use spacers to maintain a consistent gap (usually 1/4 inch) between the planks and the walls, allowing for natural expansion and contraction of the wood. Apply adhesive to the back of each plank if using a glue-down method, or nail/staple them down if using a nail-down method. Ensure each plank is tightly fitted to the previous one, using a tapping block and rubber mallet to achieve a snug fit without damaging the wood.
Finishing Touches and Maintenance Tips
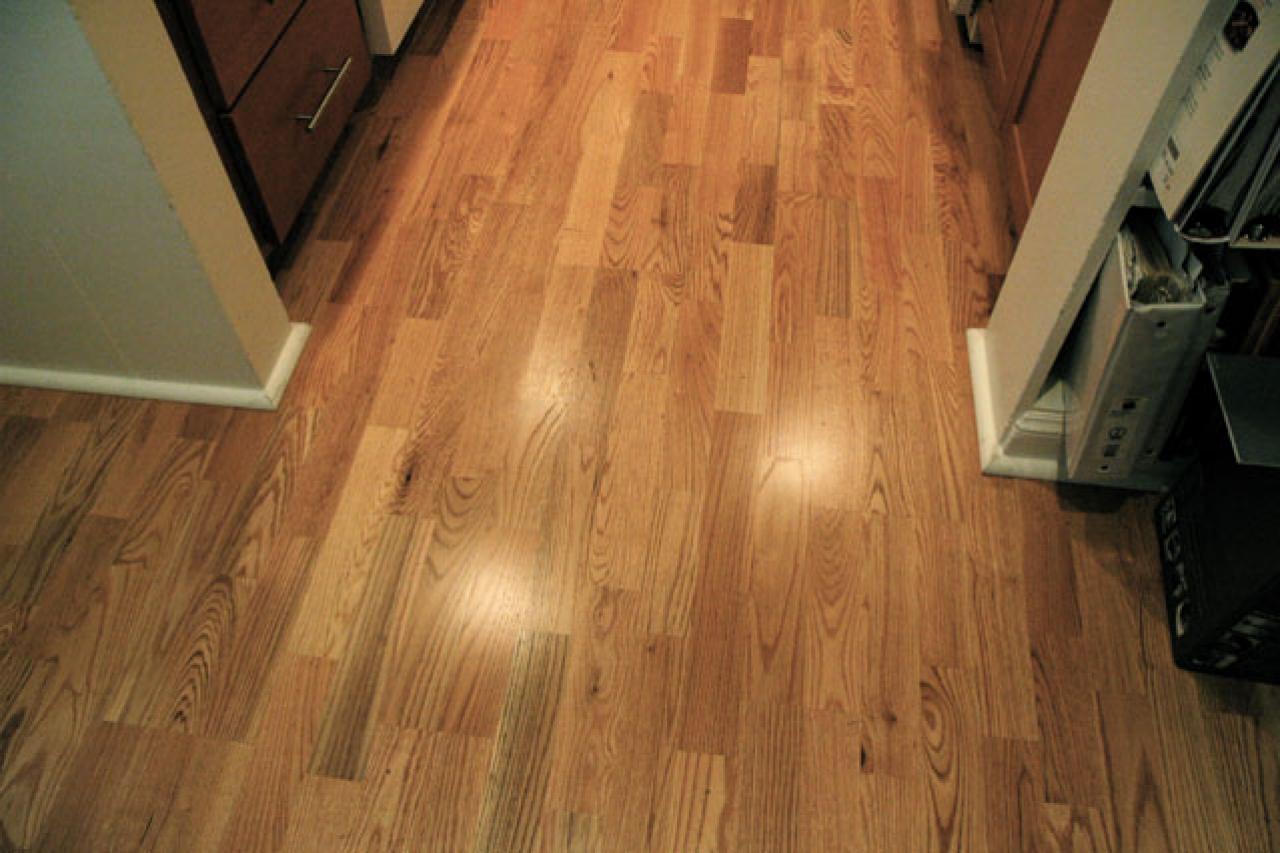
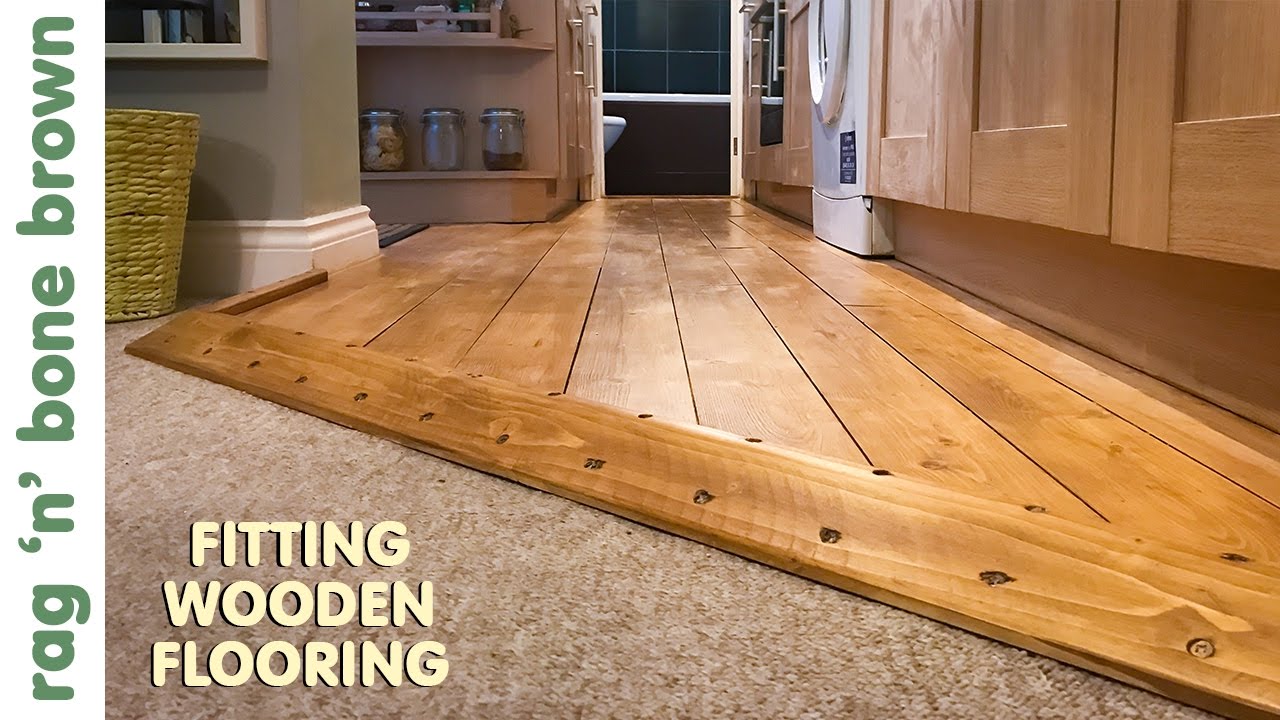
Once the wood flooring is installed, remove the spacers and install baseboards or quarter-round molding to cover the expansion gap around the perimeter of the room. This not only gives a finished look but also protects the edges of the flooring. Thoroughly clean the floor to remove any dust or debris resulting from the installation process. Regular maintenance is key to preserving the beauty and longevity of your wood flooring in the kitchen. Wipe up spills immediately to prevent water damage and use a damp mop for routine cleaning. Avoid using excessive water or harsh cleaning agents that can damage the wood. Place mats or rugs in high-traffic areas and near sinks to protect the floor from wear and moisture. Additionally, consider applying a fresh coat of finish every few years to keep the wood looking new and to add an extra layer of protection against kitchen-related wear and tear.
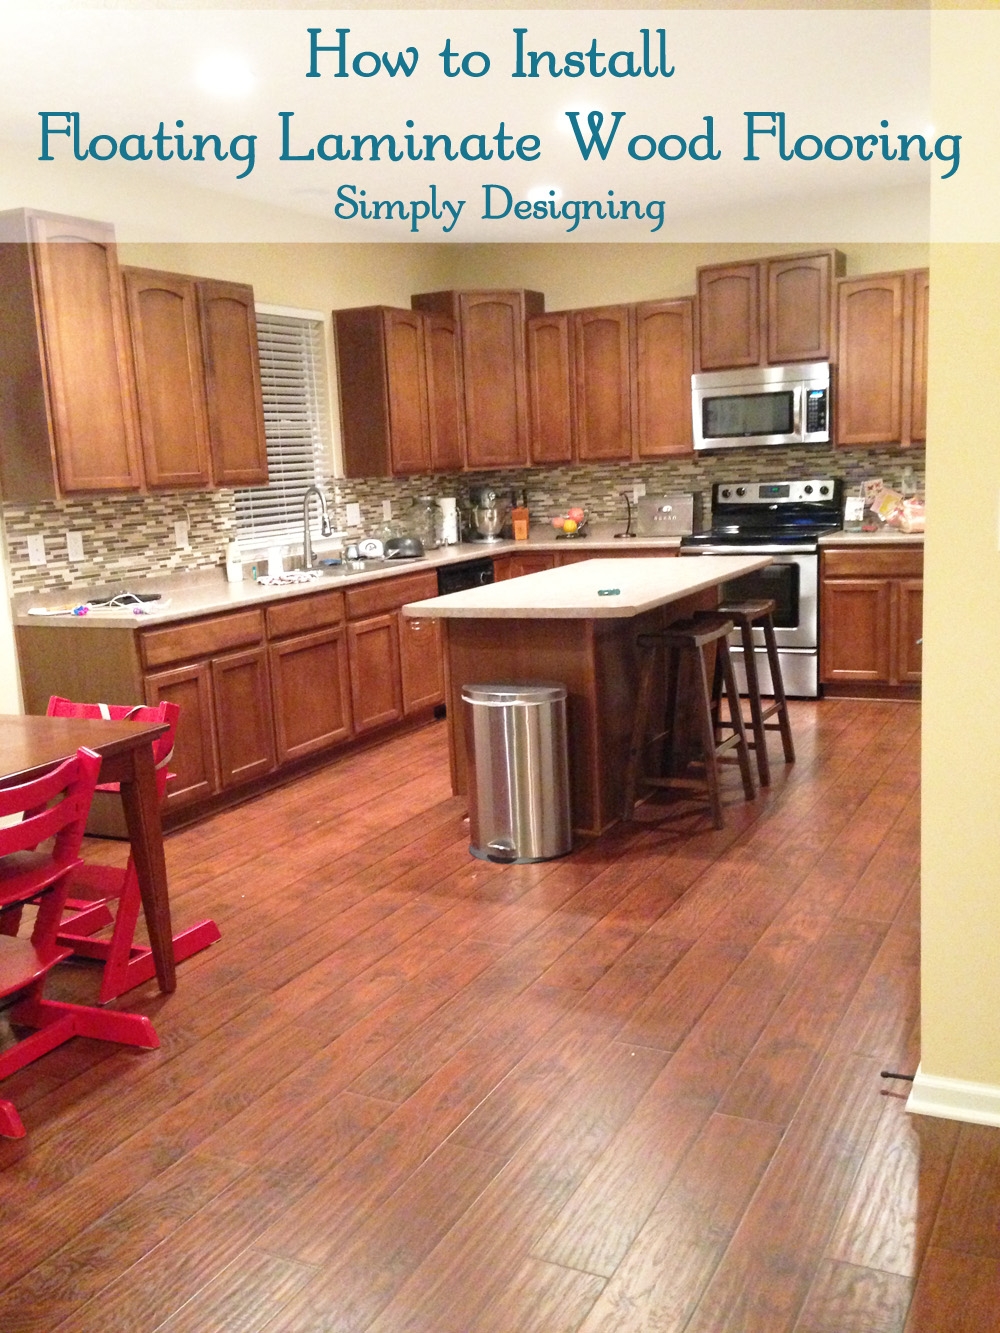
How To Install Floating Wood Laminate Flooring
How to Install Hardwood Flooring in a Kitchen
How To Install Vinyl Plank Flooring In A Kitchen And Living Room As A Beginner Home Renovation
How to Install u0026 Lay New Flooring Flooring America
![]()
Installing Hardwood Flooring In A Kitchen

Which Way to Lay Wood Floor – Designing Idea
Related Posts:
- Dark Wood Floor Pattern
- Wood Floor White Stain
- Dark Wood Floors Master Bedroom
- Grey Faux Wood Flooring
- Walnut Solid Wood Flooring
- Extra Wide Wood Flooring
- Cherry Wood Floor Bedroom
- White Oak Wood Tile Flooring
- Oak Solid Wood Flooring
- Dark Wood Floor Dining Room
Installing Wood Flooring in Your Kitchen: A Step-by-Step Guide
Adding wood flooring to your kitchen can be a great way to add warmth and elegance to the space. Installing wood flooring is a relatively straightforward process, though it can be time-consuming if you’re doing it yourself. Here is a step-by-step guide on how to successfully install wood flooring in your kitchen.
Preparing for Installation
Before you begin installing wood flooring, there are a few important steps you’ll need to take to ensure a successful installation. First, you’ll need to choose the type of wood flooring that best suits your needs. Different types of wood floors offer different levels of durability, price points, and design possibilities. You’ll also need to make sure the subfloor is in good condition and level before you begin installation. If the subfloors aren’t level, it could cause the wood planks to buckle or warp over time.
Lay Out Your Floor
Once the subfloor is prepped and ready for installation, you can start laying out your floor. Begin by laying out the boards in a dry run without any adhesive. This will give you an idea of how the finished product will look. Make sure to stagger the joints between boards for an aesthetically pleasing look. You’ll also want to make sure that you are leaving a gap of at least 1/4 inch between the wall and each board for expansion.
Cutting and Fitting
Once you have laid out the boards in a dry run, it’s time to cut and fit them into place. Use a jigsaw or circular saw to cut any boards that don’t fit exactly into place. Make sure all of your cuts are accurate as any mistakes here could cause problems later on. You may also want to use a miter saw if you’re cutting boards at an angle around doorways or walls.
Securing The Boards
Once all of the boards are cut and fitted into place, it’s time to secure them into place with adhesive. Starting in one corner, spread adhesive onto the subfloor using an appropriate trowel. Lay down one row at a time and use spacers between each board as you go along. Once all of the boards are laid down and secured, use a roller or hand roller to ensure that they are properly adhered to the subfloor.
Finishing Touches
Once all of the boards are laid down and secured into place, it’s time for some finishing touches. Use sandpaper or a sander to smooth out any rough edges or correct any mistakes from cutting or fitting the boards. You may also want to apply some sealant or finish to protect the wood from water damage and enhance its natural color and grain pattern. Once complete, you should have a beautiful new floor in your kitchen!
Common Questions & Answers
Q: How long does it take to install wood floors?
A: The amount of time it takes to install wood floors varies depending on the size of your kitchen and how experienced you are with installing floors, but on average it can take anywhere from a few hours up to a few days.
Q: What type of adhesive should I use when installing wood floors?
A: The type of adhesive used depends on the type of wood being installed, but most types of wood require an appropriate flooring adhesive made specifically for use with hardwood floors.