Epoxy Floor Coating: Basics and Benefits
Epoxy floor coating is a popular choice for both residential and commercial spaces due to its durability, aesthetic appeal, and ease of maintenance. Let’s discuss the fundamental aspects of epoxy floor coatings, from what they are to the benefits they offer.
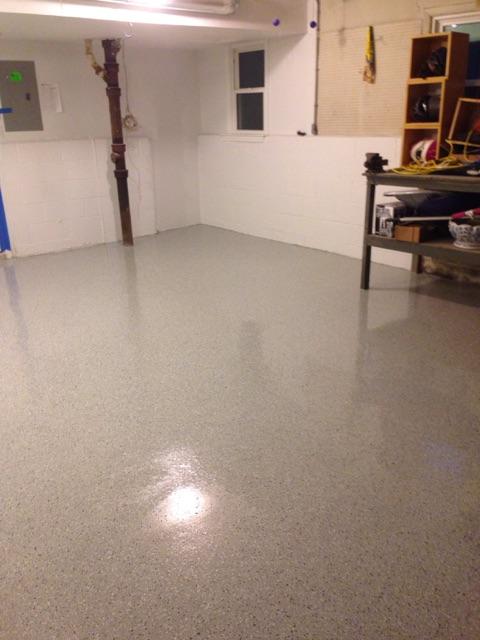
- Understanding Epoxy Flooring: Epoxy flooring is created by applying multiple layers of epoxy, a thermosetting resin, to a floor surface. The resin, when mixed with a hardening agent, forms a tough, plastic-like material that bonds exceptionally well to the substrate. This type of flooring is particularly favored in garages, warehouses, and industrial spaces but is increasingly being used in homes due to its versatile design options.
- Application Process: The process begins with thorough cleaning and preparation of the floor surface. Any existing coatings or contaminants must be removed to ensure proper adhesion. Once the surface is prepped, the epoxy mixture is applied in several layers. Each layer needs to cure fully before the next is added. The result is a seamless, high-gloss finish that can withstand heavy traffic and harsh conditions.
- Durability and Strength: One of the most significant benefits of epoxy flooring is its durability. Epoxy coatings are highly resistant to wear and tear, chemical spills, and impact damage. This makes them an ideal choice for areas that experience heavy use. The hardened surface can support the weight of heavy machinery without cracking or deteriorating.
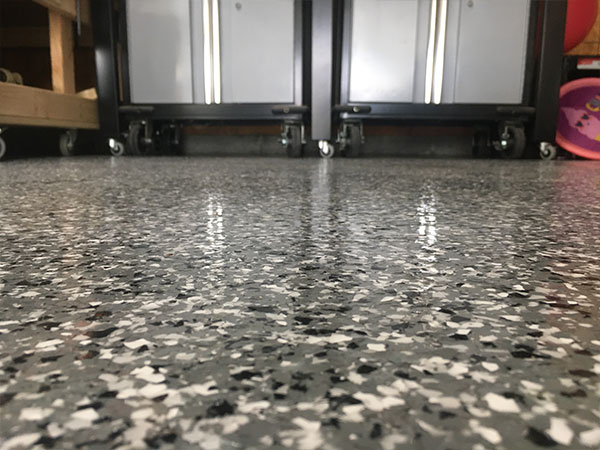
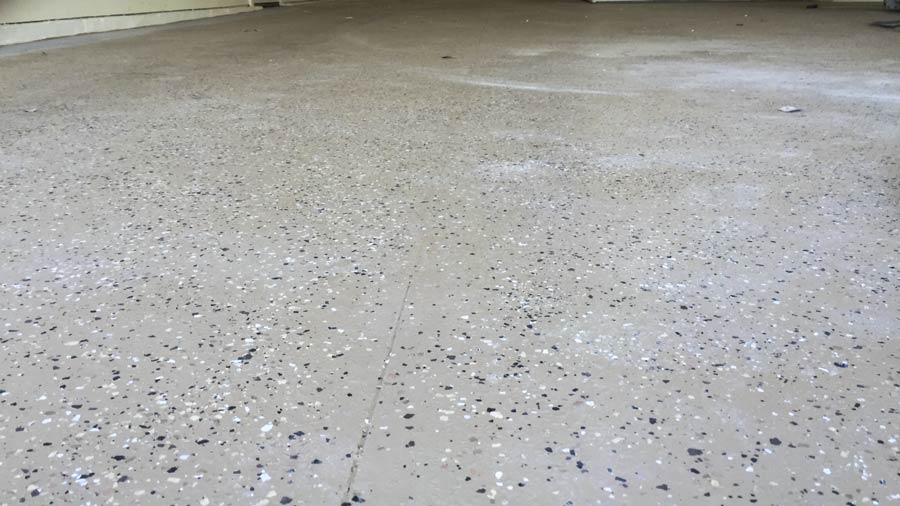
- Aesthetic Appeal: Epoxy flooring isn’t just practical; it’s also visually appealing. Available in a variety of colors and finishes, including metallic and flake designs, epoxy can be customized to match any décor. Whether you prefer a sleek, modern look or a more decorative finish, epoxy flooring offers endless design possibilities.
- Ease of Maintenance: Maintaining an epoxy floor is straightforward. The non-porous surface resists stains and can be easily cleaned with a mop and mild detergent. Unlike tile or concrete, epoxy does not require frequent sealing or waxing, making it a low-maintenance flooring solution.
- Cost-Effectiveness: While the initial cost of epoxy flooring may be higher than some other options, its longevity and minimal maintenance requirements make it a cost-effective choice in the long run. The need for fewer repairs and replacements translates to savings over time, making it a smart investment for many property owners.

Identifying Common Issues with Epoxy Floor Coatings
Despite their durability, epoxy floor coatings can encounter several issues over time. Let’s highlights the most common problems you might face with epoxy floors and how to identify them.
Peeling and Delamination
One of the most frequent issues is peeling or delamination, where the epoxy starts to lift away from the substrate. This problem usually occurs when the surface wasn’t prepared correctly before application, or if there was moisture present. You’ll notice sections of the floor looking uneven or starting to bubble up.
Yellowing and Discoloration
Exposure to UV light can cause epoxy floors to yellow or discolor over time. This is particularly problematic in areas with lots of natural light. If you observe a change in color, especially in patterns corresponding to sunlight exposure, it’s likely due to UV damage.
Cracking and Chipping
While epoxy is durable, it’s not indestructible. Heavy impacts or significant temperature fluctuations can cause cracks and chips. These can appear as hairline fractures or larger, more noticeable breaks in the coating, often resulting from dropping heavy objects or thermal expansion and contraction.
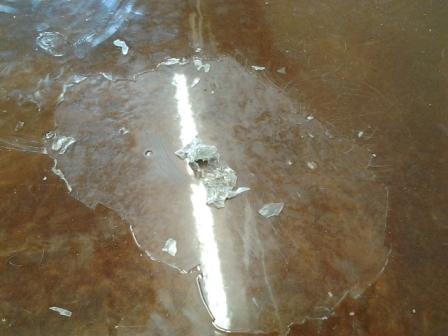
Moisture Intrusion
Moisture is a significant enemy of epoxy floors. If moisture is present in the concrete substrate before the epoxy is applied, it can cause bubbles or blisters. These look like small, raised areas on the floor and can compromise the integrity of the coating.
Surface Scratches
Although epoxy is resistant to many forms of damage, it can still get scratched, especially in high-traffic areas. Over time, these scratches can dull the surface, making it look worn. This issue is typically more aesthetic than structural but can affect the overall appearance.
Loss of Gloss
Epoxy floors are known for their high-gloss finish, but this can fade over time due to wear and tear. If your floor starts to look dull, it may be due to abrasion from foot traffic, cleaning, or simply the passage of time.

Essential Tools and Materials for Epoxy Floor Repair
Repairing epoxy floors requires specific tools and materials to ensure the job is done correctly. Let’s see what you’ll need to tackle various types of epoxy floor repairs.
Epoxy Repair Kits
Epoxy repair kits are available for different types of repairs, such as filling cracks or patching chips. These kits usually include the epoxy resin, hardener, and any necessary additives. They provide a convenient all-in-one solution for minor repairs and can be found at most hardware stores.
Grinding Tools
A concrete grinder or floor buffer with a diamond grinding attachment is essential for preparing the floor before applying new epoxy. This tool helps remove old coatings, smooth out surface imperfections, and create a rough texture that promotes better adhesion of the new epoxy layer.
Mixing Tools
Proper mixing of the epoxy resin and hardener is crucial for a successful repair. A high-quality mixing paddle attached to a power drill ensures thorough and even mixing. For smaller jobs, mixing sticks and smaller containers may suffice, but for larger areas, mechanical mixing is recommended.
Application Tools
Depending on the size and scope of your repair, you may need a variety of application tools. For larger areas, a notched squeegee or roller ensures an even layer of epoxy. For smaller repairs, a putty knife or trowel is ideal for precise application and spreading of the epoxy mixture.
Protective Gear
Safety should always be a priority. Protective gear such as gloves, safety glasses, and respirators protect you from potentially harmful fumes and contact with the epoxy. Proper ventilation in your workspace is also crucial to ensure safety while working with epoxy materials.
Surface Preparation Materials
In addition to grinding tools, you’ll need materials for surface preparation, such as a concrete cleaner or degreaser to remove any contaminants. For more thorough cleaning, an etching solution can help open up the concrete pores, ensuring better adhesion of the epoxy.
Step-by-Step Guide to Repairing Minor Cracks and Chips
Minor cracks and chips in epoxy floors can be effectively repaired with the right approach. Below we provide a detailed, step-by-step guide to help you tackle these common issues.
Assess the Damage
Before beginning any repair, carefully inspect the floor to identify all the cracks and chips that need attention. Measure the extent of the damage to determine the amount of repair material required. Small, hairline cracks and minor chips can usually be repaired easily, while larger damage may require more extensive work.
Clean the Area
Thoroughly clean the area around the crack or chip to remove dirt, debris, and any loose particles. Use a concrete cleaner or degreaser, followed by a rinse with clean water. Allow the area to dry completely before proceeding with the repair. A clean surface ensures better adhesion of the repair material.
Prepare the Epoxy Mixture
Mix the epoxy resin and hardener according to the manufacturer’s instructions. For minor repairs, you can use an epoxy repair kit, which simplifies the process. Ensure the mixture is well-blended to achieve the right consistency. Some kits may include additives for increased strength or color matching.
Apply the Epoxy
Using a putty knife or trowel, apply the mixed epoxy to the crack or chip. Press the epoxy firmly into the damaged area, ensuring it fills all gaps and voids. Smooth out the surface to make it level with the surrounding floor. For deeper cracks, you may need to apply the epoxy in layers, allowing each layer to cure before adding the next.
Allow to Cure
Let the applied epoxy cure according to the manufacturer’s guidelines. This typically takes several hours to a day, depending on the product and environmental conditions. Avoid stepping on or disturbing the repaired area during the curing process to ensure a strong bond.
Finish and Seal
Once the epoxy has fully cured, sand the repaired area lightly to smooth out any rough edges and blend it with the surrounding floor. If desired, apply a topcoat of epoxy or a clear sealer to protect the repair and maintain a consistent finish across the floor. This additional layer can also enhance the durability and appearance of the repair.

Addressing Major Damages: Patching and Resurfacing Techniques
Major damages to epoxy floors, such as large cracks or extensive wear, require more intensive repair methods. We will cover patching and resurfacing techniques to address significant issues.
Evaluating the Extent of Damage
Begin by thoroughly inspecting the floor to assess the extent of the damage. Large cracks, deep chips, or widespread deterioration will need more substantial repairs than minor issues. Document the areas needing attention and measure the damage to estimate the amount of repair material required.
Surface Preparation
Proper surface preparation is crucial for successful repairs. Start by grinding the damaged area to remove any loose material and create a rough surface for better adhesion. Use a vacuum or broom to clean up dust and debris. For deeper damage, undercut the edges of the cracks to help the patching material lock in place.
Patching Large Cracks and Holes
Mix a high-strength epoxy patching compound according to the manufacturer’s instructions. Apply the compound to the damaged area using a trowel, ensuring it fills all gaps and voids. Press firmly to eliminate air pockets and achieve a solid fill. Smooth the surface to blend with the surrounding floor. Allow the patch to cure fully before proceeding.
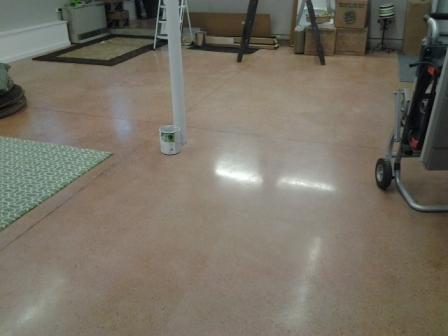
Resurfacing the Floor
For extensive damage or wear, resurfacing the entire floor may be necessary. This involves applying a new layer of epoxy over the existing floor. Start by grinding the entire surface to ensure proper adhesion. Clean the floor thoroughly to remove all dust and debris. Mix the epoxy and hardener, then apply it evenly using a notched squeegee or roller.
Leveling and Smoothing
As you apply the new epoxy layer, use a spiked roller to remove air bubbles and ensure a smooth finish. This tool helps level the epoxy and creates a uniform surface. Work systematically to cover the entire floor, paying special attention to edges and corners.
Final Curing and Inspection
Allow the resurfaced floor to cure completely according to the manufacturer’s guidelines. Once cured, inspect the floor for any remaining imperfections. If needed, lightly sand and apply a topcoat to enhance the finish and protect the new surface. A thorough final inspection ensures the repair is complete and the floor is ready for use.
Tips for Maintaining and Prolonging the Life of Your Epoxy Floor Coating
Proper maintenance is key to prolonging the life of your epoxy floor coating. Below are practical tips to help you keep your floor in top condition.
Regular Cleaning
Maintain a regular cleaning schedule to keep your epoxy floor looking its best. Sweep or vacuum the floor daily to remove dirt and debris that can cause scratches. For deeper cleaning, use a mop with a mild detergent solution. Avoid using harsh chemicals or abrasive cleaners, as these can damage the epoxy surface.
Protective Measures
Place mats or rugs at entryways to reduce the amount of dirt and grit tracked onto the floor. Use furniture pads under heavy objects to prevent scratches and dents. In high-traffic areas, consider applying an additional layer of clear sealer to provide extra protection and extend the floor’s lifespan.
Spill Management
Promptly clean up any spills to prevent staining and damage. Epoxy floors are resistant to most chemicals, but prolonged exposure can still cause issues. Use a soft cloth or paper towel to blot up spills, followed by a gentle cleaning with a mild detergent and water.
Addressing Minor Issues Promptly
Minor cracks, chips, or scratches should be repaired as soon as they are noticed. Allowing small issues to go unaddressed can lead to larger problems over time. Use an epoxy repair kit to fill in minor damage and maintain the integrity of the floor.
Periodic Inspections
Conduct periodic inspections of your epoxy floor to identify any signs of wear or damage. Look for areas where the gloss has faded, or where the coating has begun to peel or delaminate. Regular inspections allow you to address issues early and avoid more extensive repairs.
Reapplying Topcoat
Depending on the level of use, consider reapplying a topcoat every few years. This fresh layer of epoxy or clear sealer helps restore the floor’s shine and adds an extra layer of protection. Follow the manufacturer’s instructions for application and curing to ensure the best results.
DIY Epoxy Garage Floor Coating Repair – Casper, WY

Learn How to Repair Your Epoxy Floor Coating DIY

How to repair epoxy coating failure?
How to Repair An Uneven Epoxy Application – Epoxy Central

Why Garage Floor Epoxy Peels Up and How to Prevent It All Garage

Ways to Repair an Epoxy Floor

How To Touch Up Epoxy Floor

DIY Epoxy Garage Floor Coating Repair
Related Posts:
- Epoxy Gloss Floor Paint
- Epoxy Concrete Floor Covering
- Thick Epoxy Floor Coating
- Epoxy Paint Floor Finish
- Epoxy Floor Coating For Basement
- White Metallic Epoxy Floor
- Metallic Epoxy Floor Installation
- Red Epoxy Floor
- Pearl White Epoxy Floor
- Clear Epoxy Shower Floor