This particular flooring style does not need to get often cleaned, but if it will be required next simply make an answer using vinegar as well as water. It is recommended you divide the garage of yours into sections and split the job to make it easier on yourself. But occasionally, people utilize a combination of both. These can be utilized as tile flooring suggestions to make a quality finished look to each space.
Images about How To Replace Grout In Ceramic Tile Floor
How To Replace Grout In Ceramic Tile Floor
:max_bytes(150000):strip_icc()/How_to_Regrout_Ceramic_Tile_64434_04-7d62a1243b314b628e8125818455cb67.jpg)
You'll need a number of hours, with regards to the dimensions of the floor, and if the floor is actually a bathroom and you've kids, a second bath room that they can easily use might are available in handy, as a few of hours are needed for the mortar to dry. You are able to additionally blend the tiles inside the home with those outside, for instance on the patio of yours.
How to Regrout Ceramic Tile
/How_to_Regrout_Ceramic_Tile_64434_08-63a0298cea2a47ba985a0a17ed65d278.jpg)
When putting in ceramic tile on vinyl, experts would suggest rough-sanding, or maybe scarifying, the vinyl flooring surface first so the tiling mortar of yours has very good grip to set on. Be sure you've proper training for safety reasons. Proof of this may be found with the remains of Ancient Greece and Rome, where mosaic tile flooring may be seen. And patient enough to smooth mortar uniformly, yet with grooves.
Can Grout Be Replaced?
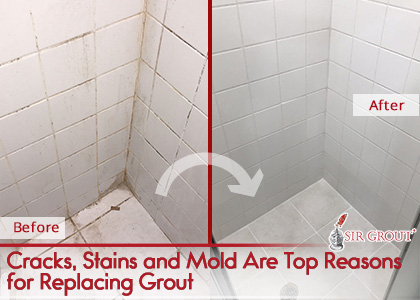
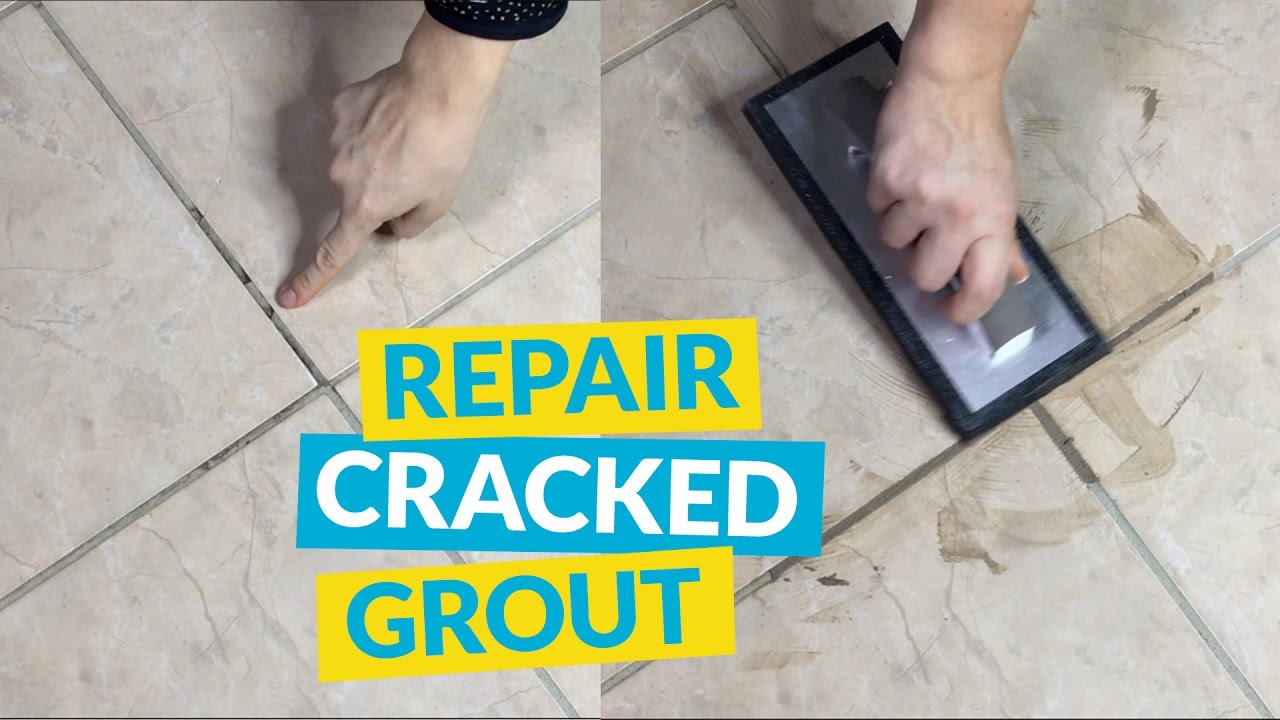
Repair Cracked Grout
Remove Grout From Ceramic Tile ProTile Grout Repair Tricks
How to Replace Ceramic Tile on Floor – Appleby Cleaning
How to Remove Old Grout
How to Change Grout Color
/change-tile-grout-color-apply-colorants-1822577-hero-a83419b3ebfe404a9c330375091521d0.jpg)
Can I put new grout over my old grout? The Grout Medic
How to Regrout Ceramic Tile
/How_to_Regrout_Ceramic_Tile_64434_05-2cdada80f2de43bc90f919d8876160d2.jpg)
Can Grout Be Replaced?
Regrouting A Bathroom Floor
How to Remove and Replace Tile Grout DIY Doctor
How to Regrout Ceramic Tile
:max_bytes(150000):strip_icc()/How_to_Regrout_Ceramic_Tile_64434_09-4a88b50ca576408fa6b52012ba5e9c3f.jpg)
Related Posts:
- Installing Slate Tile Floor
- Painting Ceramic Tile Floor In Kitchen
- Anti Slip For Tile Floors
- Laminate Tile Flooring
- Marble Tile Floors
- Travertine Tile Flooring
- Modern Kitchen Tile Floor
- Country Style Tile Floors
- White Tile Flooring Ideas
- Herringbone Brick Tile Floor
How To Replace Grout In Ceramic Tile Floor
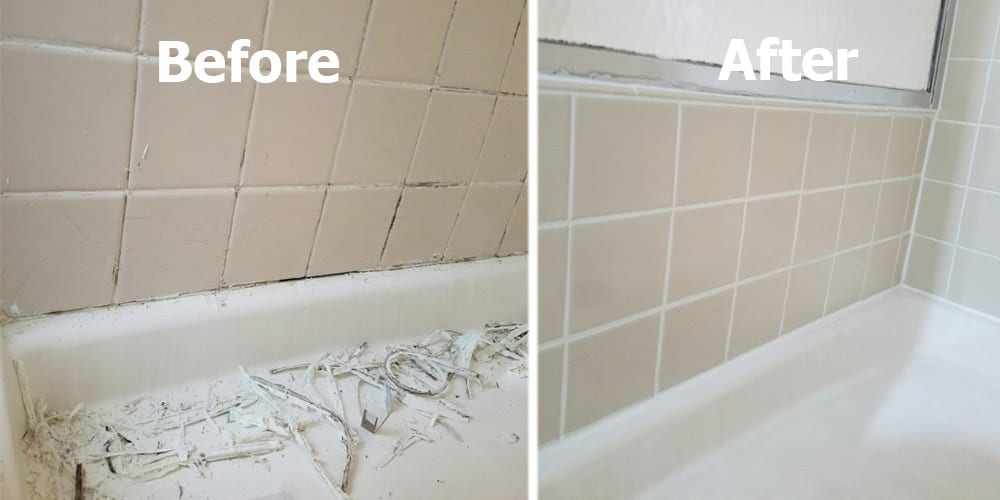
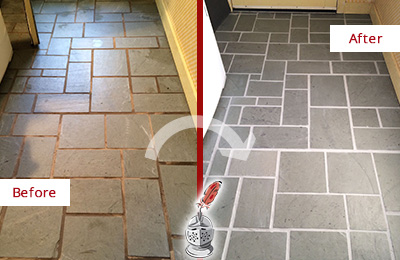
Replacing grout in ceramic tile flooring is a simple but important task. The grout between tiles helps to protect the tiles from water damage and maintain the aesthetic of your floor. Replacing grout can be done in a few easy steps and can help keep your ceramic tile floor looking great for years to come.
What You Will Need
Before you start replacing the grout, you will need to make sure you have all the necessary supplies. You will need:
– A grout saw or grout removal tool
– A vacuum cleaner
– A bucket of warm water
– Grout sealer
– New unsanded grout
– A float or trowel
– Sponges
– Grout sealer applicator (optional)
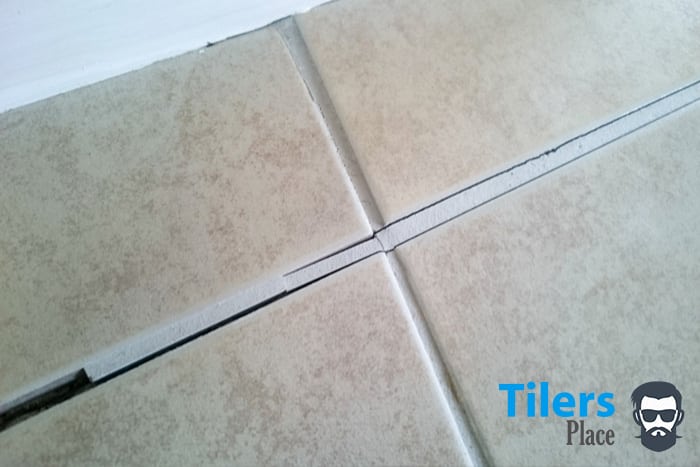
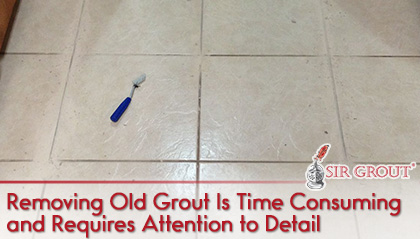
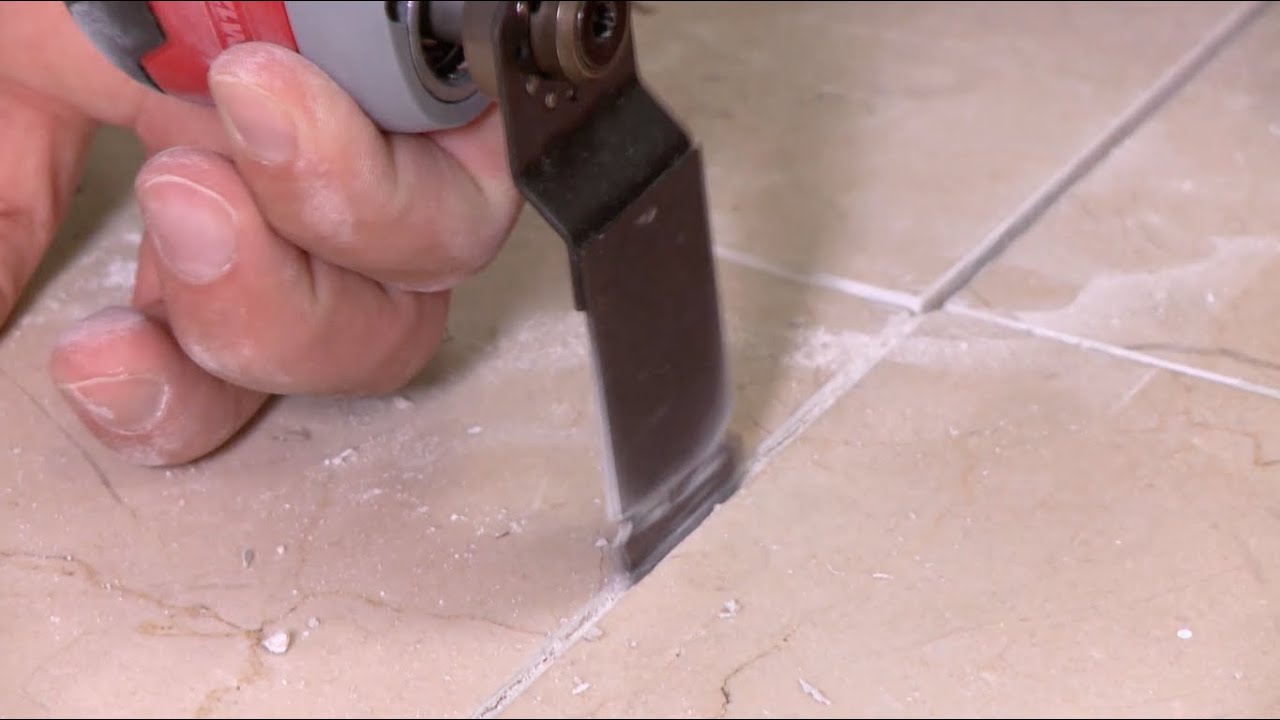
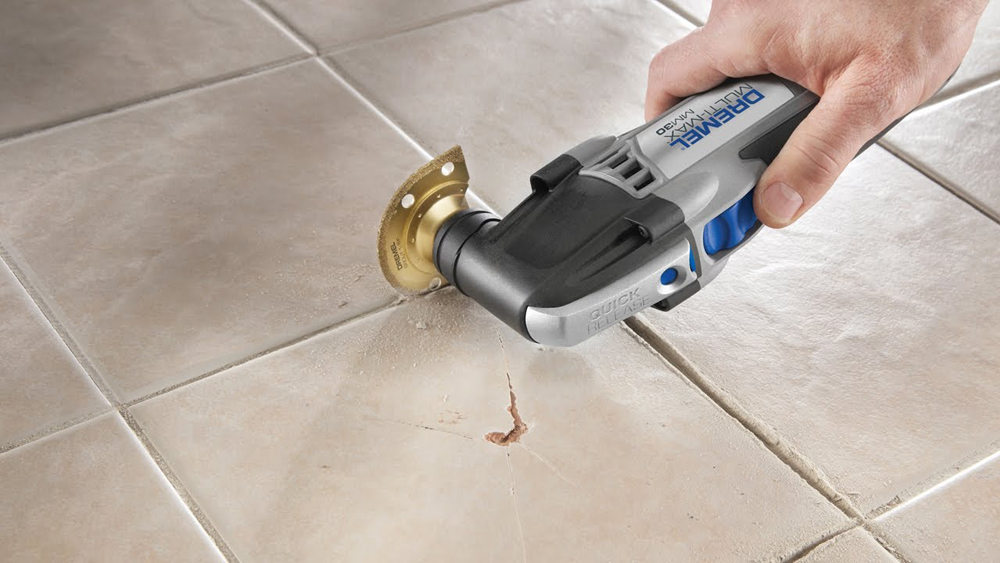
Step 1: Removing Old Grout
The first step to replacing grout in your ceramic tile floor is to remove the old grout. Use a grout saw or other grout removal tool to remove the old grout from between the tiles. Be sure to work slowly and carefully, as this is a delicate process and you don’t want to damage your tiles. Once all of the old grout has been removed, use a vacuum cleaner to clean up any loose dust or debris.
Step 2: Cleaning the Tiles
Next, use a sponge and warm water to clean all of the tiles thoroughly. This will remove any dirt or debris that may have been left behind after removing the old grout. Make sure that all of the tiles are completely dry before moving on to the next step.
Step 3: Applying Grout Sealer
Once all of the tiles have been cleaned and dried, it’s time to apply a grout sealer. This will help protect your new grout from water damage and other issues. Apply the sealer with a brush or if you have one, an applicator bottle. Allow the sealer to dry for at least 24 hours before moving on to the next step.
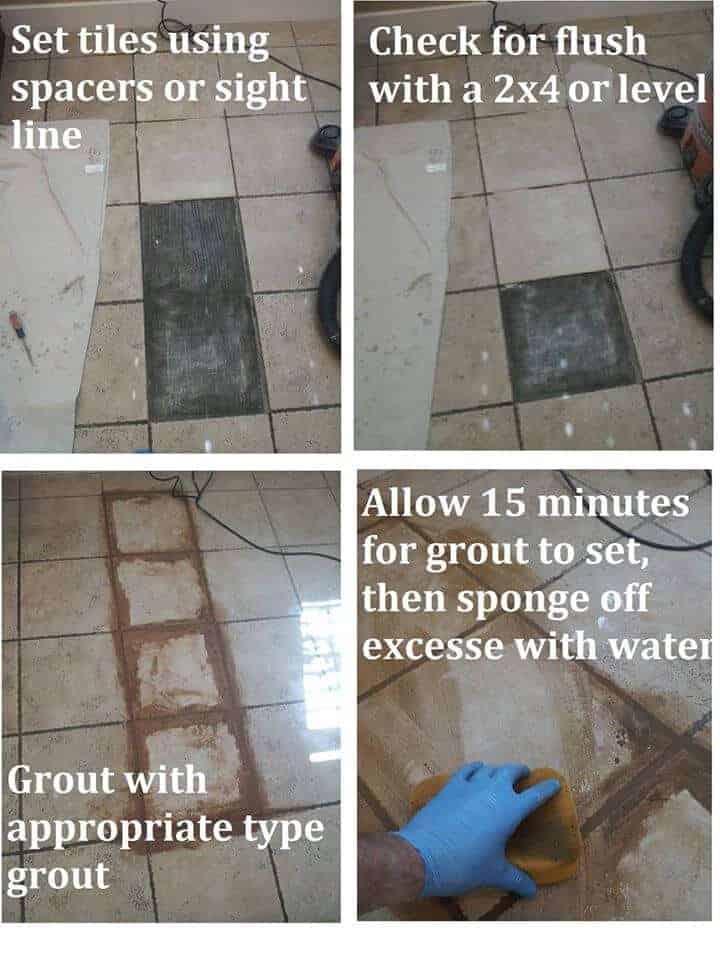
Step 4: Installing New Grout
Once the grout sealer has dried, it’s time to install the new unsanded grout. Mix up a batch of fresh grout according to the instructions on the package and then spread it between all of the tiles with a float or trowel. Be sure to work quickly so that you don’t accidentally damage any of your tiles. Once all of the new grout has been applied, use a damp sponge to wipe away any excess and then let it dry for 24 hours before using your floor again.
Step 5: Sealing The New Grout
The last step in replacing the grout in your ceramic tile floor is to apply another layer of sealer over the new grout. This will help protect it from water damage and keep it looking great for years to come. Apply the sealer with a brush or applicator bottle and allow it to dry for at least 24 hours before using your floor again.
FAQs:
Q: How often do I need to replace my ceramic tile floor’s grout?
A: Generally, it is recommended that you replace your ceramic tile floor’s grout every three to five years, depending on how much wear and tear it experiences. If you notice any cracking or discoloration in your existing grout, it’s best to replace it sooner rather than later.
Q: What type of sealant should I use?
A: The best type of sealant for ceramic tile floors is a silicone-based sealant that is specifically designed for tile and stone surfaces. This will provide maximum protection against water damage and staining while also helping to keep your grout looking fresh for years to come.
Q: Is there anything else I should do after replacing my ceramic tile floor’s grout?
A: After replacing your ceramic tile floor’s grout, it’s important that you clean it regularly with an appropriate cleaner that is designed for ceramic tile floors. This will help