Preparation: Setting the Foundation for a Successful Pour
Before embarking on the journey of pouring a concrete floor in your garage, thorough preparation is key to ensure a successful and long-lasting result. From assessing the site to gathering the necessary materials, each step plays a crucial role in setting the foundation for a smooth pour. Let’s discuss the essential aspects of preparation for your concrete floor project.
- Assessing the Site: Before starting any concrete project, it’s vital to assess the site where the concrete will be poured. Check for any obstructions, such as pipes or roots, that may hinder the pouring process. Additionally, ensure that the ground is level and compacted to provide a stable base for the concrete. Address any drainage issues beforehand to prevent water accumulation under the slab.
- Gathering Materials and Tools: Once the site assessment is complete, gather all the necessary materials and tools for the project. This includes concrete mix, reinforcement materials like rebar or wire mesh, formwork for shaping the slab, and tools such as a wheelbarrow, shovel, and level. Having everything prepared beforehand will streamline the process and prevent unnecessary delays.
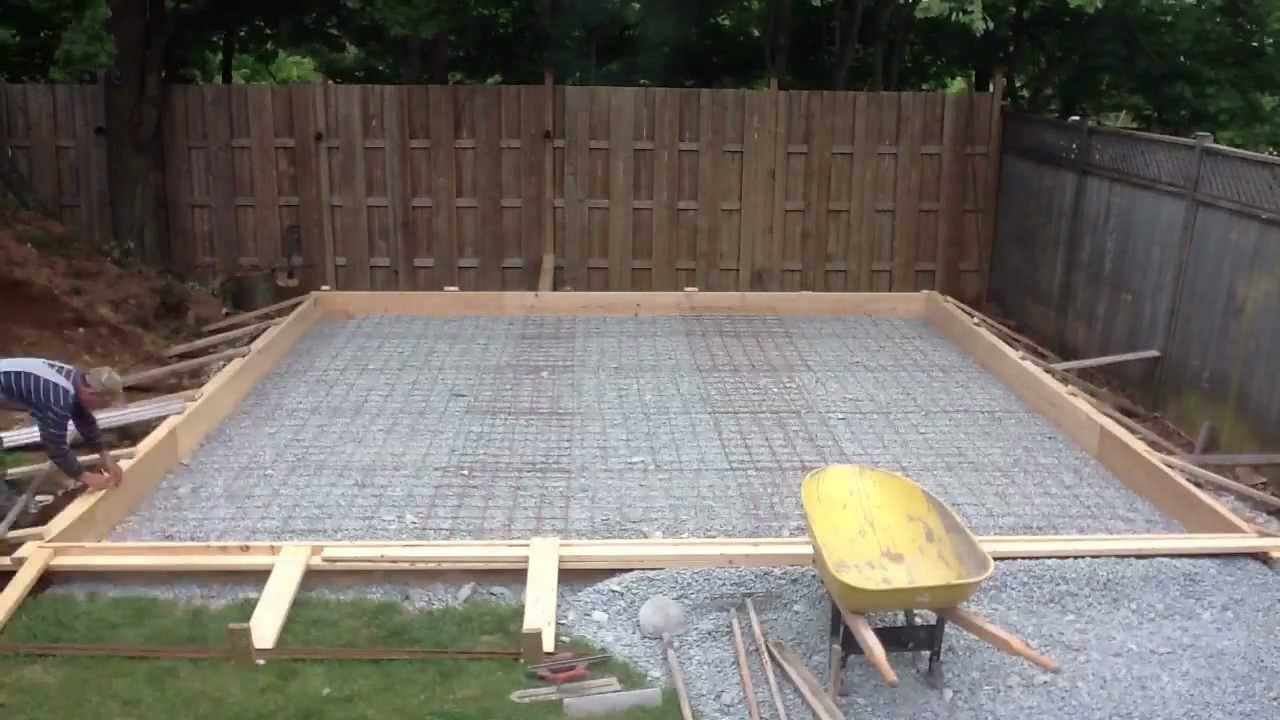
- Creating a Proper Formwork: Formwork is essential for shaping the concrete slab and containing the mixture during pouring. Use materials such as plywood or metal forms to create a sturdy frame that matches the dimensions of your garage floor. Ensure that the formwork is securely anchored and properly aligned to prevent any shifting during the pouring process.
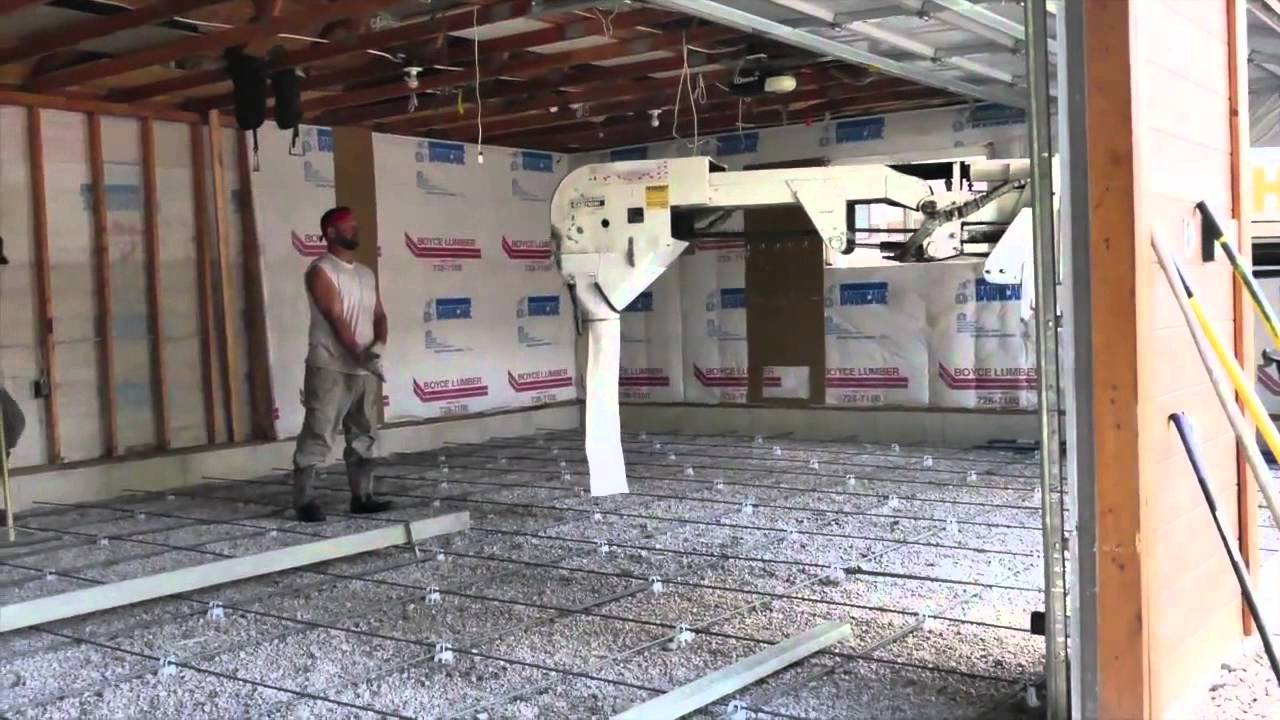
- Preparing the Subgrade: Before pouring the concrete, it’s crucial to prepare the subgrade – the native soil or existing surface where the concrete will be placed. Remove any debris, rocks, or organic matter from the area and compact the soil thoroughly to create a solid base. Adding a layer of gravel or crushed stone can further enhance stability and drainage.
- Planning for Expansion Joints: Expansion joints are essential to prevent cracks from forming in the concrete as it expands and contracts with temperature changes. Plan the placement of expansion joints strategically, considering factors such as the size and shape of the slab. Install joint filler material to accommodate movement and protect the integrity of the concrete floor over time.
- Ensuring Proper Reinforcement: Depending on the size and intended use of the garage floor, reinforcement may be necessary to enhance its strength and durability. Install rebar or wire mesh within the formwork to provide structural support and minimize the risk of cracking. Proper reinforcement is especially crucial for areas subject to heavy loads or frequent vehicle traffic.

Pouring the Concrete: Techniques and Tips for a Smooth Finish
With the groundwork laid and preparations complete, it’s time to dive into the exciting phase of pouring the concrete for your garage floor. While the process may seem straightforward, employing proper techniques and following essential tips can ensure a smooth finish and optimal results. Below are the key considerations for pouring concrete in your garage.
Mixing the Concrete: Achieving the right consistency is crucial when mixing concrete for your garage floor. Follow the manufacturer’s instructions carefully, ensuring the proper ratio of cement, aggregates, and water. Use a concrete mixer or wheelbarrow to blend the ingredients thoroughly, avoiding lumps or dry patches in the mixture. Aim for a workable consistency that allows for easy placement and finishing.
Timing Is Everything: Concrete has a finite window of workability known as the “slump” or “flow” time, which varies depending on factors such as temperature and humidity. It’s essential to time the pour accurately to prevent the mixture from becoming too stiff or dry before it can be properly placed and finished. Plan the pour accordingly, considering factors such as weather conditions and the size of the project.
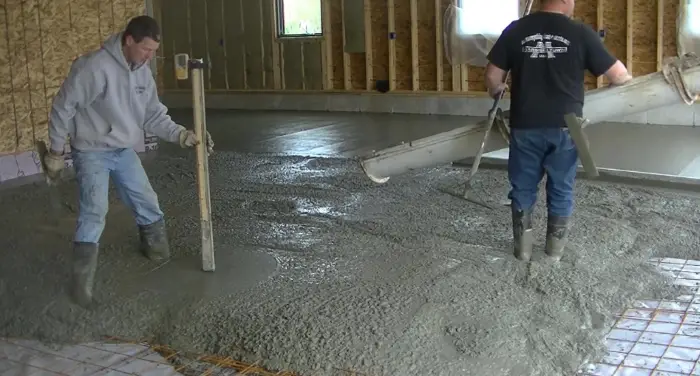
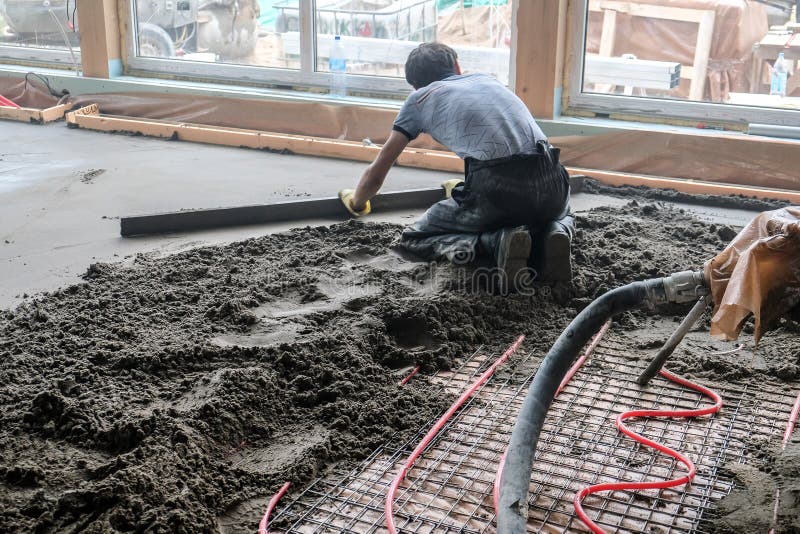
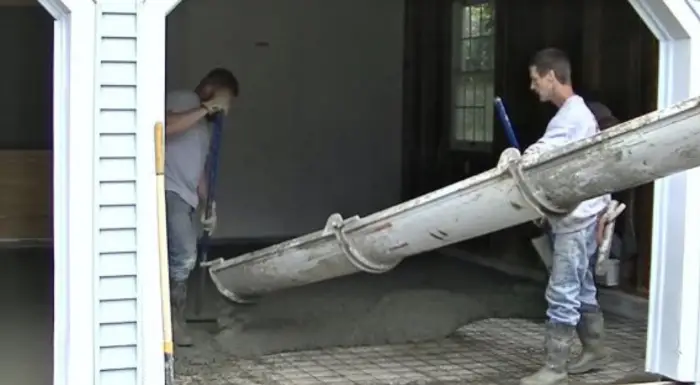
Placing and Spreading the Concrete: Once the concrete is mixed to the desired consistency, it’s time to place and spread it within the prepared formwork. Start by pouring the mixture into one corner of the formwork, working your way across the slab in a systematic manner. Use a shovel or rake to distribute the concrete evenly, ensuring consistent thickness throughout the entire surface.
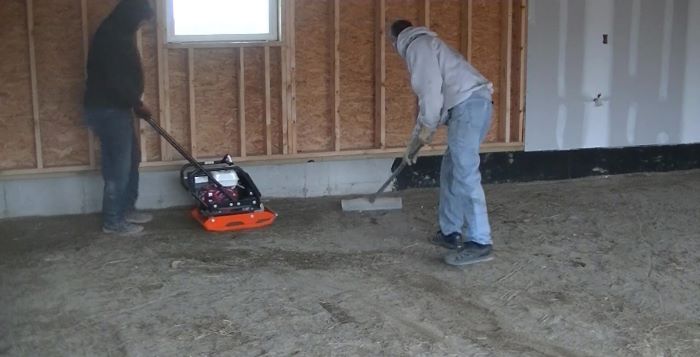
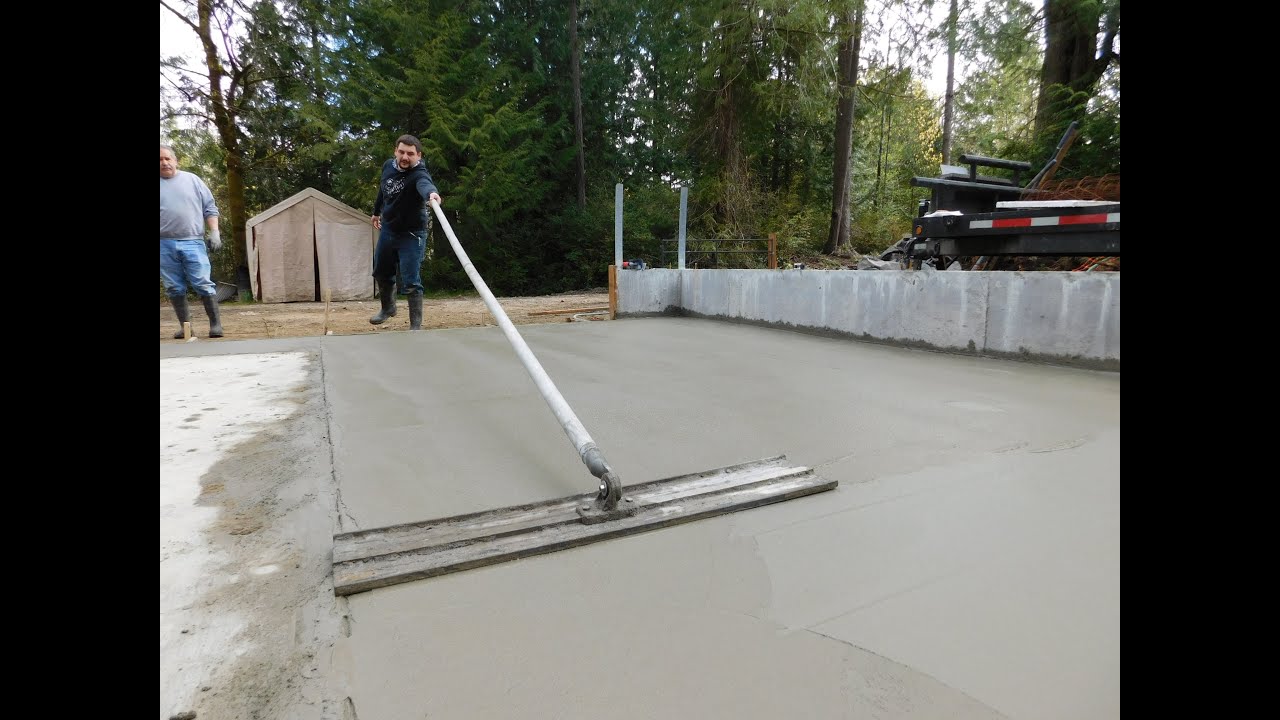
Consolidating and Leveling: After the concrete is placed, it must be consolidated to remove air pockets and achieve maximum density. Use a vibrating screed or bull float to level the surface and eliminate any high or low spots. Work methodically from one end of the slab to the other, applying gentle pressure to create a smooth and uniform finish.
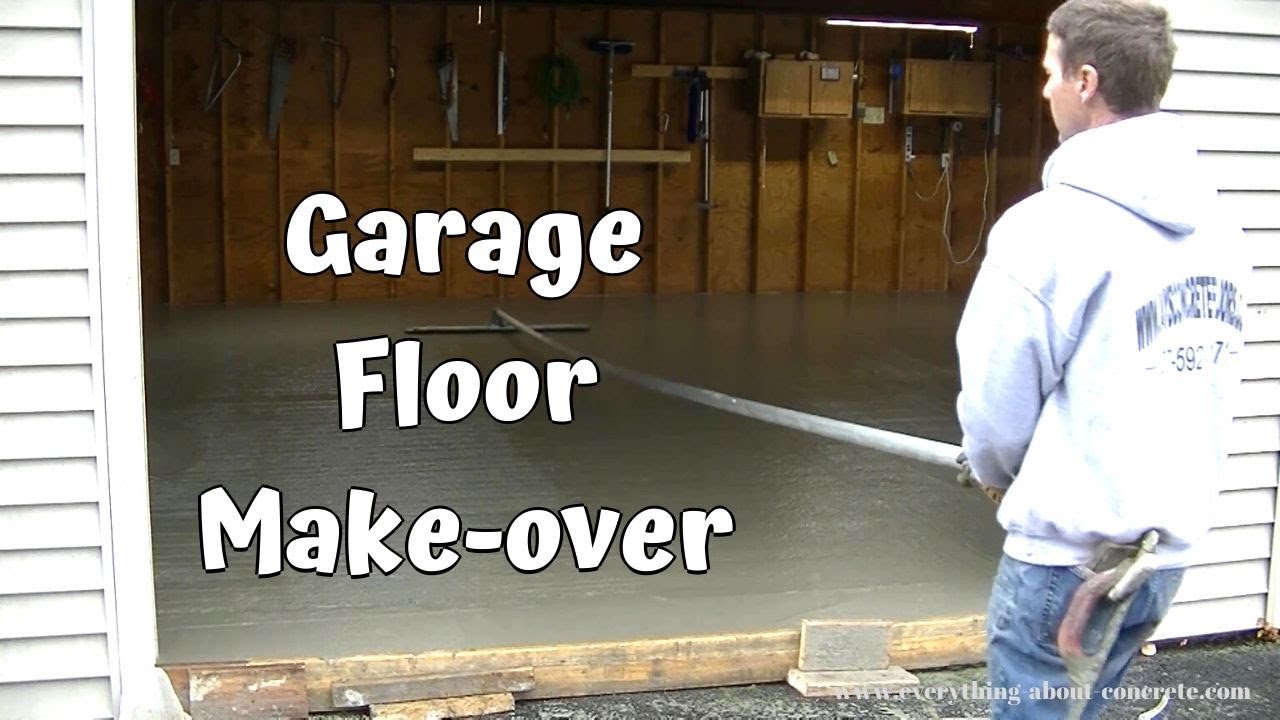
Finishing Techniques: Once the concrete is leveled, it’s time to apply finishing techniques to achieve the desired texture and appearance. Options include broom finishing for added traction, troweling for a smooth surface, or stamping for decorative effects. Experiment with different techniques to find the perfect finish for your garage floor, taking care to work quickly and efficiently before the concrete sets.
Edge Work and Control Joints: Pay close attention to the edges of the slab, ensuring that they are properly formed and finished to achieve clean lines and prevent chipping. Install control joints at regular intervals to control cracking and promote structural integrity. Use a grooving tool or saw to create clean, straight lines in the concrete, taking care not to disrupt the surface.
Curing and Drying: Patience Pays Off
After the concrete is poured and finished, the curing and drying process is critical to ensure optimal strength, durability, and longevity for your garage floor. Proper curing allows the concrete to reach its full potential, while adequate drying prevents issues such as cracking and surface defects. Let’s talk about the importance of curing and drying and explore best practices for achieving optimal results.
Understanding the Curing Process: Curing is the process of maintaining adequate moisture and temperature conditions to promote hydration and proper hardening of the concrete. This crucial step begins immediately after the concrete is placed and finished and continues for a specified period, typically ranging from seven to 28 days. Proper curing is essential to achieve the desired strength and durability of the concrete.
Methods of Curing: There are several methods of curing concrete, each designed to maintain the necessary moisture levels and temperature conditions for optimal hydration. Common techniques include ponding, where water is continuously applied to the surface; wet covering, where the concrete is covered with wet burlap or plastic sheeting; and membrane curing compounds, which form a barrier to retain moisture.
Importance of Moisture Retention: Adequate moisture retention is crucial during the curing process to prevent the concrete from drying out too quickly. Rapid evaporation can lead to surface cracking and reduce the strength and durability of the concrete. Monitor weather conditions closely and take appropriate measures to maintain a moist environment, such as using curing blankets or applying a layer of water to the surface.
Temperature Considerations: Temperature also plays a significant role in the curing process, as it affects the rate of hydration and strength development in the concrete. Avoid pouring concrete in extreme hot or cold weather conditions, as this can impact the curing process. During cold weather, consider using insulating blankets or heating equipment to maintain the desired temperature range for proper curing.
Duration of Curing: The duration of curing is crucial to ensure that the concrete achieves its desired strength and durability. While concrete continues to gain strength over time, it’s essential to follow the recommended curing period specified by the concrete mix manufacturer. Typically, this ranges from seven to 28 days, during which the concrete should be kept moist and protected from extreme temperature fluctuations.
Monitoring and Maintenance: Throughout the curing process, monitor the condition of the concrete regularly to ensure that proper curing is taking place. Check for signs of drying or cracking and take immediate action to remedy any issues. Avoid traffic or heavy loads on the concrete during the curing period, as this can disrupt the curing process and compromise the quality of the finished floor.
Transition to Drying: Once the curing period is complete, the concrete transitions from the curing phase to the drying phase. During this time, moisture within the concrete evaporates gradually, and the surface becomes ready for additional treatments such as sealing or finishing. It’s essential to allow sufficient time for the concrete to dry completely before applying any coatings or sealants.
Testing for Readiness: Before proceeding with any additional treatments or coatings, perform a moisture test to ensure that the concrete is adequately dry. Various methods, such as plastic sheet tests or moisture meters, can be used to assess the moisture content of the concrete. Once the concrete meets the specified criteria for moisture content, it’s ready for the next phase of finishing and protection.
Finishing Touches: Sealing and Protecting Your Concrete Floor
Once the concrete floor in your garage is poured, cured, and dried, it’s time to apply the finishing touches to protect and enhance its appearance and durability. Sealing the concrete not only adds an extra layer of protection against stains and damage but also enhances its aesthetic appeal. Let’s discuss the importance of sealing and other finishing touches for your garage floor.
Understanding the Benefits of Sealing: Sealing the concrete floor in your garage offers numerous benefits, including protection against stains, oil spills, moisture penetration, and surface abrasion. Additionally, sealing enhances the color and appearance of the concrete, making it easier to clean and maintain over time. Choose a high-quality sealer suitable for garage floors and follow the manufacturer’s instructions for application.
Surface Preparation: Before applying the sealer, it’s essential to prepare the concrete surface properly. Thoroughly clean the floor to remove any dirt, dust, or debris that could interfere with adhesion. Use a pressure washer or degreaser for stubborn stains or oil spots, and allow the surface to dry completely before proceeding with the sealing process.
Choosing the Right Sealer: Selecting the appropriate sealer for your garage floor is crucial to achieving the desired level of protection and aesthetic appeal. Consider factors such as the type of concrete surface, the level of traffic and use, and the desired finish (e.g., glossy or matte). Common types of sealers include acrylic, epoxy, polyurethane, and penetrating sealers, each offering unique benefits and characteristics.
Application Techniques: When applying the sealer, ensure proper ventilation and follow safety precautions outlined by the manufacturer, such as wearing protective gear and working in a well-ventilated area. Use a paint roller or sprayer to apply the sealer evenly across the surface, working in small sections to prevent overlapping and uneven coverage. Pay special attention to edges and corners to ensure thorough sealing.
Allow Sufficient Drying Time: After applying the sealer, allow sufficient drying time as specified by the manufacturer before walking or driving on the surface. Avoid exposing the freshly sealed concrete to moisture or heavy traffic during the curing period, as this can affect the quality and durability of the seal. Follow the recommended curing time to ensure optimal performance and longevity of the sealer.
Additional Finishing Options: In addition to sealing, consider other finishing options to enhance the appearance and functionality of your garage floor. Options include applying a decorative concrete coating or stain to add color and texture, installing interlocking floor tiles or mats for added protection and aesthetic appeal, or incorporating anti-slip additives for improved safety in high-traffic areas.

Maintenance: Keeping Your Garage Floor in Prime Condition
Once your concrete garage floor is poured, sealed, and finished, proper maintenance is essential to preserve its appearance and performance over time. Regular maintenance tasks not only help prevent damage and deterioration but also extend the lifespan of your garage floor. Below are several essential maintenance tips to keep your garage floor in prime condition.
Regular Cleaning: Regular cleaning is key to maintaining the appearance and functionality of your garage floor. Sweep or vacuum the surface regularly to remove dirt, dust, and debris that can accumulate over time. Use a mild detergent and water to mop the floor periodically, focusing on areas prone to spills or stains. Avoid harsh chemicals or abrasive cleaners that can damage the sealer or concrete surface.
Stain Removal: Promptly address any spills or stains on your garage floor to prevent them from becoming permanent. Use a mild cleaning solution and a soft-bristled brush to gently scrub away stains such as oil, grease, or automotive fluids. For stubborn stains, consider using a commercial concrete cleaner or degreaser specifically formulated for garage floors.
Avoiding Heavy Impact: While concrete is a durable material, it’s not immune to damage from heavy impacts or sharp objects. Avoid dropping heavy items or dragging sharp tools or equipment across the surface, as this can cause scratches, chips, or cracks. Place protective mats or pads under heavy equipment or machinery to distribute weight and prevent damage to the concrete.
Regular Inspection: Periodically inspect your garage floor for signs of damage or wear, such as cracks, spalling, or discoloration. Address any issues promptly to prevent them from worsening over time. Repair minor cracks or surface imperfections using a concrete patching compound or epoxy filler, following the manufacturer’s instructions for application.
Reapply Sealer as Needed: Over time, the protective sealant applied to your garage floor may wear off due to foot traffic, vehicle movement, or exposure to the elements. Monitor the condition of the sealer regularly and reapply it as needed to maintain optimal protection and appearance. Follow the manufacturer’s recommendations for reapplication frequency and proper application techniques.
Preventive Maintenance: In addition to regular cleaning and inspection, consider implementing preventive maintenance measures to protect your garage floor against damage and deterioration. Place floor mats or rugs at entry points to capture dirt and moisture before it reach the concrete surface. Install rubber or plastic pads under heavy furniture or equipment to prevent indentations or marks on the floor.
Tips for a Better Concrete Garage Floor Slab
Garage Pt 8 – Pouring the floor
How to pour a concrete floor for an existing garage Best How-To Guide
Pouring concrete slab editorial stock photo. Image of work – 98564248
Build my garage #9 Pouring the concrete slab
Garage Concrete Floor Slab – Construction, Thickness and Cost

Pouring the Concrete Floor in the Garage u2013 Project Small House

How to Pour a Rock-Solid, Well-Insulated Garage Slab – Fine

How to pour a concrete floor for an existing garage Best How-To Guide
How to Pour a Leveling Layer of Concrete over Floor?

Pour A Concrete Slab Over A Concrete Slab Garage Floor Makeover

Related Posts: