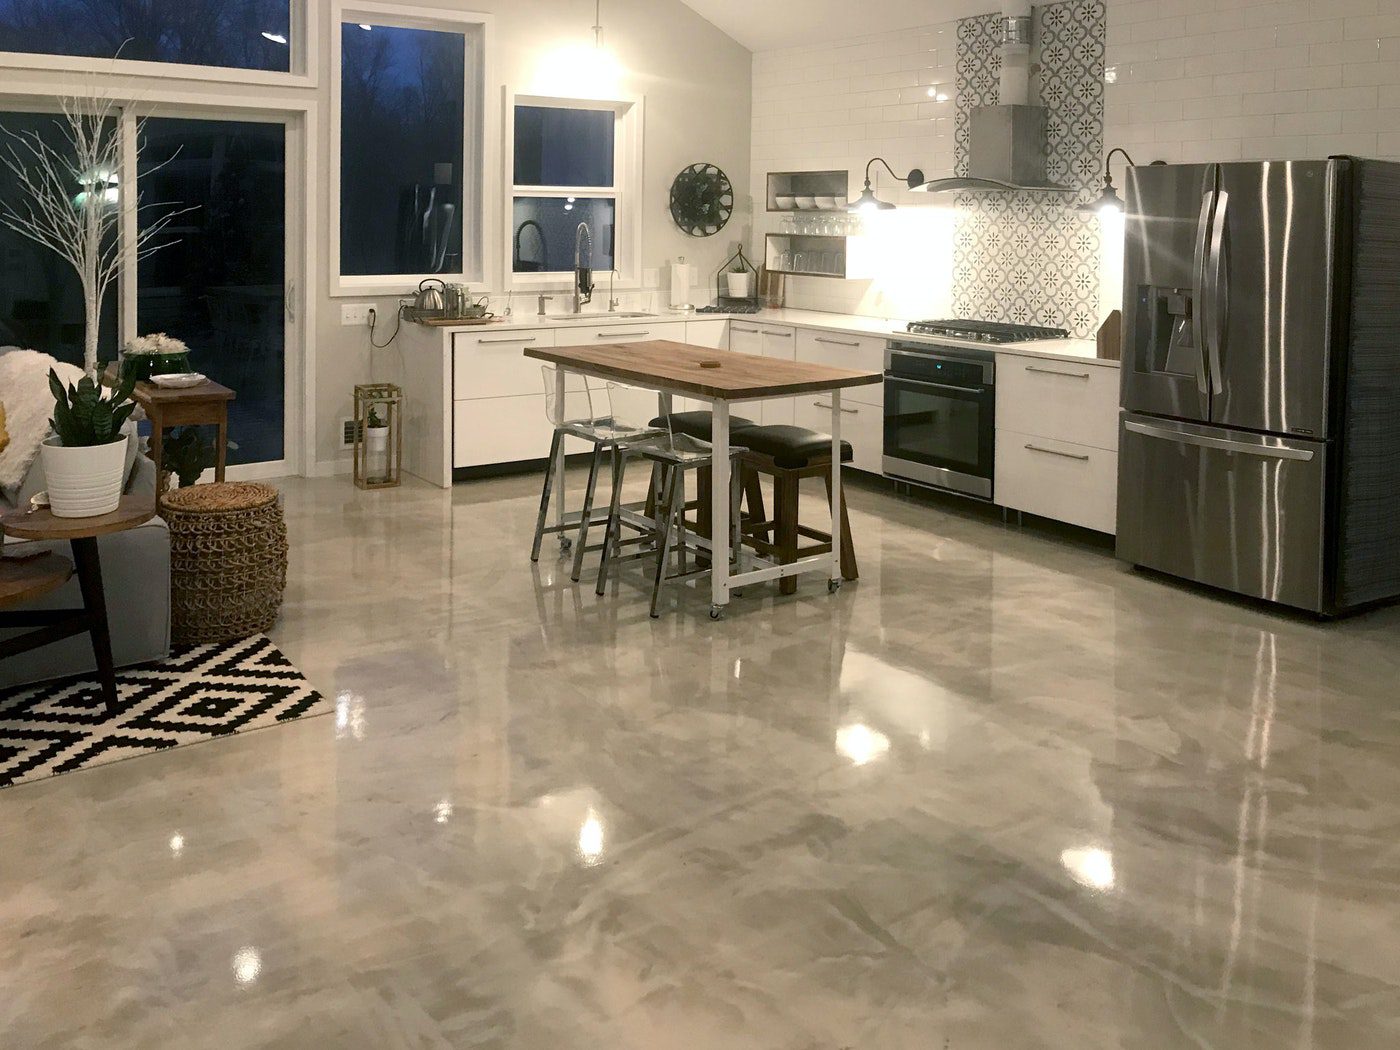
Epoxy flooring has become an increasingly popular choice for residential spaces due to its durability, aesthetic appeal, and versatility. Whether you’re looking to transform your garage, basement, or even your kitchen, epoxy flooring can provide a sleek, long-lasting finish. While hiring a professional is always an option, many homeowners opt to tackle this project themselves. We will walk you through the process of installing residential epoxy flooring, ensuring you achieve professional results on your own.
Understanding Epoxy Flooring
What is Epoxy Flooring?
Epoxy flooring is a type of synthetic resin floor system that is applied over concrete substrates as a form of protection and decoration. It consists of a two-part mixture of resin and hardener, which, when combined, creates a chemical reaction that forms a rigid plastic material. This material is highly durable, resistant to degradation, and can withstand heavy traffic and harsh chemicals, making it an excellent choice for residential and commercial applications.
Benefits of Epoxy Flooring
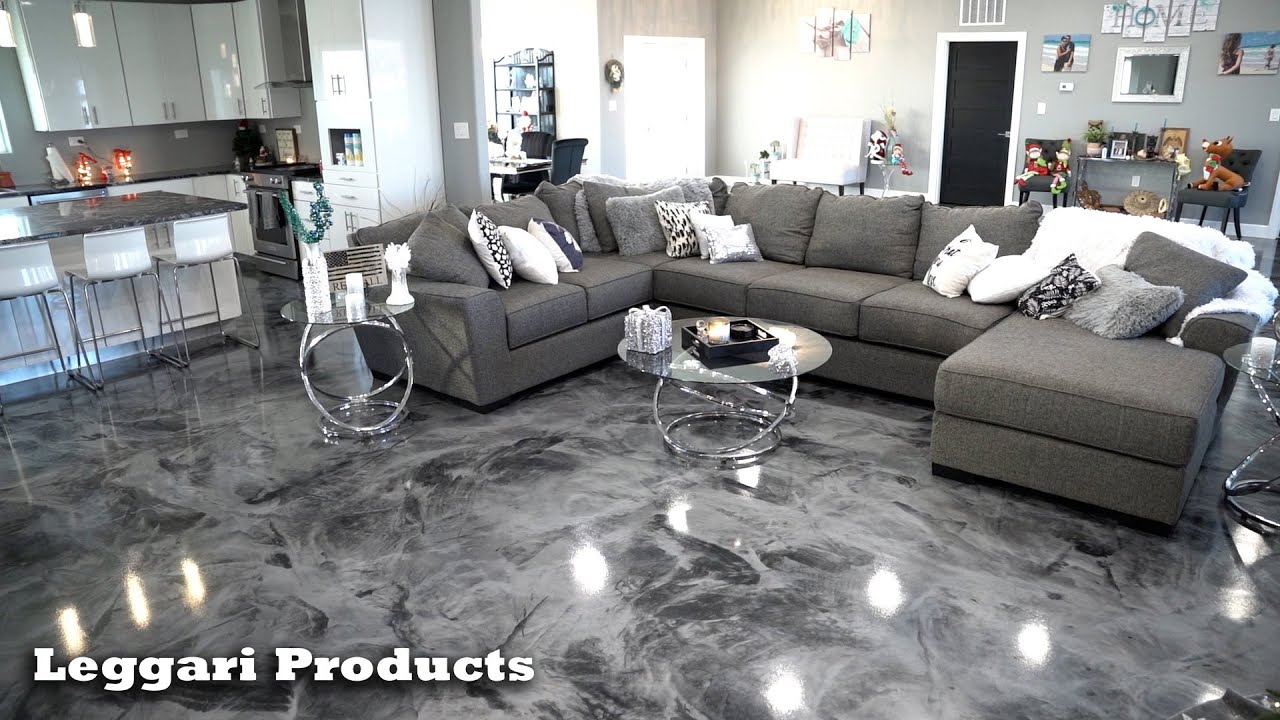
The benefits of epoxy flooring are numerous, making it a popular choice among homeowners. Firstly, epoxy flooring is incredibly durable and can last for many years without showing signs of wear and tear. It’s also resistant to stains, chemicals, and moisture, making it ideal for areas prone to spills or heavy use. Additionally, epoxy flooring is easy to clean and maintain, requiring only regular sweeping and occasional mopping. The aesthetic options are vast, with a range of colors, patterns, and finishes available to suit any style.
Types of Epoxy Flooring
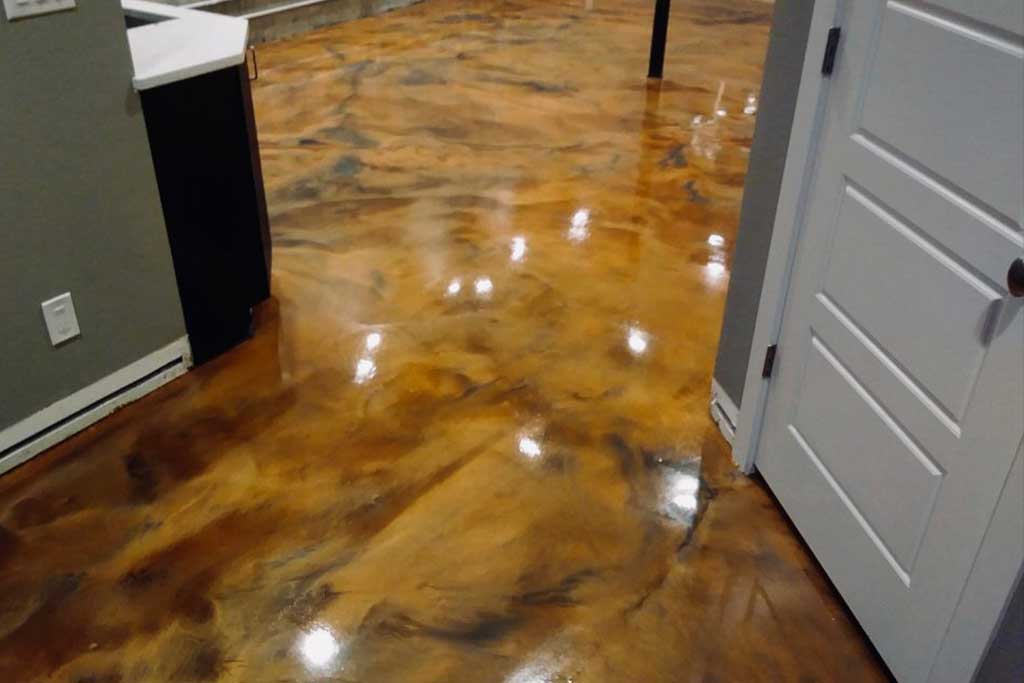
There are several types of epoxy flooring systems available, each with its own set of advantages. The most common types include self-dispersing epoxy, self-leveling epoxy, epoxy terrazzo, and epoxy mortar. Self-dispersing epoxy is known for its strength and is often used in areas with heavy forklift traffic. Self-leveling epoxy is ideal for creating a smooth, seamless surface and is often used in residential applications. Epoxy terrazzo is a decorative option that incorporates colored aggregates for a unique, artistic finish. Epoxy mortar is the most robust option and is used in industrial settings.
Choosing the Right Epoxy for Your Home
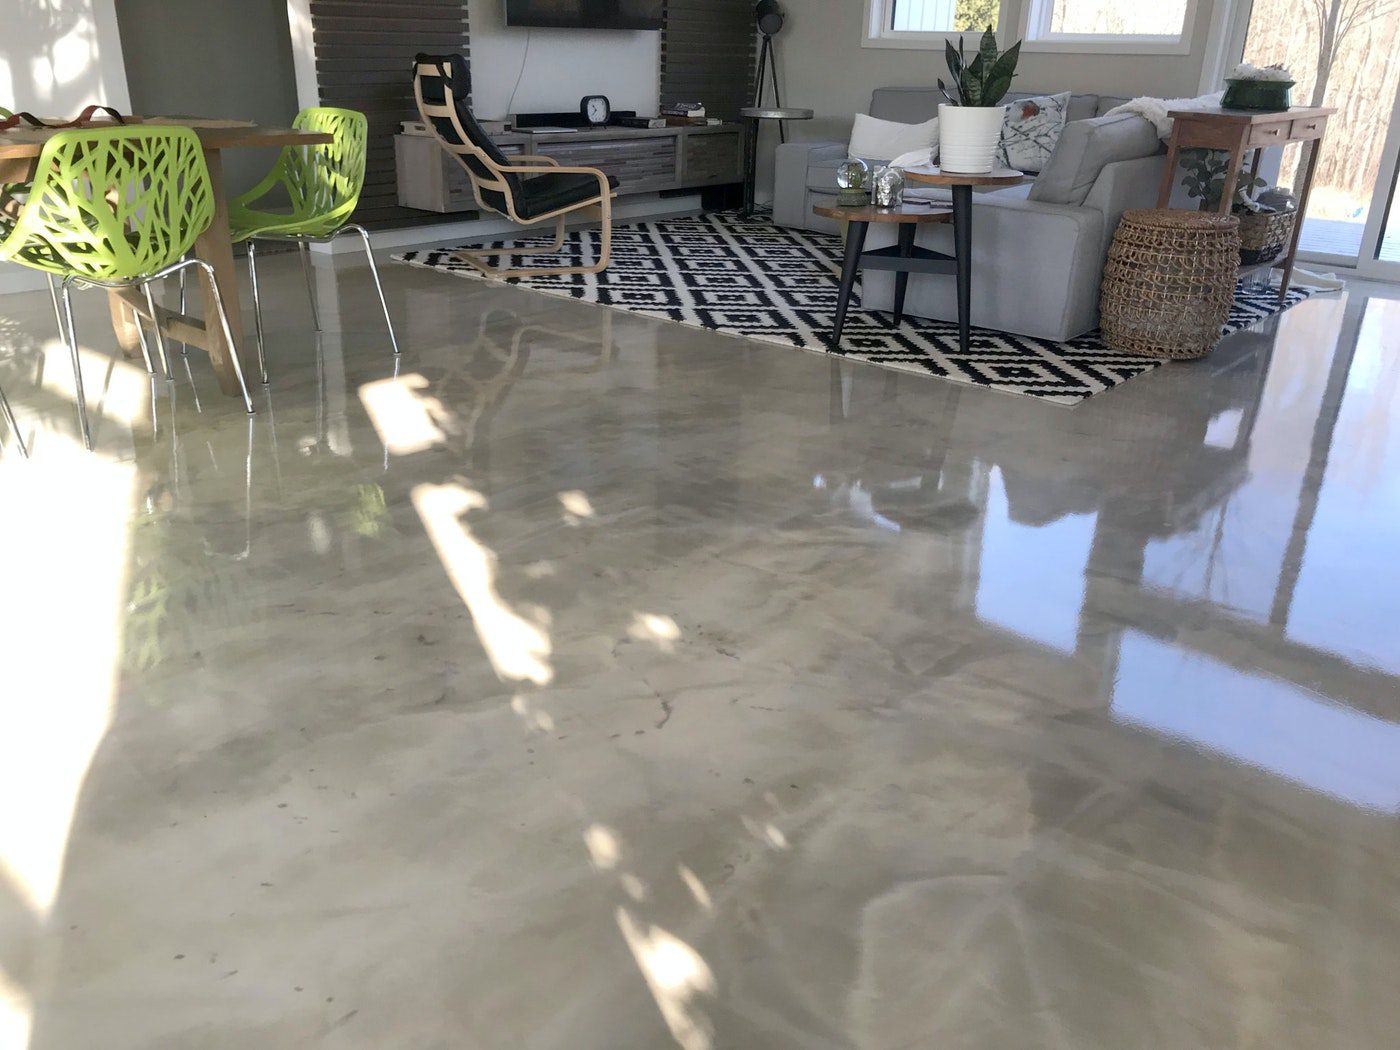
Selecting the right type of epoxy for your home depends on the specific needs and conditions of the area you’re working with. For garages and basements, a self-leveling epoxy system is often the best choice due to its ease of application and smooth finish. In living areas, epoxy terrazzo can add a decorative touch, while self-dispersing epoxy may be ideal for high-traffic areas like hallways and kitchens. Consider factors such as foot traffic, exposure to chemicals, and desired aesthetics when making your selection.
Preparing for Your Epoxy Project
Before starting your epoxy flooring project, it’s essential to prepare adequately. This includes gathering all necessary materials, such as the epoxy resin and hardener, application tools (rollers, brushes, and squeegees), and personal protective equipment (gloves, goggles, and respirators). Additionally, ensure the area to be covered is clean, dry, and free of any debris or oil stains. Proper preparation will ensure a smooth application process and a durable, long-lasting finish.
Cost Considerations
While DIY epoxy flooring can save you money compared to hiring a professional, there are still costs to consider. The price of materials will vary depending on the type of epoxy and the square footage of the area to be covered. On average, you can expect to spend between $3 to $12 per square foot on materials. Additional costs may include tools, cleaning supplies, and personal protective equipment. It’s essential to budget accordingly and ensure you have all the necessary supplies before beginning your project.

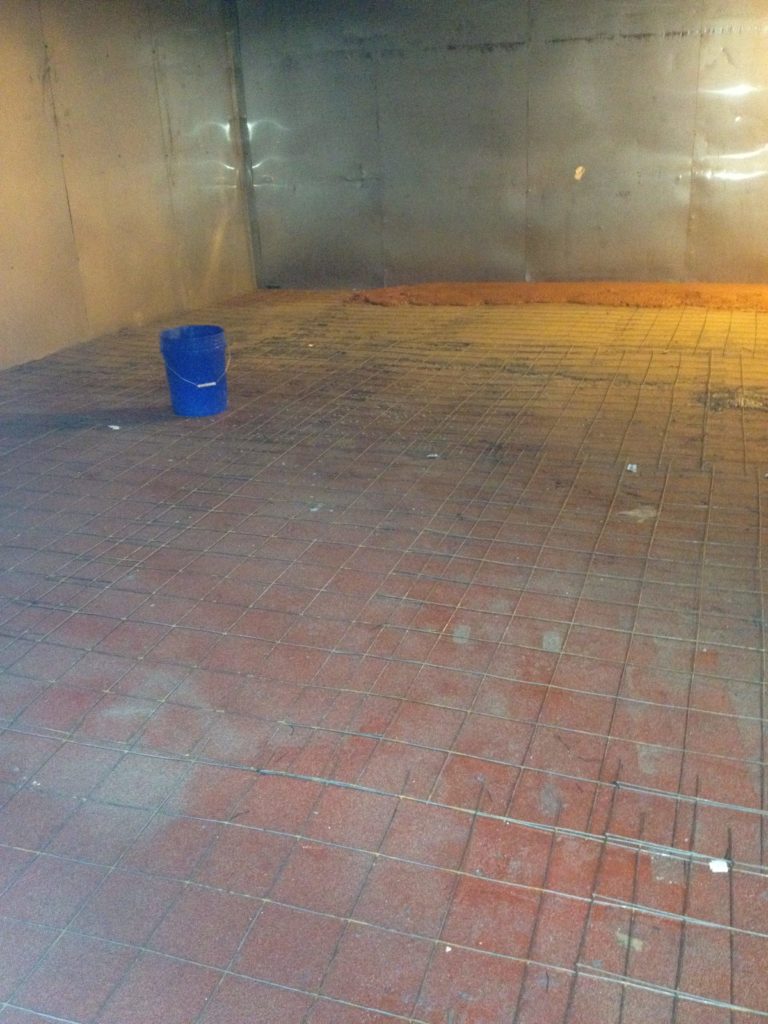
Preparing the Surface
Cleaning and Repairing the Concrete
The success of your epoxy flooring project largely depends on how well you prepare the concrete surface. Start by thoroughly cleaning the area to remove any dirt, dust, or debris. Use a degreaser to tackle oil stains and a concrete cleaner for general cleaning. After cleaning, inspect the surface for any cracks or damage. Fill any cracks or holes with a concrete patching compound and allow it to dry completely before proceeding.
Grinding or Etching the Concrete
For the epoxy to adhere properly, the concrete surface must be roughened. This can be achieved by grinding or etching. Grinding involves using a floor grinder to mechanically abrade the surface, creating a rough texture. This method is preferred for its consistency and effectiveness. Alternatively, you can use an acid etching solution to chemically roughen the surface. Apply the etching solution according to the manufacturer’s instructions, then rinse thoroughly with water and allow the concrete to dry.
Testing for Moisture
Moisture is a common issue that can affect the adhesion and longevity of epoxy flooring. Before applying the epoxy, it’s crucial to test the concrete for moisture. Use a plastic sheet test by taping a plastic sheet to the concrete and leaving it for 24 hours. If moisture accumulates under the sheet, the concrete is too damp for epoxy application. In such cases, you’ll need to address the moisture issue, possibly by installing a vapor barrier or using a moisture-mitigating primer.
Applying a Primer
Applying a primer is an important step that helps ensure a strong bond between the epoxy and the concrete. Primers also help seal the concrete, preventing air bubbles from forming in the epoxy. Choose a primer that is compatible with your epoxy system and apply it using a roller or brush. Allow the primer to dry according to the manufacturer’s instructions before proceeding with the epoxy application.
Ensuring Proper Ventilation
Proper ventilation is crucial during the epoxy application process. Epoxy fumes can be harmful if inhaled, so ensure the area is well-ventilated by opening windows and using fans to circulate air. If the project is being done in an enclosed space like a basement, consider using an exhaust fan to help expel fumes. Wearing a respirator is also recommended to protect yourself from inhaling harmful vapors.
Safety Precautions
Safety should always be a top priority when working with epoxy. In addition to ensuring proper ventilation, wear appropriate personal protective equipment, including gloves, goggles, and long sleeves to protect your skin from direct contact with the epoxy. Keep a first aid kit nearby and be familiar with the material safety data sheet (MSDS) for the products you’re using. If you experience any adverse reactions, seek medical attention immediately.
Mixing and Applying the Epoxy
Mixing the Epoxy Components
Proper mixing of the epoxy components is critical to achieving a durable and aesthetically pleasing finish. Follow the manufacturer’s instructions for mixing the resin and hardener, typically done using a drill and mixing paddle. Mix thoroughly to ensure the components are fully combined, usually for about 2-3 minutes. Be mindful of the pot life, which is the time you have to work with the epoxy before it starts to harden.
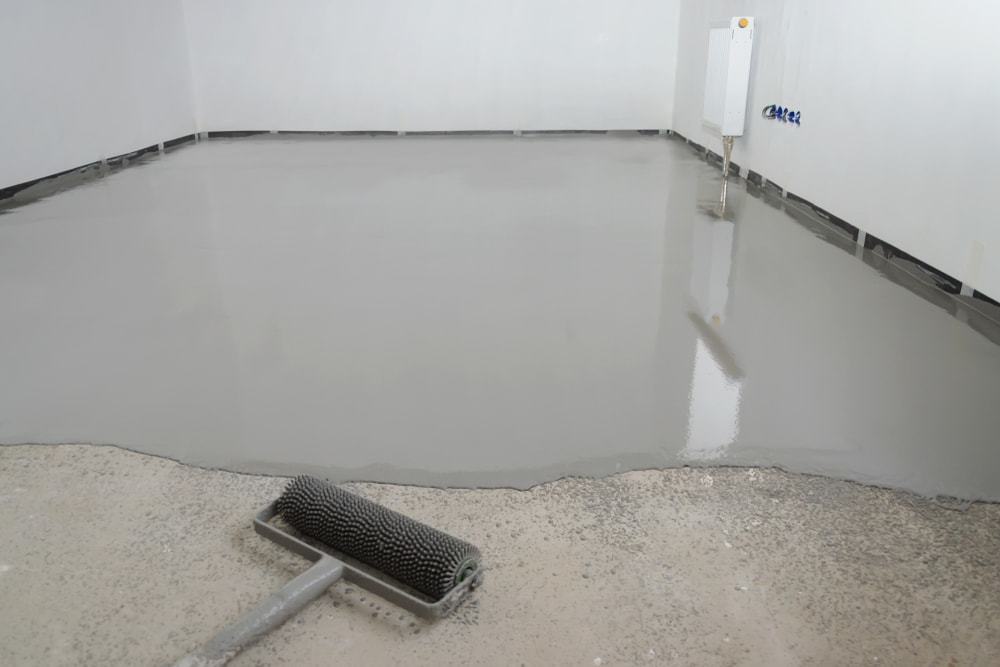
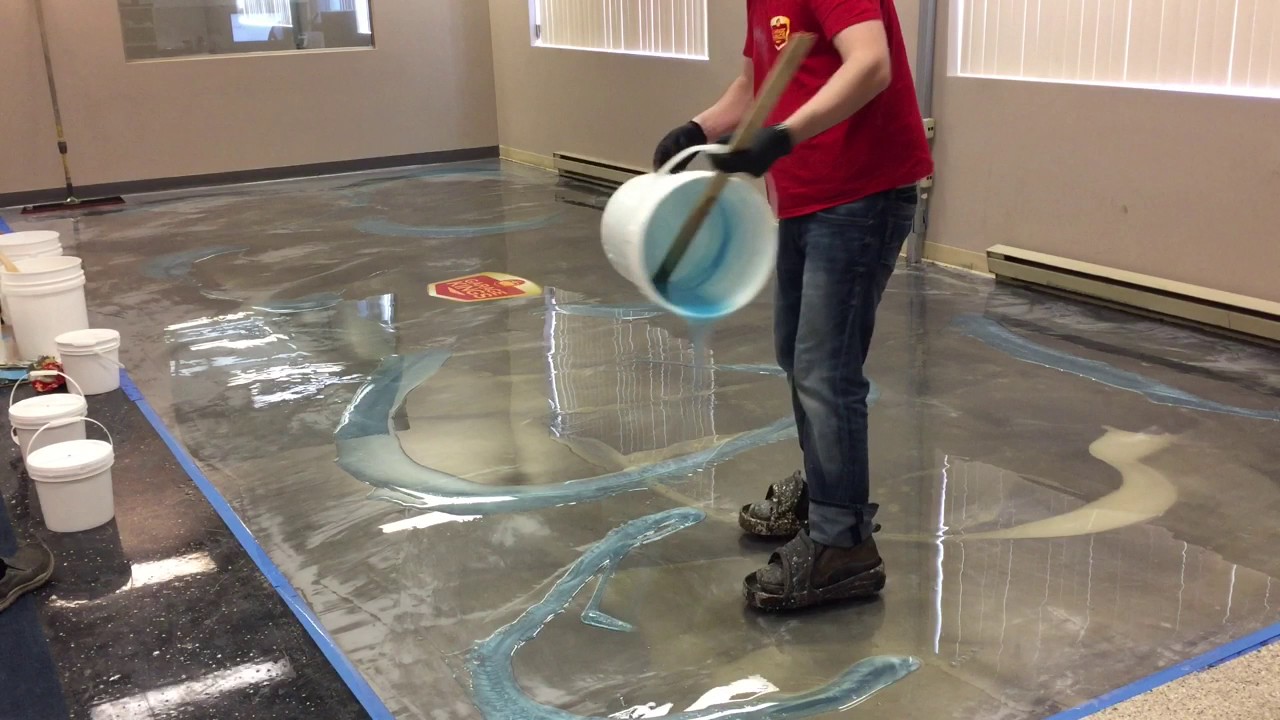
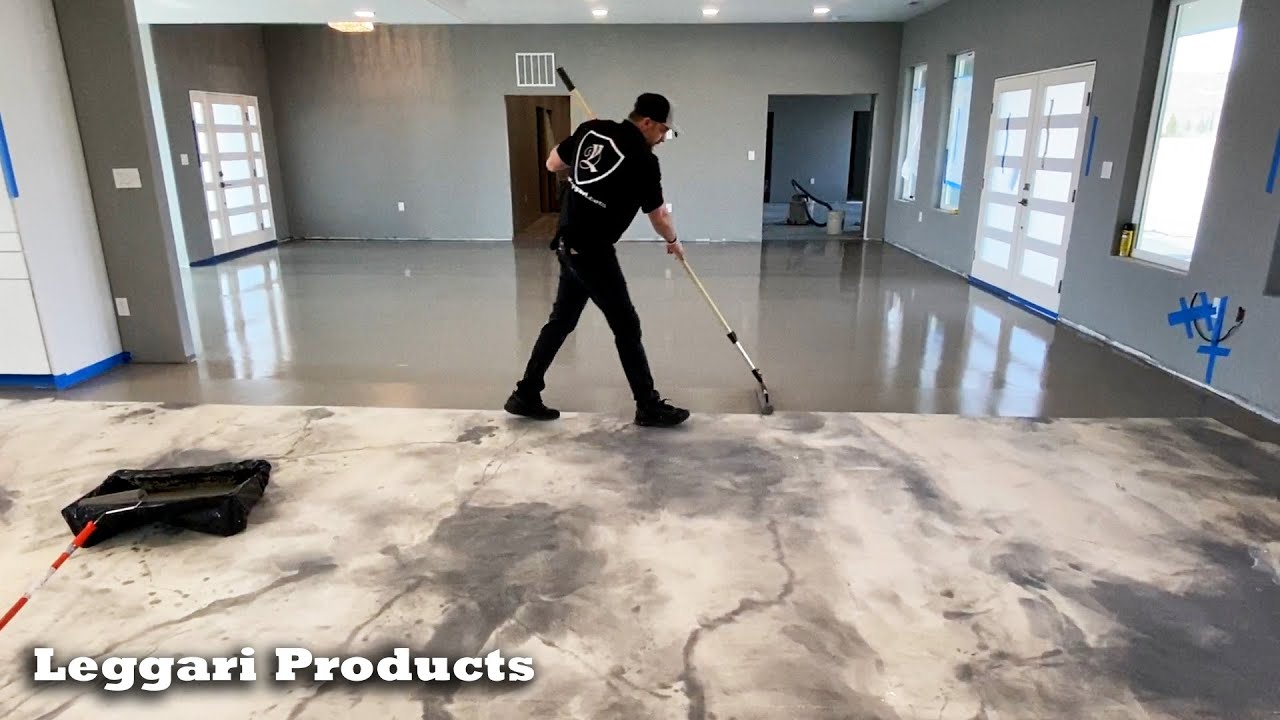
Applying the Base Coat
The base coat is the first layer of epoxy and serves as the foundation for the entire flooring system. Pour the mixed epoxy onto the prepared surface in small sections, starting from the furthest corner of the room and working your way towards the exit. Use a squeegee to spread the epoxy evenly, then use a roller to backroll and remove any air bubbles. Ensure the base coat is applied evenly and covers the entire surface.
Adding Decorative Elements
If you plan to add decorative elements, such as colored flakes or metallic pigments, now is the time to do so. Sprinkle the flakes or pigments onto the wet base coat, distributing them evenly across the surface. Be creative with your design, but work quickly to ensure the epoxy doesn’t start to harden before you’ve finished applying the decorations. Allow the base coat and decorative elements to dry according to the manufacturer’s instructions.
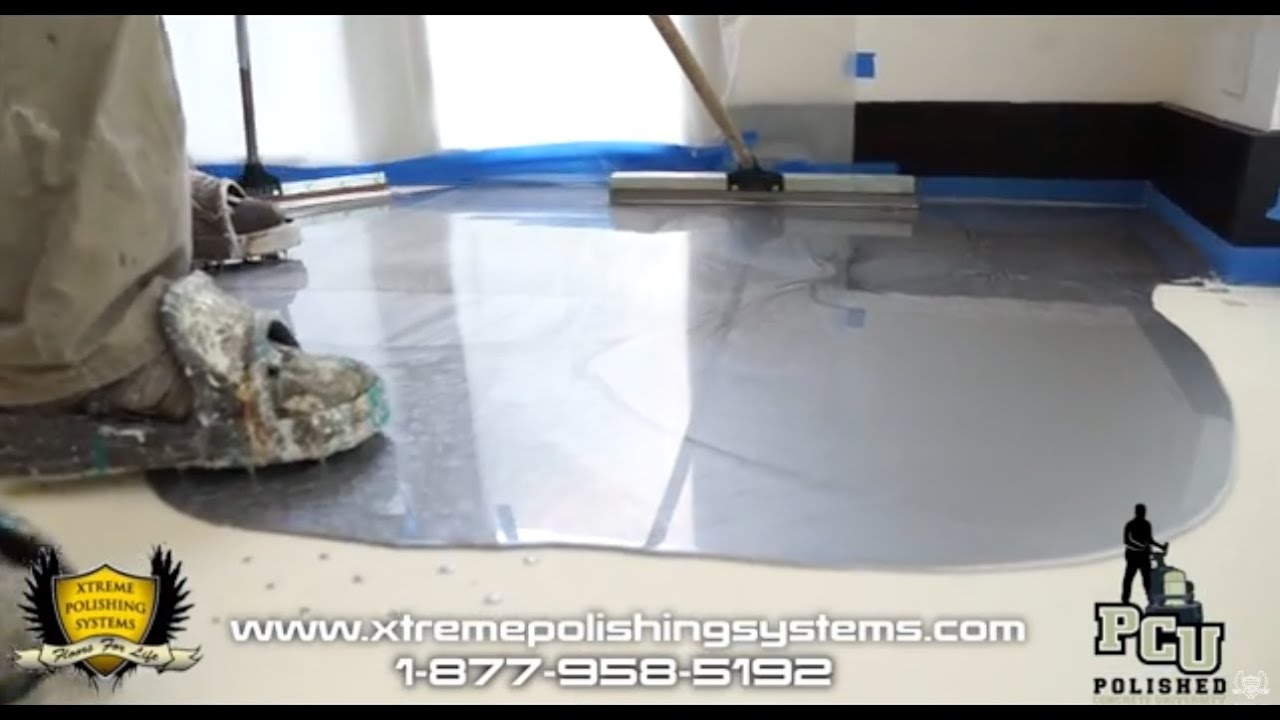
Applying the Top Coat
The top coat serves as a protective layer that enhances the durability and longevity of your epoxy floor. Mix and apply the top coat in the same manner as the base coat, using a squeegee and roller to ensure an even application. The top coat should completely cover the decorative elements and provide a smooth, glossy finish. Allow the top coat to dry for the recommended time, typically 24-48 hours, before walking on the surface.
Curing Time and Final Touches
Curing time is essential for the epoxy to reach its full strength and durability. Avoid walking on the newly applied epoxy floor for at least 24 hours and refrain from placing heavy objects on it for at least a week. Once the epoxy is fully cured, you can perform any final touches, such as adding baseboards or trim to complete the look. Regularly sweep and mop the floor to keep it clean and maintain its appearance.
Common Issues and Solutions
During the epoxy application process, you may encounter common issues such as air bubbles, uneven coverage, or color variations. Air bubbles can be addressed by using a spiked roller or torch to remove them while the epoxy is still wet. Uneven coverage can be corrected by applying additional coats of epoxy. Color variations are often due to improper mixing or application, so ensure you’re following the manufacturer’s instructions closely. If issues persist, consult the manufacturer’s troubleshooting guide or seek advice from a professional.
Post-Installation Maintenance
Cleaning and Caring for Your Epoxy Floor
Maintaining your epoxy floor is relatively simple but crucial for preserving its appearance and longevity. Regular sweeping or vacuuming will help remove dirt and debris that can scratch the surface. For more thorough cleaning, use a mild detergent and warm water with a mop. Avoid using harsh chemicals or abrasive cleaners, as they can damage the epoxy. For stubborn stains, use a soft brush or sponge to gently scrub the area.
Dealing with Spills and Stains
Epoxy flooring is resistant to most spills and stains, but it’s still important to clean up any spills promptly to prevent damage. For liquid spills, use a paper towel or cloth to absorb the liquid, then clean the area with a mild detergent and water. For oil or grease stains, use a degreaser and a soft brush to remove the residue. Avoid using sharp tools or abrasive pads, as they can scratch the surface.
Preventing Scratches and Damage
While epoxy flooring is durable, it’s not entirely immune to scratches and damage. To protect your floor, place mats or rugs in high-traffic areas and under heavy furniture. Use furniture pads to prevent scratches when moving furniture. Avoid dragging heavy objects across the floor and use caution when using sharp tools or equipment. Regularly inspect the floor for signs of wear and address any issues promptly.
Repairing Damaged Epoxy
If your epoxy floor becomes damaged, it can often be repaired without the need for a full replacement. For minor scratches or chips, use an epoxy repair kit to fill in the damaged area and smooth it out. For larger areas of damage, you may need to sand down the damaged section and reapply a new layer of epoxy. Follow the manufacturer’s instructions for the repair process and allow the epoxy to cure fully before using the area again.
Recoating Epoxy Floors
Over time, your epoxy floor may begin to show signs of wear and may require recoating to restore its appearance and durability. To recoat an epoxy floor, start by thoroughly cleaning and lightly sanding the surface to create a rough texture for the new epoxy to adhere to. Apply a new coat of epoxy using the same method as the initial application, ensuring an even and smooth finish. Allow the new coat to cure fully before using the floor.
Long-Term Maintenance Tips
To keep your epoxy floor looking its best for years to come, follow these long-term maintenance tips. Regularly sweep and mop the floor to keep it clean and free of debris. Avoid using harsh chemicals or abrasive cleaners, and promptly clean up any spills. Place mats or rugs in high-traffic areas and under heavy furniture to prevent scratches. Inspect the floor regularly for signs of wear and address any issues promptly. With proper care, your epoxy floor can maintain its appearance and durability for many years.
Common Mistakes to Avoid
Inadequate Surface Preparation
One of the most common mistakes when installing epoxy flooring is inadequate surface preparation. Failing to properly clean and roughen the concrete can result in poor adhesion and a less durable finish. Take the time to thoroughly clean the surface, repair any damage, and ensure the concrete is adequately roughened before applying the epoxy.
Ignoring Moisture Issues
Moisture is a significant enemy of epoxy flooring. Ignoring moisture issues can lead to bubbling, peeling, and premature failure of the epoxy. Always test for moisture before starting your project and address any issues before applying the epoxy. Consider using a moisture barrier or primer if necessary to ensure a successful application.
Incorrect Mixing Ratios
Epoxy relies on a precise chemical reaction between the resin and hardener. Incorrect mixing ratios can result in a weak or improperly cured epoxy. Follow the manufacturer’s instructions carefully and measure the components accurately. Use a mixing paddle and drill to ensure the components are thoroughly combined.
Rushing the Application Process
Patience is key when applying epoxy flooring. Rushing the process can lead to uneven coverage, air bubbles, and other issues. Take your time to apply the epoxy evenly, backroll to remove air bubbles, and allow each coat to dry according to the manufacturer’s instructions. Working methodically will result in a more professional and durable finish.
Skipping the Primer
Skipping the primer step is a common mistake that can compromise the adhesion and durability of the epoxy. Primers help seal the concrete and create a strong bond between the epoxy and the surface. Always apply a compatible primer before applying the base coat of epoxy to ensure a successful application.
Using Incorrect Tools
Using the wrong tools can make the epoxy application process more challenging and result in a subpar finish. Invest in high-quality tools such as rollers, squeegees, and mixing paddles designed for epoxy application. Using the right tools will make the process smoother and help achieve a professional-looking finish.
How long does epoxy flooring last in a residential setting?
Epoxy flooring can last for many years in a residential setting, typically between 10 to 20 years, depending on the quality of the installation and the level of maintenance. Regular cleaning, prompt spill cleanup, and preventive measures like using furniture pads can help extend the lifespan of your epoxy floor.
Can I apply epoxy flooring over existing tiles?
Applying epoxy flooring over existing tiles is possible, but it requires proper preparation to ensure good adhesion. The tiles must be thoroughly cleaned, degreased, and roughened to create a surface that the epoxy can adhere to. In some cases, a primer designed for use over tiles may also be necessary.
How do I choose the right color and finish for my epoxy floor?
Choosing the right color and finish for your epoxy floor depends on your aesthetic preferences and the intended use of the space. Consider the overall color scheme of your home and the amount of natural light in the area. Glossy finishes are popular for their sleek appearance, while matte finishes can hide imperfections and provide a more subtle look.
Is epoxy flooring safe for homes with pets and children?
Epoxy flooring is generally safe for homes with pets and children. It is durable, easy to clean, and resistant to stains and scratches. However, epoxy can be slippery when wet, so consider adding a non-slip additive to the top coat to improve traction and reduce the risk of falls.
Can epoxy flooring be used in outdoor areas?
While epoxy flooring is primarily designed for indoor use, it can be used in certain outdoor areas, such as covered patios or garages. However, exposure to UV rays can cause the epoxy to yellow and degrade over time. If you plan to use epoxy outdoors, choose a UV-resistant epoxy or apply a UV-protective top coat to help maintain its appearance and durability.
What should I do if my epoxy floor starts to peel or bubble?
If your epoxy floor starts to peel or bubble, it’s likely due to improper surface preparation, moisture issues, or incorrect mixing ratios. To address the problem, you’ll need to remove the damaged section by sanding or grinding, thoroughly clean and dry the area, and reapply the epoxy according to the manufacturer’s instructions. If the problem persists, consult with a professional for further assistance.
How To Install Epoxy Floors In A 2000 sq ft Home Step By step Explained
Is Epoxy Flooring Safe For My Home? Epoxy Colorado
Easy Do-It-Yourself Epoxy Flooring Installation Guide We Are Extreme
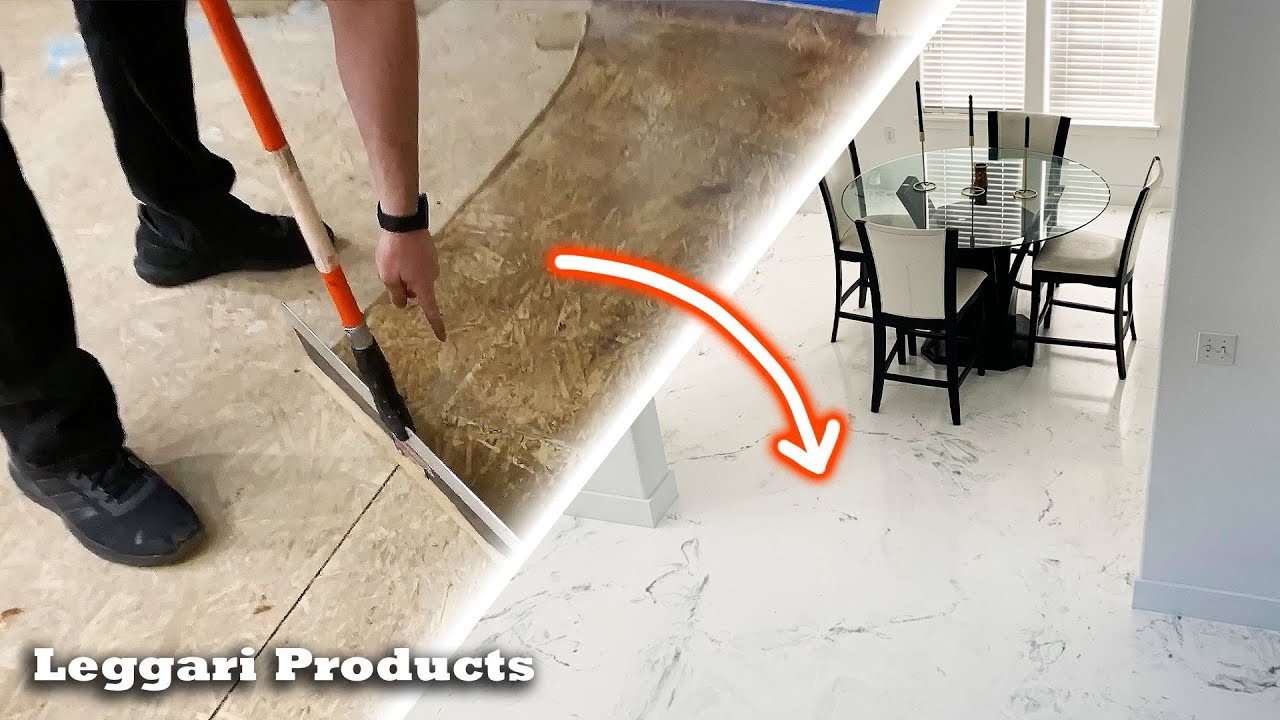
How To Install Epoxy Floors
Over Wood Subfloor DIY Faux White Marble Luxury Floor Using Epoxy Resin
Metallic Epoxy Floor Coatings

Related Posts: