Rubber Flooring Bathroom Ideas for Modern Homes
Rubber flooring may not be the first material that comes to mind when you think of bathroom flooring, but it’s becoming an increasingly popular choice for modern homes. With its durability, water resistance, and versatility, rubber flooring offers numerous benefits for bathrooms of all sizes and styles. Here are some creative and practical rubber flooring bathroom ideas to consider for your home:
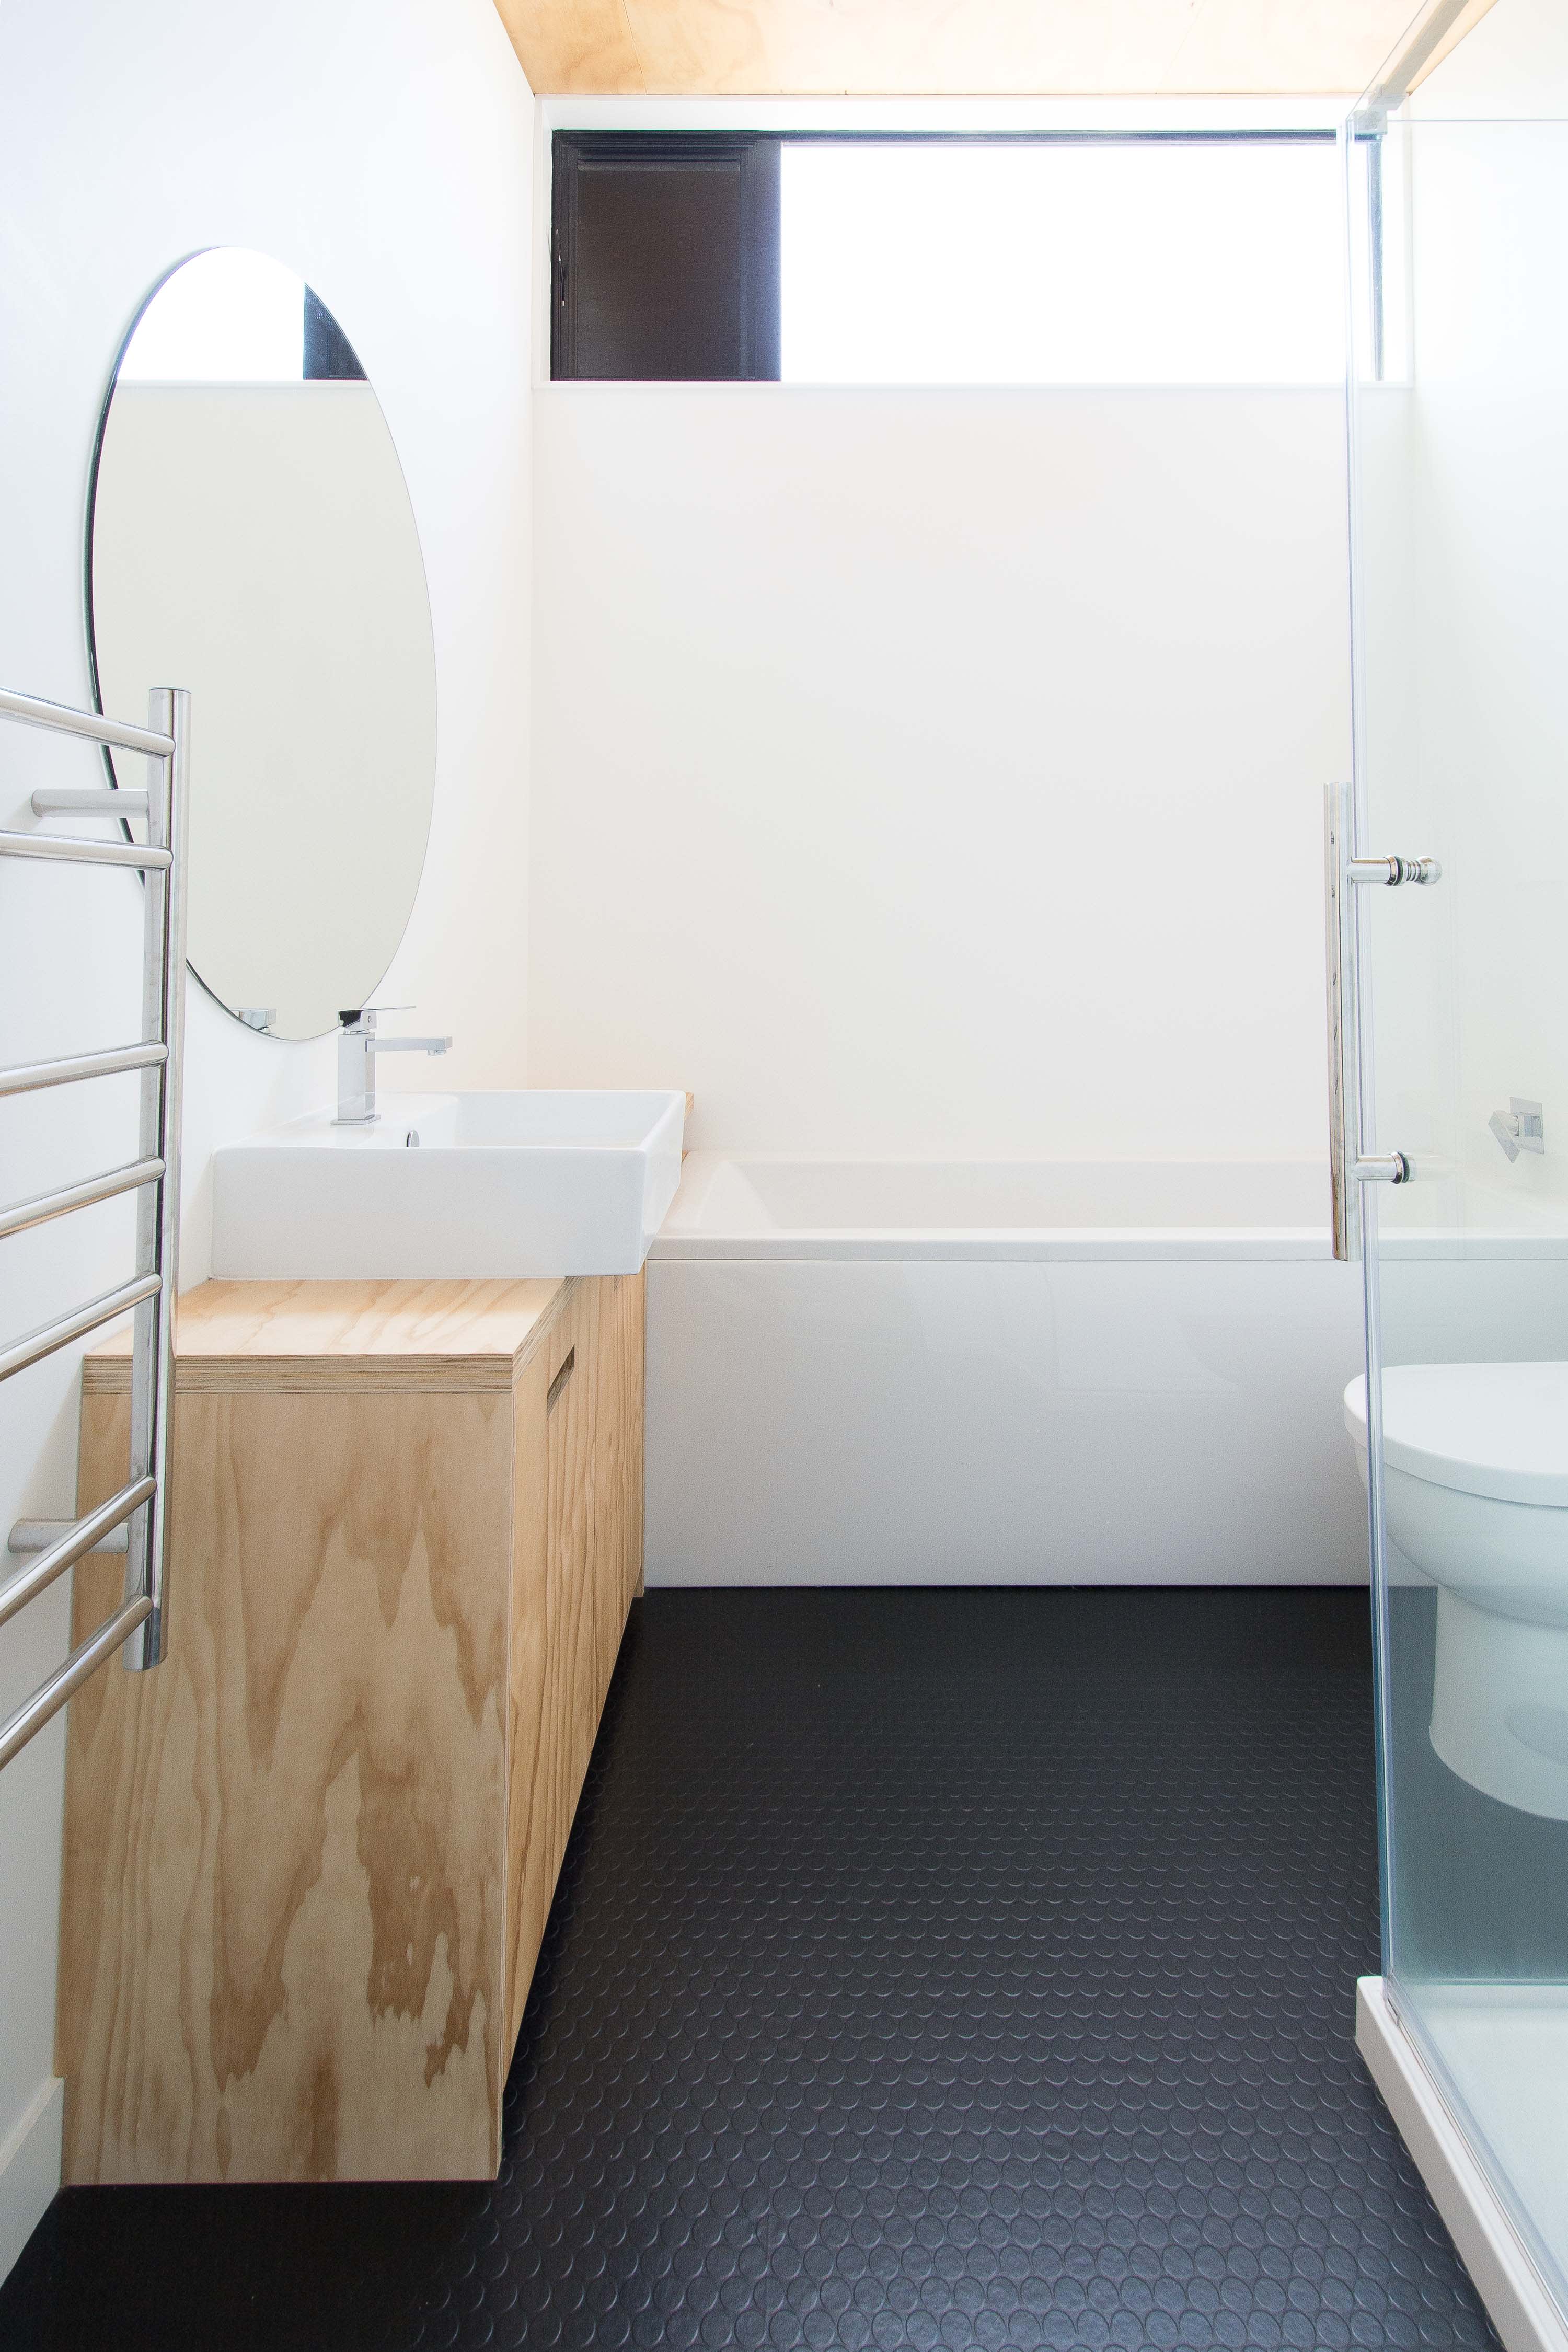
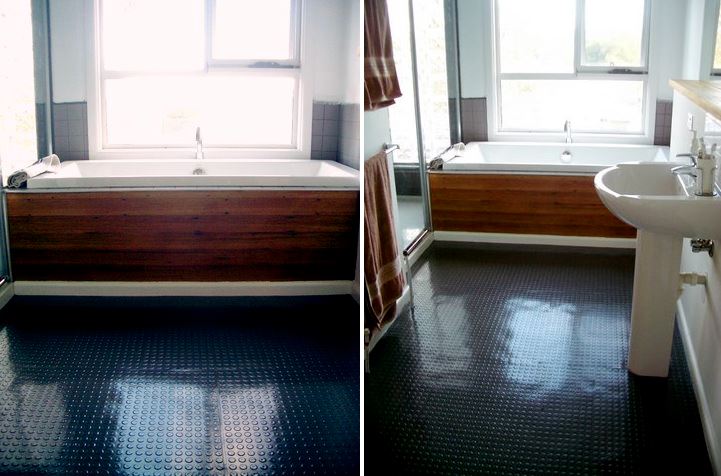
- Sleek and Minimalist: For a sleek and minimalist look, consider installing solid black rubber flooring in your bathroom. This bold and modern choice creates a clean and contemporary aesthetic that pairs well with sleek fixtures and minimalist decor. Add pops of color with vibrant towels, accessories, and artwork to create visual interest and personality in the space.
- Textured and Non-Slip: Safety is a top priority in the bathroom, especially when it comes to flooring. Opt for textured rubber flooring with a non-slip surface to prevent slips and falls in wet areas like the shower and bathtub. Choose a neutral color like gray or beige for a timeless look that complements any decor style.
- Patterned and Playful: Inject personality and whimsy into your bathroom with patterned rubber flooring. Choose a fun and playful pattern like chevron, herringbone, or geometric shapes to add visual interest and dimension to the space. Pair patterned rubber flooring with neutral walls and fixtures for a balanced and cohesive look that doesn’t overwhelm the room.
- Warm and Inviting: While rubber flooring is often associated with commercial spaces, it can also add warmth and comfort to residential bathrooms. Opt for rubber flooring with a wood-look finish for a warm and inviting vibe that mimics the look of hardwood without the maintenance and water damage concerns. Pair wood-look rubber flooring with natural materials like stone and wood accents for a cozy and inviting atmosphere.
- Customizable and Creative: Get creative with rubber flooring by mixing and matching colors, patterns, and textures to create a truly unique look for your bathroom. Consider using rubber tiles or interlocking mats to create custom designs and patterns on the floor. Mix contrasting colors or create a bold focal point with a pop of color in the center of the room.
Benefits of Rubber Flooring in the Bathroom
Rubber flooring may not be the most conventional choice for bathroom flooring, but it offers numerous benefits that make it a smart choice for modern homes. From its durability and water resistance to its comfort and safety features, rubber flooring is an excellent option for bathrooms of all sizes and styles. Here are some of the key benefits of choosing rubber flooring for your bathroom:
Durability: One of the primary benefits of rubber flooring is its exceptional durability. Made from resilient synthetic materials, rubber flooring is designed to withstand heavy foot traffic, moisture, and everyday wear and tear without showing signs of damage or deterioration. This makes it an ideal choice for bathrooms, where floors are subjected to constant exposure to water and humidity.
Water Resistance: Rubber flooring is naturally water-resistant, making it an excellent choice for wet areas like bathrooms. Unlike hardwood or laminate flooring, which can warp, swell, or become damaged when exposed to water, rubber flooring remains unaffected by moisture. This makes it easy to clean and maintain, as spills and splashes can be wiped away with ease.
Comfort and Cushioning: Rubber flooring offers a comfortable and cushioned surface to stand on, making it ideal for bathrooms where you may spend a lot of time getting ready in front of the mirror or showering. The soft, resilient texture of rubber flooring provides shock absorption and support underfoot, reducing fatigue and strain on your legs and feet.
Non-Slip Surface: Safety is a top priority in the bathroom, where wet and slippery surfaces can pose a risk of slips and falls. Rubber flooring typically features a textured surface that provides excellent traction, even when wet. This helps prevent accidents and injuries, making rubber flooring an ideal choice for homes with children, elderly individuals, or individuals with mobility issues.
Easy Maintenance: Rubber flooring is incredibly easy to clean and maintain, requiring minimal effort to keep it looking like new. Simply sweep or vacuum regularly to remove dirt and debris, and mop with a mild soap solution or rubber floor cleaner as needed. Unlike other flooring materials that require special cleaners or treatments, rubber flooring is durable and stain-resistant, making it a low-maintenance option for busy households.
Noise Reduction: Rubber flooring has excellent sound-absorbing properties, making it an ideal choice for bathrooms located on upper floors or in multi-story homes. The soft, resilient texture of rubber flooring helps absorb impact and reduce noise transmission, creating a quieter and more peaceful environment for you and your family to enjoy.
Design Inspiration for Rubber Flooring in Your Bathroom
Rubber flooring may not be the most traditional choice for bathroom flooring, but it offers endless design possibilities for creating stylish and functional spaces. With its durability, water resistance, and versatility, rubber flooring can be used to achieve a wide range of design aesthetics, from sleek and modern to rustic and industrial. Here are some design inspiration ideas for using rubber flooring in your bathroom:
Modern Minimalism: Embrace the clean lines and minimalist aesthetic of modern design with sleek and simple rubber flooring in neutral tones like black, gray, or white. Pair solid-colored rubber flooring with minimalist fixtures and accessories for a cohesive and contemporary look that’s both stylish and functional. Add visual interest with geometric patterns or textured finishes for a modern twist on traditional rubber flooring.
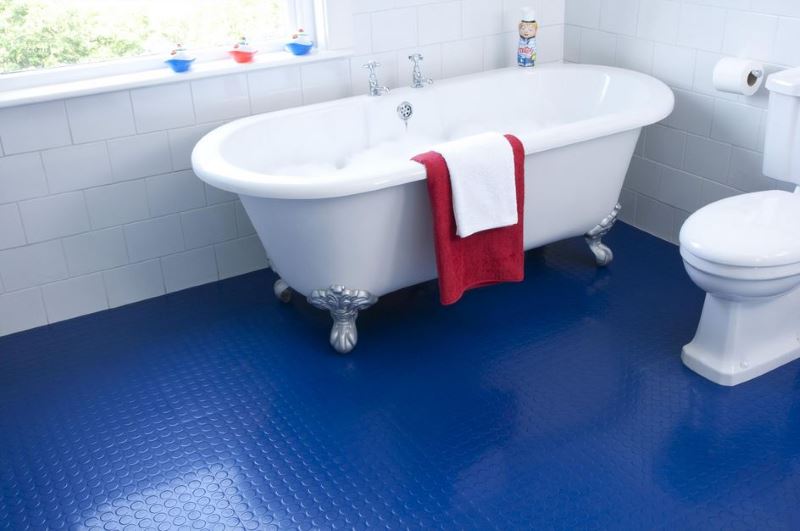
Industrial Chic: Channel the urban appeal of industrial design with rubber flooring in bold colors like charcoal gray, slate blue, or deep burgundy. Opt for textured rubber flooring with a matte or brushed finish to mimic the look of concrete or metal for an industrial-chic vibe. Pair industrial-inspired rubber flooring with exposed pipes, metal accents, and vintage fixtures for a raw and edgy aesthetic that’s sure to make a statement.
Rustic Charm: Create a cozy and inviting atmosphere in your bathroom with rubber flooring in warm, earthy tones like terracotta, sandstone, or caramel. Choose rubber flooring with a wood-look finish for a rustic-chic look that complements natural materials like stone, wood, and wicker. Add soft textiles, botanical prints, and vintage accents for a touch of rustic charm that feels warm and welcoming.
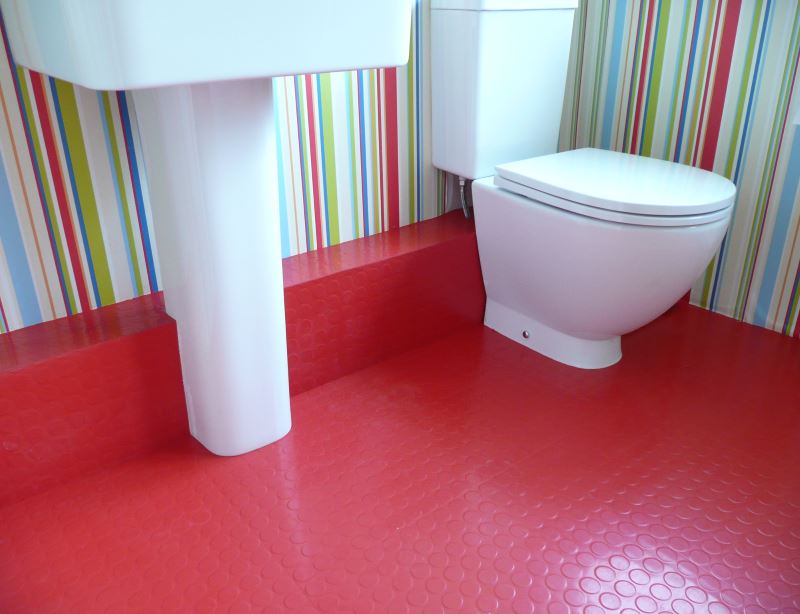
Playful Patterns: Add personality and whimsy to your bathroom with patterned rubber flooring in bold colors and fun designs. Experiment with playful patterns like stripes, chevrons, or polka dots to create a vibrant and dynamic space that reflects your personality and style. Mix and match contrasting colors and patterns for a custom look that’s as unique as you are.
Elegant Elegance: Elevate your bathroom with rubber flooring in sophisticated shades like navy blue, emerald green, or rich plum. Choose rubber flooring with a glossy or metallic finish for a touch of glamour and elegance that’s perfect for upscale bathrooms. Pair elegant rubber flooring with luxe materials like marble, brass, and crystal for a timeless and luxurious aesthetic that exudes sophistication and style.

Installation Tips and Considerations for Rubber Flooring in the Bathroom
Installing rubber flooring in the bathroom is a relatively straightforward process, but it requires careful planning and attention to detail to ensure a successful and long-lasting result. From preparing the subfloor to cutting and fitting the rubber tiles or rolls, here are some installation tips and considerations to keep in mind:
Prepare the Subfloor: Before installing rubber flooring in the bathroom, it’s essential to prepare the subfloor properly. Ensure that the subfloor is clean, dry, and level, with no bumps, dips, or imperfections that could affect the installation. Use a self-leveling compound to fill in low spots and sand down high spots for a smooth and even surface.
Acclimate the Rubber Flooring: Allow the rubber flooring to acclimate to the room’s temperature and humidity for at least 48 hours before installation. This helps prevent the expansion and contraction of the rubber tiles or rolls after installation, ensuring a stable and secure fit.
Choose the Right Adhesive: Select a high-quality adhesive that is specifically formulated for use with rubber flooring. Avoid using general-purpose adhesives or solvent-based products, as these may not bond well with rubber and can cause issues with adhesion and durability. Follow the manufacturer’s instructions for mixing and applying the adhesive, and allow it to dry completely before installing the rubber flooring.
Cut and Fit the Rubber Flooring: Measure the dimensions of the bathroom carefully and mark the layout of the rubber flooring tiles or rolls accordingly. Use a sharp utility knife or scissors to cut the rubber flooring to size, taking care to make precise cuts for a seamless and professional-looking finish. Dry-fit the rubber flooring before applying adhesive to ensure a proper fit and alignment.
Install the Rubber Flooring: Begin installation by applying adhesive to the subfloor according to the manufacturer’s instructions. Work in small sections, starting from one corner of the room and working your way outwards. Press the rubber flooring tiles or rolls firmly into place, using a roller or heavy object to ensure good contact with the adhesive. Use spacers to maintain consistent spacing between the tiles or rolls, and wipe away any excess adhesive with a damp cloth.
Seal the Seams (Optional): Depending on the type of rubber flooring you choose, you may need to seal the seams to prevent water infiltration and enhance the durability of the flooring. Use a seam sealer or adhesive recommended by the manufacturer to seal the seams between tiles or rolls, and allow it to dry completely before using the bathroom.
Allow for Expansion Joints: Leave a small expansion gap around the perimeter of the room to allow for natural expansion and contraction of the rubber flooring. Use spacers or shims to maintain the gap, and fill it with a flexible caulk or sealant to prevent water intrusion and protect the edges of the flooring.
Finish the Edges: Once the rubber flooring is installed, finish the edges with baseboards or transition strips to create a clean and polished look. Use a miter saw or coping saw to cut the baseboards to size, and secure them in place with nails or adhesive. Caulk any gaps between the baseboards and the walls to create a seamless finish.
Maintenance and Care Tips
Rubber flooring is known for its durability and low maintenance, making it an excellent choice for bathrooms where cleanliness and hygiene are top priorities. With its water resistance, slip resistance, and easy-to-clean surface, rubber flooring is a practical and functional option for busy households. Here are some maintenance and care tips to help you keep your rubber bathroom flooring in top condition:
Regular Cleaning: To keep your rubber bathroom flooring looking its best, sweep or vacuum regularly to remove dirt, dust, and debris that can accumulate over time. Use a soft-bristled broom or a vacuum cleaner with a hardwood floor attachment to prevent scratches and abrasions. For deeper cleaning, mop the floor with a mild soap solution or rubber floor cleaner, and rinse with clean water to remove any residue.
Spot Cleaning: For spills and stains, clean up immediately to prevent them from penetrating the rubber and causing damage. Blot the spill with a clean, damp cloth to absorb as much liquid as possible, then gently scrub the area with a mild soap solution or rubber floor cleaner. Rinse the area thoroughly with clean water and dry it with a soft, clean cloth to prevent water spots and streaks.
Avoid Harsh Chemicals: When cleaning rubber flooring, avoid using harsh chemical cleaners or abrasive scrubbers that can damage the surface. Stick to mild, pH-neutral cleaners specifically formulated for use on rubber flooring, and dilute them with water according to the manufacturer’s instructions. Test the cleaner in an inconspicuous area before applying it to the entire floor to ensure compatibility and prevent damage.
Prevent Scratches and Scuffs: Rubber flooring is highly resistant to scratches and scuffs, but it’s still essential to take precautions to prevent damage. Place felt pads or furniture coasters under heavy furniture legs to distribute weight evenly and avoid indentations. Use rugs or mats in high-traffic areas and entryways to protect against dirt and debris that can scratch the surface.
Maintain Slip Resistance: Rubber flooring typically features a textured surface that provides excellent traction, even when wet. To maintain slip resistance and prevent accidents, clean the floor regularly to remove dirt and grime that can reduce traction. Use a non-slip rug or mat in front of the bathtub or shower to provide additional traction and absorb excess water.
Inspect and Repair Damage: Periodically inspect your rubber bathroom flooring for any signs of damage or wear, such as scratches, cuts, or tears. Repair any damage promptly to prevent it from spreading and causing further issues. Use a rubber patch kit or adhesive recommended by the manufacturer to repair small tears or punctures, and replace damaged tiles or rolls as needed.
Prevent Mold and Mildew: Rubber flooring is naturally resistant to mold and mildew, but it’s still essential to prevent moisture buildup and promote airflow in the bathroom. Use a dehumidifier or exhaust fan to reduce humidity levels and prevent condensation on the surface of the flooring. Wipe up spills and splashes immediately to prevent water from seeping into the seams and causing mold growth.
Protect Against Sun Damage: Direct sunlight can cause rubber flooring to fade and deteriorate over time, so it’s essential to protect it from prolonged exposure to UV rays. Install blinds or curtains on windows to block out direct sunlight during the day, or use UV-resistant window film to reduce UV exposure and protect your rubber flooring from sun damage.

Bathroom Flooring Luxury Vinyl Bathroom Flooring LVT

Grey Rubber Floor Design Hemingway Design for Harvey

Mink

Bathroom flooring ideas – Flooring ideas for bathrooms

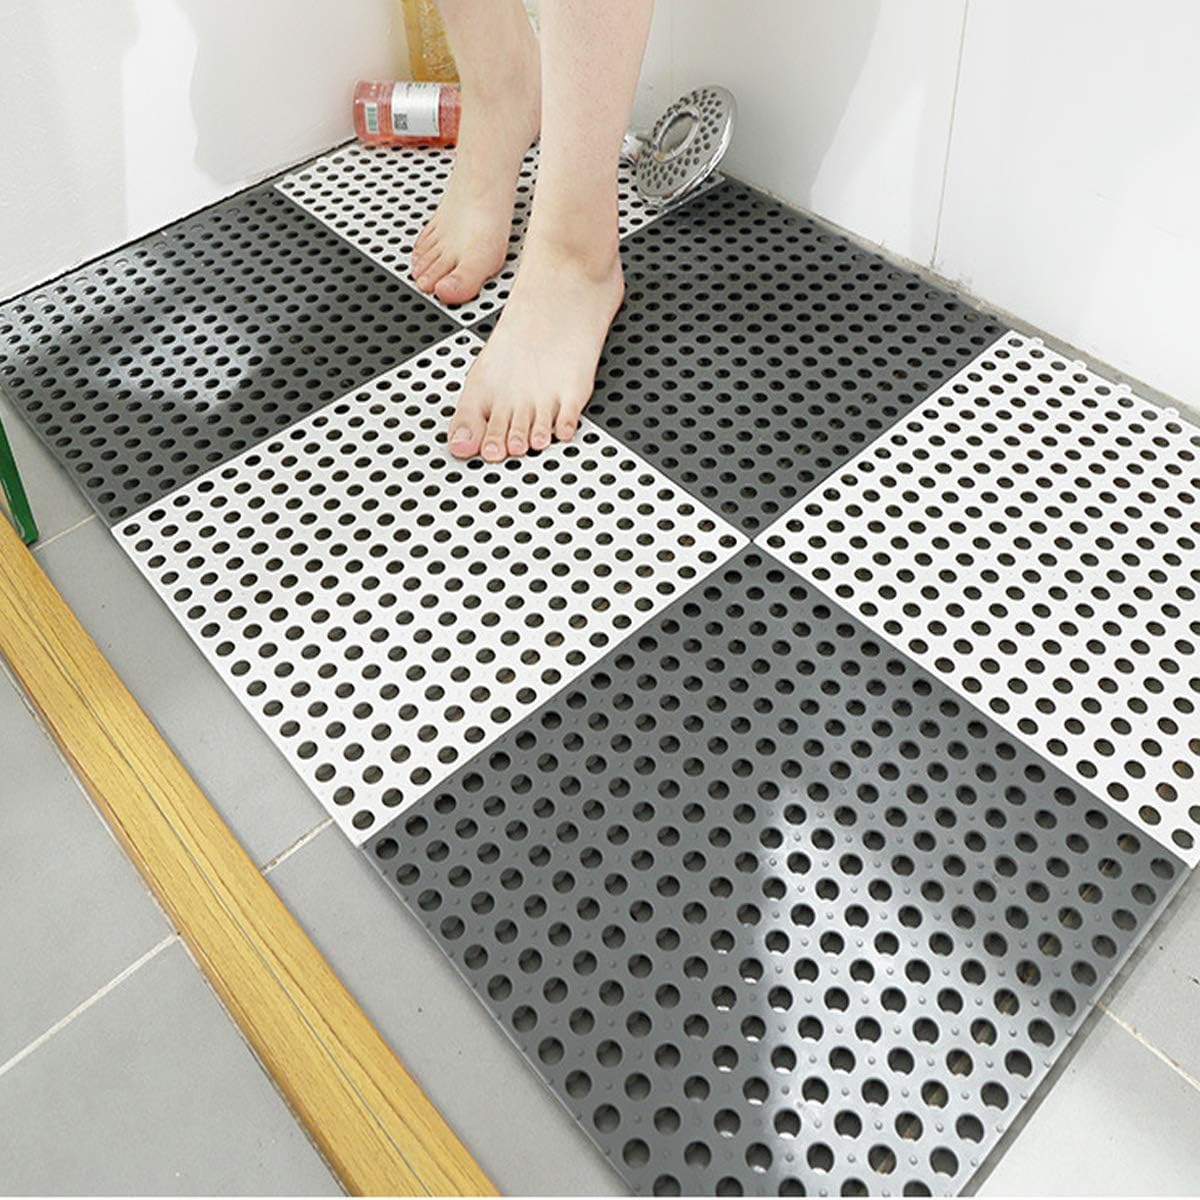
Interlocking Rubber Floor Tiles with Drain Holes DIY Size 11.8Inx 11.8In Bathroom Shower Toilet Floor Tiles Mat Interlocking Massage Soft
Rooms With Rubber Flooring
Bathroom flooring ideas u2013 Flooring ideas for bathrooms

Five Reasons Why Rubber Flooring for Bathrooms Is the Best Option

Rubber flooring ideas rubber flooring, flooring, kitchen flooring

Related Posts: