Standing on my cracked, weathered concrete patio three summers ago, I felt frustrated with the eyesore that dominated my backyard. The gray, utilitarian surface looked more like an unfinished construction project than an inviting outdoor living space.
After watching countless home improvement shows and scrolling through Pinterest boards filled with gorgeous outdoor spaces, I discovered that stained concrete could transform my boring slab into something remarkable. What started as a weekend project became a complete education in outdoor concrete finishing that changed how I view my entire property.
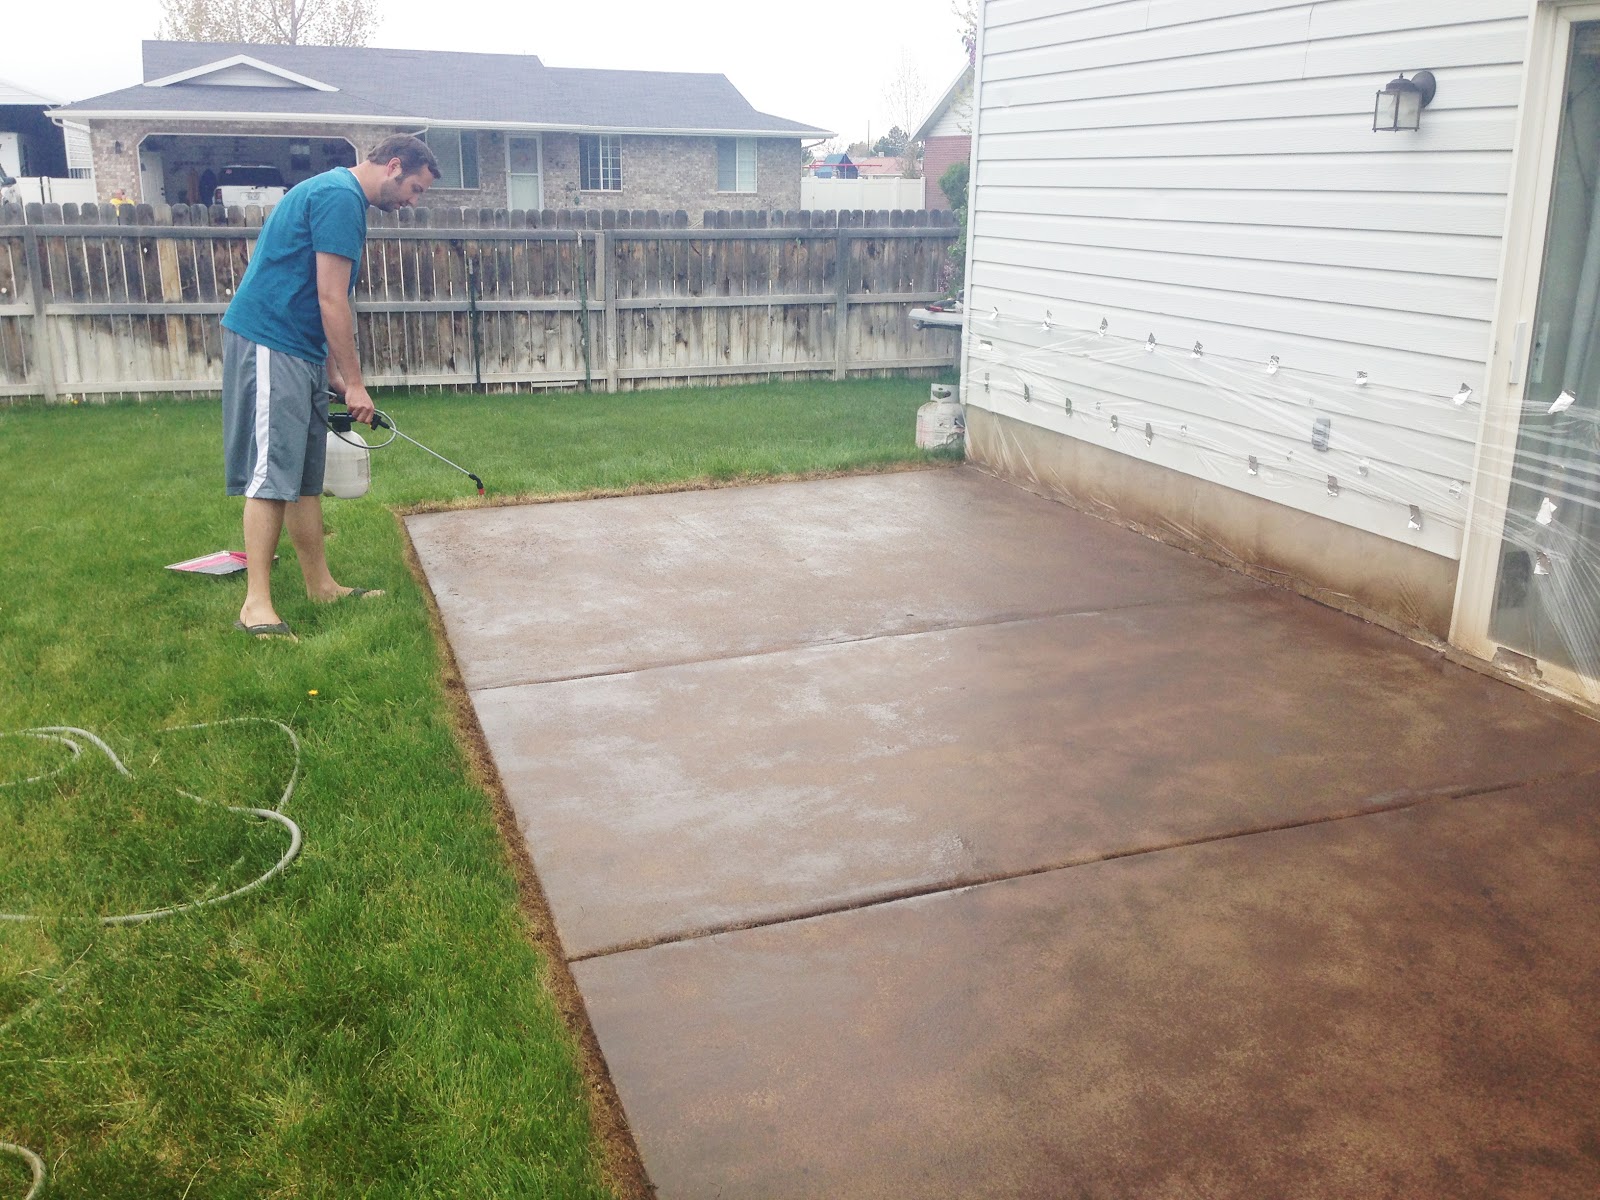
The Moment I Discovered This Game-Changing Solution
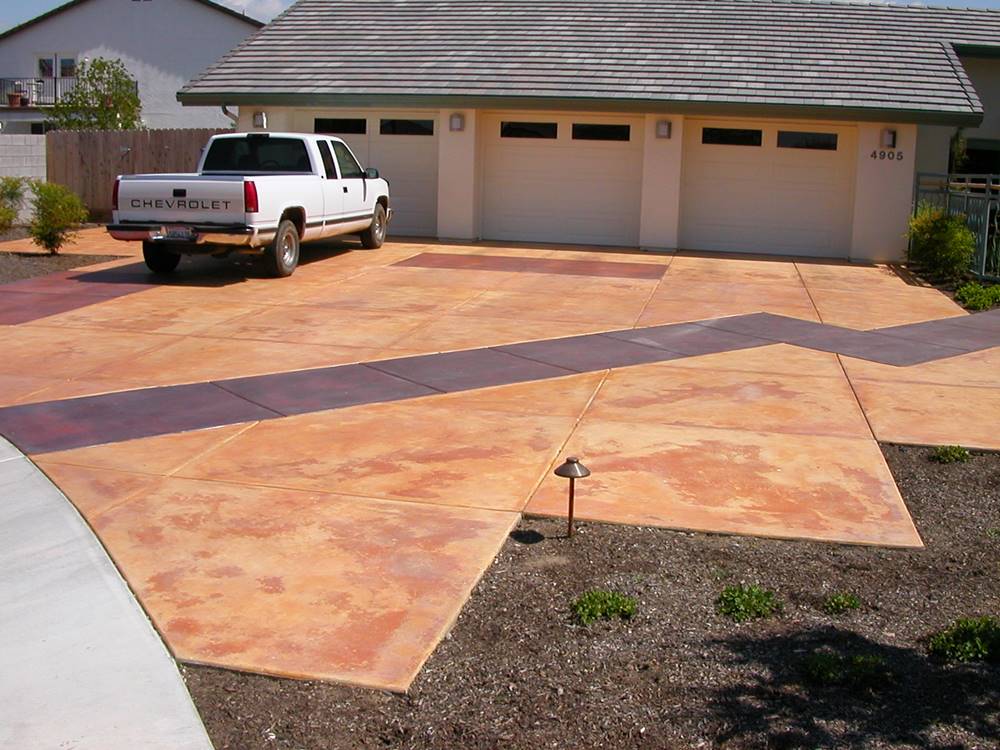
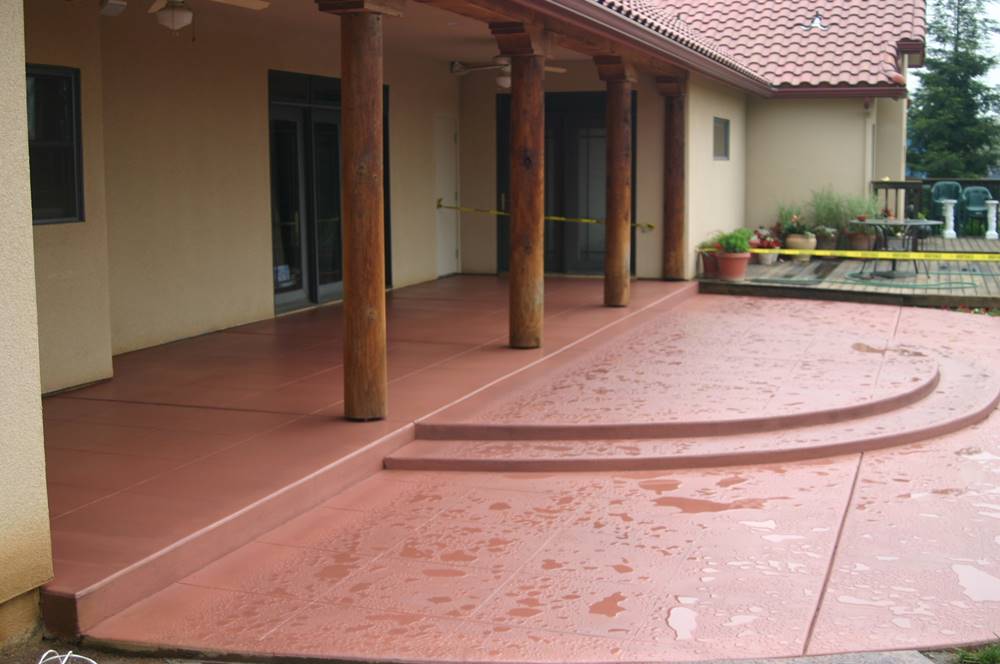
I was hosting a barbecue when my neighbor casually mentioned her recent patio transformation using acid stains. Walking over to see her work, I couldn’t believe the rich, variegated colors that seemed to flow naturally across what I knew had been plain concrete just months before. The earthy browns and warm terra cotta tones created depth and character that rivaled expensive natural stone installations I’d admired in magazines.
Her explanation of the chemical process fascinated me completely. Unlike paint that sits on top, acid stains react with minerals in the concrete, creating permanent color that penetrates deep into the surface.
She showed me how the random patterns formed naturally, explaining that no two sections looked exactly alike because of variations in the concrete’s composition and porosity throughout the slab.
That evening, I spent hours researching different stain colors and techniques online. I learned about water-based stains versus acid stains, discovered the importance of proper surface preparation, and began understanding why this method produced such authentic-looking results.
My excitement grew as I realized I could achieve a high-end appearance without the expense of replacing my existing concrete foundation.

Surface Preparation That Nearly Broke My Spirit
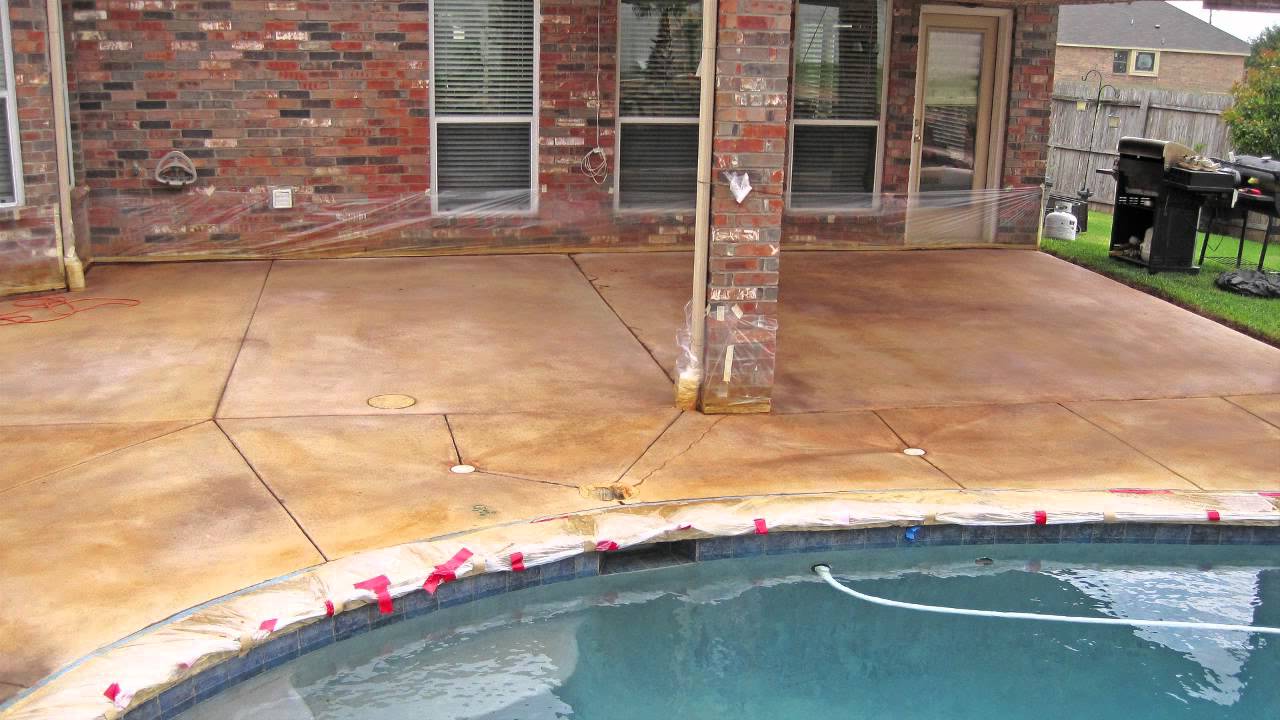
The grinding and cleaning phase proved far more intensive than I’d anticipated. My concrete had years of oil stains, paint splatters, and embedded dirt that required aggressive treatment before any staining could begin. I rented a concrete grinder and spent two full days removing the top layer, creating clouds of dust that covered everything within a fifty-foot radius of my work area.
Acid washing came next, using muriatic acid diluted according to the manufacturer’s specifications. Working in small sections while wearing full protective equipment, I applied the solution, scrubbed vigorously, then neutralized and rinsed thoroughly. The process revealed how uneven my concrete’s porosity was, with some areas absorbing the cleaning solution quickly while others remained resistant to penetration.
Temperature and humidity became critical factors I hadn’t considered initially. Working during a particularly humid week caused extended drying times and uneven stain absorption. I learned to check weather forecasts carefully, planning work sessions during optimal conditions. This preparation phase took three weeks instead of my planned weekend, but established the foundation necessary for professional-quality results.
Color Selection and Application Techniques I Mastered
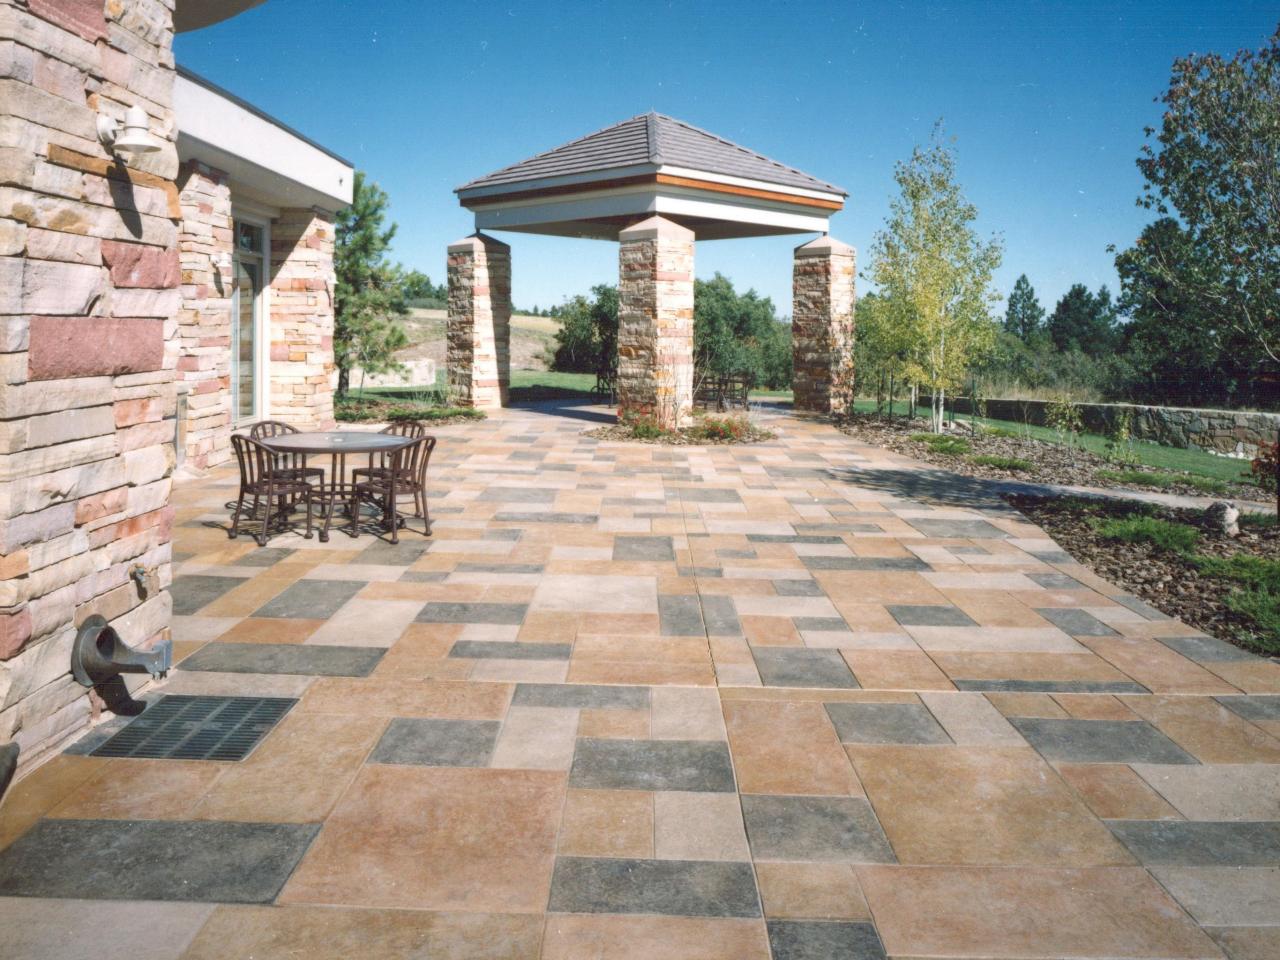
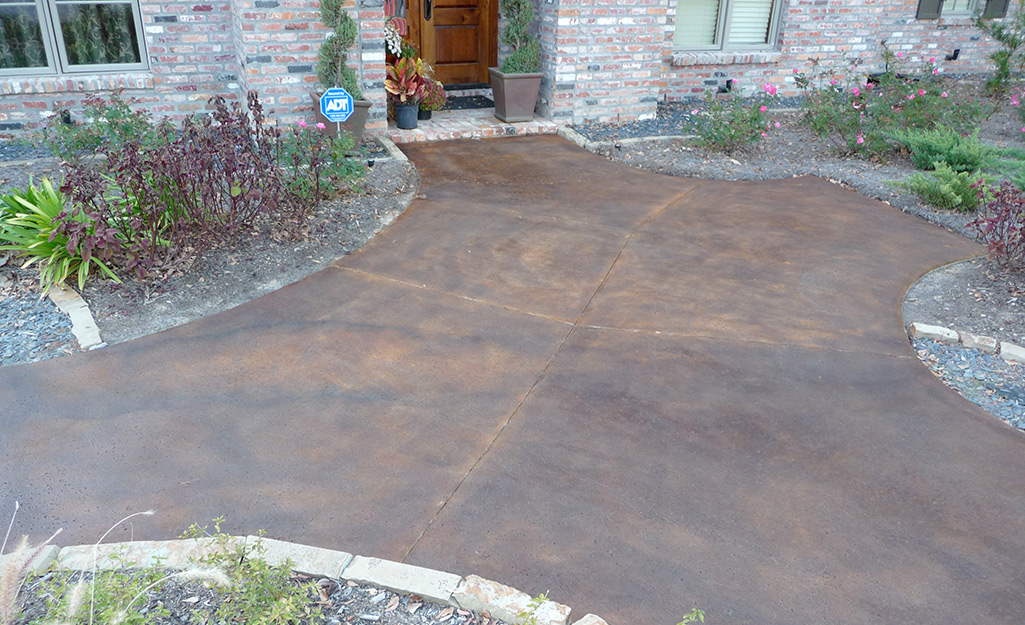
Choosing colors required more strategy than I’d expected. I tested multiple combinations on hidden sections, discovering that layering different stains created the most interesting effects. My final choice combined a warm brown base coat with selective applications of terra cotta and charcoal accents that mimicked natural stone variations I’d seen in expensive installations.
The actual staining process demanded patience and artistic vision. Working in manageable sections, I applied the first color using a pump sprayer, then used natural sponges and rags to create texture and blend harsh lines. Each area required immediate attention before the stain dried, making this a race against time that kept me completely focused for hours at a stretch.
Multiple thin coats produced better results than single heavy applications. I allowed each layer to fully cure before adding subsequent colors, building depth gradually over several days. The transformation was remarkable, with each new coat adding richness and complexity that made my concrete look like it had been professionally installed by master craftsmen using premium materials.
Weather Challenges and Seasonal Considerations
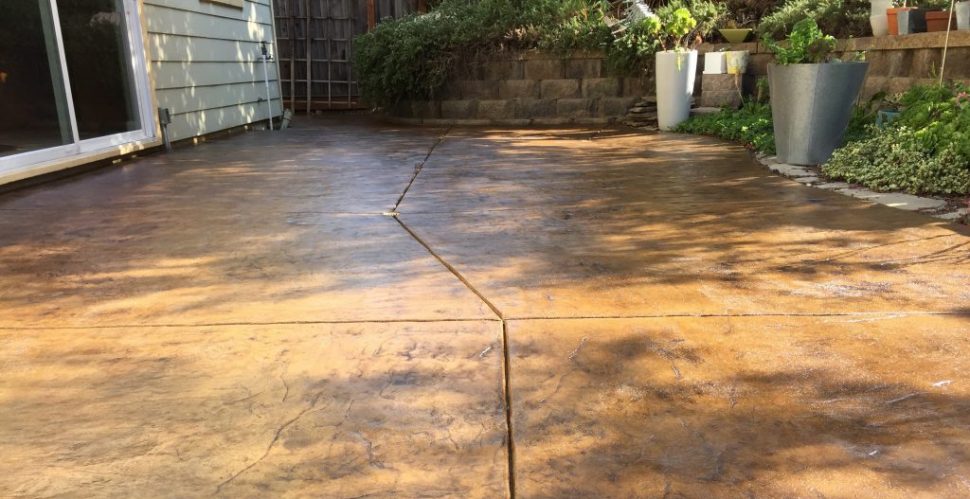
My first winter taught me about thermal expansion and contraction effects I hadn’t anticipated. The stained surface developed small hairline cracks that initially panicked me, but research revealed this was normal concrete behavior. I learned to embrace these natural aging characteristics as part of the authentic appearance that made stained concrete so appealing compared to synthetic alternatives.
Rain protection became a constant concern during the curing process. I invested in heavy-duty tarps and developed quick deployment strategies for unexpected weather changes. One surprise thunderstorm nearly ruined a section I’d stained that morning, teaching me to monitor forecasts obsessively and have backup plans ready for any situation that might threaten my work progress.
Extreme temperature swings affected both application and curing processes significantly. Summer heat caused rapid drying that sometimes prevented proper penetration, while cool spring weather extended curing times beyond manufacturer recommendations. I adapted by working during optimal temperature windows and adjusting my timeline expectations based on seasonal conditions rather than rigid schedules.
Sealing and Protection Methods That Work
Selecting the right sealer proved crucial for long-term durability and appearance retention. After extensive research and testing, I chose a penetrating silane sealer that protected without creating a glossy film that could peel or yellow over time. The invisible protection allowed the stained concrete’s natural appearance to shine through while repelling water and preventing stain penetration.
The application technique for sealing required the same attention to detail as the staining process itself. I used a low-pressure sprayer to apply thin, even coats, working systematically across the entire surface. Overlapping spray patterns ensured complete coverage while avoiding heavy buildup areas that could create uneven protection or visible application marks on the finished surface.
Maintenance sealing became an annual ritual that protected my investment and maintained the stunning appearance I’d worked so hard to achieve. I established a schedule based on traffic patterns and weather exposure, with high-use areas receiving extra attention. This proactive approach prevented moisture infiltration and staining that could compromise the beautiful finish I’d created.

Long-Term Results and Unexpected Benefits
Five years later, my stained concrete patio continues drawing compliments from visitors who assume I installed expensive natural stone. The colors have mellowed beautifully, developing a patina that looks increasingly authentic with age. Weather exposure has enhanced rather than diminished the appearance, creating subtle variations that add character and depth to the overall design aesthetic.
The property value impact exceeded my expectations significantly. Recent appraisals credited the outdoor living space improvements with adding substantial value to my home’s overall worth. Real estate professionals consistently praise the professional appearance and low-maintenance characteristics that appeal to potential buyers seeking attractive outdoor entertainment areas without ongoing upkeep headaches.
The durability has been remarkable, showing minimal wear despite heavy use during countless gatherings and daily family activities. Small maintenance tasks like annual sealing and occasional pressure washing keep the surface looking fresh and vibrant. My initial investment of time and materials continues paying dividends through reduced maintenance costs and enhanced outdoor living enjoyment.
How long does stained concrete last in outdoor weather conditions?
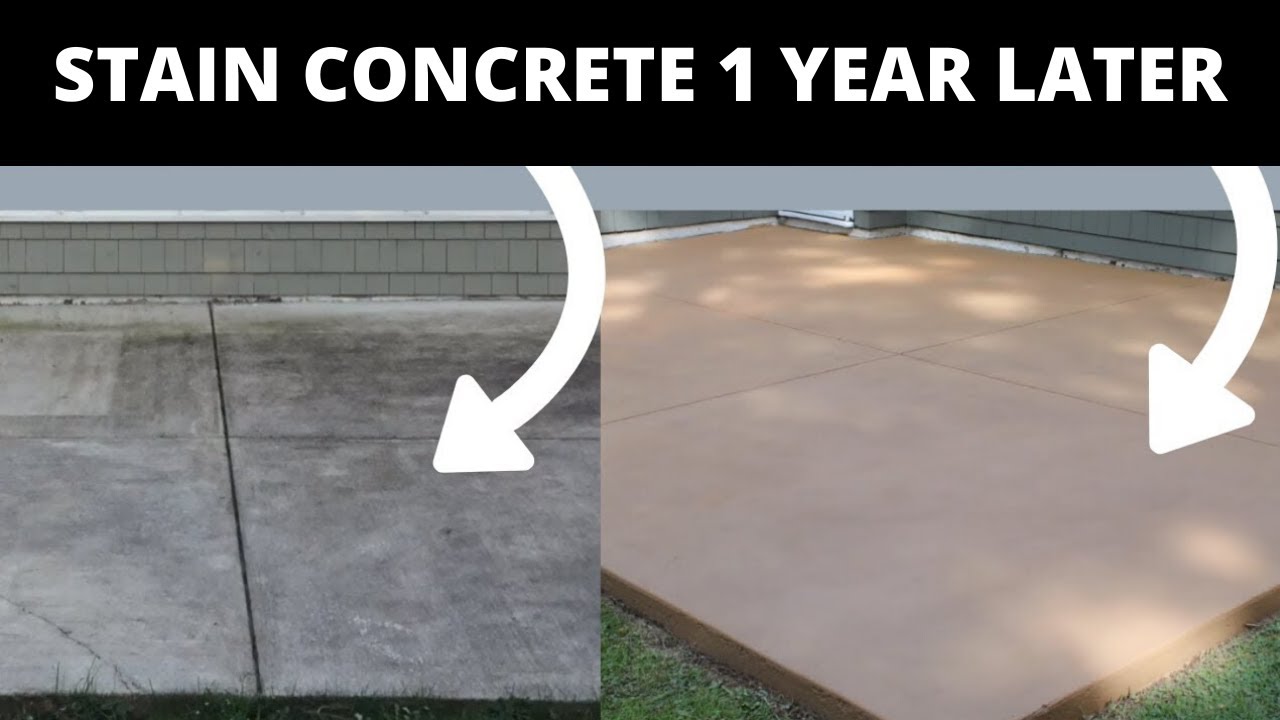
Properly applied stained concrete can last decades when maintained correctly, even under harsh outdoor conditions. My patio has shown minimal fading after five years of exposure to intense summer sun, freezing winters, and heavy rainfall. The key is using quality acid-based stains that chemically bond with the concrete rather than sitting on top like paint. Regular sealing every 1-2 years protects against moisture infiltration and UV damage. Weather-related wear appears as natural patina that enhances the authentic stone-like appearance over time.
Can I apply stained concrete over existing outdoor surfaces with cracks?
Small hairline cracks can enhance the natural stone appearance of stained concrete, but larger structural cracks need repair before staining. I filled significant cracks with concrete crack filler, allowed complete curing, then ground smooth before beginning the staining process. The repairs became virtually invisible after staining, blending seamlessly with the surrounding areas. However, if your concrete has major structural issues or settlement problems, address those first. Staining won’t fix underlying problems and may highlight them.

What’s the difference between acid stains and water-based concrete stains for outdoor use?
Acid stains create permanent chemical reactions with concrete minerals, producing variegated, natural-looking colors that won’t peel or fade like surface coatings. I chose acid stains because they penetrate deep and develop unique patterns based on the concrete’s composition. Water-based stains offer more color options and easier application, but don’t achieve the same depth and authenticity. For outdoor durability, acid stains perform better under weather exposure, though they require more careful handling during application due to their caustic nature and limited color palette.
How much does DIY stained concrete cost compared to professional installation?
My DIY project cost approximately $3 per square foot, including stains, sealers, and equipment rental, while professional quotes ranged from $8-15 per square foot for similar results. The 400 square foot patio cost me $1,200 in materials versus $3,200-6,000 for professional installation. However, the labor investment was substantial, requiring three weeks of weekend work. Factor in learning curve mistakes and potential do-overs when calculating true costs. Professional installation offers warranty protection and expertise that DIY lacks, making it worthwhile for larger projects or complex designs.
What preparation is required before staining existing outdoor concrete?
Surface preparation determines staining success more than any other factor. I started with thorough degreasing using TSP cleaner, followed by pressure washing to remove all dirt and debris. Grinding removed the top layer and opened concrete pores for better stain penetration. Acid etching came next, using muriatic acid solution to neutralize alkalinity and improve stain absorption. Finally, I tested porosity by sprinkling water drops to ensure even absorption across the entire surface. Skipping any preparation step compromises the final results significantly.
How do I maintain stained concrete floors in outdoor environments?
Regular maintenance keeps stained concrete looking professional for years. I sweep weekly to prevent abrasive debris buildup, then pressure wash monthly during heavy-use seasons. Annual resealing protects against moisture infiltration and staining from leaves, oil, or other contaminants. For spot cleaning, I use pH-neutral cleaners that won’t affect the stain or sealer. Avoid harsh chemicals or acidic cleaners that can damage the protective coating. Winter preparation includes removing snow promptly and avoiding de-icing salts that can cause surface damage over time.
Stained concrete patio
Outdoor Stained Concrete Floors

Concrete Stain and Sealer Patio Makeover Concrete Exchange

How to Stain Concrete
How To Stain A Concrete Patio
Related Posts: