Hardwood flooring on stairs can add a touch of elegance and continuity to your home’s design. It offers durability and timeless beauty that can significantly enhance the aesthetic appeal and value of your property. Let’s find out the benefits of using hardwood for stairs, the types of hardwood suitable for this purpose, the difference between solid and engineered hardwood, preparation, and installation methods, finishing techniques, safety considerations, and cost factors to help you make an informed decision.
Benefits of Hardwood Stairs
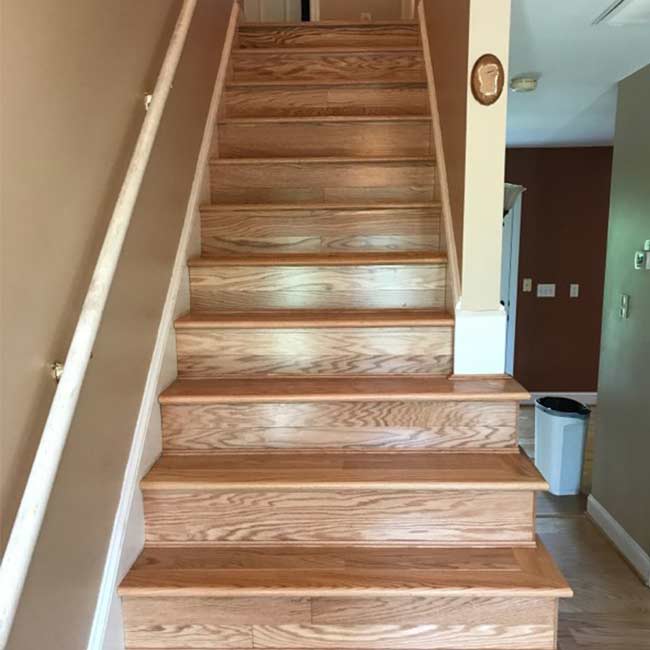
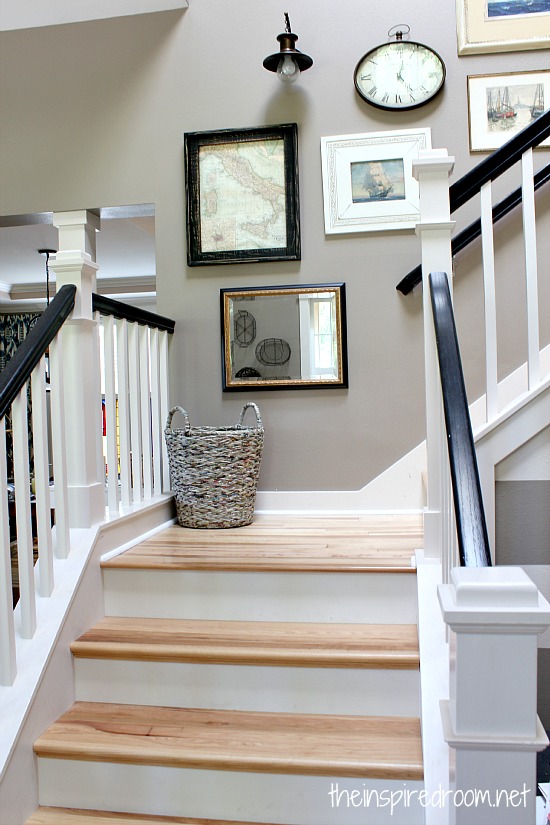
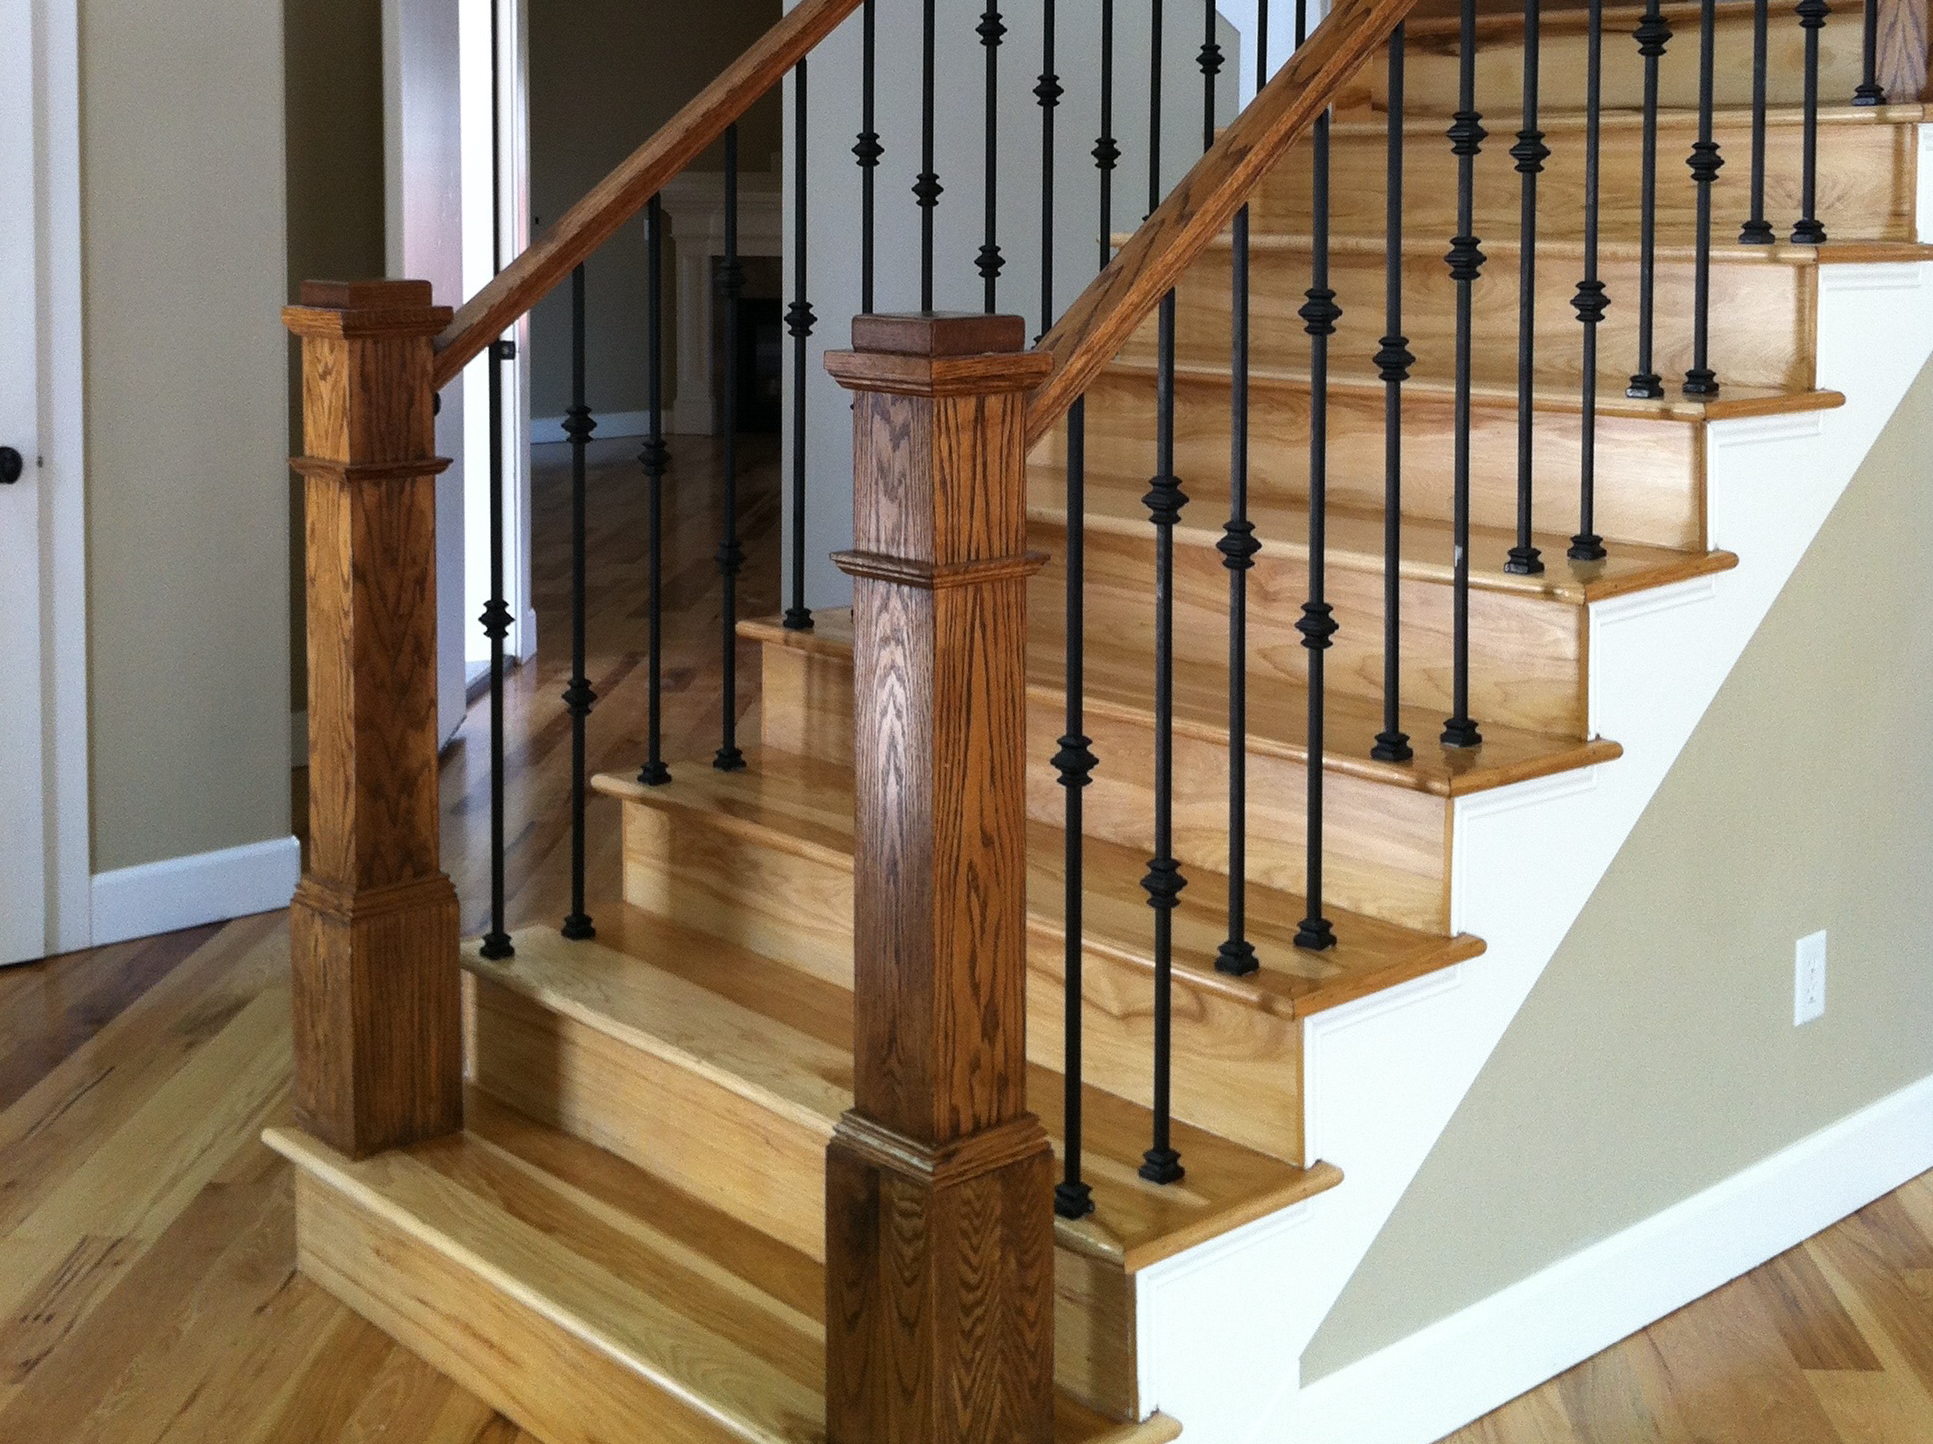
- Aesthetic Appeal: Hardwood stairs offer a classic and sophisticated look that complements various interior designs. The natural beauty and unique grain patterns of hardwood make each stair a focal point in your home, providing a warm and inviting atmosphere.
- Durability: Hardwood is known for its strength and longevity. Properly maintained hardwood stairs can last for decades, withstanding the daily wear and tear of foot traffic. This makes hardwood a cost-effective investment in the long run.
- Ease of Maintenance: Hardwood stairs are relatively easy to clean and maintain. Regular sweeping and occasional mopping are usually sufficient to keep them looking pristine. Unlike carpeted stairs, hardwood does not trap dust and allergens, contributing to a healthier indoor environment.
- Versatility: Hardwood stairs are available in a variety of species, colors, and finishes, allowing homeowners to choose an option that best matches their style and the overall decor of their home. From rich, dark tones to light, airy hues, there is a hardwood option for every taste.
- Increased Property Value: Installing hardwood stairs can boost the value of your home. Potential buyers often perceive hardwood as a premium material, which can make your property more attractive in the real estate market. This can lead to a higher resale value and faster sales.
- Eco-Friendly Option: Many hardwood options are sourced from sustainable forests, making them an environmentally responsible choice. Additionally, hardwood can be refinished multiple times, reducing the need for replacement and minimizing waste.

Types of Hardwood Suitable for Stairs
Oak: Oak is a popular choice for stairs due to its durability and wide availability. It comes in two main varieties: red oak and white oak. Red oak has a warm, reddish tone and prominent grain patterns, while white oak is slightly harder and has a more subdued, grayish-brown color.
Maple: Maple is known for its smooth grain and light color, making it a great choice for modern and minimalist interiors. It is harder than oak and highly resistant to wear and tear, making it an excellent option for high-traffic areas like stairs.
Cherry: Cherry hardwood offers a rich, warm color that deepens with age. Its fine grain and smooth texture add a touch of elegance to any staircase. However, cherry is softer than oak and maple, so it may require more careful maintenance to prevent dents and scratches.
Walnut: Walnut is prized for its deep, chocolate-brown color and unique grain patterns. It is a softer hardwood compared to oak and maple, but its striking appearance makes it a popular choice for those looking to make a statement with their staircase.
Hickory: Hickory is one of the hardest domestic hardwoods available, making it extremely durable and resistant to wear. Its distinctive grain and color variation adds a rustic charm to any staircase, making it a great choice for country or farmhouse-style homes.
Mahogany: Mahogany is a premium hardwood known for its rich, reddish-brown color and excellent durability. It is highly resistant to moisture and pests, making it a long-lasting option for stairs. Its luxurious appearance makes it a favorite for upscale homes.

Solid vs. Engineered Hardwood for Stairways
Definition and Composition: Solid hardwood is made from a single piece of wood, while engineered hardwood consists of a top layer of real wood veneer adhered to multiple layers of plywood or high-density fiberboard (HDF). This construction gives engineered hardwood greater stability and resistance to moisture changes.
Durability: Both solid and engineered hardwood are durable, but solid hardwood can be sanded and refinished multiple times, extending its lifespan. Engineered hardwood can also be refinished, but the number of times depends on the thickness of the top veneer layer.
Installation Flexibility: Engineered hardwood is often easier to install on stairs, especially in basements or areas with fluctuating humidity levels, as it is less prone to warping and cupping. Solid hardwood, while traditional and robust, requires careful installation to accommodate wood expansion and contraction.
Cost Considerations: Solid hardwood generally costs more than engineered hardwood due to its composition and longevity. However, the initial higher investment in solid hardwood can be offset by its long-term durability and the ability to refinish it multiple times.
Aesthetic Options: Both solid and engineered hardwood offer a wide range of species, finishes, and colors. Engineered hardwood often comes pre-finished, which can save time during installation, while solid hardwood allows for more customization with on-site finishing.
Environmental Impact: Engineered hardwood can be more eco-friendly as it uses less wood in its core layers, reducing the demand for raw timber. Additionally, many engineered products are made using sustainable practices and materials, making them a responsible choice for environmentally conscious homeowners.

Preparation Steps for Installing Hardwood on Stairs
Assessing the Stairs: Before installation, inspect the stairs for any damage or structural issues. Ensure that each step is level and secure, as any imperfections can affect the final installation. Repair any loose or creaking steps to create a solid foundation for the hardwood.
Measuring and Planning: Accurate measurements are crucial for a successful installation. Measure the width, depth, and height of each stair, including the risers. Create a detailed plan, noting any irregularities or unique features, to ensure that you purchase the correct amount of hardwood and other materials.
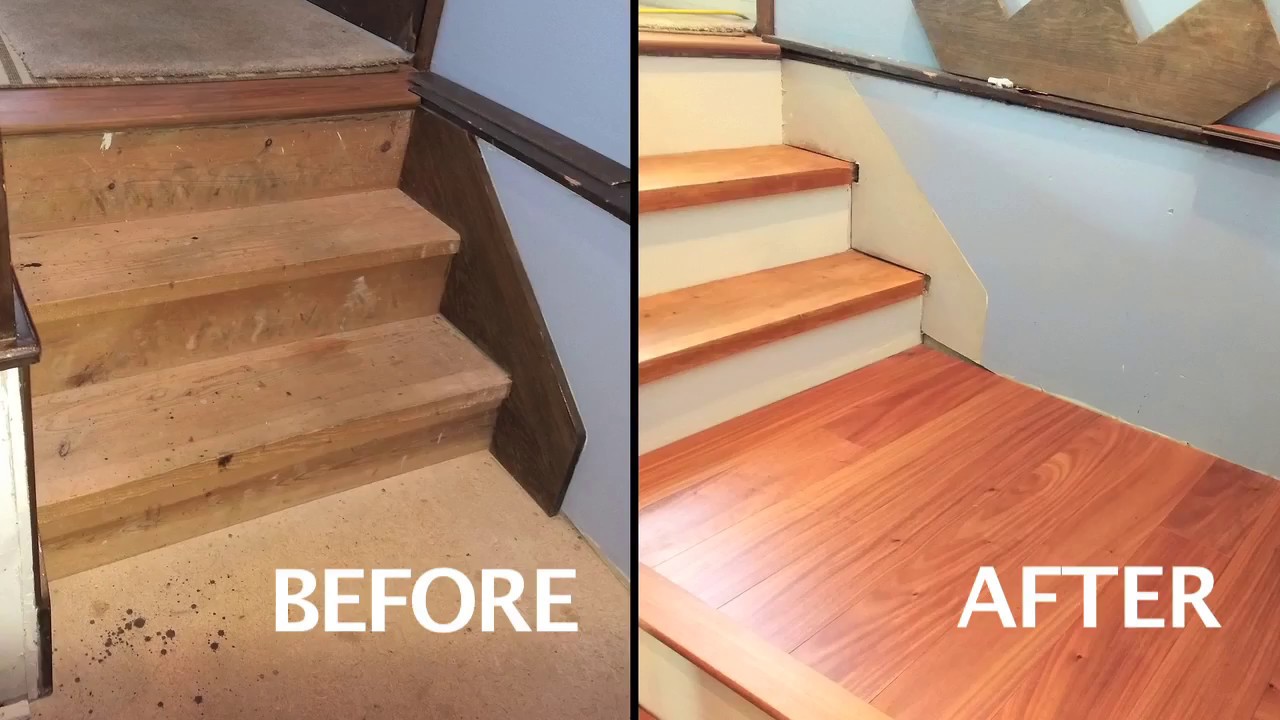
Removing Existing Flooring: If your stairs are currently carpeted or have another type of flooring, remove it carefully. Use a utility knife to cut through the carpet and pry bars to lift it away from the stairs. Remove any adhesive residue or staples to create a clean, smooth surface.
Preparing the Substrate: The substrate, or the surface on which the hardwood will be installed, must be clean, dry, and level. Sand down any high spots and fill in low areas with a suitable leveling compound. Ensure that the substrate is free of dust and debris before proceeding.
Acclimating the Hardwood: Hardwood needs to acclimate to the indoor environment to prevent expansion or contraction after installation. Place the hardwood planks in the room where they will be installed, and let them sit for at least 48 hours. This step is crucial to ensure a stable and lasting installation.
Gathering Tools and Materials: Gather all necessary tools and materials before beginning the installation. This typically includes a saw, measuring tape, adhesive, nails or staples, a hammer, a level, and safety equipment. Having everything ready will streamline the installation process and help you avoid delays.

Installation Methods and Techniques
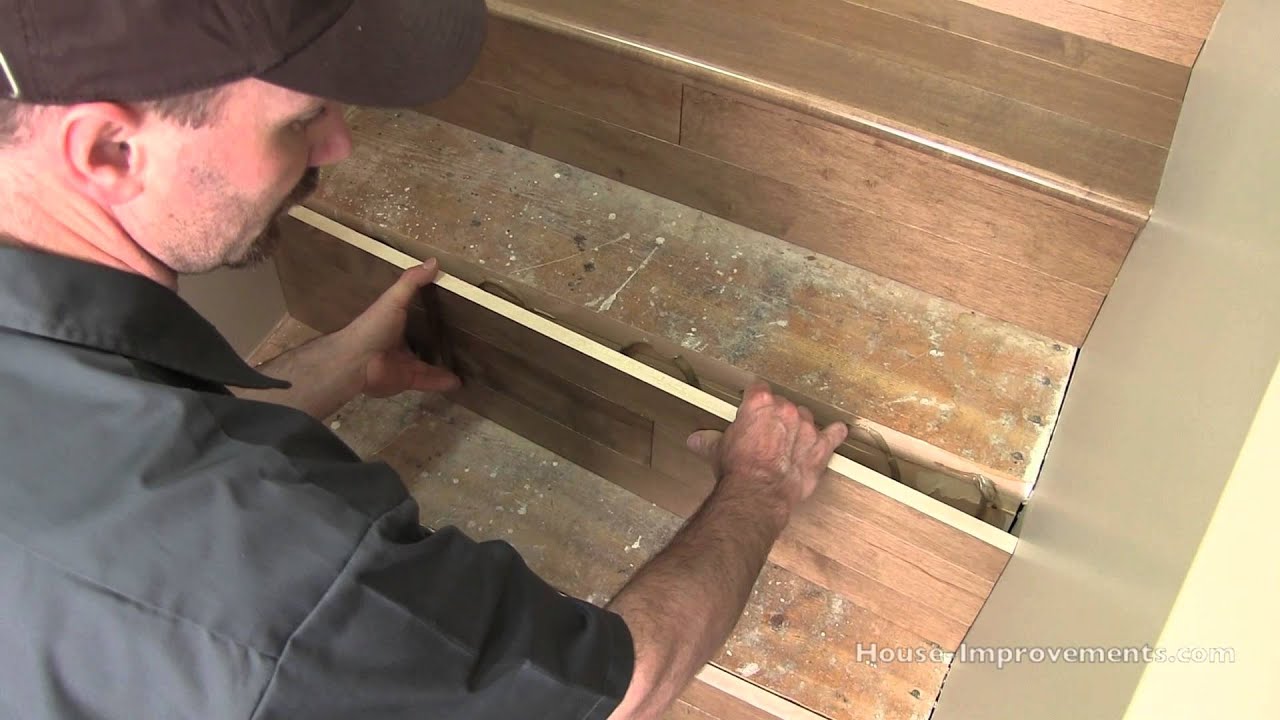
Dry Fitting the Hardwood: Before securing the hardwood, lay out the planks on the stairs to ensure a good fit. This process, known as dry fitting, allows you to make any necessary adjustments and cuts before permanent installation. Mark any areas that need trimming and ensure that the grain patterns align properly.
Cutting the Planks: Use a saw to cut the hardwood planks to fit each step and riser. Measure twice and cut once to avoid mistakes. Ensure that the cuts are clean and accurate to achieve a professional finish. Use a miter saw for angled cuts and a table saw for straight cuts.
Adhering the Hardwood: Apply a suitable adhesive to the back of each plank before placing it on the stair. Press the plank firmly into place, ensuring that it is level and aligned correctly. Some installers prefer to use nails or staples in addition to adhesive for added security.
Securing the Planks: If using nails or staples, place them at regular intervals along the edges of the plank to secure it to the substrate. Countersink the nails to ensure a smooth surface. Use a nail set to drive the nail heads below the surface of the wood, then fill the holes with wood filler.
Installing the Risers: Install the risers (the vertical parts of the stairs) after the treads (the horizontal parts) are in place. Measure and cut each riser to fit snugly between the treads. Secure them using adhesive and nails or staples, ensuring that they are flush with the edges of the treads.
Finishing Touches: Once all the planks are installed, check for any gaps or uneven areas. Fill any gaps with wood filler and sand down rough spots. Clean the stairs thoroughly to remove any dust or debris before applying the final finish.
Finishing and Staining Hardwood Stairs
Choosing the Finish: Select a finish that enhances the natural beauty of the hardwood while providing protection against wear and tear. Common options include polyurethane, oil-based finishes, and water-based finishes. Consider the level of gloss and the durability required for your specific needs.
Preparing the Surface: Before applying the finish, ensure that the stairs are clean and free of dust. Sand the surface lightly with fine-grit sandpaper to create a smooth base. Wipe down the stairs with a tack cloth to remove any sanding residue.
Applying Stain: If you choose to stain the hardwood, apply it evenly using a brush or cloth. Work in small sections to prevent the stain from drying before it is fully absorbed. Wipe off any excess stain with a clean cloth to achieve a uniform color. Allow the stain to dry completely before applying the finish.
Sealing the Stairs: Apply the chosen finish in thin, even coats. Follow the manufacturer’s instructions for drying times and the number of coats required. Use a high-quality brush or roller to achieve a smooth, professional finish. Allow each coat to dry fully before applying the next.
Buffing and Polishing: After the final coat of finish has dried, buff the surface lightly with a soft cloth or a buffing pad to achieve a smooth, polished look. This step enhances the appearance of the stairs and provides an additional layer of protection.
Maintenance Tips: To maintain the beauty and durability of your hardwood stairs, clean them regularly with a damp cloth or a hardwood floor cleaner. Avoid using harsh chemicals or abrasive tools that can damage the finish. Reapply the finish as needed to keep the stairs looking their best.

Safety Considerations for Hardwood Stairs
Non-Slip Treatments: Hardwood stairs can be slippery, especially when wet. Apply non-slip treatments such as anti-slip coatings, adhesive strips, or carpet runners to enhance safety. These treatments provide traction and reduce the risk of slips and falls.
Proper Lighting: Ensure that your stairs are well-lit to prevent accidents. Install adequate lighting at the top and bottom of the staircase, as well as along the stairway if possible. Consider using motion-sensor lights for added convenience and safety.
Handrails and Banisters: Install sturdy handrails and banisters to provide support while using the stairs. Ensure that they are securely fastened and at a comfortable height for all users. Regularly check the handrails for any signs of wear or looseness.
Regular Maintenance: Keep the stairs clean and free of obstacles to prevent tripping hazards. Regularly inspect the stairs for any signs of damage, such as loose planks or worn finishes, and address issues promptly to maintain a safe environment.
Child and Pet Safety: If you have young children or pets, consider additional safety measures such as baby gates at the top and bottom of the stairs. This helps prevent accidental falls and keeps everyone safe.
Emergency Preparedness: In case of an emergency, ensure that your staircase is clear and easily accessible. Practice emergency evacuation plans with your family and keep flashlights or emergency lighting available near the stairs.
Cost Factors and Budgeting
Material Costs: The cost of hardwood varies depending on the species, grade, and finish. Exotic hardwoods tend to be more expensive than domestic options. Additionally, solid hardwood generally costs more than engineered hardwood due to its composition and longevity.
Installation Costs: Professional installation can significantly impact the overall cost of your hardwood stairs. Factors such as the complexity of the staircase, the condition of the existing substrate, and the chosen installation method will affect labor costs. It is advisable to obtain multiple quotes from reputable contractors.
Preparation and Removal: Preparing the stairs and removing existing flooring can add to the cost. This includes repairing any structural issues, leveling the substrate, and disposing of old materials. These steps are essential for ensuring a successful and long-lasting installation.
Finishing Costs: The cost of finishing and staining the hardwood stairs should be factored into your budget. This includes the price of stains, finishes, brushes, and any additional labor required. Opting for high-quality finishes may have a higher upfront cost but can offer better durability and appearance.
Maintenance and Repairs: Budget for ongoing maintenance and potential repairs. Regular cleaning, refinishing, and addressing any damage promptly will help prolong the life of your hardwood stairs and maintain their appearance.
Contingency Fund: It is wise to set aside a contingency fund for unexpected expenses that may arise during the project. This can include additional materials, unforeseen repairs, or changes in design. Having a financial buffer ensures that you can handle any surprises without compromising the quality of the installation.

Engineered Wood Floor Install on Stair Platform
Hickory Hardwood Flooring and Staircase Makeover
Hardwood Floor Stairs Real Hardwood Floors
Related Posts: