The Common Issues with Wood Laminate Flooring
When I first installed wood laminate flooring in my home, I was drawn to its beautiful appearance and affordability compared to traditional hardwood. However, like any flooring material, it wasn’t long before I began to notice some common issues that arose with wood laminate. Understanding these problems early on has helped me maintain my floors better and address any concerns before they escalate.
- Scratches and Scuffs: One of the first issues I noticed with my wood laminate flooring was the inevitable scratches and scuffs. Despite the flooring’s durable surface, the constant movement of furniture, playful pets, and everyday foot traffic can lead to small imperfections. These minor damages might not be noticeable at first, but they can accumulate over time, creating a worn and tired appearance on the flooring.
- Gaps Between Laminate Planks: Gaps between laminate planks are another common issue that caught me off guard. These gaps can appear due to fluctuations in humidity and temperature, causing the planks to expand and contract. The gaps can be unsightly and may even lead to further damage if not addressed promptly. I’ve found that this problem tends to worsen in areas with significant climate changes.
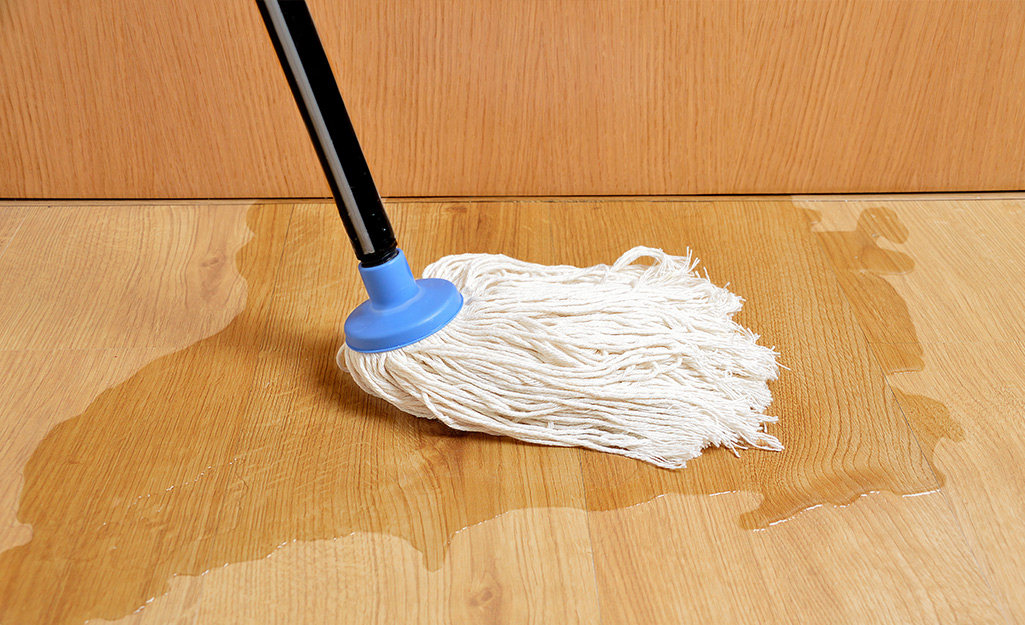
- Water Damage: Although laminate flooring is designed to be water-resistant, it’s not entirely waterproof. I learned this the hard way when a small leak in my kitchen went unnoticed for a while. The result was water seeping into the edges of the laminate planks, causing them to swell and warp. This is a common issue, particularly in areas like kitchens and bathrooms where moisture is prevalent.
- Fading and Discoloration: Over time, I noticed that certain areas of my laminate flooring began to fade, especially in spots exposed to direct sunlight. While this isn’t an immediate concern, it can gradually alter the appearance of the flooring. The rich color that once made my floor stand out began to dull, and in some cases, even discolor.
- Peaking and Buckling: Peaking and buckling occur when the laminate planks are pushed together too tightly, causing them to rise at the seams. I experienced this issue in my hallway, where heavy furniture placed too close to the wall created extra pressure on the planks. The result was an uneven floor that not only looked bad but also became a tripping hazard.
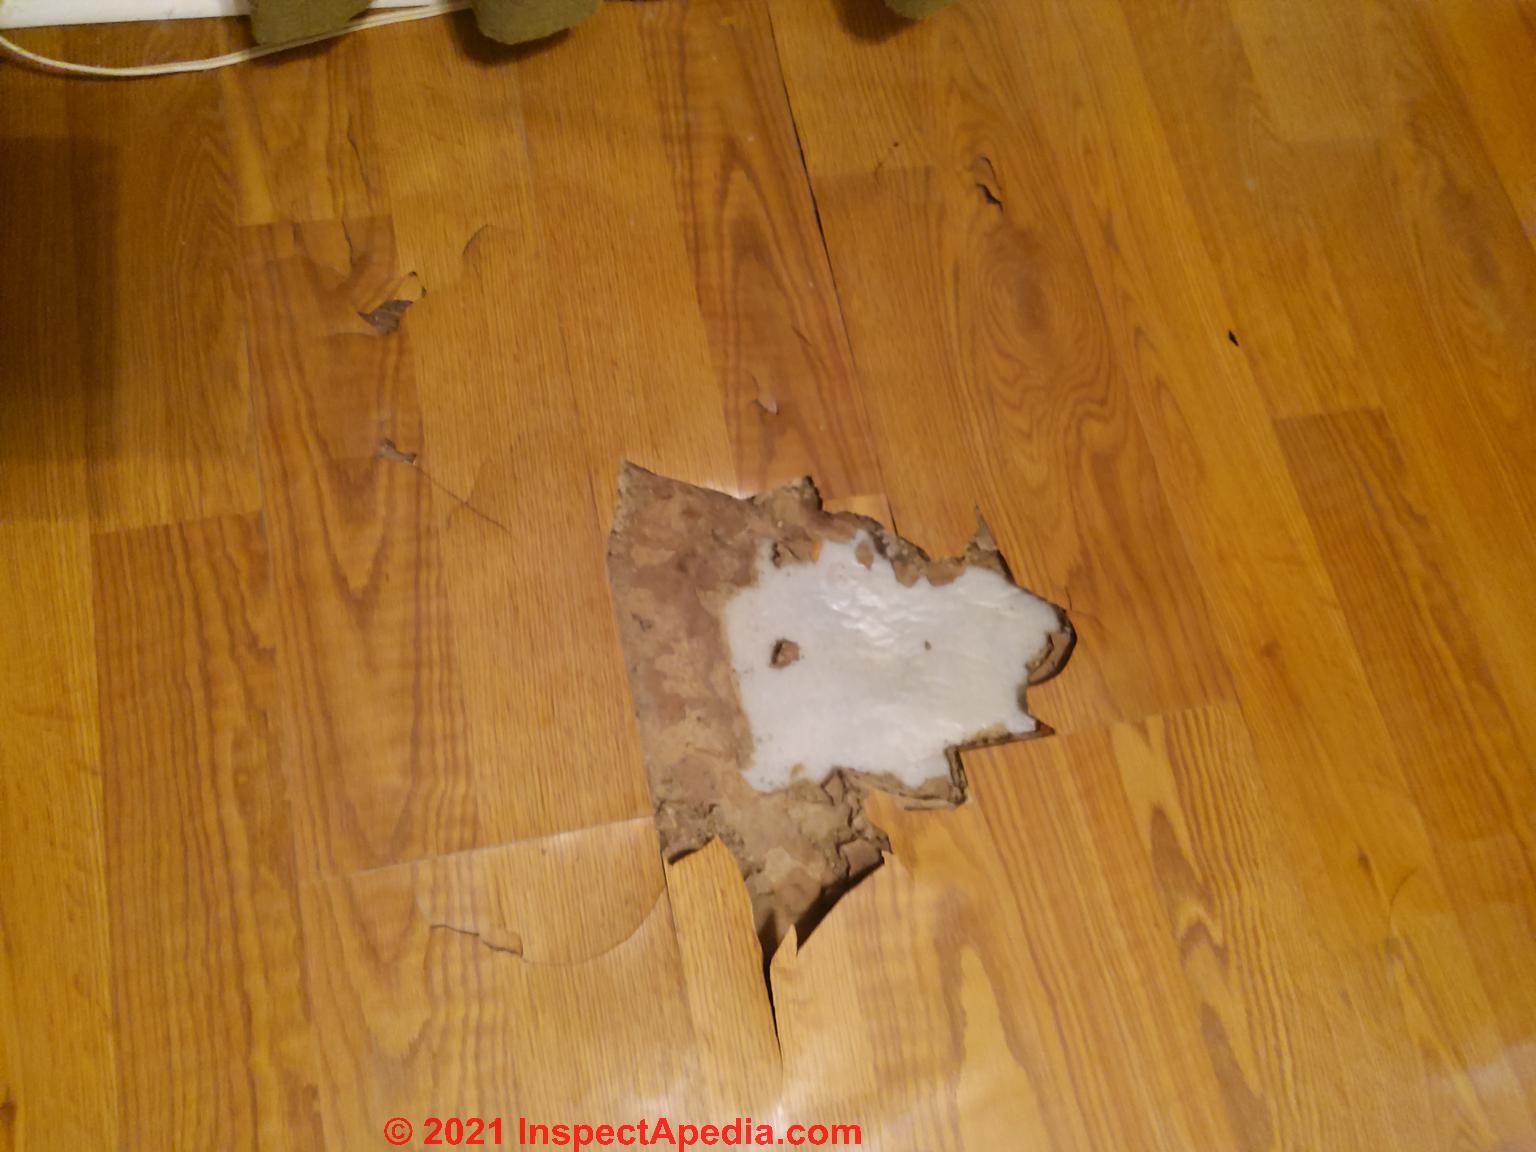
- Delamination: Delamination is another problem I faced, where the top layer of the laminate began to peel away from the core. This can happen due to moisture, heavy impact, or poor-quality flooring. In my case, it was a combination of water damage and the wear and tear of daily use. Once delamination starts, it’s challenging to repair, and often the affected plank needs to be replaced.
- Stains: Despite being easy to clean, laminate flooring isn’t completely stain-proof. I’ve found that certain spills, especially from liquids like wine or coffee, can leave stubborn stains if not cleaned up immediately. The protective layer on the laminate can only do so much, and if the spill seeps through, it can leave a lasting mark on the flooring.

Tools and Materials You’ll Need for Laminate Flooring Repair
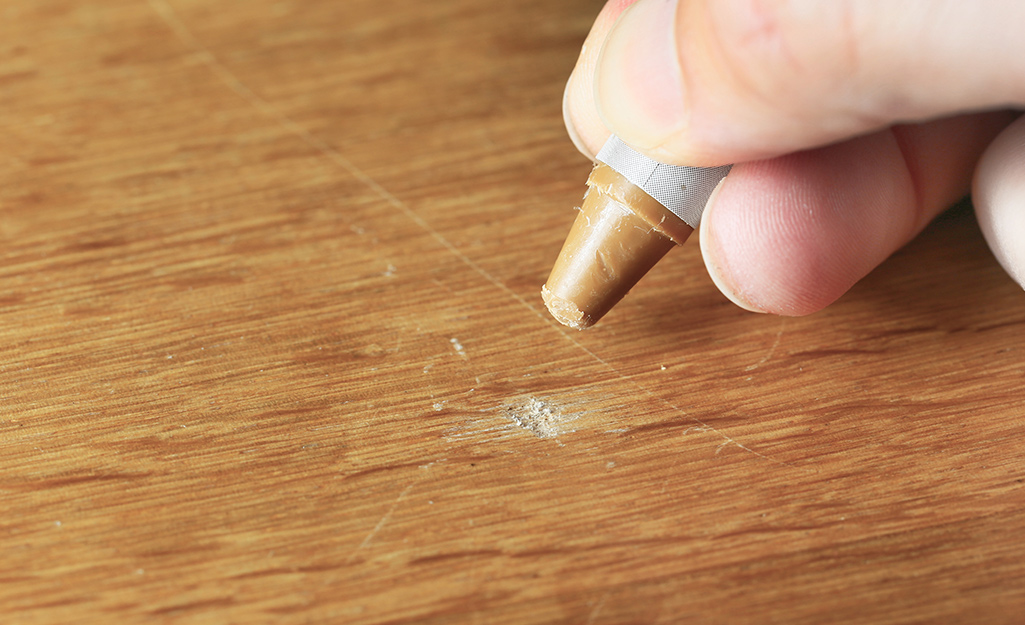
Flooring Repair Kit A good flooring repair kit is essential for any laminate floor owner. These kits usually come with putty, wax, or markers that match the color of your laminate. I’ve used these kits multiple times to fill in scratches or small chips, and they work wonders in making minor damage nearly invisible. It’s one of those tools that I always keep handy.
Laminate Plank Replacement Sometimes, the damage is beyond repair with just putty or markers. In such cases, having extra laminate planks from your original installation is crucial. I made sure to keep a few spare planks when I first installed my flooring. These planks have come in handy for replacing sections that were too damaged to fix with repair kits.
Adhesive When dealing with delamination or gaps between planks, a strong adhesive is necessary. I’ve found that using a high-quality laminate flooring adhesive helps ensure that the repaired areas stay intact over time. It’s important to choose an adhesive that’s specifically designed for laminate flooring to avoid further damage.
Hammer and Pull Bar A hammer and pull bar are essential tools when you need to adjust or replace planks. I’ve used these tools to gently tap planks into place, ensuring a snug fit without causing additional damage. The pull bar is particularly useful for accessing tight spaces, like near walls or under cabinets.
Spacers Spacers are a must when you’re dealing with peaking or buckling issues. These small tools help maintain the proper distance between planks and the wall, allowing the flooring to expand and contract without causing damage. I’ve used spacers to prevent peaking in several areas of my home, and they’ve been incredibly effective.
Moisture Meter A moisture meter is a handy tool that I use to check the humidity levels in my home. Since laminate flooring is sensitive to moisture, keeping an eye on the environment helps prevent issues like warping and swelling. By using a moisture meter, I can take preventive measures to maintain the integrity of my flooring.
Utility Knife A sharp utility knife is another tool that has proven invaluable for making precise cuts when replacing damaged planks. It’s essential for trimming the edges of planks or removing damaged sections without affecting the surrounding flooring. I always keep a utility knife in my repair kit for quick and easy fixes.
Step-by-Step Guide to Repairing Minor Scratches and Scuffs
Assess the Damage The first step in repairing scratches and scuffs is to assess the extent of the damage. I always take a close look at the affected area to determine whether the scratch is surface-level or deeper. This helps me decide on the best approach for the repair. Surface-level scratches are usually easier to fix, while deeper ones might require more effort.
Clean the Area Before starting any repair, I make sure to clean the area thoroughly. Dust, dirt, and debris can interfere with the repair process, so I always use a soft cloth and a mild cleaner to wipe down the surface. This step ensures that the repair materials adhere properly to the laminate flooring.
Use a Laminate Repair Kit For minor scratches, I reach for my laminate repair kit. These kits typically include wax pencils, putty, or markers that match the color of your flooring. I’ve found that filling in scratches with these materials is a quick and effective way to make the damage less noticeable. After applying the repair product, I gently buff the area with a soft cloth to blend it in.
Apply a Protective Finish Once the repair is complete, I like to apply a protective finish to the area. This can be in the form of a laminate sealer or a specialized floor polish. The finish helps to protect the repaired area from future damage and restores the shine to the flooring. I’ve found that this step also helps to blend the repaired area with the surrounding floor.
Buff the Area After applying the protective finish, I take the time to buff the area again. Using a soft cloth, I gently rub the surface in a circular motion until it has a consistent shine. This step ensures that the repaired area looks as close to the original as possible. It’s a simple yet effective way to ensure a seamless repair.
Prevent Future Damage Finally, I always consider what caused the scratch in the first place and take steps to prevent it from happening again. Whether it’s placing felt pads under furniture legs or using rugs in high-traffic areas, these small preventive measures can go a long way in protecting the flooring from further damage.
Regular Maintenance To keep my laminate flooring looking its best, I’ve made regular maintenance a part of my routine. This includes sweeping or vacuuming to remove dirt and debris, as well as using a damp mop with a laminate-friendly cleaner. By taking these steps, I’ve been able to keep scratches and scuffs to a minimum and maintain the beauty of my floors.
Fixing Gaps Between Laminate Planks: A Detailed Approach
Identify the Cause Before jumping into the repair, I always try to identify the cause of the gaps. Gaps between laminate planks can occur due to changes in humidity, temperature, or improper installation. Understanding why the gaps are forming helps me determine the best way to fix them and prevent them from reoccurring.
Clean the Area Once I’ve identified the cause, the next step is to clean the area around the gaps. Dust and debris can accumulate in the gaps, making them more noticeable and harder to fix. I use a vacuum or a soft brush to remove any particles, ensuring that the area is clean before proceeding with the repair.
Use an Adhesive To fix the gaps, I usually apply a high-quality laminate flooring adhesive. I’ve found that using a small amount of adhesive in the gap helps to secure the planks in place. After applying the adhesive, I gently press the planks together, holding them in place until the adhesive sets. This step ensures that the planks stay aligned and the gap is closed.
Hammer and Pull Bar Technique For larger gaps, I’ve had success using the hammer and pull bar technique. I place the pull bar along the edge of the plank and gently tap it with a hammer to close the gap. This method requires a bit of patience, but it’s effective in aligning the planks and closing the gaps without causing additional damage.
Use Spacers After closing the gaps, I use spacers to maintain the proper distance between the planks and the wall. Spacers allow the flooring to expand and contract with changes in temperature and humidity, preventing future gaps. I’ve found that using spacers during the initial installation and after repairs helps to keep the flooring in place.
Apply a Finish To complete the repair, I apply a finish to the area. This can be a laminate sealer or a specialized floor polish that matches the flooring. The finish helps to blend the repaired area with the rest of the floor and protects the planks from future damage. I always make sure to buff the area after applying the finish for a consistent shine.
Regular Monitoring After fixing the gaps, I make it a point to monitor the repaired area regularly. Changes in humidity and temperature can cause gaps to reappear, so I keep an eye on the environment and take preventive measures as needed. This ongoing monitoring has helped me maintain the integrity of my laminate flooring over time.
How to Replace Damaged Laminate Flooring Planks
Assess the Damage When I first noticed a damaged plank in my laminate flooring, I knew that a simple repair wouldn’t be enough. Replacing the damaged plank was the only way to restore the floor’s appearance. Before starting the replacement process, I carefully assessed the extent of the damage to ensure that only the affected plank needed to be replaced.
Gather the Necessary Tools Replacing a laminate plank requires a few specific tools, including a utility knife, adhesive, hammer, pull bar, and spacers. I also made sure to have a replacement plank that matched the existing flooring. Having all the necessary tools on hand made the replacement process smoother and more efficient.
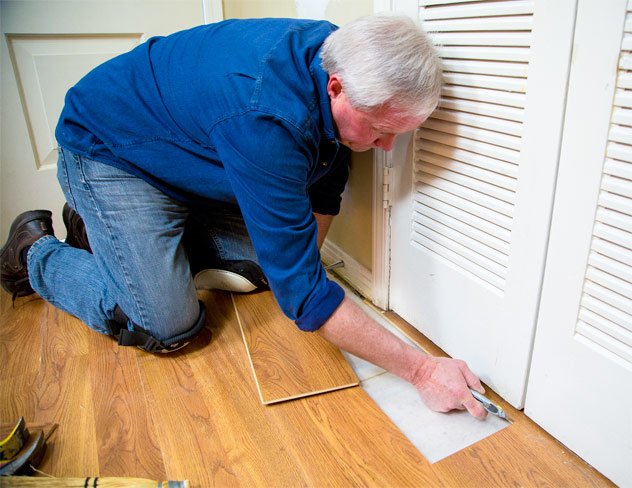
Remove the Damaged Plank To remove the damaged plank, I used a utility knife to carefully cut along the edges of the plank. This allowed me to lift the plank out without damaging the surrounding flooring. Removing the plank required some patience, but taking my time ensured that the neighboring planks remained intact.
Prepare the Replacement Plank Before installing the replacement plank, I checked to make sure it was the correct size and color match. I also applied a small amount of adhesive to the edges of the plank to secure it in place. This step is crucial to ensure that the replacement plank fits seamlessly with the rest of the floor.
Install the Replacement Plank I carefully placed the replacement plank into the empty space, making sure it aligned perfectly with the surrounding planks. Using a hammer and pull bar, I gently tapped the plank into place, ensuring a snug fit. This step requires precision, but the result is a floor that looks as good as new.
Apply a Finish After installing the replacement plank, I applied a finish to the area. This helped to blend the new plank with the rest of the floor and added an extra layer of protection. I always make sure to buff the area after applying the finish for a consistent appearance across the entire floor.
Monitor the Repaired Area Following the replacement, I keep an eye on the repaired area to ensure that the new plank remains in place and no further issues arise. Regular monitoring helps me catch any potential problems early, allowing me to address them before they become more significant issues.
Preventing Future Damage: Maintenance Tips for Wood Laminate Flooring
Regular Cleaning One of the best ways I’ve found to prevent damage to my wood laminate flooring is through regular cleaning. I make it a point to sweep or vacuum the floors daily to remove dirt, dust, and debris that could cause scratches or wear down the surface. A clean floor is less likely to suffer from damage, and it helps maintain the flooring’s appearance over time.
Use Mats and Rugs Placing mats and rugs in high-traffic areas has been a game-changer for protecting my laminate flooring. These areas, like entryways and hallways, are prone to more wear and tear. By using mats and rugs, I’ve been able to reduce the impact on the flooring and prevent scratches and scuffs from shoes, pets, and heavy furniture.
Protect Furniture Legs One of the first things I did after installing my laminate flooring was to add felt pads to the legs of all my furniture. These pads prevent the furniture from scratching the floor when moved. It’s a small and inexpensive step, but it has made a significant difference in preventing damage, especially when rearranging furniture.
Control Humidity Levels Laminate flooring can be sensitive to changes in humidity, so I’ve made it a priority to maintain a stable indoor environment. Using a dehumidifier during the humid months and a humidifier during the dry winter months has helped me prevent the flooring from warping, buckling, or developing gaps between the planks.
Immediate Spill Cleanup Accidents happen, and spills are inevitable, especially with kids and pets around. To prevent water damage, I always clean up spills immediately. Allowing water or other liquids to sit on the laminate flooring can lead to swelling, warping, or even staining. By addressing spills right away, I’ve managed to keep my floors in excellent condition.
Use Proper Cleaning Products Not all cleaning products are suitable for laminate flooring. I’ve learned to avoid harsh chemicals or abrasive cleaners that could damage the protective layer on the flooring. Instead, I use a laminate-friendly cleaner that’s designed to clean without leaving streaks or residue. This helps maintain the floor’s finish and prolongs its lifespan.
Regular Inspections In addition to regular cleaning and preventive measures, I make it a habit to inspect my laminate flooring regularly. By catching potential issues early, such as small scratches, gaps, or signs of wear, I can address them before they become bigger problems. This proactive approach has helped me keep my flooring in top shape for years.
When to Call a Professional: Assessing the Need for Expert Help
Extensive Damage While I’m comfortable handling minor repairs and maintenance, there are times when the damage is too extensive for a DIY approach. If you’re dealing with significant water damage, large areas of delamination, or widespread buckling, it’s often best to call in a professional. In my experience, trying to fix these major issues on my own could lead to further damage or an unsatisfactory repair.
Complex Repairs Some repairs require specialized tools or techniques that I may not have experience with. For example, replacing planks in the middle of a room or repairing subfloor issues can be complex and time-consuming. When faced with these challenges, I prefer to hire a professional who has the expertise and equipment needed to ensure a flawless repair.
Time Constraints There have been times when my busy schedule made it difficult to devote the necessary time to a repair. If you’re in a similar situation, hiring a professional can save you time and stress. A professional can complete the job quickly and efficiently, allowing you to focus on other tasks while ensuring the repair is done correctly.
Warranty Considerations If your laminate flooring is still under warranty, attempting a DIY repair could void the coverage. In such cases, I recommend contacting the manufacturer or a professional installer to handle the repair. This ensures that the work is done according to the warranty’s requirements and protects your investment in the flooring.
Repeated Issues If you’ve noticed that the same problems keep recurring, despite your best efforts to repair them, it might be time to seek professional help. Repeated issues could indicate an underlying problem that needs to be addressed by an expert. In my experience, a professional can identify and fix the root cause, preventing future problems.
Peace of Mind Ultimately, hiring a professional can provide peace of mind. Knowing that the repair is in the hands of an expert can alleviate the stress and uncertainty that often comes with DIY projects. I’ve found that sometimes, it’s worth the investment to have a professional handle the repair, especially for complex or extensive damage.
Long-Term Maintenance Even if your flooring is in good condition, consulting with a professional for long-term maintenance can be beneficial. A professional can offer advice on how to care for your specific type of laminate flooring and recommend products or techniques to extend its lifespan. This proactive approach can help you avoid costly repairs down the road.
How to Repair Water-Damaged Laminate Flooring
Wood Repair Set – Scratches on laminate, parquet, vinyl, furniture, wood decor
Laminate Flooring Damage, Diagnosis, Repair
Related Posts:
- Grey Vintage Oak Laminate Flooring
- Dark Laminate Flooring Living Room
- Cheap Walnut Laminate Flooring
- Designer Choice Laminate Flooring
- Laminate Flooring Around Stairs
- Laminate Flooring Brick Pattern
- Black Gray Laminate Flooring
- Satin Walnut Laminate Flooring
- Laminate Floor Leveling
- Dark Oak Effect Laminate Flooring


