Introduction to Cork Flooring: An Eco-Friendly Flooring Option
Cork flooring is a popular choice for homeowners seeking an eco-friendly and sustainable flooring option that offers both style and functionality. Made from the bark of cork oak trees, cork flooring is a renewable resource that provides numerous benefits for both the environment and your home. Let’s discuss the characteristics of cork flooring, its eco-friendly attributes, and why it’s becoming an increasingly popular choice for environmentally conscious homeowners.
- Renewable Resource: Cork is harvested from the bark of cork oak trees, which can be harvested every nine to twelve years without harming the tree. This makes cork a highly renewable and sustainable resource compared to other types of flooring materials, such as hardwood or vinyl, which require the harvesting of entire trees or the use of fossil fuels in manufacturing.
- Environmentally Friendly Production: The production of cork flooring has minimal environmental impact compared to other flooring materials. The bark of cork oak trees is harvested by hand, using traditional methods that do not require heavy machinery or the use of pesticides or herbicides. Additionally, cork flooring is manufactured using low-energy processes that produce minimal waste and emissions, making it a more environmentally friendly option.
- Natural Insulator: Cork has natural insulating properties, making it an excellent choice for homeowners looking to improve the energy efficiency of their homes. Cork flooring helps to regulate temperature and reduce energy costs by providing insulation against heat loss in the winter and heat gain in the summer. This can lead to significant savings on heating and cooling bills over time.
- Comfort and Durability: In addition to its eco-friendly attributes, cork flooring is also known for its comfort and durability. The natural resilience of cork provides cushioning underfoot, making it comfortable to walk on and reducing fatigue. Cork flooring is also resistant to wear and tear, scratches, and dents, making it a durable option for high-traffic areas in the home.
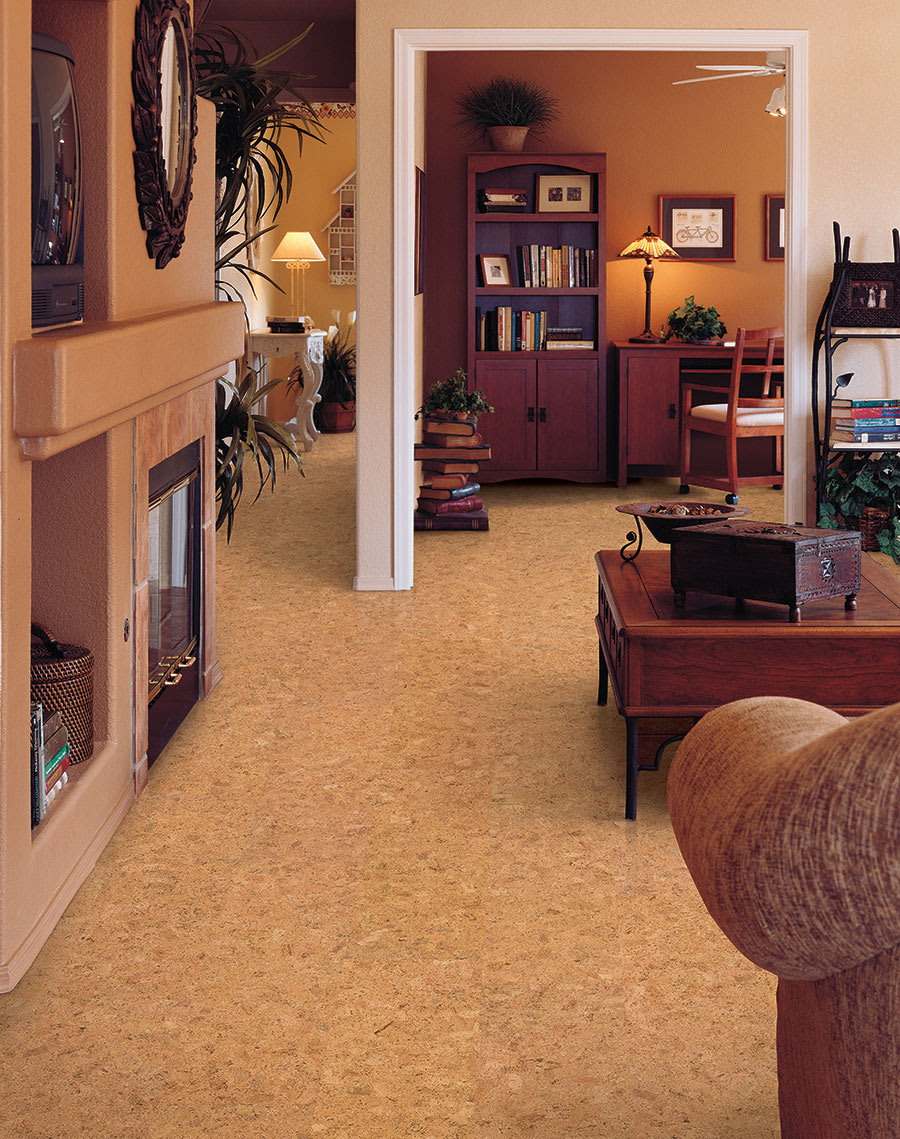
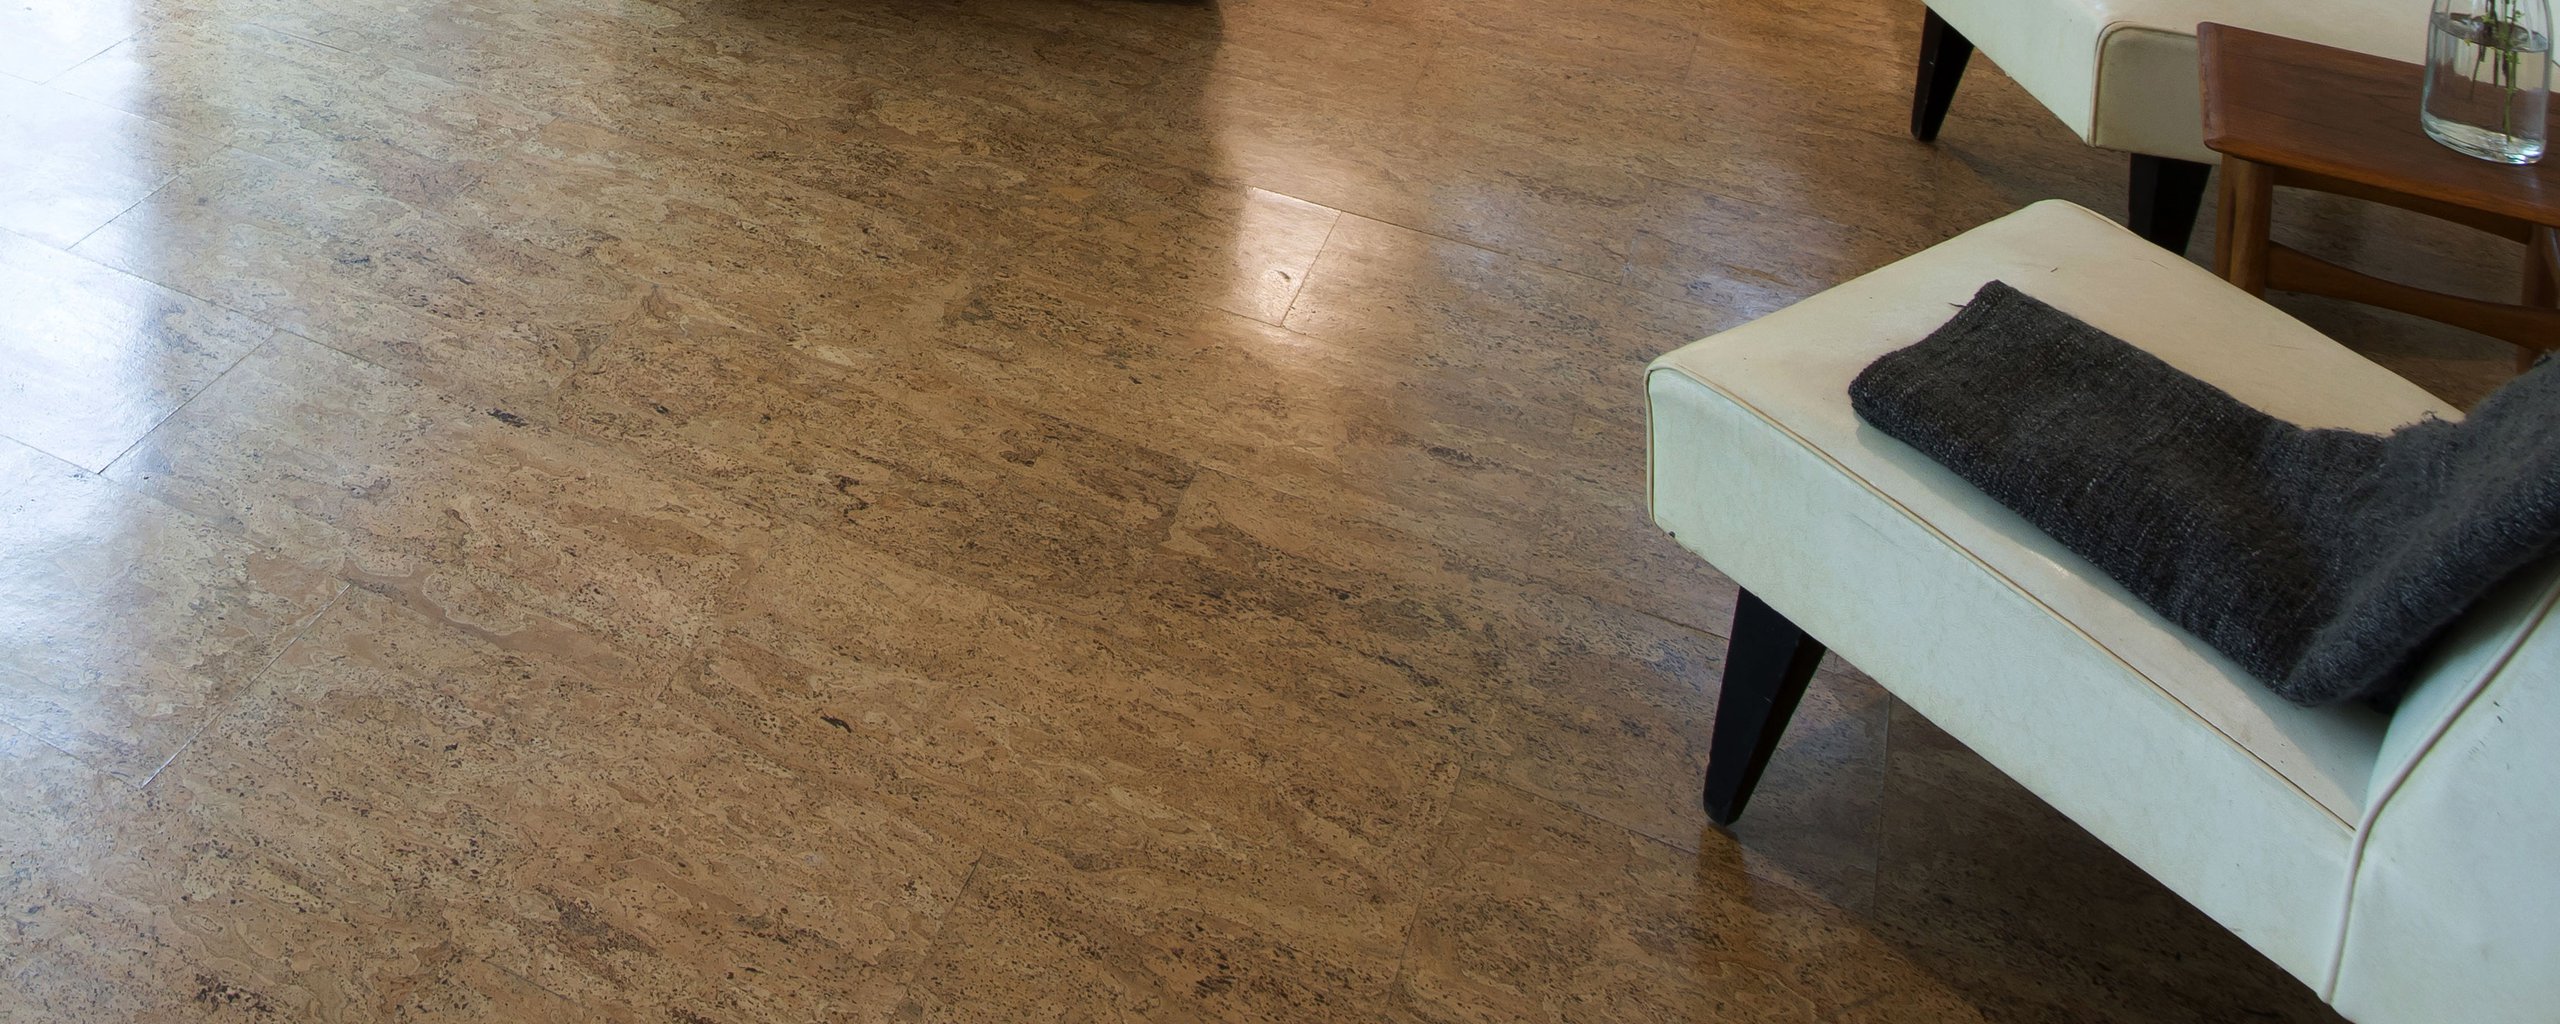
- Variety of Styles and Finishes: Cork flooring comes in a wide range of styles, colors, and finishes to suit any aesthetic preference or design scheme. From natural cork with its distinctive grain and texture to stained or painted cork in a variety of colors and patterns, there are endless options to choose from to complement your home’s decor.
Benefits of Cork Flooring for DIY Projects
Cork flooring is gaining popularity among DIY enthusiasts for its ease of installation, versatility, and numerous benefits for the home. Whether you’re looking to renovate your kitchen, living room, or bedroom, cork flooring offers several advantages that make it an attractive option for DIY projects. Below are the benefits of cork flooring for DIY projects and why it’s becoming a popular choice among homeowners.
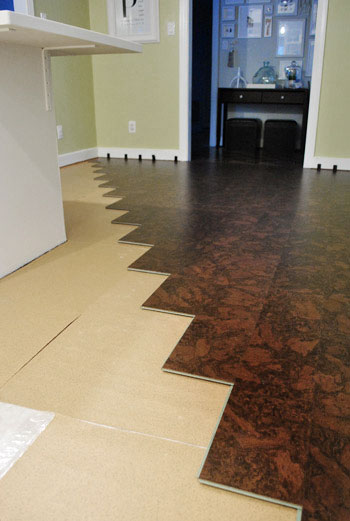
Ease of Installation: One of the primary benefits of cork flooring for DIY projects is its ease of installation. Cork flooring typically comes in interlocking planks or tiles that are designed to be installed as a floating floor, meaning they can be laid directly over existing subfloors without the need for adhesives or nails. This makes cork flooring a beginner-friendly option for DIY enthusiasts looking to tackle home improvement projects themselves.
Versatility: Cork flooring is available in a variety of styles, colors, and finishes to suit any design aesthetic or decor scheme. Whether you prefer the natural look of cork with its distinctive grain and texture or a more modern and sleek finish, there are endless options to choose from to complement your home’s style. Additionally, cork flooring can be stained or painted to match your existing decor or create a custom look for your space.
Comfort and Insulation: Cork flooring is known for its natural cushioning and insulation properties, making it a comfortable and cozy option for any room in the home. The natural resilience of cork provides cushioning underfoot, reducing fatigue and discomfort when standing or walking for long periods. Additionally, cork flooring helps to regulate temperature and reduce noise, making it an ideal choice for bedrooms, living rooms, and other areas where comfort and tranquility are paramount.
Durability and Resilience: Despite its soft and cushiony feel, cork flooring is surprisingly durable and resilient. Cork is naturally resistant to mold, mildew, and moisture, making it a suitable option for kitchens, bathrooms, and other areas prone to moisture. Additionally, cork flooring is resistant to scratches, dents, and stains, making it a durable option for high-traffic areas in the home.
Low Maintenance: Cork flooring is relatively low maintenance and easy to clean, making it a convenient option for busy homeowners. Regular sweeping or vacuuming to remove dirt and debris, combined with occasional mopping with a mild detergent or cleaner, is all that’s needed to keep cork flooring looking great for years to come. Additionally, cork flooring is naturally antimicrobial, making it a hygienic choice for allergy sufferers or households with pets.
Preparation Steps Before Installing Cork Flooring
Before embarking on a DIY cork flooring installation project, proper preparation is essential to ensure a successful and long-lasting result. From assessing the subfloor to gathering the necessary tools and materials, taking the time to prepare properly can save you time, effort, and frustration down the line. Let’s outline the key preparation steps you need to take before installing cork flooring to help you achieve professional results.
Assess the Subfloor: The first step in preparing for cork flooring installation is to assess the condition of the existing subfloor. Cork flooring can be installed over a variety of subfloor materials, including plywood, concrete, and vinyl, as long as they are clean, dry, and level. Check for any signs of moisture, unevenness, or damage to the subfloor that may need to be addressed before installation.
Acclimate the Cork Flooring: Cork flooring is a natural material that can expand and contract with changes in temperature and humidity. To prevent buckling or warping after installation, it’s important to acclimate the cork flooring to the room where it will be installed for at least 48 hours before beginning the installation process. Stack the flooring planks or tiles in the room and allow them to adjust to the ambient conditions.
Gather the Necessary Tools and Materials: Before installing cork flooring, gather all the necessary tools and materials you’ll need for the job. This may include cork flooring planks or tiles, underlayment, adhesive or adhesive tape, a utility knife, a straight edge, a tapping block, a rubber mallet, spacers, and a saw for cutting planks to size. Having everything you need on hand before you begin will streamline the installation process and help you work more efficiently.
Prepare the Subfloor: Once you’ve assessed the subfloor and gathered your tools and materials, it’s time to prepare the subfloor for installation. Start by cleaning the subfloor thoroughly to remove any dirt, dust, or debris that could affect adhesion. Repair any cracks, holes, or uneven areas in the subfloor using a suitable patching compound or leveling compound. Ensure the subfloor is smooth, level, and free of imperfections before proceeding with the installation.
Install Underlayment (if necessary): Depending on the type of subfloor and cork flooring you’re installing, you may need to install an underlayment to provide additional cushioning, insulation, or moisture protection. Follow the manufacturer’s instructions for installing the underlayment, ensuring it is properly secured and free of wrinkles or gaps that could affect the installation of the cork flooring.
Plan the Layout: Before installing cork flooring, take the time to plan the layout of the room and determine the best starting point for installation. Measure the room and calculate the amount of cork flooring you’ll need, taking into account any obstacles, doorways, or irregularities in the room. Lay out the flooring planks or tiles in the desired pattern, leaving space around the perimeter of the room for expansion.

DIY Installation of Cork Flooring: Step-by-Step Guide
Installing cork flooring is a rewarding DIY project that can enhance the beauty and comfort of your home while adding a touch of natural warmth and elegance to any room. With proper preparation and attention to detail, you can achieve professional results and enjoy the benefits of cork flooring for years to come. In this step-by-step guide, we’ll walk you through the process of installing cork flooring to help you tackle this project with confidence.
Prepare the Subfloor: The first step in installing cork flooring is to prepare the subfloor. Ensure the subfloor is clean, dry, level, and free of any debris, dust, or imperfections that could affect adhesion. Repair any cracks, holes, or uneven areas in the subfloor using a suitable patching compound or leveling compound. Allow the subfloor to dry completely before proceeding with the installation.
Acclimate the Cork Flooring: Before installing cork flooring, it’s important to acclimate the flooring planks or tiles to the room where they will be installed. Stack the flooring planks or tiles in the room and allow them to adjust to the ambient conditions for at least 48 hours. This will help prevent buckling or warping of the cork flooring after installation.
Install Underlayment (if necessary): Depending on the type of subfloor and cork flooring you’re installing, you may need to install an underlayment to provide additional cushioning, insulation, or moisture protection. Follow the manufacturer’s instructions for installing the underlayment, ensuring it is properly secured and free of wrinkles or gaps that could affect the installation of the cork flooring.
Plan the Layout: Before installing cork flooring, take the time to plan the layout of the room and determine the best starting point for installation. Measure the room and calculate the amount of cork flooring you’ll need, taking into account any obstacles, doorways, or irregularities in the room. Lay out the flooring planks or tiles in the desired pattern, leaving space around the perimeter of the room for expansion.
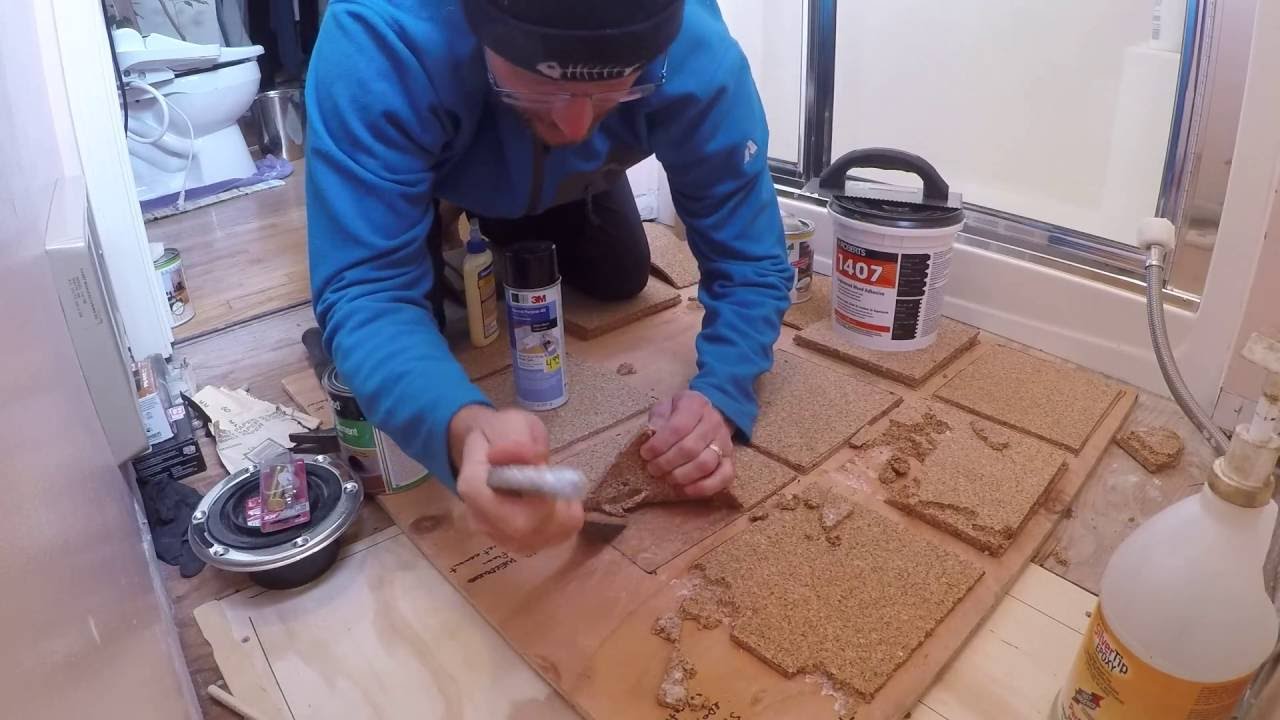
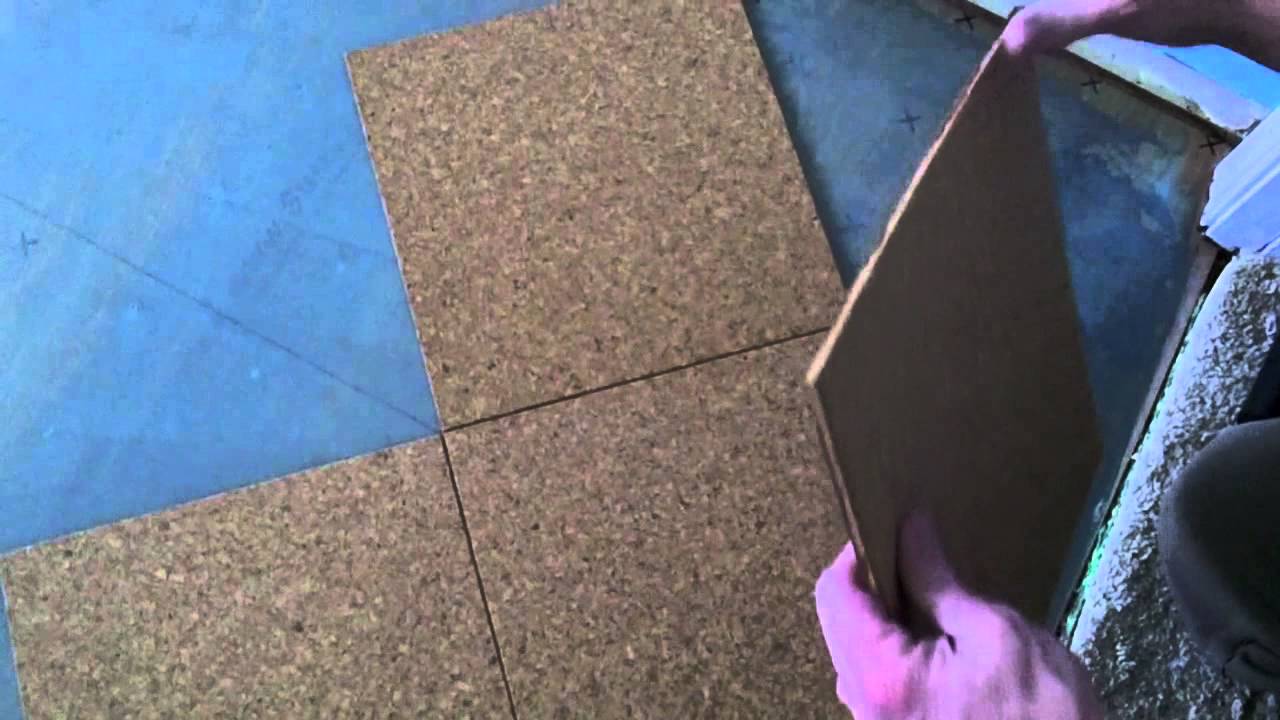
Install the Cork Flooring: Once the subfloor is prepared, and acclimated, and the layout is planned, it’s time to install the cork flooring. Begin by applying adhesive or adhesive tape to the perimeter of the room and along the edges of the first row of cork flooring planks or tiles. Press the first row of cork flooring firmly into place, ensuring it is straight and aligned with the layout lines.
Continue Installation: Continue installing cork flooring row by row, working from one side of the room to the other. Use spacers to maintain a consistent gap between the cork flooring planks or tiles and the walls, and use a tapping block and rubber mallet to ensure a tight fit between planks or tiles. Trim the last row of cork flooring planks or tiles to fit using a saw as needed.
Allow the Adhesive to Cure: Once the cork flooring is installed, allow the adhesive to cure according to the manufacturer’s instructions before walking on or placing furniture on the floor. This typically involves allowing the adhesive to set for at least 24-48 hours, depending on temperature and humidity conditions.
Install Baseboards and Trim: After the adhesive has cured, install baseboards and trim around the perimeter of the room to cover the expansion gap and provide a finished look. Use finishing nails or adhesive to secure the baseboards and trim in place, ensuring they are flush with the cork flooring.
Enjoy Your New Cork Flooring: Once the installation is complete and the adhesive has cured, enjoy your new cork flooring! Sweep or vacuum the floor regularly to remove dirt and debris, and mop with a mild detergent or cleaner as needed to keep it looking great for years to come.
Maintenance and Care Tips
Cork flooring is a durable and resilient flooring option that requires minimal maintenance to keep it looking great for years to come. With proper care and regular maintenance, you can protect the natural beauty and functionality of your cork flooring and enjoy its many benefits for years to come. Below we share some maintenance and care tips for cork flooring to help you keep your floors looking great.
Regular Cleaning: Regular cleaning is essential to remove dirt, dust, and debris that can scratch the surface of your cork flooring. Sweep or vacuum the floor regularly to remove loose dirt and debris, and mop with a mild detergent or cleaner diluted in water to remove stubborn stains and spills. Avoid using harsh chemical cleaners or abrasive tools that can damage the cork flooring.
Avoid Standing Water: Moisture can damage the cork flooring and cause it to swell or warp over time. Avoid leaving standing water on the surface of your cork flooring by promptly wiping up spills and using mats or rugs in areas prone to moisture, such as entryways and kitchen areas. Use a dry mop or towel to soak up spills immediately to prevent them from seeping into the cork flooring.
Protective Measures: Take protective measures to prevent damage to your cork flooring, such as placing furniture pads or felt protectors under heavy furniture to prevent scratching and dents. Use mats or rugs in high-traffic areas to reduce wear and tear and protect the surface from dirt and debris. Avoid dragging heavy objects or sharp items across the floor, as this can scratch or gouge the cork flooring.
Avoid Direct Sunlight: Direct sunlight can cause fading and discoloration of cork flooring over time. Use blinds or curtains to block out direct sunlight and protect your cork flooring from UV rays. Consider using area rugs or furniture to cover areas of your cork flooring that are exposed to direct sunlight to prevent fading and discoloration.
Periodic Maintenance: Periodic maintenance is essential to keep your cork flooring looking great and performing well over time. Depending on the level of traffic and wear, you may need to periodically refinish or recoat your cork flooring to restore its appearance and protect it from damage. Follow the manufacturer’s recommendations for maintenance and touch-up procedures, and consider hiring a professional for larger repair or recoating projects.
Avoid Sharp Objects: Sharp objects and heavy impacts can damage the cork flooring and cause scratches, gouges, or dents. Encourage guests and family members to remove shoes with sharp heels before walking on the floor, and use furniture pads or felt protectors under heavy furniture to prevent damage.
Regular Inspections: Regularly inspect your cork flooring for signs of damage, wear, or deterioration, such as scratches, dents, stains, or areas of discoloration. Address any issues promptly to prevent further damage and extend the life of your cork flooring.
Reapply Finish as Needed: Over time, the finish of your cork flooring may wear down or become damaged, compromising its appearance and protection. Consider reapplying the finish periodically to restore its gloss and durability and protect the underlying cork flooring from damage. Follow the manufacturer’s recommendations for finish application and drying times.
How To Install A Floating Cork Floor Young House Love
How to Install Cork Tile Flooring (DIY) Family Handyman

DIY Cork Flooring – Pros, Cons u0026 Green Installation Guide for LEED
DIY cork floor for bathroom with cheap underlayment – adhesive testing
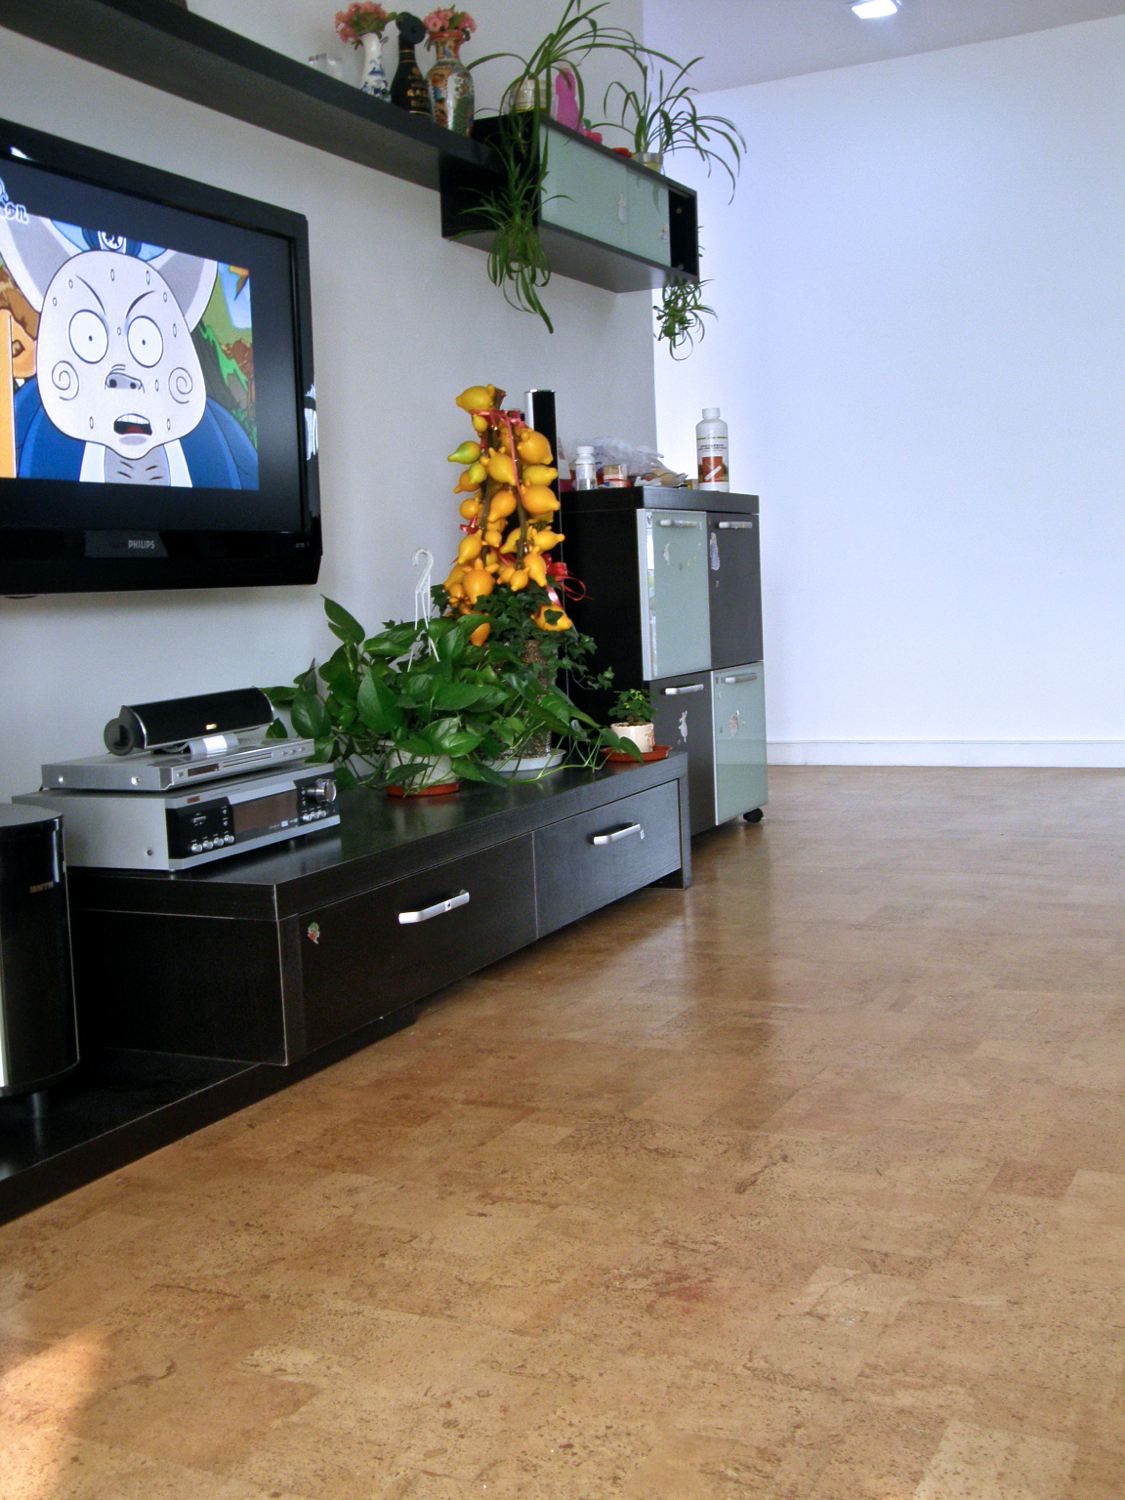
Cork Flooring for Home Office

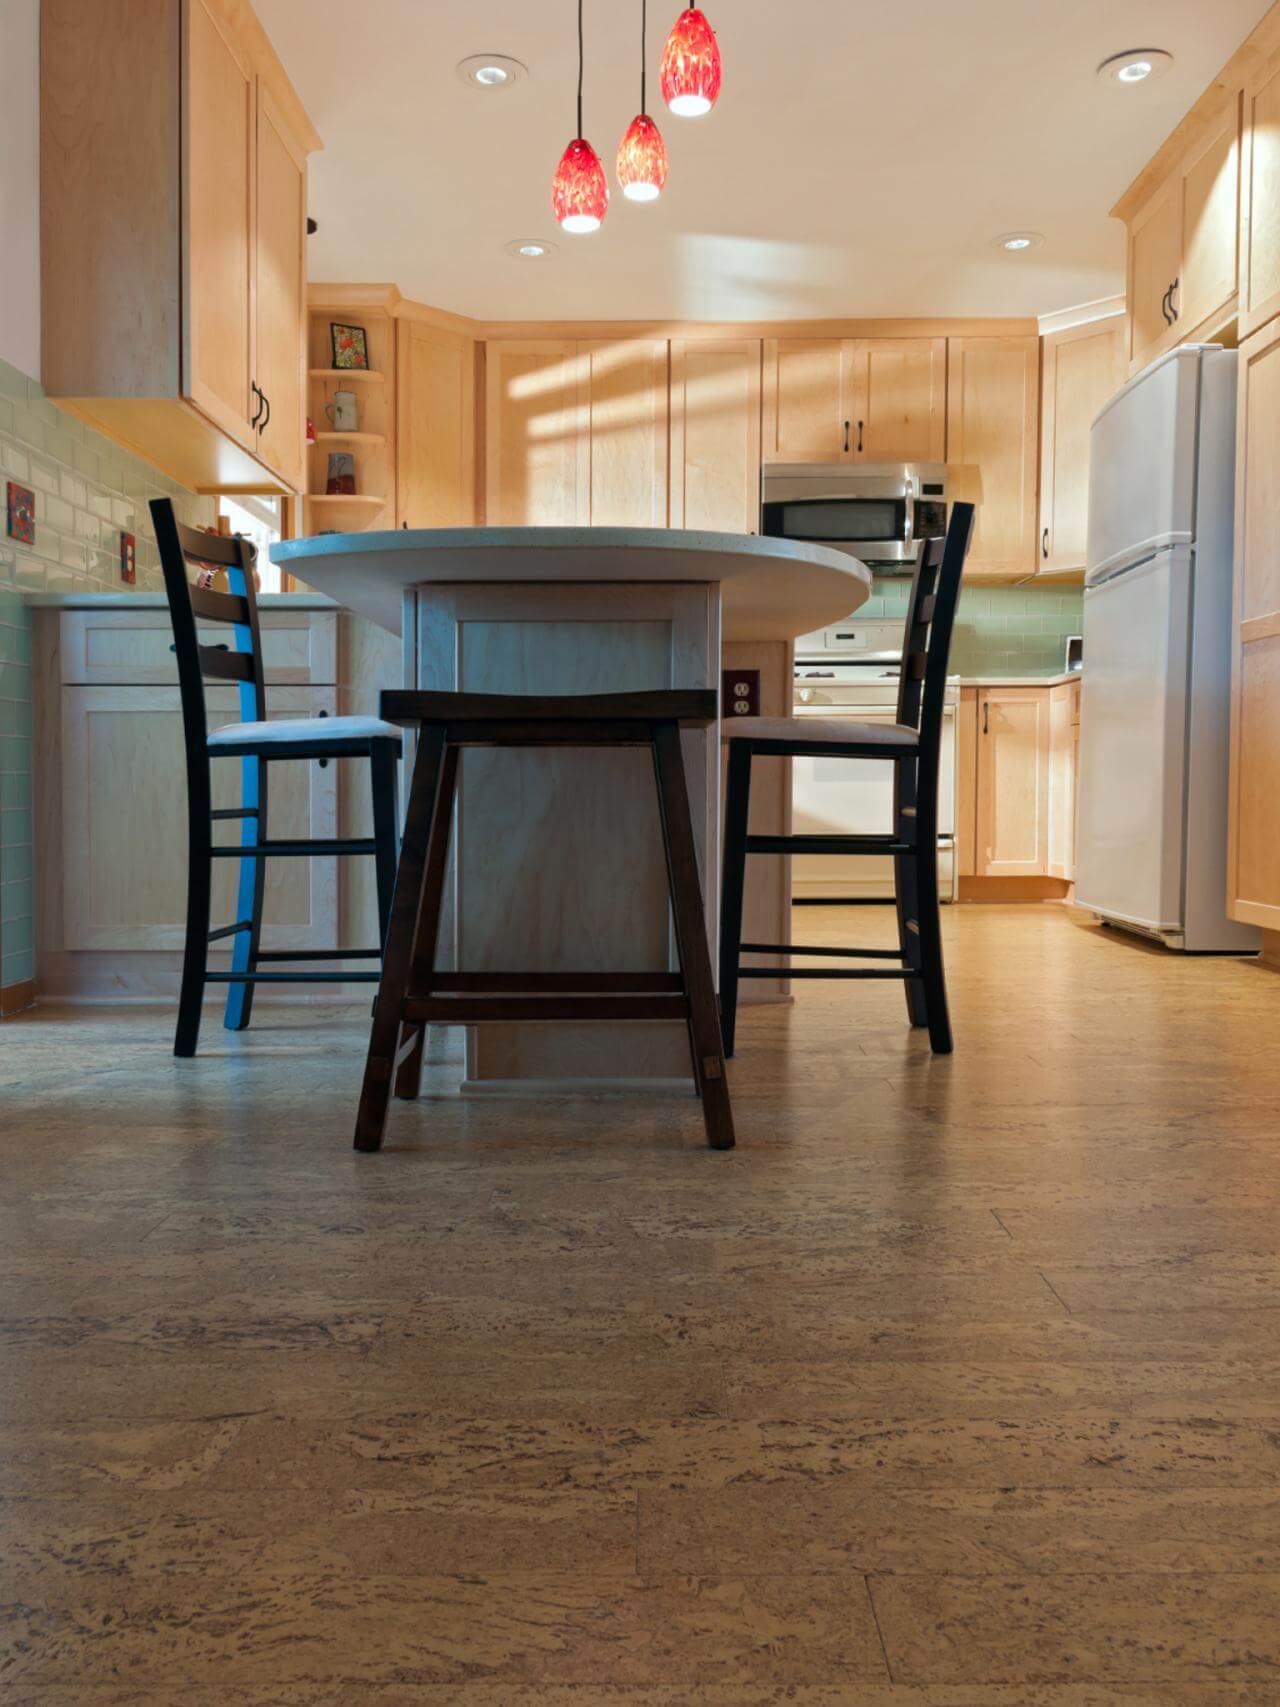
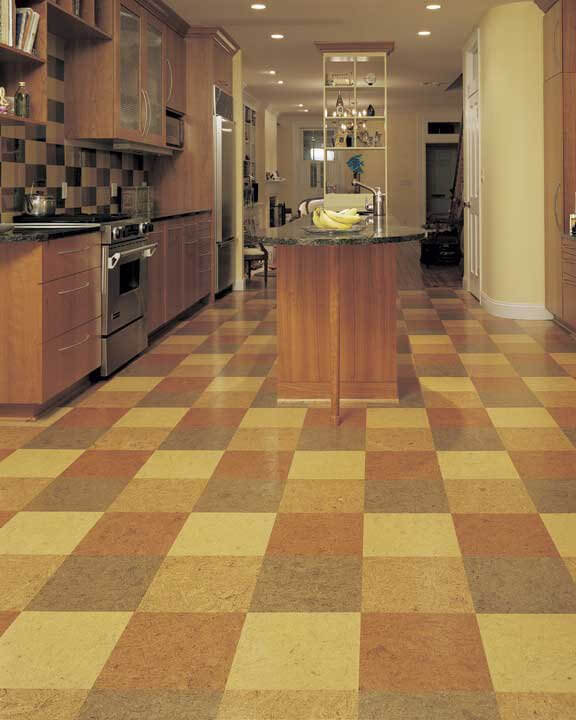
Cork Floor for Kitchen

Cork Floor Install – How to install a cork glue down floor.
Cork Flooring Installation – How to Do It DIY Home Improvement
Related Posts: