Why Choose Cork Flooring for Your Bathroom?
Cork flooring has become an increasingly popular choice for bathrooms due to its unique benefits and aesthetic appeal. If you’re considering new flooring for your bathroom, cork is a versatile and eco-friendly option worth exploring.
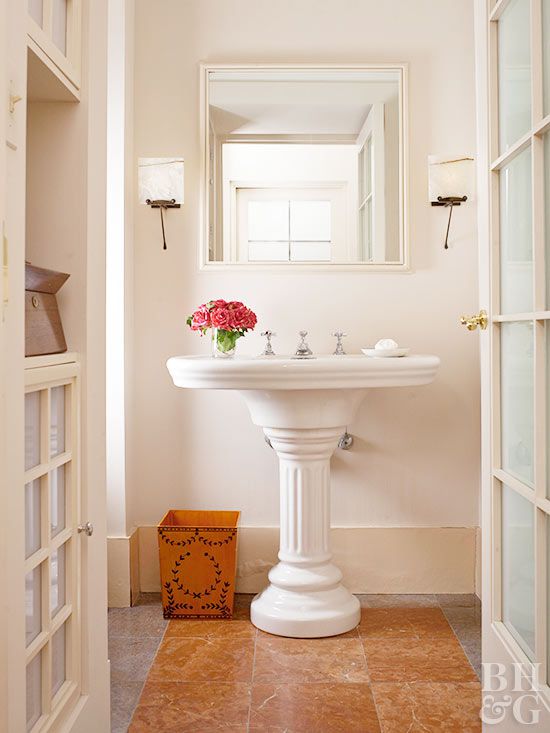
- Natural Water Resistance: Cork is naturally resistant to water, which makes it an excellent choice for bathroom flooring. Its inherent properties help prevent moisture from penetrating the surface, reducing the risk of mold and mildew growth. This makes cork a durable and practical option for wet environments.
- Comfort and Warmth: Cork flooring provides a soft and warm surface underfoot, which can make a significant difference in a bathroom. Unlike cold tile floors, cork retains heat, providing a more comfortable experience, especially during the colder months. This warmth can enhance the overall comfort and coziness of your bathroom.
- Eco-Friendly Material: Cork is a sustainable and environmentally friendly material. It is harvested from the bark of cork oak trees, which regenerate after the bark is removed, allowing for repeated harvesting without harming the tree. Choosing cork flooring supports sustainable forestry practices and reduces your environmental footprint.
- Aesthetic Appeal: Cork flooring comes in a variety of colors and patterns, allowing you to customize the look of your bathroom. Whether you prefer a natural, rustic appearance or a more contemporary design, there are cork flooring options to suit your style. Its unique texture and pattern can add a touch of elegance and uniqueness to your bathroom.
- Durability and Resilience: Cork flooring is known for its durability and resilience. It can withstand heavy foot traffic and is resistant to scratches and dents, making it suitable for busy bathrooms. Additionally, the cork’s natural elasticity allows it to recover from minor impacts, maintaining its appearance over time.
- Sound Insulation: Cork has excellent sound insulation properties, which can help reduce noise in your bathroom. Its cellular structure absorbs sound, creating a quieter and more peaceful environment. This can be particularly beneficial in multi-story homes where noise reduction is important.

Preparing Your Bathroom for Cork Flooring Installation
Proper preparation is key to a successful cork flooring installation in your bathroom. Taking the time to prepare your bathroom correctly ensures a smooth and durable installation.
Remove Existing Flooring: Start by removing the existing flooring in your bathroom. This may involve pulling up tiles, vinyl, or other types of flooring. Ensure that the subfloor is clean, dry, and free of any adhesive residues. If necessary, use a scraper or sander to achieve a smooth surface.
Check for Moisture Issues: Before installing cork flooring, it’s essential to address any moisture issues in your bathroom. Inspect the subfloor for signs of water damage or leaks. Repair any plumbing issues and ensure that the subfloor is completely dry. Moisture barriers or underlayment with moisture protection can be used to prevent future water damage.
Level the Subfloor: A level subfloor is crucial for a successful cork flooring installation. Use a level to check for any uneven areas. If the subfloor is not level, use a self-leveling compound to fill in low spots and create a smooth, even surface. Allow the compound to dry completely before proceeding with the installation.
Acclimate the Cork Flooring: Cork flooring needs to acclimate to the bathroom’s environment before installation. Lay the cork planks or tiles in the bathroom for at least 48 hours to adjust to the room’s temperature and humidity. This helps prevent expansion or contraction after installation, ensuring a stable and long-lasting floor.
Install a Moisture Barrier: To protect your cork flooring from potential water damage, install a moisture barrier on the subfloor. This can be a plastic sheet or an underlayment with built-in moisture protection. The moisture barrier helps prevent moisture from seeping up from the subfloor and damaging the cork.
Gather Necessary Tools and Materials: Before starting the installation, gather all the tools and materials you will need. This includes cork flooring planks or tiles, adhesive (if required), a utility knife, a measuring tape, a straight edge, spacers, and a rubber mallet. Having everything ready ensures a smooth and efficient installation process.

Tools and Materials Needed for Installing Cork Flooring
Installing cork flooring in your bathroom requires specific tools and materials to ensure a professional and durable finish. Having the right equipment on hand makes the process smoother and more efficient.
Cork Flooring Planks or Tiles: The first and most crucial material is the cork flooring itself. Choose high-quality cork planks or tiles that are designed for bathroom use. Ensure you have enough to cover the entire bathroom floor, accounting for any waste or mistakes.
Adhesive: Depending on the type of cork flooring you choose, you may need a suitable adhesive. Some cork flooring options come with a self-adhesive backing, while others require a separate adhesive. Make sure to select an adhesive that is moisture-resistant and recommended for use with cork flooring.
Moisture Barrier: A moisture barrier is essential to protect your cork flooring from potential water damage. This can be a plastic sheet or an underlayment with built-in moisture protection. The moisture barrier prevents moisture from seeping up from the subfloor and damaging the cork.
Cutting Tools: You will need cutting tools to trim the cork planks or tiles to fit around the bathroom fixtures and edges. A utility knife with a sharp blade is ideal for this purpose. A straight edge or a T-square can help ensure precise cuts and straight lines.
Measuring Tools: Accurate measurements are crucial for a successful installation. A measuring tape is essential for measuring the bathroom floor and cutting the cork planks or tiles to the correct size. A chalk line can also help mark straight lines and ensure even placement.
Installation Tools: A rubber mallet is useful for tapping the cork planks or tiles into place without damaging them. Spacers are necessary to maintain consistent gaps around the edges of the room for expansion. A notched trowel is needed for spreading adhesive evenly if you are using a glue-down method.

Step-by-Step Guide to Installing Cork Flooring in a Bathroom
Installing cork flooring in your bathroom can be a rewarding DIY project. Follow this step-by-step guide to ensure a successful and professional installation.
Prepare the Subfloor: Start by ensuring the subfloor is clean, dry, and level. Remove any existing flooring and repair any damage. Install a moisture barrier to protect the cork from potential water damage. Allow the subfloor to dry completely before proceeding.
Acclimate the Cork Flooring: Place the cork planks or tiles in the bathroom for at least 48 hours to acclimate to the room’s temperature and humidity. This step is crucial to prevent expansion or contraction after installation, ensuring a stable and durable floor.
Measure and Plan: Measure the bathroom floor to determine the layout of the cork flooring. Plan the placement of the planks or tiles to minimize cuts and ensure a balanced appearance. Mark straight lines using a chalk line to guide the installation.
Apply Adhesive (if needed): If you are using a glue-down method, apply adhesive to a small section of the subfloor using a notched trowel. Follow the manufacturer’s instructions for the appropriate adhesive and application method. Work in small sections to prevent the adhesive from drying before the cork is placed.
Install the Cork Flooring: Begin laying the cork planks or tiles along the longest wall or a focal point in the room. Use spacers to maintain a small expansion gap around the edges of the room. Fit the planks or tiles together, tapping them gently with a rubber mallet to ensure a snug fit. Continue this process, working your way across the room.
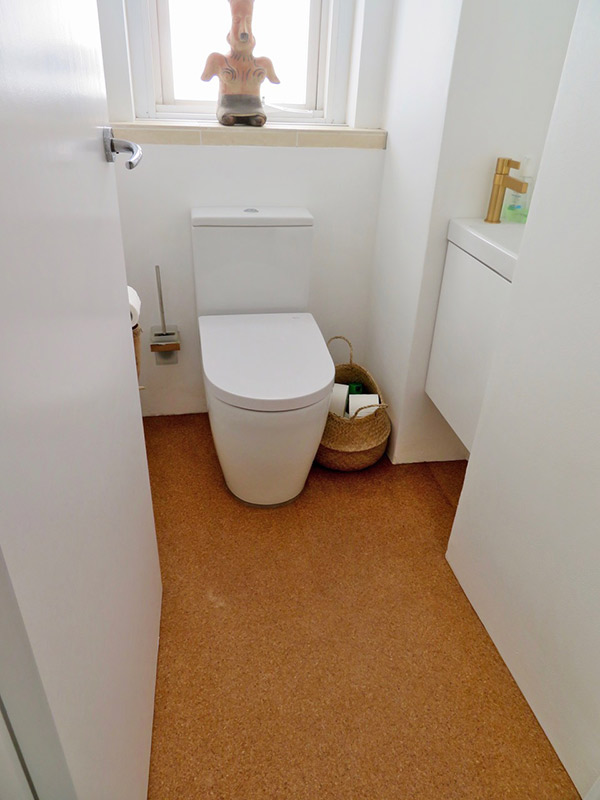
Cut and Fit Around Obstacles: Use a utility knife to cut the cork planks or tiles to fit around bathroom fixtures, such as the toilet and sink. Make precise cuts to ensure a clean and professional finish. Install the cut pieces carefully, ensuring they fit snugly against the obstacles.

Tips for Sealing and Protecting Cork Bathroom Flooring
Sealing and protecting cork flooring in your bathroom is essential to maintain its beauty and durability. Proper sealing helps prevent water damage and extends the lifespan of your flooring.
Choose the Right Sealant: Select a high-quality, water-resistant sealant designed specifically for cork flooring. A polyurethane-based sealant is a popular choice due to its durability and moisture resistance. Ensure the sealant is suitable for bathroom use to provide maximum protection.
Apply Multiple Coats: For optimal protection, apply multiple coats of sealant. Start with a thin, even coat and allow it to dry completely before applying additional layers. Follow the manufacturer’s instructions for drying times and the number of recommended coats. Multiple coats provide a robust barrier against moisture and wear.
Pay Attention to Edges and Seams: Pay extra attention to the edges and seams of the cork flooring, as these areas are more susceptible to water penetration. Ensure the sealant covers all seams and edges thoroughly. Consider using a small brush to reach tight corners and edges for complete coverage.
Allow Proper Drying Time: Allow the sealant to dry completely between coats and after the final application. Proper drying time is crucial to ensure the sealant cures correctly and provides effective protection. Avoid using the bathroom until the sealant is fully dry to prevent any damage to the flooring.
Regular Maintenance: Regularly inspect the sealant for any signs of wear or damage. Reapply the sealant as needed to maintain its protective properties. Depending on the level of use and moisture exposure, the sealant may need to be reapplied every few years to ensure continued protection.
Use Bathroom Rugs and Mats: Place bathroom rugs or mats in high-moisture areas, such as in front of the shower or bathtub, to provide additional protection for your cork flooring. Rugs and mats help absorb excess moisture and prevent water from pooling on the surface of the cork, reducing the risk of water damage.

Maintaining and Caring Tips
Proper maintenance and care are essential to keep your cork bathroom flooring looking its best and lasting for many years. With the right approach, you can preserve its beauty and functionality.
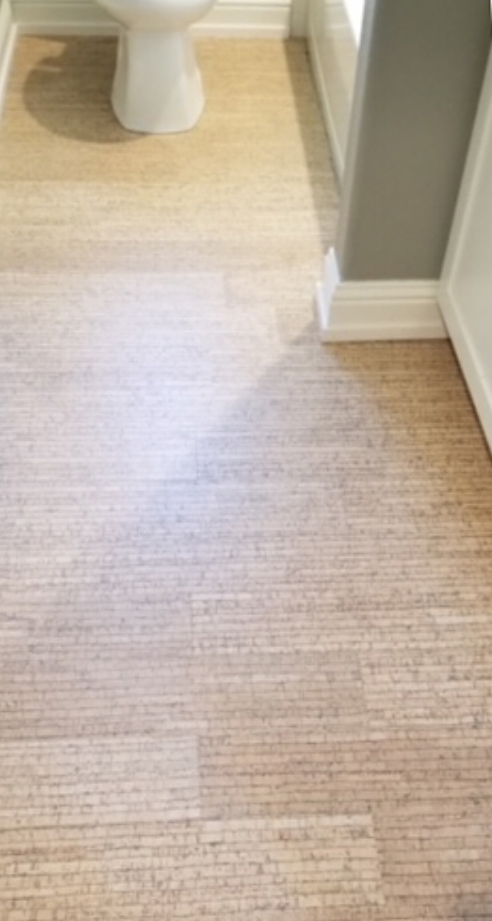
Regular Cleaning: Sweep or vacuum your cork flooring regularly to remove dust and debris. Use a soft-bristle broom or a vacuum with a hardwood floor attachment to avoid scratching the surface. Regular cleaning prevents dirt from accumulating and helps maintain the floor’s appearance.
Avoid Excessive Water: While cork is naturally water-resistant, excessive water can still cause damage. Use a damp mop rather than a wet one for cleaning. Wipe up spills immediately to prevent water from seeping into the seams and causing swelling or warping. Avoid using steam cleaners, as they can introduce too much moisture to the flooring.
Use pH-Neutral Cleaners: When mopping, use a pH-neutral cleaner specifically designed for cork or hardwood floors. Harsh chemicals and abrasive cleaners can damage the sealant and the cork itself. Dilute the cleaner according to the manufacturer’s instructions and avoid using excessive amounts.
Protect from Furniture and Heavy Objects: Place felt pads under the legs of bathroom furniture and fixtures to prevent scratches and dents. Avoid dragging heavy objects across the floor. If you need to move furniture, lift it rather than dragging it to protect the cork from damage.
Regular Inspections: Periodically inspect your cork flooring for any signs of wear, damage, or moisture infiltration. Check the sealant for areas that may need reapplication. Address any issues promptly to prevent further damage and maintain the floor’s integrity.
Reapply Sealant as Needed: Depending on the level of use and moisture exposure, the sealant on your cork flooring may need to be reapplied every few years. Follow the manufacturer’s recommendations for maintenance and resealing. Regular reapplication of sealant helps protect the cork from moisture and extends its lifespan.
Cork Floors for Bathrooms Better
Can Cork Flooring Be Installed in A Bathroom?

Surprising Facts You Need to Know Before Installing Cork

Cork Flooring Materials In Humid Bathroom Conditions
Gray Bamboo – 1/4 Inch (6mm) – Cork Tile Glue Down (Floor And Wall
Best Natural Floors for Bathrooms u2014 Naturlich Flooring
Related Posts: