Why Choose Epoxy for Your Basement Floor? Benefits and Advantages
When considering flooring options for your basement, epoxy often stands out as a leading choice. This versatile and durable solution transforms the basement into a functional, beautiful space while addressing challenges unique to below-ground areas. From moisture resistance to aesthetic appeal, there are countless reasons why epoxy is worth your attention.
- Durability That Withstands Wear and Tear
One of the epoxy’s standout features is its durability. Basements are often used as multi-purpose spaces, housing heavy appliances, storage, or recreational areas. Epoxy’s tough surface resists scratches, impacts, and heavy loads, making it ideal for such environments. Unlike traditional concrete, it won’t chip or crack easily, even under high traffic or pressure. - Moisture Resistance for Below-Ground Spaces
Moisture is a common problem in basements due to their proximity to the ground. Epoxy creates a seamless, non-porous barrier that prevents water from seeping through, protecting your floor and reducing the risk of mold or mildew. This feature is especially beneficial for homes in regions prone to damp conditions. - Easy Maintenance for Long-Term Use
Keeping an epoxy-coated basement floor clean is a breeze. Dust, dirt, and spills can be quickly swept or wiped away without leaving stains or residues. Its smooth, seamless finish eliminates crevices where dirt might accumulate, ensuring the space stays hygienic and visually appealing with minimal effort. - Aesthetic Versatility to Suit Any Style
Epoxy coatings offer endless design possibilities. Whether you prefer a sleek, glossy finish or a decorative look with flakes and patterns, epoxy allows for customization that can transform a plain basement into an inviting, modern space. You can even opt for colors or designs that mimic natural materials like marble or stone. - Increases Home Value
Upgrading your basement with epoxy flooring can enhance the overall value of your home. A well-finished basement is a major selling point for potential buyers, and epoxy adds a polished, professional look that’s both functional and visually appealing. It signals attention to detail and quality. - Cost-Effective in the Long Run
While the upfront cost of epoxy may seem higher than some flooring options, its longevity and low maintenance make it a cost-effective choice. The protective layer reduces the need for repairs and replacements over time, saving you money in the long term.

Tools and Materials You’ll Need for an Epoxy Basement Floor Project
Before diving into your epoxy basement floor project, preparation is essential. Having the right tools, materials, and safety gear on hand can make the process smoother and more efficient. Here’s a detailed checklist to ensure you’re fully equipped for this DIY endeavor.
Essential Tools for Application
Start by gathering the fundamental tools for applying epoxy:
-
- A high-quality roller with an extension pole for even application.
- A paintbrush for edges and corners.
- A mixing drill with a paddle attachment to thoroughly combine the epoxy resin and hardener.
- A squeegee for spreading the epoxy evenly across the surface.
Surface Preparation Tools
Preparing the concrete is a critical step, requiring specific tools:
-
- A stiff-bristled broom or vacuum to remove dust and debris.
- A floor grinder or concrete etcher to smooth and prepare the surface for better adhesion.
- A patching compound for filling cracks and holes in the concrete.
Protective Gear for Safety
Safety should never be overlooked during a DIY project involving chemicals. Essential safety gear includes:
-
- Gloves to protect your hands from the epoxy mixture.
- Safety goggles to shield your eyes from splashes.
- A respirator mask to avoid inhaling fumes during mixing and application.
Materials for the Epoxy Process
You’ll need the following materials:
-
- Epoxy resin and hardener (choose a kit appropriate for your floor size).
- Decorative flakes or pigments if you want a custom look.
- A topcoat for added durability and shine.
Cleaning Supplies
To prepare and maintain the work area, gather:
-
- A bucket for cleaning solutions.
- Degreaser for removing oil or grease spots.
- Rags and sponges for wiping spills or cleaning edges.
Optional Add-Ons
Depending on your design preferences, you might also need:
-
- Slip-resistant additives to improve safety on glossy surfaces.
- Masking tape to mark off edges and avoid accidental coating of walls.
Having all the necessary tools and materials ready ensures a smoother application process and minimizes the risk of delays. Proper preparation is half the battle, setting the stage for a successful epoxy floor transformation.
Preparing Your Basement Floor: Cleaning, Repairs, and Surface Readiness
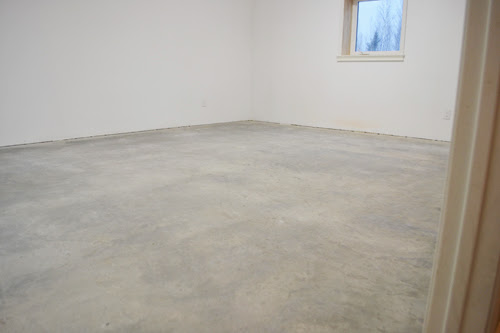
The success of your epoxy basement floor project hinges on proper surface preparation. A well-prepared floor ensures that the epoxy adheres properly, resulting in a long-lasting and professional-looking finish. Neglecting this critical step can lead to peeling, bubbling, or other issues down the line. Here’s a comprehensive guide to getting your basement floor ready for epoxy coating.
Thoroughly Clean the Floor
The first step is to clean your basement floor meticulously. Use a stiff-bristled broom or a vacuum cleaner to remove dust, dirt, and debris. For grease or oil stains, apply a degreaser and scrub the area thoroughly. Rinse the floor with water and let it dry completely. Remember, even small particles or residues can interfere with epoxy adhesion, so take your time with this step.
Inspect the Surface for Cracks and Imperfections
Once the floor is clean, examine it for cracks, chips, or holes. These imperfections need to be repaired before applying epoxy. Use a high-quality concrete patching compound to fill any gaps or cracks, following the manufacturer’s instructions. Smooth out the patched areas with a trowel to ensure an even surface.
Test for Moisture
Basements are prone to moisture issues, which can compromise the performance of epoxy coatings. Conduct a simple moisture test by taping a square of plastic sheeting to the floor and leaving it for 24 hours. If condensation forms underneath, your floor may need a moisture barrier or additional treatment before proceeding with the epoxy application.
Etch the Concrete Surface
Etching is a crucial step that opens up the pores of the concrete, allowing the epoxy to bond effectively. Use a concrete etching solution, typically made of mild acid, and apply it evenly across the floor. Follow safety guidelines by wearing gloves, goggles, and a respirator. After etching, rinse the floor thoroughly and let it dry completely.
Smooth the Surface with a Grinder (If Necessary)
If your floor is uneven or has an old coating, consider using a floor grinder to smooth the surface. Grinding ensures uniformity and removes any remnants of previous coatings. Once the grinding is complete, vacuum up the dust and wipe down the surface to remove any lingering particles.
Final Inspection and Prep Work
Before you start applying epoxy, double-check your floor to ensure it’s clean, dry, and smooth. Mask off areas you don’t want to coat, such as walls or drains, using painter’s tape. This final round of preparation ensures you’re ready for a seamless application process.
Proper preparation might seem time-consuming, but it’s the foundation for a successful epoxy floor project. By taking these steps, you set yourself up for a durable and visually stunning finish that will last for years.
Choosing the Right Epoxy: Types, Finishes, and What to Consider
Not all epoxy coatings are created equal. Choosing the right type of epoxy for your basement floor involves evaluating your needs, design preferences, and budget. With various options available, from basic coatings to high-end finishes, making the right choice can feel overwhelming. Let’s break it down to simplify the decision-making process.
Understanding the Types of Epoxy
There are three main types of epoxy coatings to consider:
-
- Water-Based Epoxy: Ideal for DIY projects due to its ease of application and lower odor levels. While not as durable as other options, it’s perfect for light-traffic areas.
- Solvent-Based Epoxy: Offers better durability and adhesion but requires proper ventilation during application due to its strong fumes.
- 100% Solids Epoxy: The most durable and professional-grade option. It creates a thick, hard coating but is best applied by experienced DIYers or professionals.
Choosing the Finish
The finish of your epoxy floor significantly affects its appearance and functionality. Glossy finishes create a sleek, modern look, while matte finishes are more understated. If safety is a concern, consider a textured finish with slip-resistant additives for better traction.
Consider the Color Palette
Epoxy coatings come in a wide range of colors, from neutral tones like gray and beige to bold options like blue or red. Choose a color that complements the intended use of the space. For basements used as recreational rooms, vibrant colors can add energy, while neutral tones work well for storage areas.
Explore Decorative Options
If you want to elevate the aesthetic of your basement, explore decorative epoxy coatings. These include metallic finishes, quartz-infused coatings, and systems that mimic the look of marble or stone. Adding flakes or pigments can also create a unique and customized look.
Factor in Durability Requirements
Consider the level of durability you need. For basements that will house heavy equipment or vehicles, opt for a high-strength epoxy like 100% solids. For lighter use, a water-based or solvent-based option may suffice.
Budget and Longevity
High-end epoxy coatings are more expensive but offer greater durability and visual appeal. While budget-friendly options are available, they may require more frequent maintenance or replacement. Think about the long-term value and choose accordingly.
Selecting the right epoxy is a balance of functionality, aesthetics, and budget. By understanding your specific needs and the options available, you can make an informed decision that ensures a successful and satisfying outcome.
Mixing the Epoxy: Getting the Ratio and Technique Just Right
Mixing epoxy is one of the most critical steps in the application process. The resin and hardener must be combined in precise proportions to ensure proper curing and long-lasting results. Incorrect mixing can lead to issues such as uneven curing, bubbling, or a weak finish. Let’s break down the steps and techniques for mixing epoxy correctly.
Understand the Components of Epoxy
Epoxy coatings typically consist of two components: the resin and the hardener. These parts are designed to chemically react when mixed, creating a durable, solid surface. Each product will have specific instructions for the proper mixing ratio, often indicated on the packaging (e.g., 2:1 or 1:1). Always read these instructions thoroughly before beginning.
Use the Right Mixing Tools
To ensure a consistent blend, you’ll need:
- A mixing container, preferably with clear volume markings.
- A mixing drill with a paddle attachment helps thoroughly combine the resin and hardener.
- Disposable mixing sticks or spatulas for smaller batches or edge touch-ups.
Avoid using household tools like wooden spoons, as they may not provide the uniform consistency required.
Measure Accurately for Optimal Results
Precision is key when mixing epoxy. Use measuring cups to pour the exact amounts of resin and hardener as specified by the manufacturer. Even a slight deviation in the ratio can affect the curing process, leading to either a sticky or brittle finish. Mark the measurements beforehand to avoid mistakes.
Mix Thoroughly but Quickly
Once the resin and hardener are in the mixing container, use your drill and paddle to mix them thoroughly. Move the paddle in circular motions, ensuring you scrape the sides and bottom of the container to incorporate all the material. Most epoxies require 2–5 minutes of mixing but refer to your product’s instructions for specifics. Work quickly but carefully, as epoxy begins to cure once mixed.
Watch for Color and Consistency Changes
As you mix, you’ll notice the epoxy changing from cloudy to clear or developing a consistent texture, depending on the type of product. This indicates that the components are blending correctly. If the mixture appears lumpy or uneven, continue mixing until the consistency smooths out.
Plan for Pot Life
Pot life refers to the amount of time you have to work with the mixed epoxy before it begins to harden. This window can range from 20 minutes to an hour, depending on the product and room temperature. To avoid wasting material, only mix the amount you can apply within the pot life timeframe. If you’re working on a large area, consider mixing smaller batches as you go.
Mixing epoxy may seem straightforward, but attention to detail and proper technique make all the difference. By following these steps, you’ll set the stage for a successful application and a professional-quality finish.
Applying the First Coat: Techniques for an Even and Smooth Layer
The first coat of epoxy is critical to achieving a strong bond and a flawless finish. Proper application techniques help ensure even coverage, prevent bubbles, and establish a solid base for subsequent layers. Here’s how to apply the first coat like a pro.
Prime the Floor for Better Adhesion
Some epoxy products include a primer layer to enhance adhesion between the concrete and the epoxy. Priming also helps seal the concrete, reducing the risk of bubbles caused by trapped air. Apply the primer evenly with a roller, allowing it to dry according to the manufacturer’s instructions before proceeding to the base coat.
Mix the Base Coat
Before applying the first coat, prepare your epoxy mixture as described in the previous section. Ensure the resin and hardener are thoroughly combined, and work within the pot life of the product to prevent the epoxy from hardening prematurely.
Start with the Edges
Use a paintbrush to apply the epoxy along the edges of the floor where a roller cannot reach. This step, known as “cutting in,” ensures a seamless application and prevents gaps along the perimeter. Be precise and avoid overloading the brush, which can lead to drips.
Roll the Epoxy Evenly Across the Floor
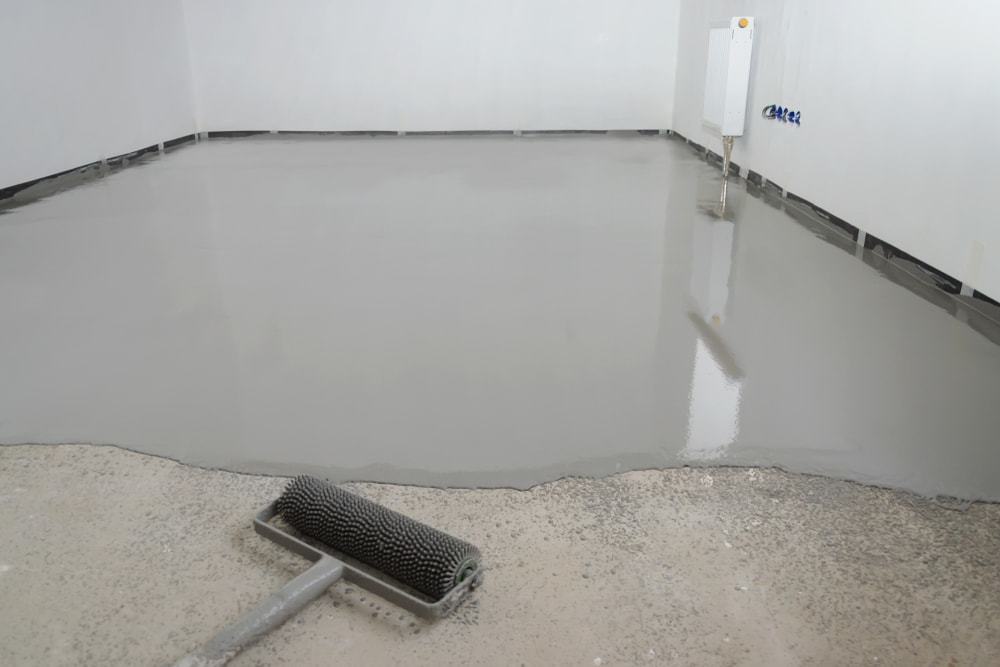
After the edges are complete, use a roller with a long extension pole to apply the epoxy to the main surface. Work in small sections, rolling the epoxy in a crisscross pattern to distribute it evenly. Avoid leaving puddles or streaks, as these can affect the appearance and durability of the finish.
Monitor for Bubbles or Imperfections
As you apply the epoxy, keep an eye out for bubbles, which can form due to trapped air or overmixing. Use a spiked roller to eliminate bubbles while the epoxy is still wet. Smooth out any uneven areas immediately, as epoxy begins to cure quickly.
Allow Proper Drying Time
Once the first coat is applied, allow it to dry completely according to the manufacturer’s guidelines. This drying period, often referred to as the “curing time,” is essential for establishing a strong bond between the epoxy and the concrete. Avoid walking on the surface or applying additional layers until the first coat is fully set.
The first coat of epoxy serves as the foundation for the entire project, so precision and care are vital. By following these techniques, you’ll achieve a smooth and professional-looking base layer that’s ready for decorative elements or additional coats.
Adding Decorative Flakes or Designs for a Custom Look
Epoxy is not just about functionality—it’s also a canvas for creativity. One of the best aspects of applying epoxy to your basement floor is the opportunity to incorporate decorative flakes, pigments, or patterns that can transform the look of the space. These decorative elements can add texture, color, and a custom flair to your floor, elevating it from plain to extraordinary. Here’s how you can add these special touches.
Choosing the Right Decorative Elements
There are several options when it comes to customizing your epoxy floor.
-
- Decorative Flakes: These are small, colorful chips of vinyl or other materials that you can scatter across the freshly applied epoxy coat. They come in a variety of colors, sizes, and textures, allowing for endless design possibilities.
- Metallic Pigments: Metallic or pearlescent pigments can be mixed into the epoxy resin before application, giving your floor a dynamic, shimmering look. These pigments reflect light differently, depending on the angle, creating a sophisticated, high-end finish.
- Mica or Quartz Additives: If you want a more natural stone look, consider adding quartz or mica aggregates. These provide a subtle, textured finish and can mimic the look of granite or marble.
When to Apply the Decorative Elements
Timing is crucial when adding flakes or pigments. You should apply decorative flakes while the base coat is still wet but not dripping. This allows the flakes to adhere properly to the surface. If you wait too long, the epoxy may be too dry for the flakes to stick. Similarly, for metallic pigments, mix them into the epoxy resin before applying it to ensure even distribution.
Even Distribution of Flakes
When sprinkling flakes, use a consistent technique to avoid clumping or uneven coverage. Start at one end of the room and work your way across, tossing the flakes gently from a height of about 6–12 inches. Ensure that the flakes are evenly distributed but don’t overcrowd the surface. You can always apply additional layers if needed.
Layering and Customizing Designs
If you want to create specific patterns or designs, you can do so by applying different colors or types of flakes in layers. For example, you could use one color for the main part of the floor and another for borders or accents. If you prefer a more structured design, you can use masking tape to create lines or geometric shapes before applying the flakes or pigments.
Using a Clear Topcoat for Protection
After adding your decorative elements, it’s essential to apply a clear topcoat. This serves two purposes: protecting your design and enhancing the visual appeal of the floor. A glossy topcoat will bring out the vibrant colors of the flakes or pigments and add a smooth, shiny finish to your floor. It also adds an extra layer of protection against wear and tear, ensuring your design lasts.
Caring for Your Custom Epoxy Floor
Once your decorative floor is complete, it’s important to maintain it properly. Although the decorative flakes or pigments are durable, they still need some care to stay vibrant. Regular cleaning with mild detergents and non-abrasive tools will keep the surface looking fresh. Be mindful not to drag heavy furniture or equipment across the floor, as this could damage the design.
By adding decorative flakes or pigments to your epoxy floor, you can completely transform the look of your basement, turning it into a beautiful, unique space. Whether you prefer a subtle design or something bold and vibrant, the possibilities are limitless.
Sealing the Surface: Applying the Topcoat for Durability and Shine
After applying the epoxy base coat and any decorative elements, the next essential step is applying the topcoat. The topcoat not only seals and protects the floor but also enhances its overall appearance, providing a smooth, glossy finish. Let’s walk through the process of applying a topcoat and why it’s a critical part of your epoxy project.
Why You Need a Topcoat
The topcoat is the final protective layer that seals in your work and ensures your epoxy floor remains durable over time. It adds a layer of shine and makes cleaning easier. Without a topcoat, your floor may be more susceptible to damage from scratches, stains, and moisture. It also helps lock in any decorative elements or flakes you’ve applied, preserving their appearance.
Choosing the Right Topcoat
Similar to choosing your epoxy base coat, selecting the right topcoat depends on your needs. Most epoxy kits come with a compatible topcoat, but you can also choose from several options:
-
- Clear Polyurethane Topcoat: Provides a glossy finish and adds extra durability.
- Matte or Satin Topcoat: If you prefer a non-reflective finish, these options give your floor a more subtle sheen.
- Slip-Resistant Topcoat: For added safety, especially if the basement is used as a workshop or gym, a slip-resistant topcoat adds texture to prevent slipping.
Application of the Topcoat
Before applying the topcoat, ensure that the base coat and any decorative layers are fully cured. If the base coat is still tacky, the topcoat may not adhere properly. Use a clean roller with an extension pole to apply the topcoat evenly. Start from one corner of the room and work your way out to avoid stepping on freshly coated areas.
Smooth and Even Coating
Similar to the base coat, apply the topcoat in thin, even layers to avoid pooling or streaks. Be sure to roll the topcoat across the surface in a crisscross motion to ensure even coverage. Pay special attention to edges, where drips may form. For a uniform finish, don’t overload the roller with too much topcoat at once.
Allowing Proper Drying Time
The drying time for the topcoat is usually shorter than for the base coat, but it still requires careful attention. Allow the topcoat to dry for at least 24 hours before walking on it. For full curing, it may take up to 72 hours, depending on the product and temperature. Avoid placing heavy furniture or equipment on the floor until it’s fully cured.
Final Inspection and Touch-Ups
After the topcoat has dried, inspect your floor for any imperfections. If you notice any streaks, missed spots, or imperfections, lightly sand the area with fine-grit sandpaper and apply another thin layer of topcoat. Ensure that the floor is even and smooth before using the space.
The topcoat is the final layer of protection for your epoxy floor, enhancing its durability and ensuring your design stays intact. By applying a clear, protective finish, you guarantee that your floor will maintain its vibrant look and stand up to the test of time.
Curing Time and Post-Installation Tips: What to Expect
Once you’ve applied the epoxy base coat, decorative flakes, and topcoat, you’re almost finished! However, before you can enjoy your beautiful new floor, you need to allow proper curing time. The curing process is essential for the epoxy to fully harden and reach its maximum durability. Understanding the curing timeline and following some key post-installation tips will help ensure the longevity of your epoxy floor. Let’s dive into what you can expect during this phase.
What Is Curing Time?
Curing time refers to the period during which the epoxy undergoes a chemical reaction and hardens completely. While drying time refers to the surface becoming dry to the touch, curing time is the period necessary for the epoxy to achieve its full strength and durability. Depending on factors like the type of epoxy used, the ambient temperature, and humidity levels, the curing time can vary.
Drying vs. Curing: What’s the Difference?
It’s important to distinguish between drying and curing. Drying simply means the epoxy is no longer tacky to the touch, but it may not yet have achieved its full strength. Curing, on the other hand, is when the chemical bond forms between the resin and hardener, and the floor becomes fully solid. This process can take anywhere from 24 hours to several days. Make sure you don’t confuse the two, as walking or placing heavy items on a floor that hasn’t fully cured can cause permanent damage.
Recommended Curing Times
The typical curing time for epoxy floors ranges from 24 to 72 hours, but this can be influenced by various factors:
-
- Temperature: Epoxy cures faster in warmer temperatures. If your basement is too cold, it may take longer for the floor to cure. Ideally, the temperature should be between 60°F (15°C) and 85°F (29°C).
- Humidity: High humidity can slow down the curing process. If possible, use fans to increase airflow and reduce humidity in the space.
- Type of Epoxy: Some epoxy products are designed for quicker curing, while others may take longer for optimal results. Always follow the manufacturer’s instructions to ensure you’re allowing enough time.
Avoid Foot Traffic and Equipment
During the curing period, it’s essential to avoid any foot traffic on the floor. While you may be able to walk on the floor after the first 24 hours, it’s best to wait 72 hours for full curing. Any pressure applied to the surface before it’s completely cured can leave marks, scratches, or indentations that are difficult or impossible to remove.
-
- Do not place heavy furniture or equipment on the floor until it is fully cured, as this can leave permanent dents or damage to the surface.
Protecting the Floor During the Curing Process
While the epoxy is curing, take extra precautions to protect the floor from dust, dirt, and debris. Even though the floor may be dry to the touch, it’s still vulnerable during the curing period. Consider covering the floor with a clean tarp or plastic sheeting to keep it safe from accidental scratches or contaminant exposure.
If the basement is being used as a workspace, try to keep the area clear of heavy objects and tools until the floor is completely set.
Final Inspection
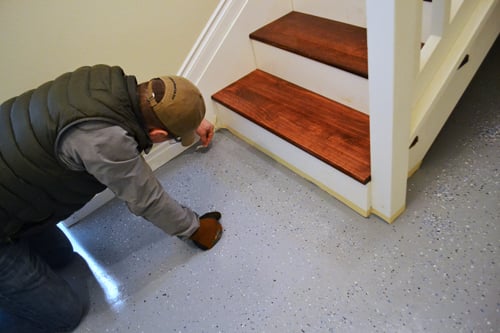
After the recommended curing period, perform a final inspection of the epoxy floor. Check for any imperfections, such as missed spots or bubbles, and assess the overall look of the finish. If you notice any issues, you can lightly sand the affected areas and apply a touch-up coat of epoxy or clear topcoat to fix the problem. Once the floor is fully cured and flawless, it’s ready to be used and enjoyed.
Proper curing is key to achieving the full potential of your epoxy basement floor. By allowing enough time for the floor to cure completely, you’ll ensure it’s durable, functional, and ready for years of use.
Common DIY Mistakes and How to Avoid Them
Even with the best intentions, it’s easy to make mistakes when applying epoxy to your basement floor. Epoxy projects require attention to detail, and one small misstep can impact the final result. Let’s look at some of the most common DIY mistakes and how to avoid them, ensuring your epoxy floor turns out perfectly.
Not Properly Preparing the Surface
One of the most frequent errors people make is neglecting proper surface preparation. Without cleaning, etching, and repairing the concrete, the epoxy won’t adhere well and may peel or bubble over time.
-
- How to Avoid It: Take your time to thoroughly clean and prepare the floor, repair any cracks or imperfections, and etch the surface properly. This is the foundation of your project, so don’t rush through it.
Incorrect Mixing Ratio
Epoxy must be mixed in the correct ratio of resin to hardener to ensure it cures properly. If the mixture is off, it can lead to issues such as sticky spots or uneven curing.
-
- How to Avoid It: Always follow the manufacturer’s instructions on the mixing ratio. Use accurate measuring tools and mix thoroughly to avoid inconsistency in the mixture.
Applying Epoxy in the Wrong Conditions
Epoxy should be applied in ideal conditions—typically in temperatures between 60°F and 85°F and in low humidity. If applied in too cold or too hot an environment, the epoxy may not cure correctly, leading to an unsatisfactory finish.
-
- How to Avoid It: Check the weather and temperature conditions before starting the project. If you’re working in a basement that tends to be humid or cold, consider using fans or space heaters to control the environment.
Rushing the Drying and Curing Process
A common mistake is not allowing sufficient time for the epoxy to dry and cure properly. Walking on the floor or placing heavy objects on it before it’s fully cured can cause permanent damage.
-
- How to Avoid It: Be patient. Allow the epoxy to cure for the full recommended time, and resist the temptation to rush the process. Keep the area clear of foot traffic and heavy equipment until it’s ready.
Not Using Enough Epoxy
Epoxy should be applied in sufficient quantities to ensure an even and consistent coating. Using too little epoxy can result in a thin, patchy surface that is more prone to damage.
-
- How to Avoid It: Follow the manufacturer’s guidelines for coverage, and ensure that you have enough product for the entire floor. If in doubt, buy extra to avoid running out halfway through the application.
Overloading the Roller or Brush
Overloading your roller or brush with too much epoxy can cause streaks, drips, or an uneven finish. Applying too much product at once can also cause it to pool in certain areas, leading to an unattractive surface.
-
- How to Avoid It: Apply epoxy in thin, even coats. Use the roller to spread the material evenly, and don’t overload the tools with too much product. It’s better to apply multiple thin layers than one thick layer.
Not Using Protective Gear
Epoxy resins and hardeners contain chemicals that can be harmful to your skin and respiratory system. Not using protective gloves, goggles, and a respirator is a serious safety mistake.
-
- How to Avoid It: Always wear appropriate safety gear, including gloves, goggles, and a mask. Work in a well-ventilated area, and consider using fans or opening windows for extra airflow.
By being aware of these common mistakes and taking the necessary precautions, you can avoid these pitfalls and achieve a flawless epoxy basement floor. Careful preparation, patience, and attention to detail are the keys to success.
Epoxy Flooring Ideas to Extend the Life of Your Floors
Related Posts:
