Basement floor covering is among the final things you think about when finishing a basement. These include tiers of composite materials, different rubbers as well as connectible flooring products and more. This’s why having your basement checked for dampness accumulation is essential to the proper functioning of the brand new flooring you wish to have put in.
Images about How To Install Shower Drain In Basement Floor
How To Install Shower Drain In Basement Floor?
On some other hand, ceramic tile or even waterproofed organic hardwood are preferred components since they’re resistant to this particular kind of damage. Moreover, in case you ensure the floor of yours is fitted properly, you will encounter fewer problems with the downstairs room flooring in the future. These tests can generally be realized in many hardware stores.
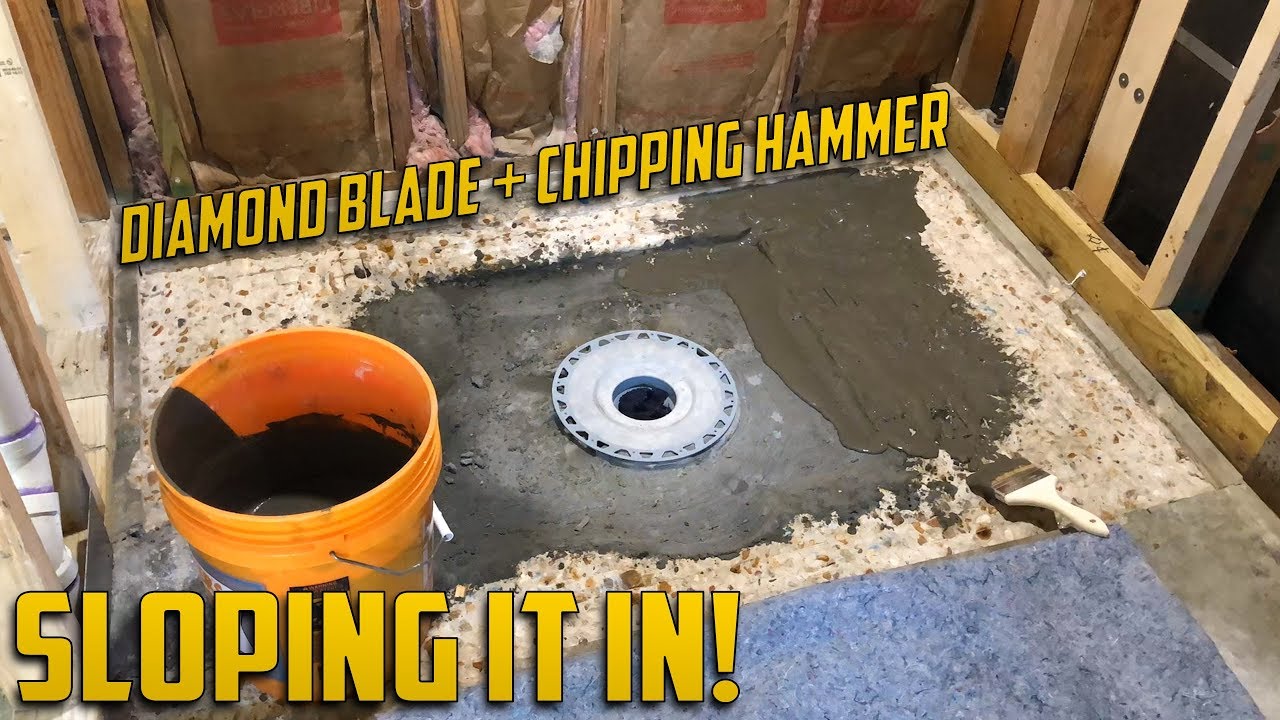
Installing a Curbless Shower on a Concrete Slab
Immediately after 1 day or perhaps so, look to determine if any moisture accumulated underneath the plastic sheet. Nonetheless, in terms of picking a floor covering for basements, your choice is usually a sensible or even pricey one. It’s a good deal of area that is generally out of the manner in which.
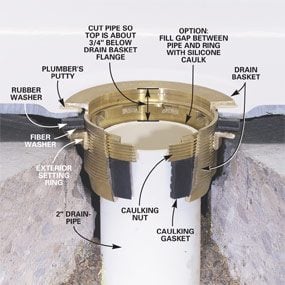
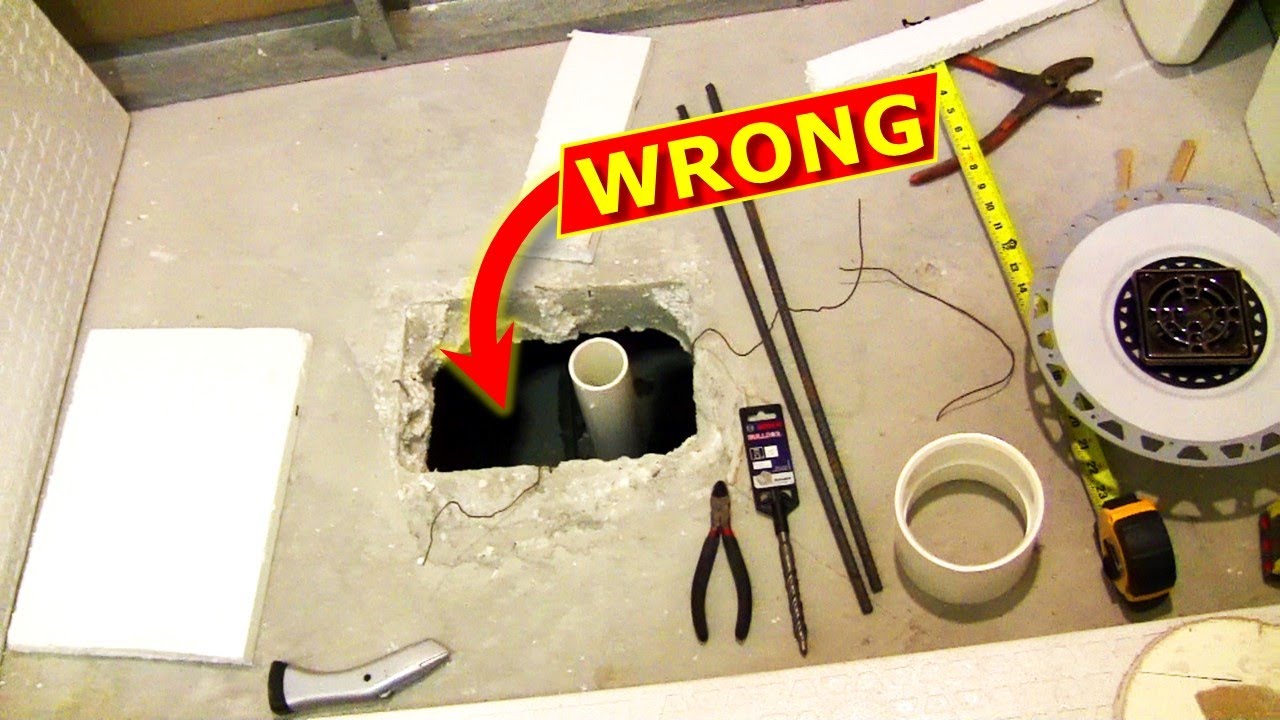
Shower drain flush with concrete floor- help! – Ceramic Tile

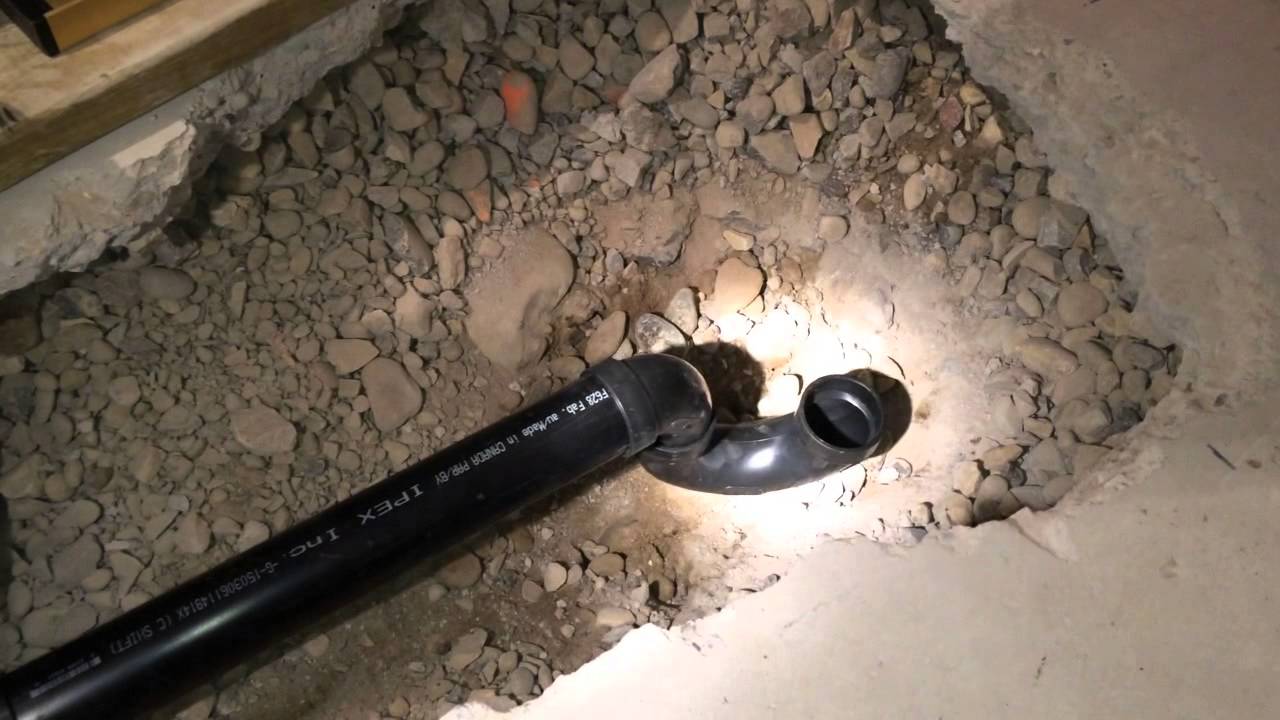
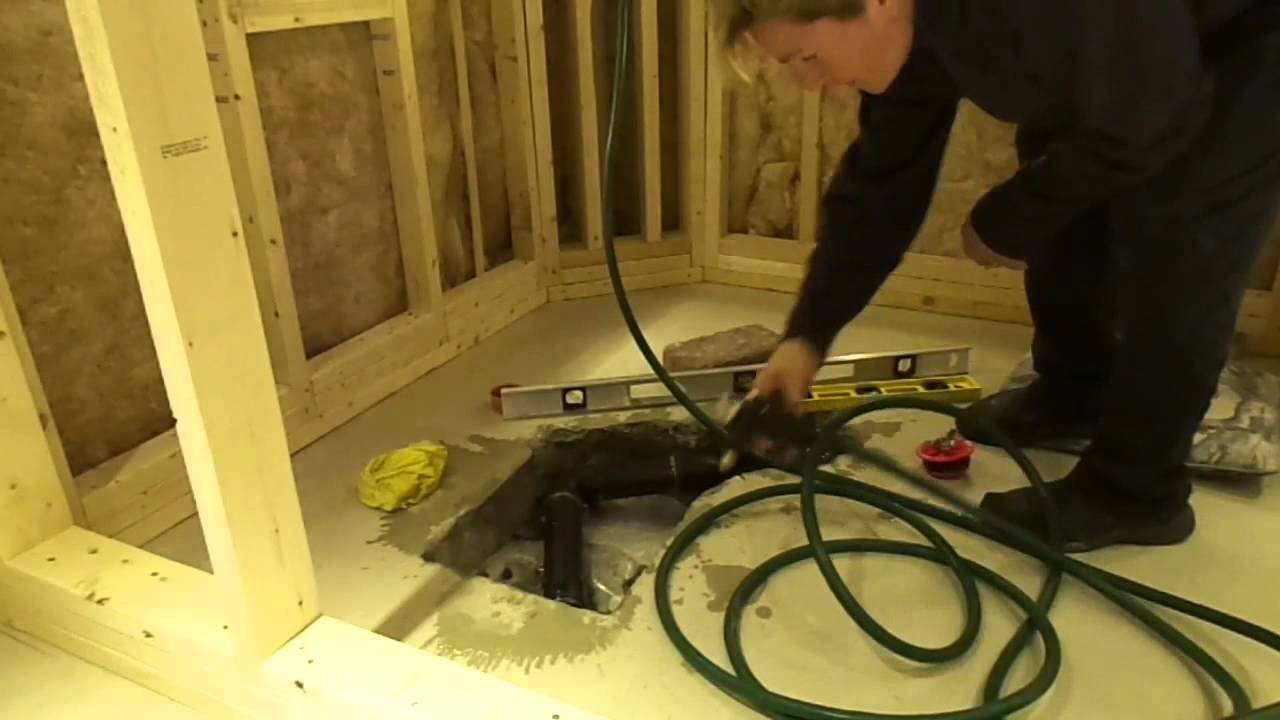
Moving a shower/bath drain in basement concrete
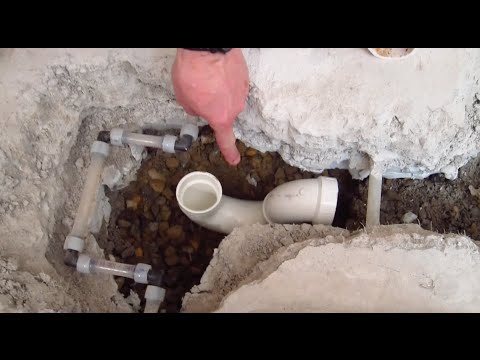
How to Install Shower Drain Pipe Part 1
Basement Floor Drain as Shower Drain? Terry Love Plumbing Advice
shower drain concrete slab issue – DoItYourself.com Community Forums

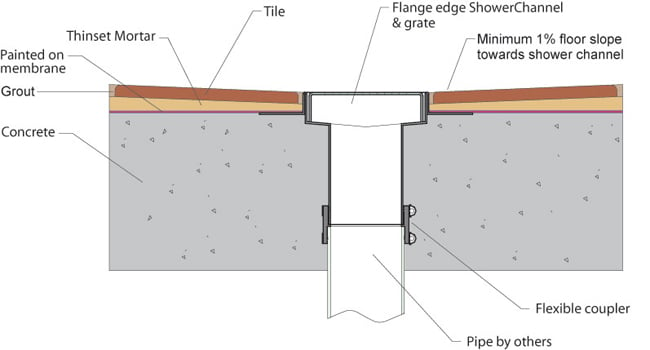
Shower Channel Concrete Slab Installation Flooring Supply Shop Blog
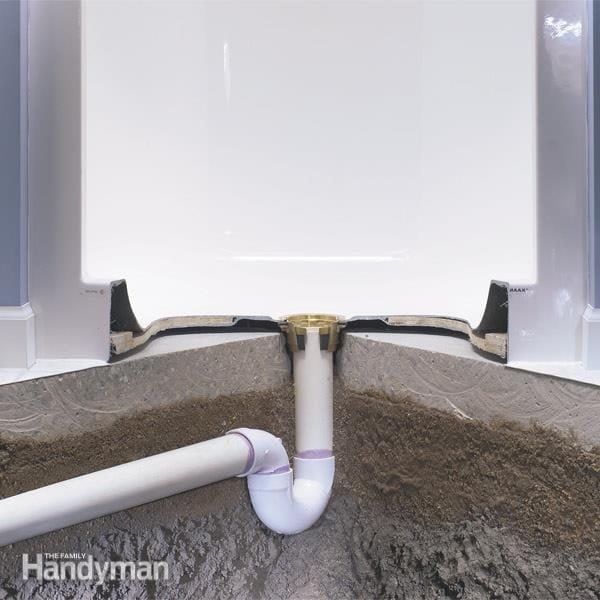
How to Install a Fiberglass Base Over Concrete (DIY) Family Handyman
Plumbing Tips: Stop Shower Drain Pipe Breaks! Fill In Boxout
How to level a concrete floor with self-leveling concrete

How to install a shower drain in a cement floor
How to Install a Basement Bathroom – This Old House
/cdn.vox-cdn.com/uploads/chorus_asset/file/19498305/richard_basement_bath.jpg)
Solution for this offset shower drain?
Related Posts:
- Vinyl Plank Flooring Basement Installation
- Basement Floor Insulation
- Tile Basement Flooring
- Concrete Basement Floor
- Cleaning Concrete Basement Floor
- Wood Basement Floor
- Basement Laminate Flooring Ideas
- Basement Floor Coating
- Luxury Basement Floor
- Epoxy Paint Basement Floor
How To Install Shower Drain In Basement Floor
Installing a shower drain in a basement floor can be a difficult and time-consuming task, but it is well worth the effort. Taking the time to do it correctly will ensure that the drain works properly and that there won’t be any leaking or flooding in the future. This guide will provide an overview of the steps involved in installing a shower drain in a basement floor.
Gathering Your Supplies
The first step is to gather all of the supplies you will need to complete the project. You will need a shower drain, a drain pan, some PVC piping, drill bits, a hammer, screwdrivers, pliers, and possibly other items depending on the size and complexity of your project. Make sure that you have all of the necessary supplies before you begin.
Locating the Drain
Once you have all of your supplies, you need to locate the drain in the basement floor. The best place to start is by measuring the distance from one side of the room to the other and then dividing it in half. This will give you an approximate location for your drain. Make sure to measure twice before drilling any holes as this could result in costly mistakes. After you have located where you would like to install the drain, you can begin to mark out the area for drilling using a pencil or marker.
Drilling Holes
Once you have marked out your area, it’s time to begin drilling. Using a hammer and drill bit, make two holes at the points you marked on the floor for your drain. The size of the holes should match up with whatever type of drain pan or other plumbing fixtures you are using. For example, if you are using a 2-inch diameter pipe for your shower drain, then your drill bit should also be 2 inches in diameter. Once your holes are drilled, you can use pliers to remove any debris or dirt from inside them.
Installing Piping
Now that you have drilled all of your holes, it’s time to start installing your piping. Start by inserting one end of your PVC piping into one of the holes and tightening it with pliers or a wrench. Then place the other end of the pipe into the other hole and secure it with pliers or a wrench as well. Make sure that all connections are tight so that there are no leaks when running water through them.
Adding Drain Pan
Once your pipes are installed, it’s time to add your drain pan. Place the drain pan onto the PVC piping and secure it using screws or bolts, depending on what type of pan you purchased. Once securely attached, add any additional sealant or caulking around the edges of the pan to ensure that there are no leaks.
Final Touches
Once everything is in place and secure, it’s time for some final touches before testing out your new shower drain system. Add any necessary trim pieces around the edges of your pan and/or pipes so that they look neat and professional when completed. You may also want to add some silicone sealant around any areas where water could potentially leak out such as joints or seams in order to prevent any water damage in case of an emergency or accident.
Testing It Out
Now that everything is installed properly, it’s time to test out your new shower drain system by running water through it. Make sure that all connections are tightly secured before doing so and then turn on a faucet in another part of your home and let it run for several minutes at least. If everything is working properly, then you should see water draining from your shower drain without any issues or problems.
FAQs:
Q: What type of drill bit do I need for installing a shower drain?
A: The size of drill bit you need will depend on what type of piping you are using for your shower drain installation project. Generally speaking, if you are using PVC piping then you will need a drill bit that is equal in size to whatever diameter pipe you are using (e.g., 2-inch pipe = 2-inch drill bit).
Q: Do I need any additional