Laying tile flooring is an excellent way to enhance the aesthetics and functionality of any space. Whether you’re renovating your home or revamping a commercial property, tile flooring offers a durable and stylish solution. However, the process of laying tile requires careful planning and precise execution. In this article, I will explore various ways to lay tile flooring, from preparation to installation, ensuring a successful and visually appealing result.
Surface Preparation
Before starting any tile installation project, thorough surface preparation is crucial. Start by cleaning the subfloor or existing flooring, and removing any debris, dust, or old adhesives. Ensure the surface is flat, level, and dry to provide a stable foundation for the tile. If the subfloor is uneven, consider using a self-leveling compound to create a smooth surface.
Next, determine the layout of the tiles by marking guidelines using chalk lines. This will help you visualize how the tiles will fit in the space and make adjustments before permanently setting them. Take accurate measurements and plan the layout to avoid having tiny, awkward tile cuts near walls or corners.
Choosing the Right Adhesive
Selecting the appropriate adhesive is vital to the success and longevity of your tile flooring. The choice of adhesive depends on the type of tiles and the substrate material. For example, thin-set mortar is commonly used for ceramic and porcelain tiles, while mastic adhesive is suitable for smaller tiles in low-moisture areas.
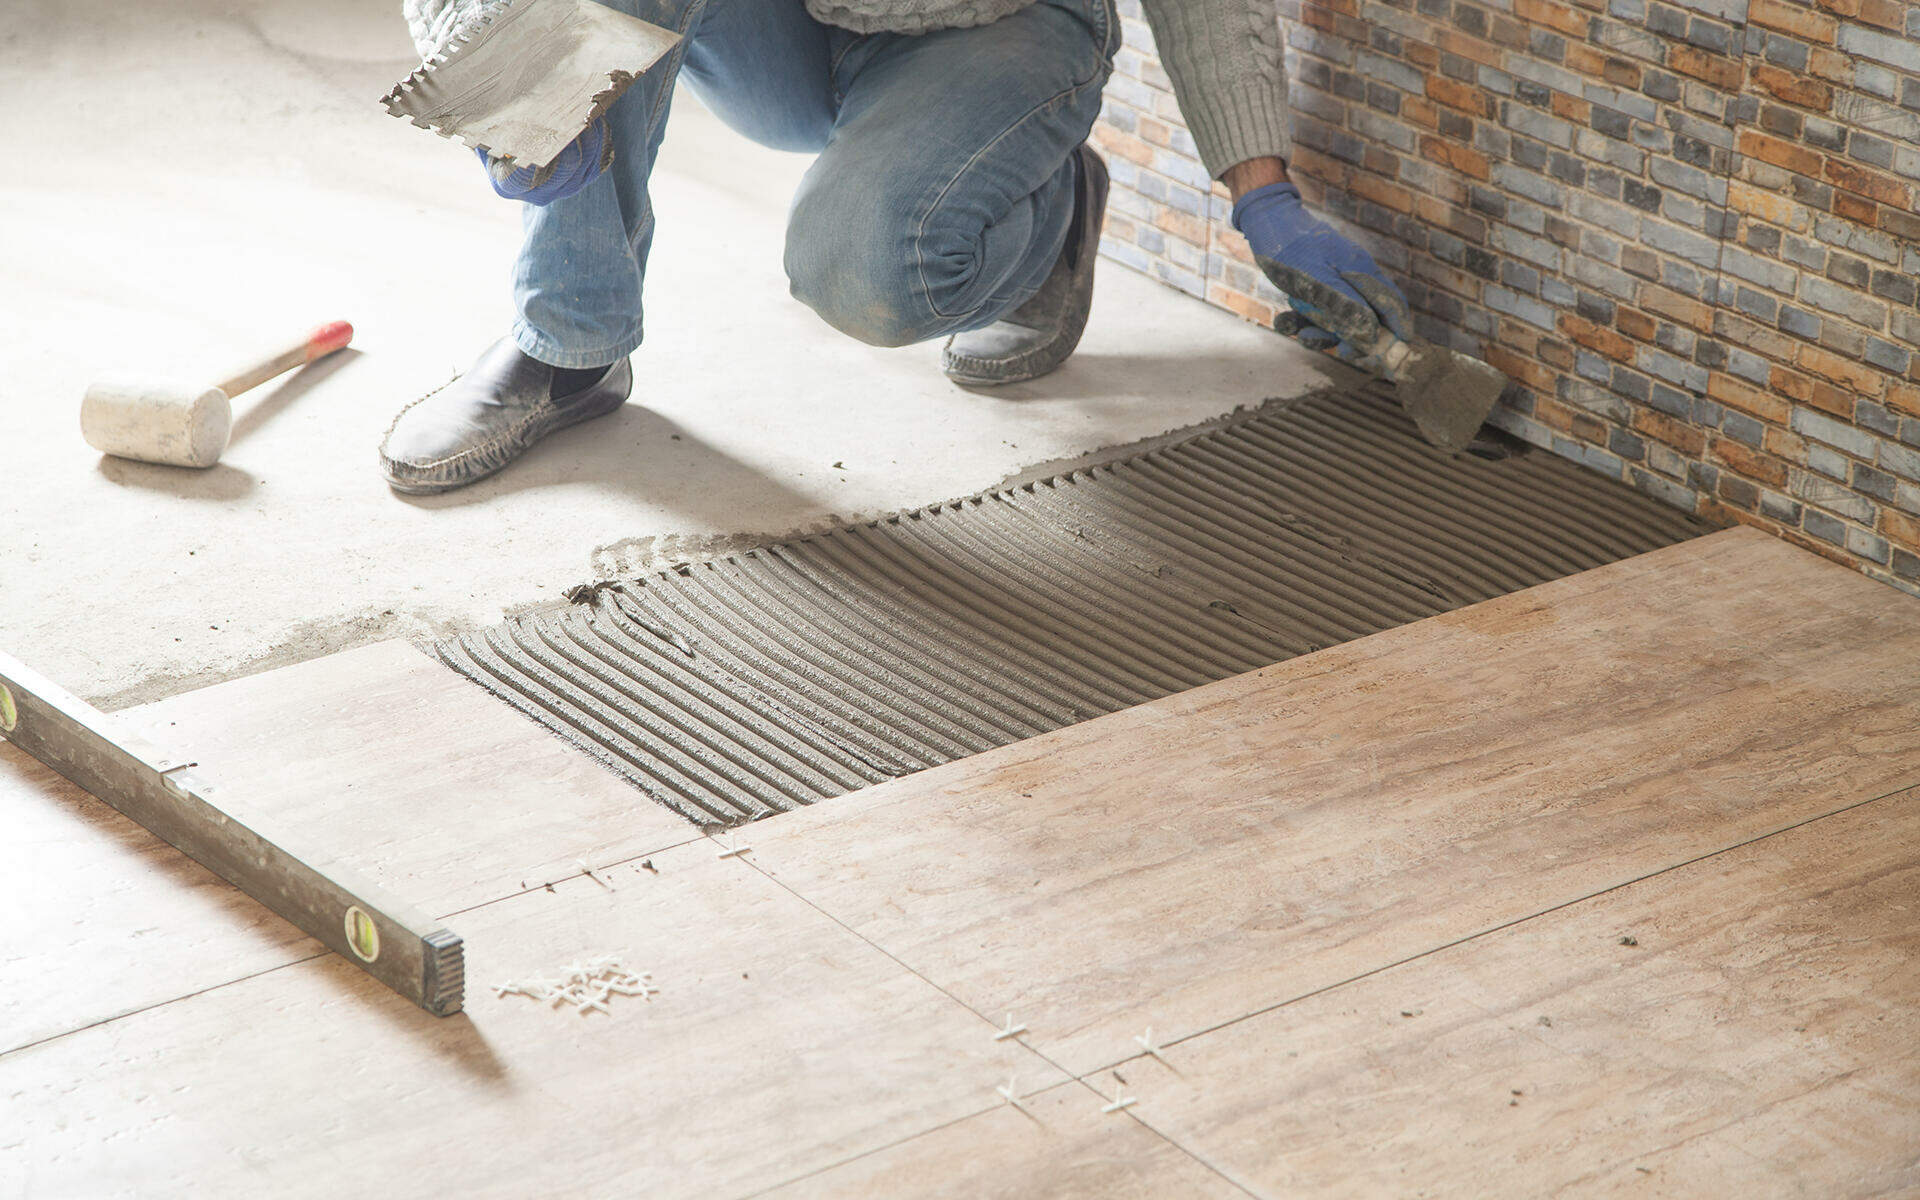
Follow the manufacturer’s guidelines when mixing the adhesive and apply it evenly using a notched trowel. Work in small sections, ensuring the adhesive remains workable while placing the tiles. If using large-format tiles or natural stone, consider back-buttering each tile to ensure complete coverage and prevent air pockets.
Tile Installation
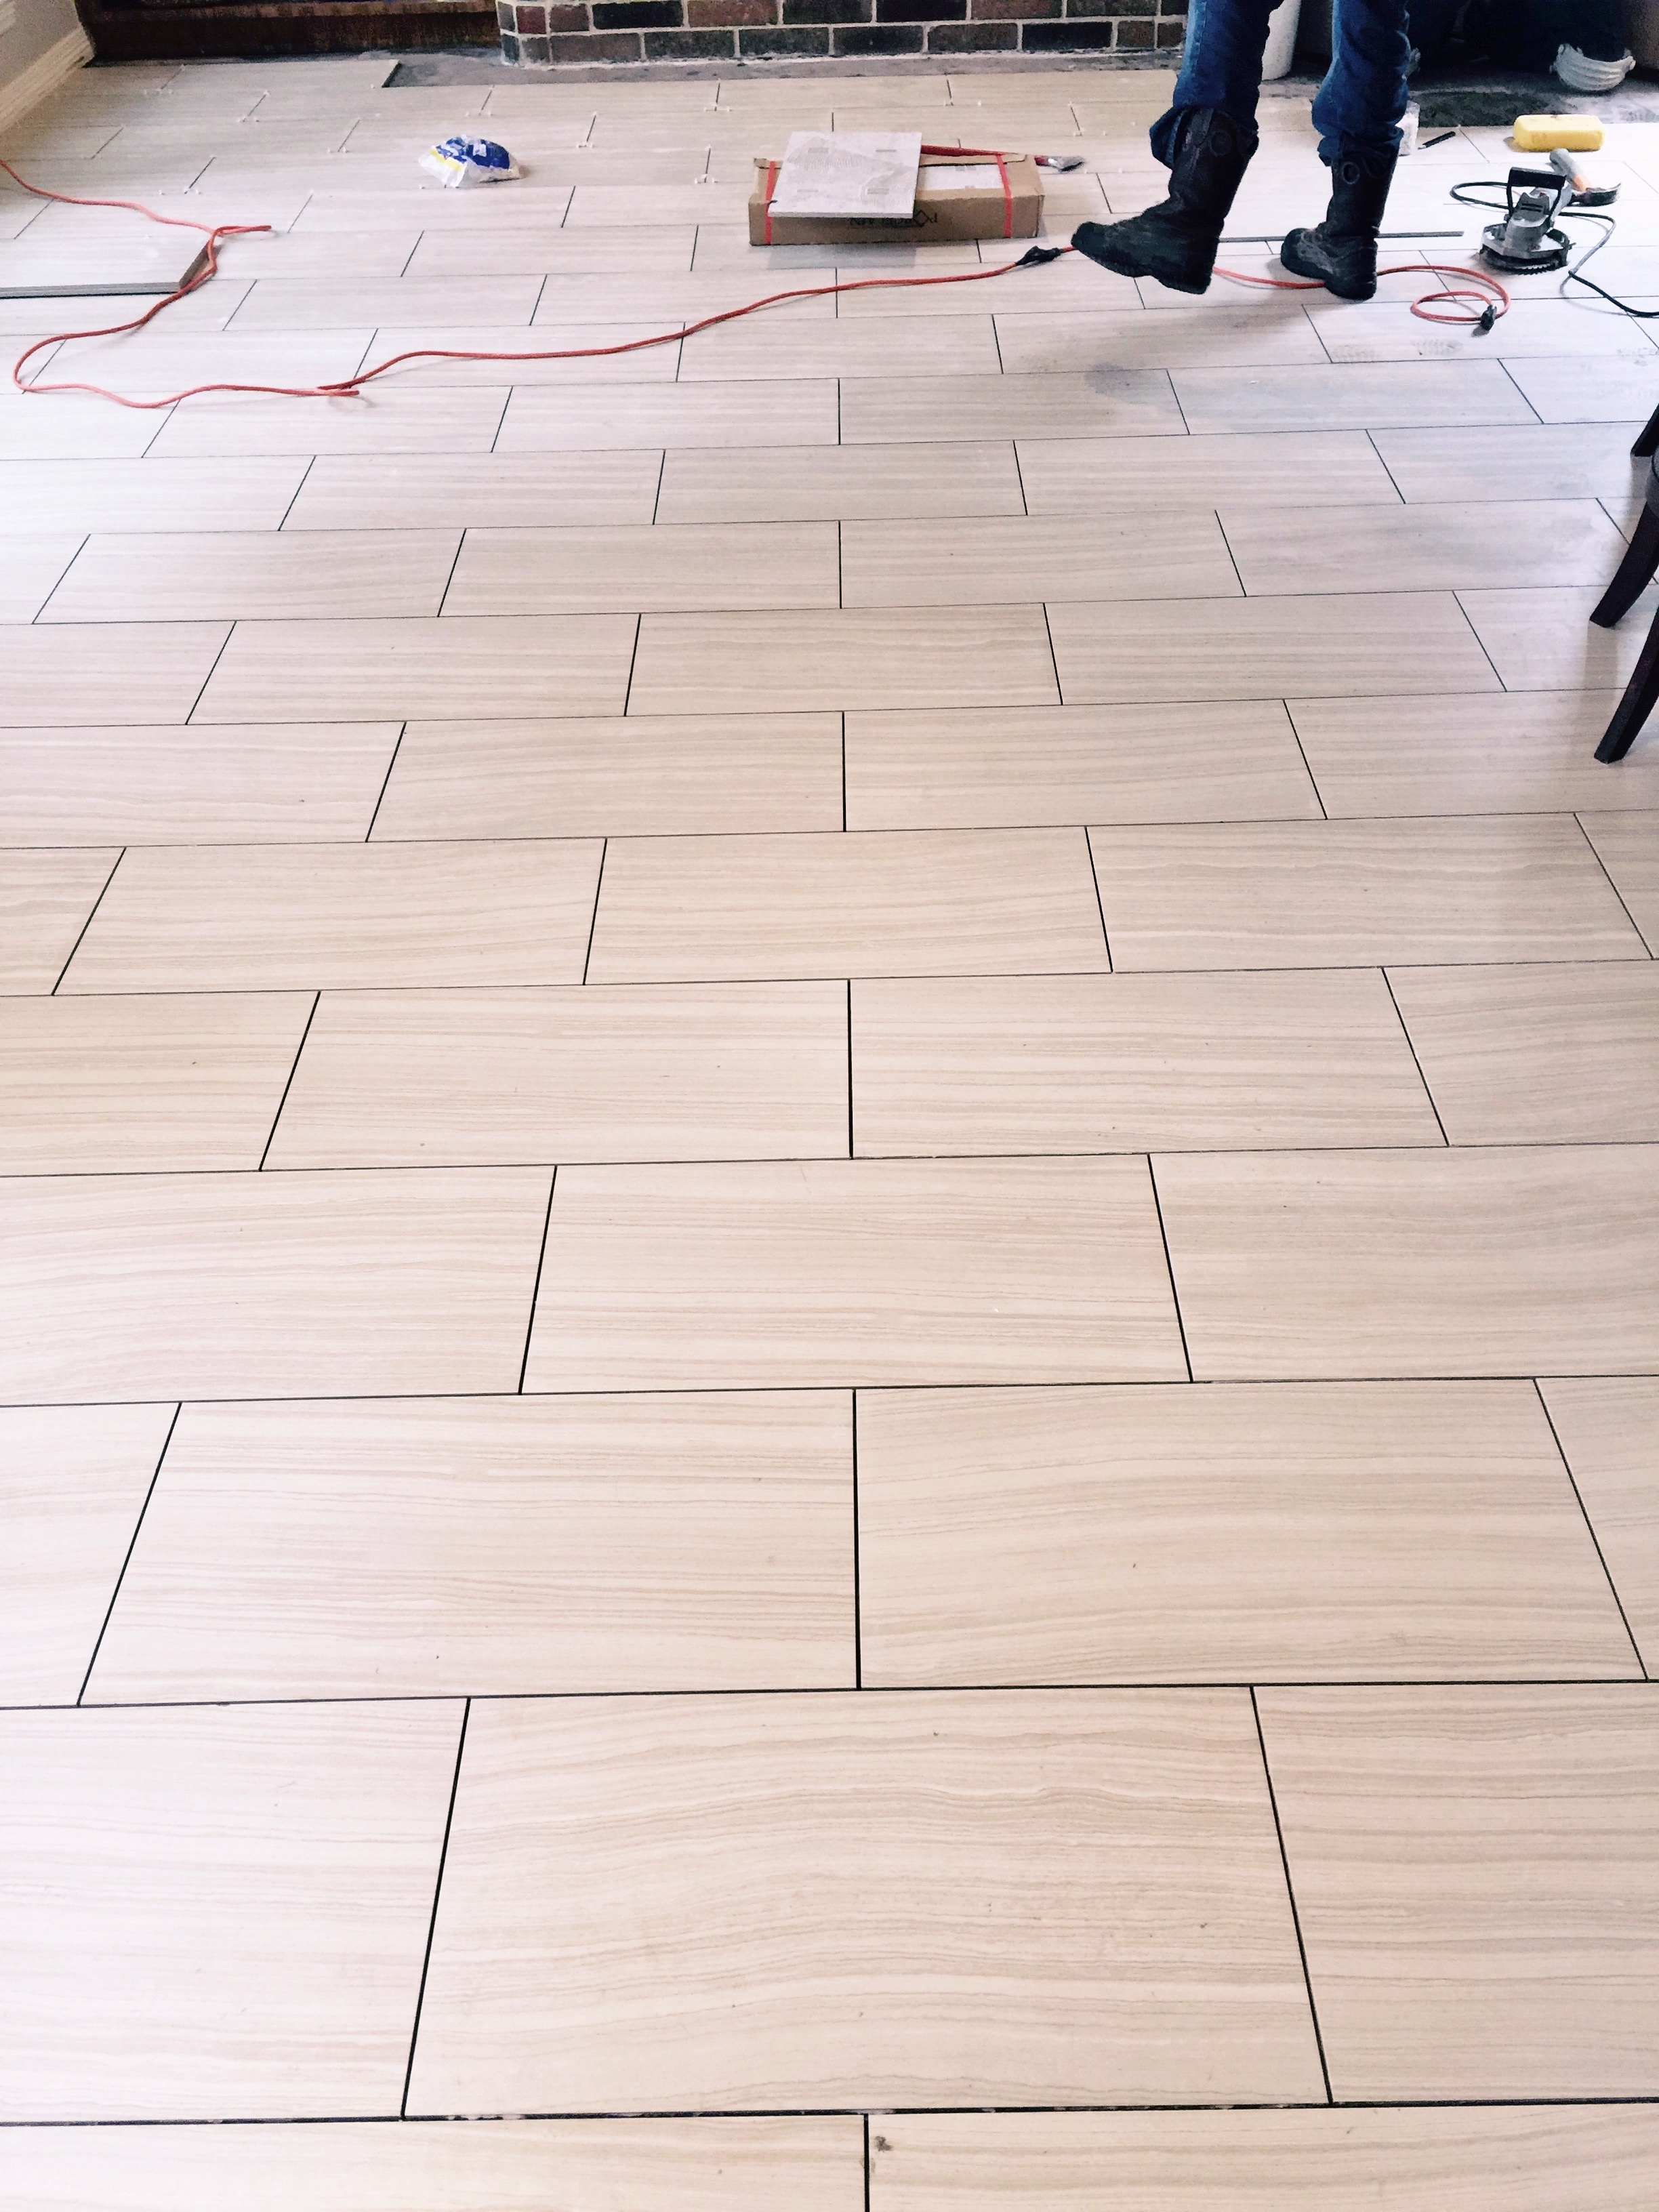
With the surface prepared and adhesive applied, it’s time to lay the tiles. Start at the center of the room or focal point and work your way towards the walls. Following the chalk guidelines, press each tile firmly into the adhesive, giving them a slight twist to secure their bond.
Use tile spacers between each tile to maintain uniform grout lines. The size of the spacers depends on your desired grout width, which can range from 1/16 inch to 1/8 inch or more. Adjust the tiles as necessary to ensure a level surface, periodically checking with a spirit level.
Cutting Tiles and Edge Pieces
Inevitably, you’ll encounter areas where full tiles won’t fit. To address this, you’ll need to cut tiles to fit along edges, corners, and obstacles like pipes. A tile cutter or wet saw is the most precise tool for this task. Measure carefully and mark the tiles before making any cuts to avoid errors.
For curved or intricate cuts, a tile nibbler or tile file might be necessary. Additionally, using tile trim or bullnose tiles can provide a polished look for edges and corners, eliminating the need for intricate cuts.
Grouting and Sealing
After allowing the tiles to set for the recommended time, it’s time to grout the joints. Mix the grout according to the manufacturer’s instructions and apply it diagonally across the tiles using a rubber float. Press the grout into the joints and remove any excess with the float’s edge.
Allow the grout to set for a few minutes, then use a damp sponge to clean the tiles and shape the grout lines. Seal the grout after it has cured to prevent staining and moisture penetration. Sealants come in various types, such as penetrating and surface sealers, so choose one that suits your tile and grout type.
Laying tile flooring can be a rewarding project that adds value and beauty to your living or working space. By preparing the surface, selecting the right adhesive, and meticulously installing the tiles, you can achieve a stunning and long-lasting result. Remember to take your time, be precise in your measurements, and follow the manufacturer’s guidelines for the best outcome. With these fundamental techniques in mind, you’ll be well on your way to becoming a proficient tile layer and enjoying the benefits of a beautifully tiled floor.
9 Types of Floor Tile Patterns To Consider in Tallahassee
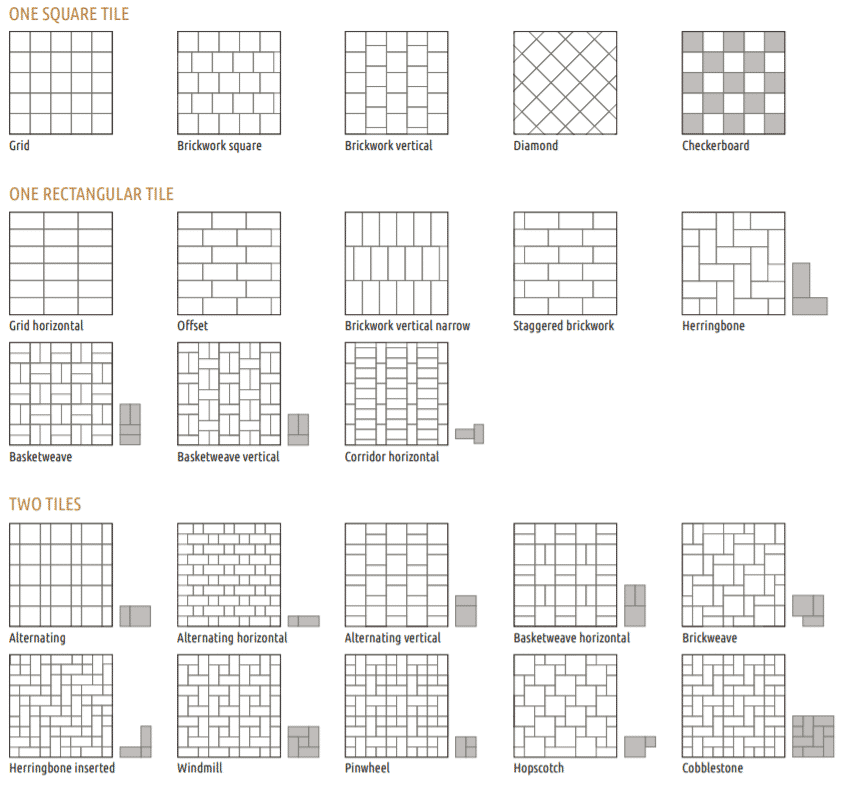
Top 7 Tile Patterns You Need To Know Popular Tile Layouts

Tile Floor 101 Step by Step How to Install Tile for the First Time

Top 7 Tile Patterns You Need To Know Popular Tile Layouts

5 Popular Ceramic Tile Laying Patterns LoveToKnow

Beginneru0027s Guide to Laying Tile – A Beautiful Mess

10 New Ways to Lay Wall Tiles and Floor Tiles – Tile Mountain

Tile Flooring Installation Cost Tile Floor Prices
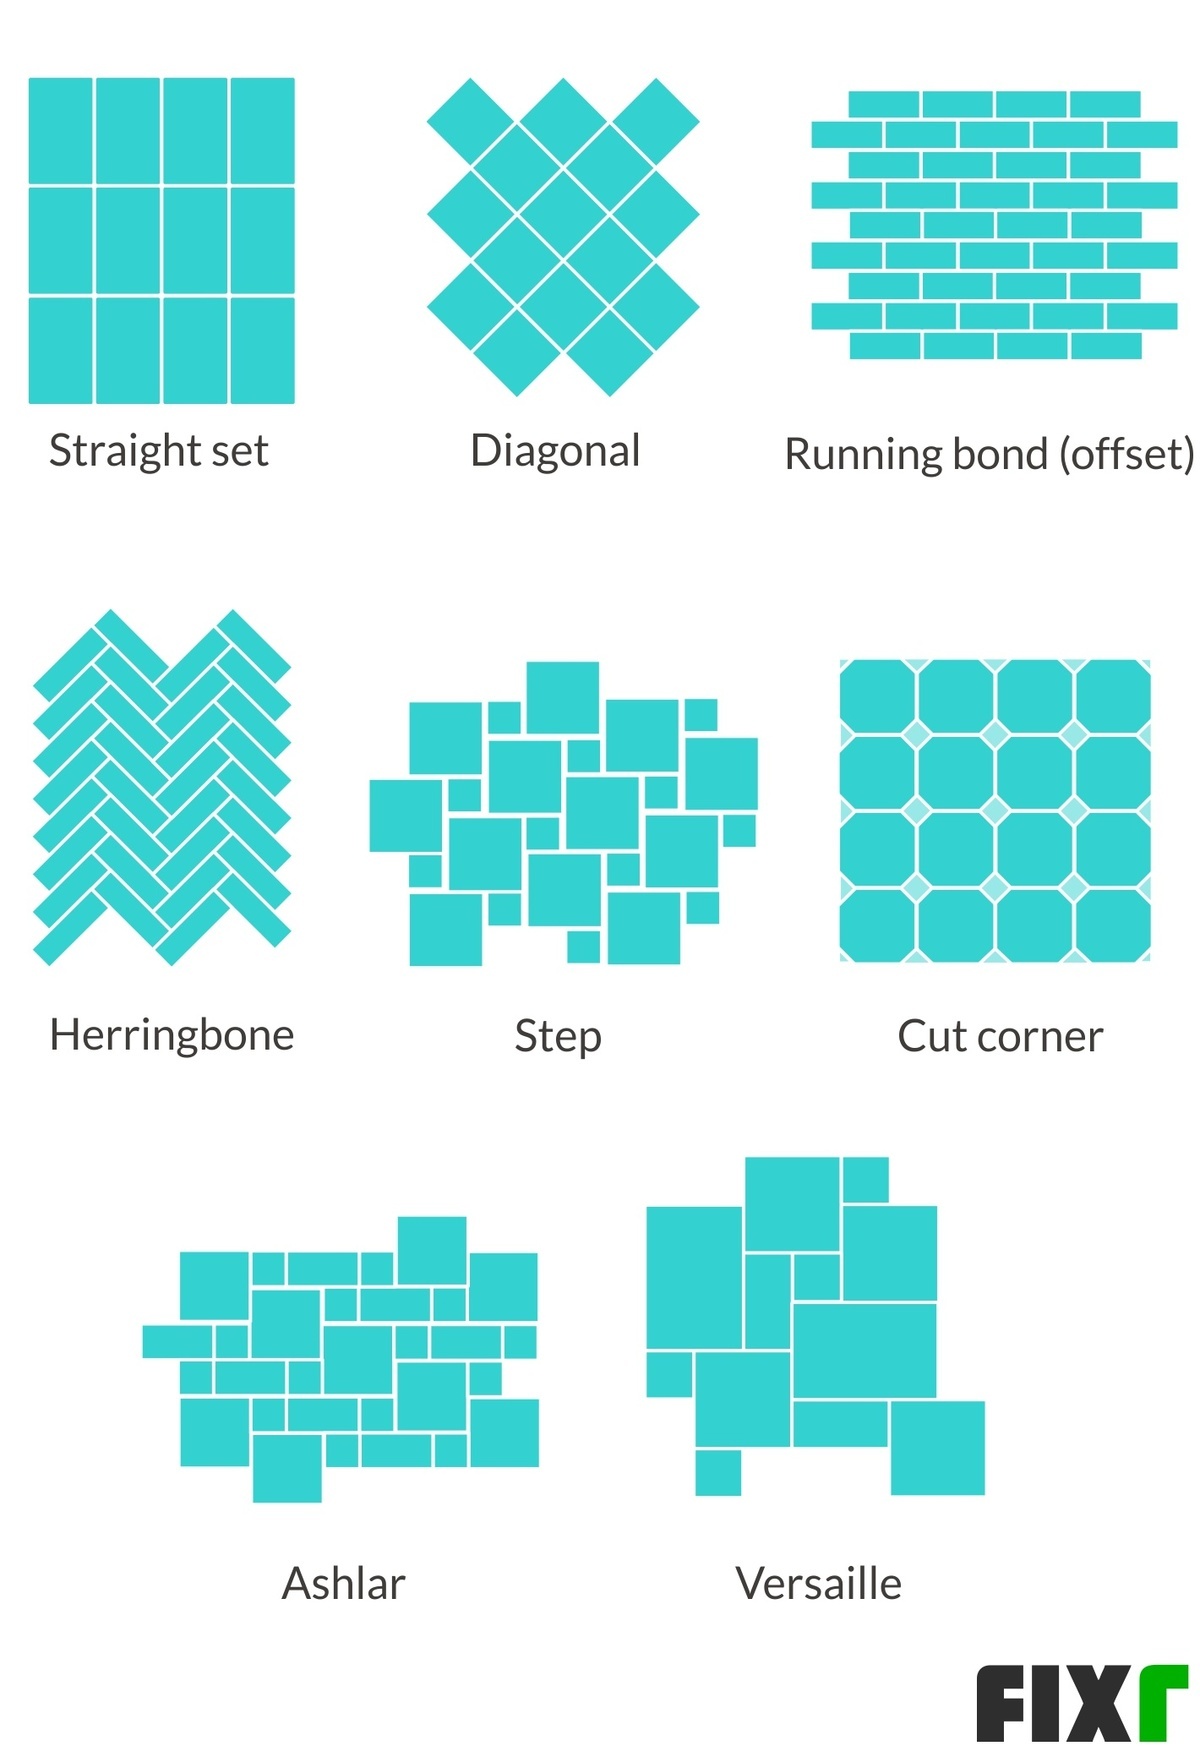
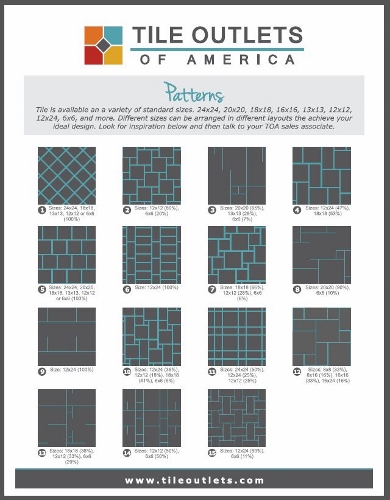
Tile Installation Patterns for Your Tile Design Project – Tile
Wood-look Tile Flooring: How to Lay Tile professionally – Blog RUBI
 Related Posts: