Whether you are searching for cheap or perhaps luxury vinyl flooring, you've to have at least a bit of knowledge about vinyl type flooring. In a question of hours you can completely transform the way an area looks just by installing brand new vinyl floor surfaces in it. No matter what the style of yours or budget preference, you will find options that are several to select from.
Images about Laying Floating Vinyl Flooring
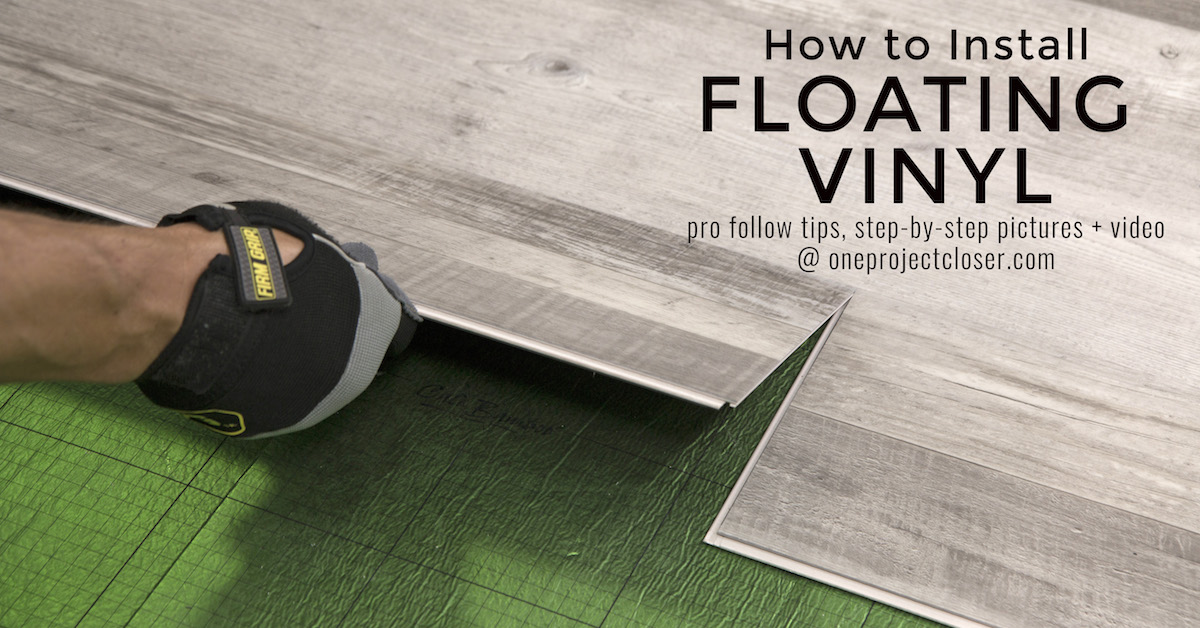
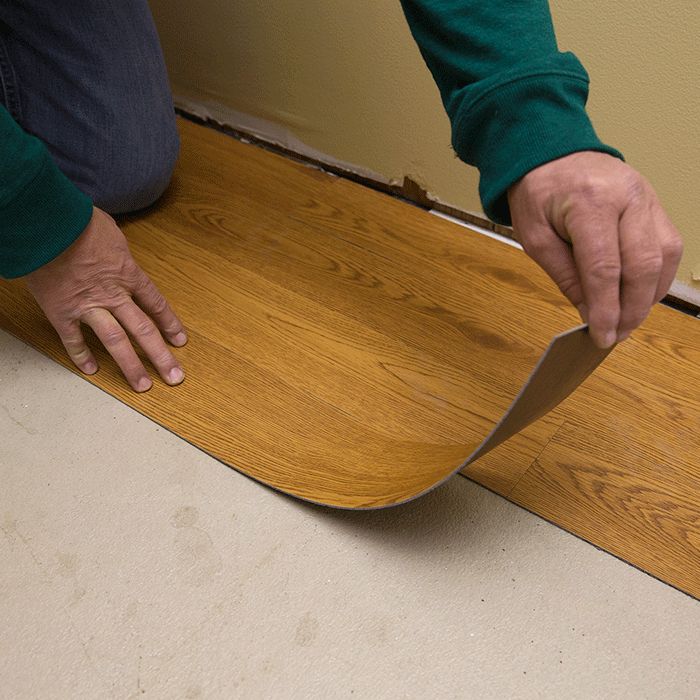
Laying Floating Vinyl Flooring

Vinyl flooring can work considerably towards enhancing the home decor of yours. Along with its affordability, vinyl comes in types that are different and of different makes which makes it the right selection even in areas where it tends to be slippery. If installed incorrectly, a fairly permanent mark is going to be noticeable. And you will save lots of time too. All you have to undertake is sweep the floor and mop it ultimately.
How to Install Vinyl Plank Flooring
/easy-install-plank-vinyl-flooring-1822808-06-3bb4422ca1bd49b080bfa73bce749acc.jpg)
A floor created out of luxury vinyl becomes a genuine centrepiece, adding a touch of luxury and class to any area, and must be thought to be a worthwhile investment. This material is far more durable compared to the cheaper peel as well as stick variety, and yes it is going to allow the floors of yours to look beautiful for years to come. Vinyl floor covers are also not quite as expensive as other flooring types – this's biggest benefit of using vinyl covers.
Installing Vinyl Plank Flooring – How To FixThisBuildThat
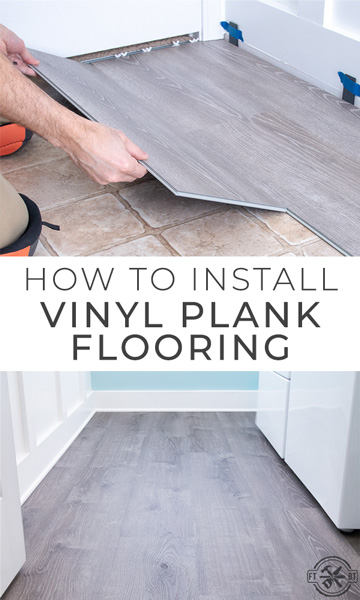
How to Install Vinyl Plank Flooring
/easy-install-plank-vinyl-flooring-1822808-10-6cfb7acfac434155a53e0ef80bfbc825.jpg)
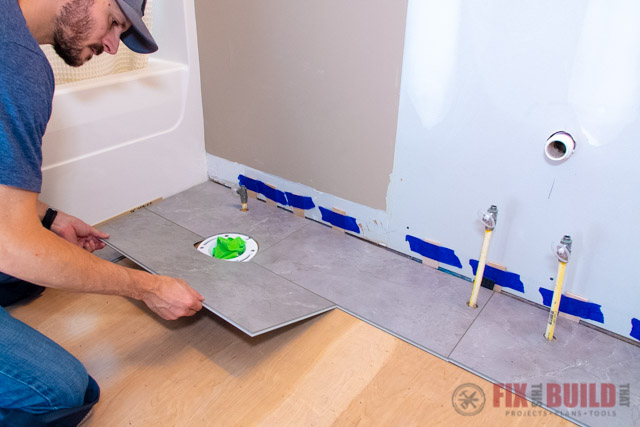
How to Install Vinyl Plank Flooring in a BATHROOM 🚽

How to Install Vinyl Plank Flooring
How to Install Floating Vinyl Flooring
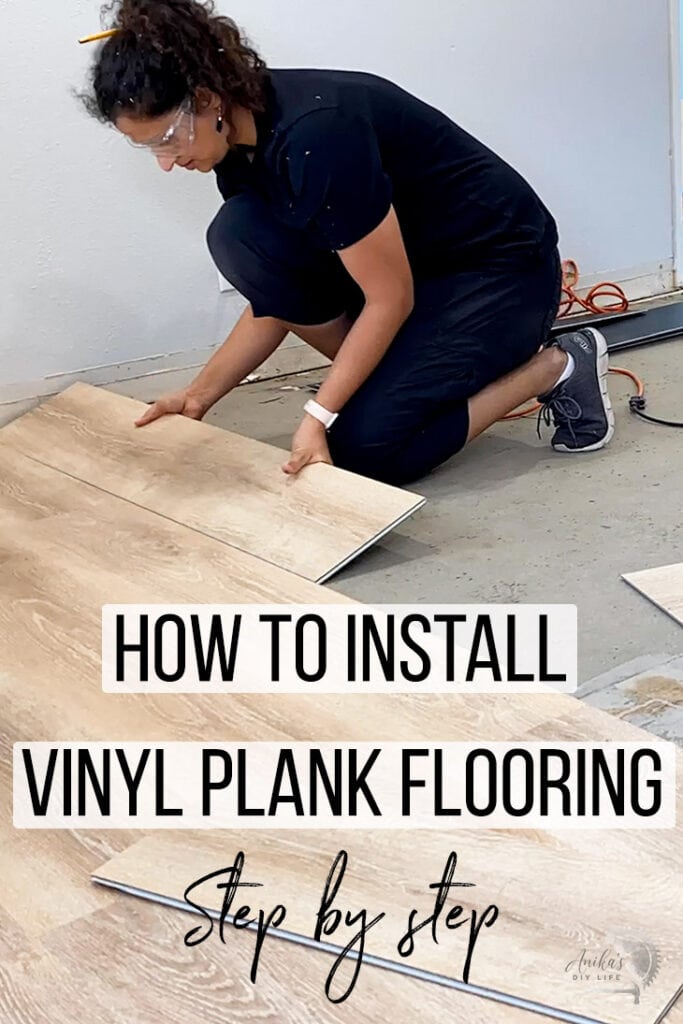
Installing Vinyl Plank Flooring For Beginners – Anikau0027s DIY Life
How to Install Vinyl Plank Flooring Loweu0027s

How to Install Vinyl Plank Flooring
/easy-install-plank-vinyl-flooring-1822808-hero-cefa2d84f781434b9e1e73a0c44e3a5c.jpg)
How to Install Vinyl Plank Flooring Loweu0027s
How to Install Vinyl Plank Flooring
Vinyl Plank Flooring Problems (During and After Install) – Ready

How to Install Vinyl Plank Flooring in a Bathroom FixThisBuildThat
Related Posts:
- How To Repair Vinyl Flooring Scratches
- Copper Vinyl Flooring
- Vinyl Flooring In Bathroom
- Commercial Vinyl Flooring
- Luxury Vinyl Flooring Bedroom
- Herringbone Vinyl Floor Tiles
- Vinyl Flooring That Looks Like Wood
- Vinyl Flooring For Basement
- Toilet Vinyl Flooring
- Rustic Vinyl Flooring
Laying Floating Vinyl Flooring
Floating vinyl floors are one of the most popular flooring options available today. They offer a stylish, low-maintenance solution for any room in the house. Whether you’re laying these floors in your kitchen, bathroom, or living room, the process is essentially the same. Here’s everything you need to know about laying floating vinyl flooring.
Preparation
Before you start laying your vinyl floor, you must make sure that your subfloor is properly prepared. This involves checking for any bumps, divots, or uneven surfaces and patching them up with a self-leveling compound if necessary. You should also make sure that the surface is clean and free of dirt, dust, and debris before you begin.
Measurement
Once your subfloor is prepped and ready to go, you’ll need to take some measurements of the room in order to determine how much material you’ll need to purchase for the job. Measure the length and width of the room, then add an extra 5-10% to your total measurements in order to account for waste.
Installing the Underlayment
Once you have your measurements, it’s time to start installing the underlayment. This is a thin layer of foam or felt that will provide cushioning and insulation between your subfloor and vinyl flooring. Start by unrolling the underlayment across the length of the room, making sure to overlap each section by 6 inches or more. Use a utility knife or scissors to cut the sections to size as needed.
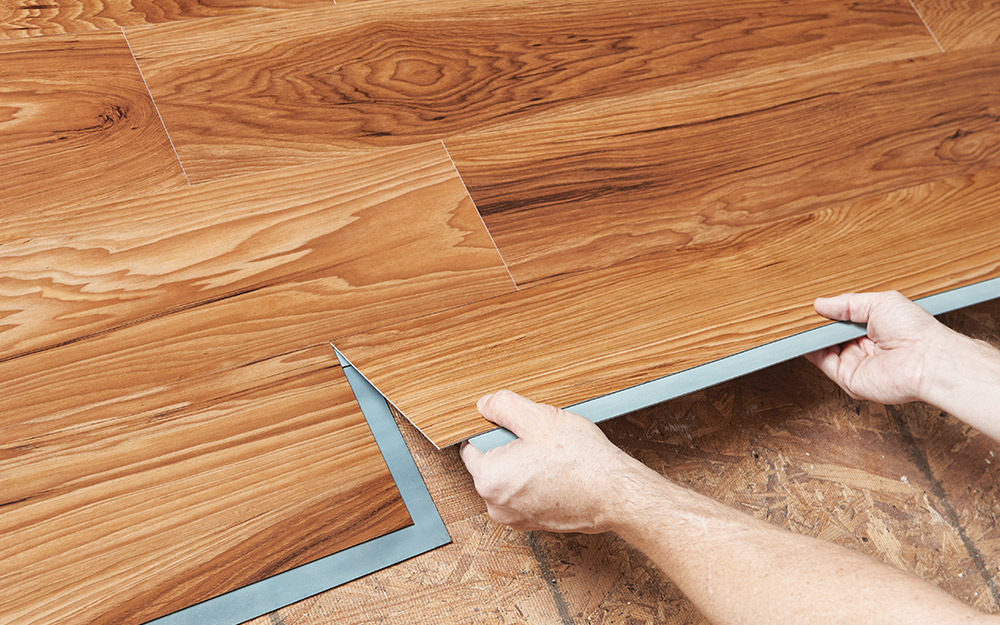
Laying the Vinyl Planks
Once your underlayment is installed, it’s time to start laying your vinyl planks. Start at one corner of the room and use a chalk line to make sure that your first row is straight and even. Peel off the adhesive backing from each plank and place it on the subfloor. Make sure that you leave enough space between each plank for expansion. Continue laying planks until you reach the end of the row.
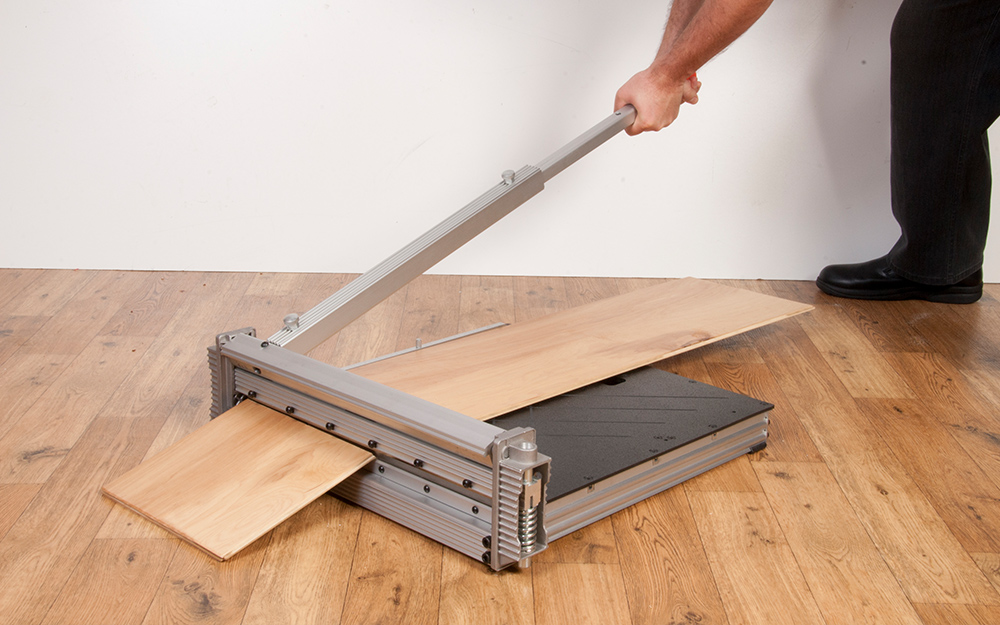
Trimming and Sealing Edges
Once all of your planks are laid, use a utility knife or scissors to trim off any excess material around the edges of the room. This will help ensure that your flooring looks neat and uniform once it’s finished. Once all of your trimming is done, it’s time to seal all of the edges with vinyl sealant in order to protect them from water damage and ensure a long-lasting installation.
Finishing Up
Once your edges are sealed and all of your trim work is complete, all that’s left to do is sweep up any excess dirt or debris from the floor and enjoy your new floating vinyl floors!
FAQs
Q: What type of subfloor should I use for floating vinyl flooring?
A: It’s important to make sure that your subfloor is clean and level before installing floating vinyl flooring. If there are any bumps or divots in your subfloor, patch them up with a self-leveling compound before beginning. Most types of subfloors can be used for this type of installation such as concrete, plywood, or OSB board.
Q: How do I measure my room for floating vinyl flooring?
A: To determine how much material you’ll need for installation, measure the length and width of your room then add an extra 5-10% to account for waste. Once you have these measurements, you can purchase enough material for your project.
Q: How do I install my floating vinyl planks?
A: Start at one corner of your room and use a chalk line to make sure that your first row is straight and even. Peel off the adhesive backing from each plank and place it on the subfloor with enough space between each plank for expansion. Continue laying planks until you reach the end of the row. Once all of your planks are laid, use a utility knife or scissors to trim off any