Benefits of Using Wood Flooring as a Backsplash
Aesthetic Appeal: One of the main benefits of using wood flooring as a backsplash is its aesthetic appeal. Wood brings warmth, natural beauty, and a timeless charm to any space. Whether you choose a rustic, distressed look or a sleek, modern design, wood flooring as a backsplash can enhance the overall aesthetics of your kitchen or bathroom.
Versatility: Wood flooring offers a wide range of options in terms of color, texture, and pattern. This allows you to choose a wood species and design that complements your existing decor or creates a striking contrast. From light-colored oak to dark walnut, or from traditional planks to intricate parquet patterns, the versatility of wood flooring as a backsplash provides endless possibilities for design customization.
Easy to Clean and Maintain: Wood flooring is relatively easy to clean and maintain, especially when used as a backsplash. Unlike other materials, such as tile or stone, wood does not have grout lines or crevices where dirt and grime can accumulate. Regular wiping with a damp cloth and mild detergent is usually sufficient to keep the wood backsplash looking clean and fresh.
Durability and Longevity: Wood flooring is known for its durability and longevity. When properly cared for, a wood backsplash can withstand regular wear and tear, including splashes, spills, and heat exposure. With proper sealing and periodic maintenance, wood flooring can last for many years, making it a cost-effective choice in the long run.
Eco-Friendly Option: Using wood flooring as a backsplash is an eco-friendly choice. Wood is a renewable resource, and many manufacturers offer sustainable and responsibly sourced wood options. Additionally, wood has a lower carbon footprint compared to other materials commonly used for backsplashes, such as ceramic or glass tiles.
Warmth and Comfort: In addition to its visual appeal, wood flooring as a backsplash adds warmth and comfort to your kitchen or bathroom. Wood has natural insulating properties, which can help to regulate the temperature in the space. It also provides a softer and more comfortable surface compared to harder materials like tile or stone.
Increased Home Value: Adding wood flooring as a backsplash can increase the value of your home. Wood is a popular and sought-after material in interior design, and many potential homebuyers appreciate the timeless elegance it brings to a space.
How to Install Wood Flooring as a Backsplash
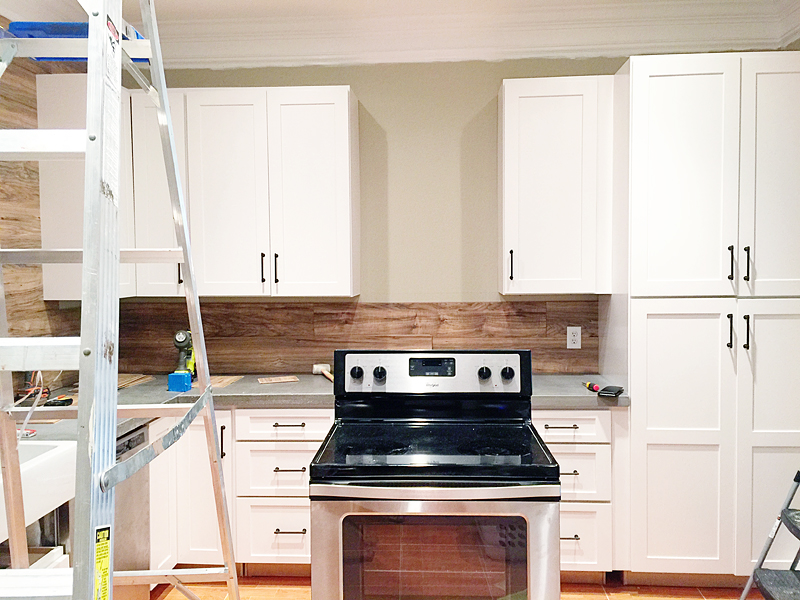
1. Measure and Prepare the Area
Before starting the installation process, accurately measure the area where you plan to install the wood flooring as a backsplash. This will help you determine the amount of wood flooring material you will need. Additionally, ensure that the surface is clean and free from any dust or debris.
2. Gather the Necessary Tools and Materials
To successfully install wood flooring as a backsplash, gather all the tools and materials you will need. This may include wood flooring planks, adhesive, a saw, a measuring tape, a level, a trowel, a notched trowel, a rubber mallet, and a utility knife. Ensure that you have everything readily available before starting the installation.
3. Choose the Right Wood Flooring
When selecting wood flooring for a backsplash, consider the type of wood and the finish that will complement your overall design. Hardwoods like oak, maple, or walnut are commonly used due to their durability. Additionally, choose a finish that will protect the wood from moisture and make it easy to clean.
4. Prepare the Wood Flooring Planks
If the wood flooring planks are not prefinished, you may need to sand and finish them before installation. This will ensure that the wood is smooth and protected against any potential water damage. Follow the manufacturer’s instructions for the sanding and finishing process.
5. Apply Adhesive to the Wall
Apply adhesive to the wall using a trowel, ensuring that it is evenly spread. The adhesive should be suitable for wood flooring installation and recommended by the manufacturer. Make sure to follow the instructions provided by the adhesive manufacturer for proper application.
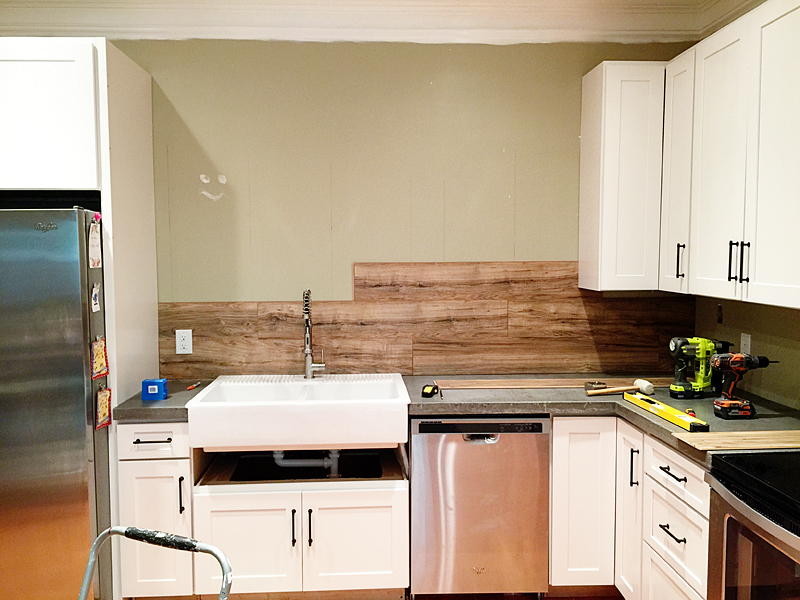
6. Install the Wood Flooring Planks
Starting from the bottom, place the first wood flooring plank onto the adhesive, ensuring it is level. Use a rubber mallet to gently tap the plank into place, ensuring a secure fit. Repeat this process for the remaining planks, ensuring they are tightly fitted together.
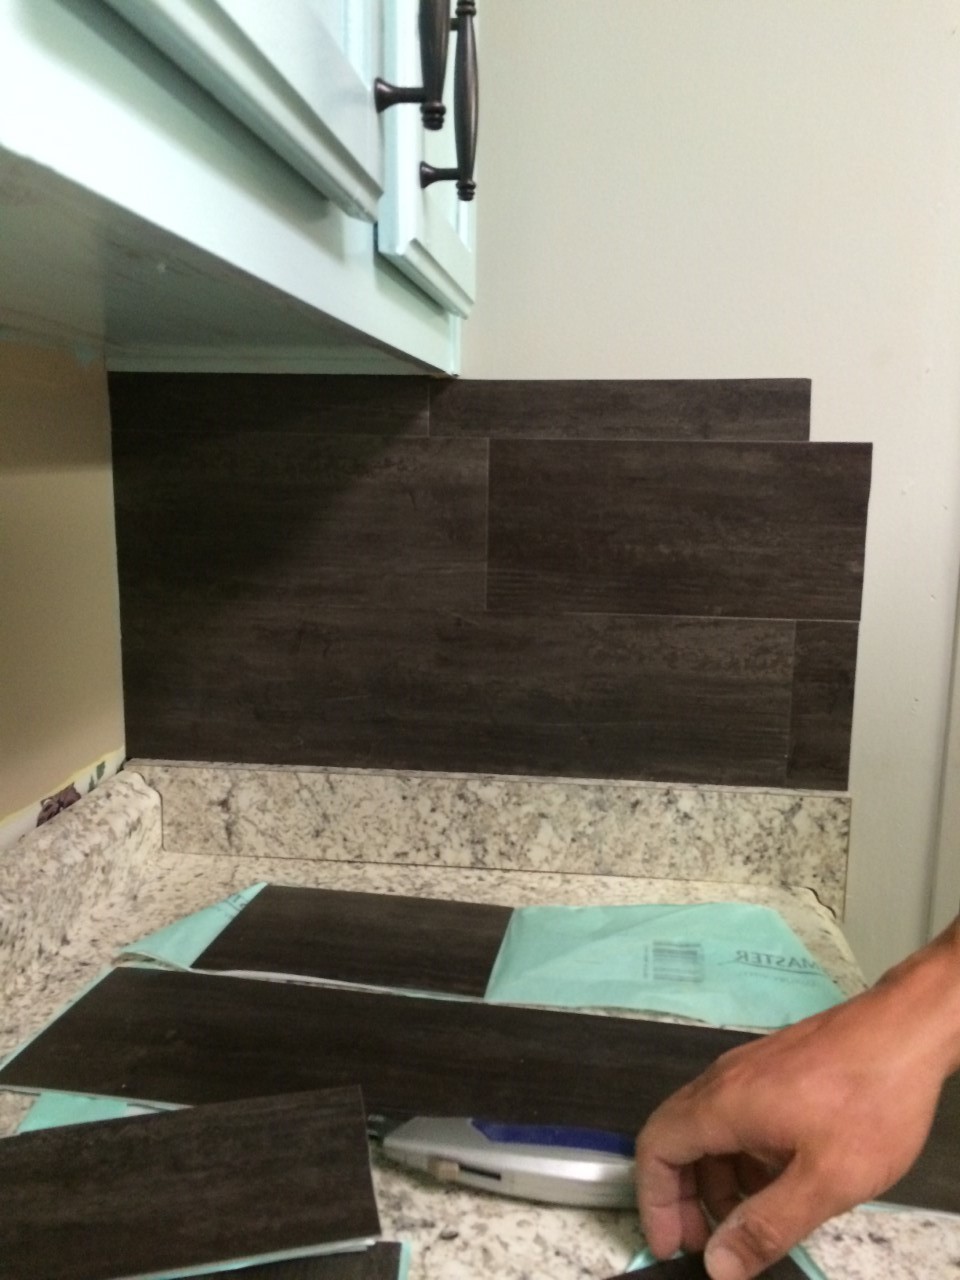
7. Cut and Trim the Wood Flooring
Measure and mark any areas where the wood flooring needs to be cut or trimmed to fit around corners, outlets, or other obstacles. Use a saw or a utility knife to carefully cut the wood flooring to the desired shape and size. Remember to wear safety goggles and gloves when using cutting tools.

Wood Flooring Backsplash Design Ideas
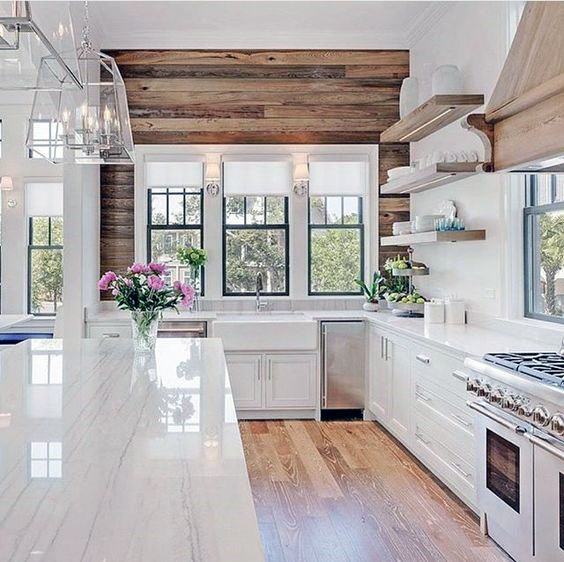
Reclaimed Wood: Using reclaimed wood as a backsplash can add a rustic and unique touch to your kitchen or bathroom. The aged and weathered texture of the wood brings a sense of warmth and character to the space. Whether it’s salvaged barn wood or old wooden planks, the natural imperfections and patina create a visually appealing backdrop.
Chevron Pattern: Creating a chevron pattern with wood flooring as a backsplash can add a modern and stylish element to your design. The V-shaped pattern adds visual interest and can make a small space appear larger. By using different shades of wood or alternating the direction of the planks, you can further enhance the geometric pattern.
Herringbone Pattern: Similar to the chevron pattern, a herringbone pattern using wood flooring as a backsplash can create a timeless and elegant look. The diagonal arrangement of the planks adds a sense of movement and sophistication to the space. This design idea works well in both traditional and contemporary settings.
Whitewashed Wood: If you’re looking for a light and airy feel, consider using whitewashed wood as a backsplash. This technique involves applying a white or light-colored wash over the wood, allowing the grain to show through. The result is a fresh and beachy look that can brighten up any kitchen or bathroom.
Geometric Inlay: For those who want to make a bold statement, incorporating geometric inlays into the wood flooring backsplash can be a great option. Whether it’s a diamond, hexagon, or any other shape, the intricate design adds visual interest and can become the focal point of the room. This design idea works best in contemporary or eclectic spaces.
Mixed Materials: Combining wood flooring with other materials, such as tile or stone, can create a unique and visually striking backsplash. By incorporating different textures and colors, you can add depth and dimension to the space. For example, pairing wood with subway tiles can create a modern farmhouse aesthetic.
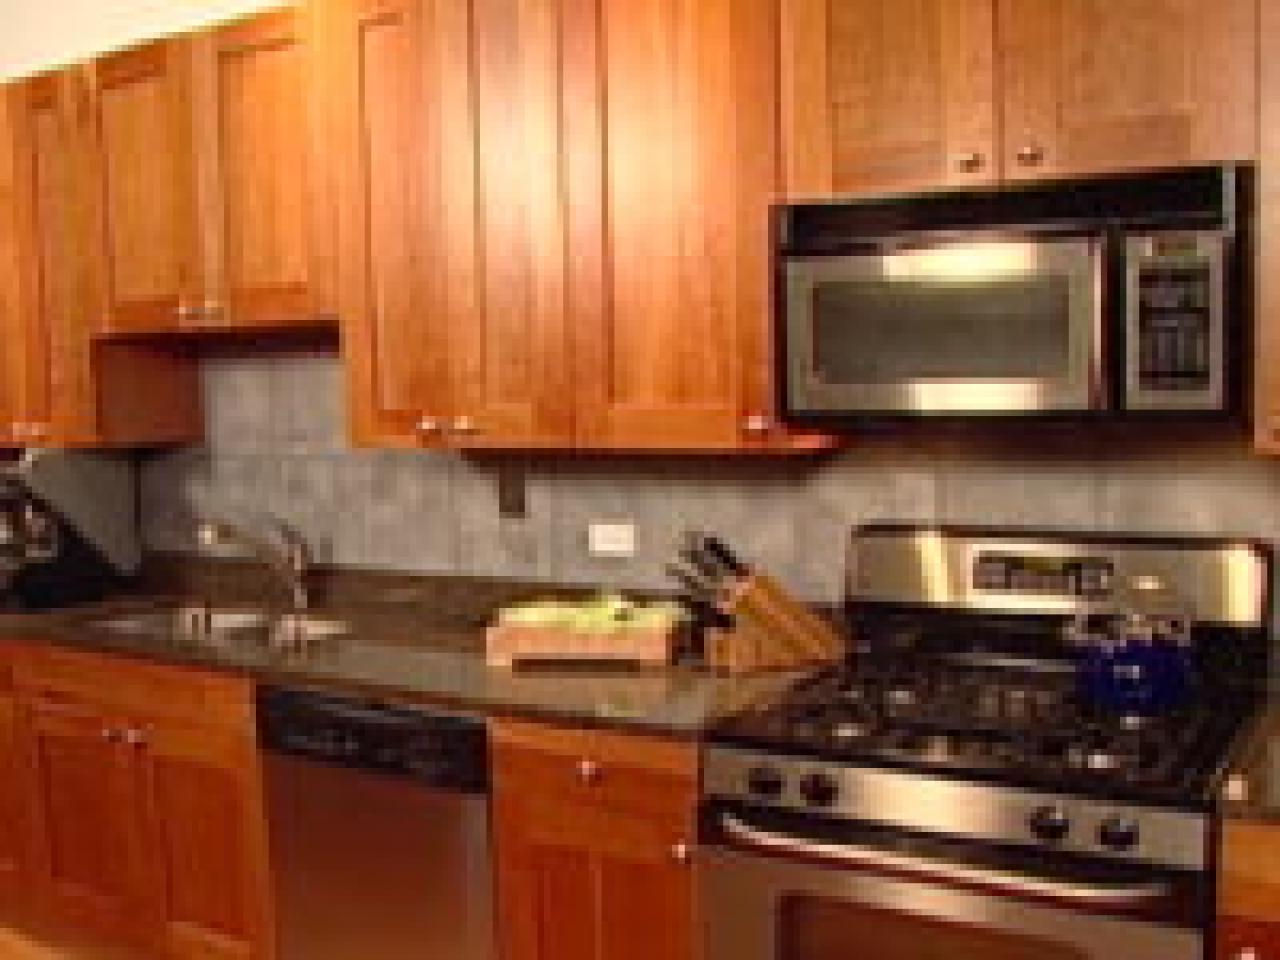
Stained Wood: Staining the wood flooring backsplash allows you to customize the color and match it with your overall design scheme. Whether you prefer a dark espresso stain or a lighter honey tone, the stained wood can create a warm and inviting atmosphere. This design idea works well in traditional, rustic, or even industrial-style kitchens or bathrooms.

Maintenance Tips for Wood Flooring Backsplashes
Wood flooring backsplashes can add a touch of warmth and natural beauty to any kitchen or bathroom. However, like any other type of flooring, they require regular maintenance to keep them looking their best. Here are some essential tips to help you maintain your wood flooring backsplashes:
1. Clean spills immediately: Wood is prone to water damage, so it is crucial to clean up any spills as soon as they occur. Use a soft cloth or paper towel to blot the spill, avoiding any rubbing or scrubbing which could cause further damage to the wood.
2. Use gentle cleaning products: Avoid using harsh or abrasive cleaners on your wood flooring backsplashes, as they can strip away the protective finish and damage the wood. Instead, opt for mild, wood-specific cleaning products or homemade solutions such as a mixture of warm water and vinegar.
3. Regularly sweep and vacuum: Dust, dirt, and debris can scratch the surface of your wood flooring backsplashes if left unattended. To prevent this, make it a habit to sweep or vacuum the area regularly, using a soft-bristle broom or a vacuum cleaner with a hardwood floor attachment.
4. Avoid excessive moisture: Exposing wood to excessive moisture can cause it to warp, swell, or even develop mold and mildew. To protect your wood flooring backsplashes, avoid excessive steam or water exposure, and use a vent or range hood to minimize moisture accumulation during cooking.
5. Protect against heat and scratches: Place trivets or hot pads under hot cookware to prevent heat damage to your wood flooring backsplashes. Additionally, use felt or rubber pads under furniture legs to prevent scratches when moving or rearranging furniture.
6. Regularly inspect for damage: Take the time to inspect your wood flooring backsplashes for any signs of damage, such as cracks, chips, or discoloration. Promptly address any issues by sanding, refinishing, or replacing damaged sections to prevent further deterioration.
7. Maintain humidity levels: Wood is sensitive to changes in humidity, which can cause it to expand or contract. To maintain the ideal humidity level for your wood flooring backsplashes, use a humidifier during dry seasons and a dehumidifier during humid periods.
An Easy Backsplash Made With Vinyl Tile HGTV
Our $40 Backsplash {Using Vinyl Flooring} – Re-Fabbed
Pin on Ideas for the House

Backsplash Makeover on a Budget – Shabby Paints

Hardwood flooring as backsplash and focal wall treatment–yay or nay?

An Easy Backsplash Made With Vinyl Tile HGTV
Laminate Flooring Backsplash (It looks like WOOD!) – Bower Power
Laminate Flooring Backsplash (It looks like WOOD!) Laminate

Top 60 Best Wood Backsplash Ideas – Wooden Kitchen Wall Designs
7 DIY Kitchen Backsplash Ideas that Are Easy and Inexpensive

Related Posts: