DIY laying tile floor projects can be rewarding endeavors for homeowners looking to enhance the aesthetic appeal and functionality of their spaces. Laying tile floors can significantly transform the look and feel of a room, whether it’s a kitchen, bathroom, or entryway. However, it’s essential to approach this task with careful planning, preparation, and attention to detail to ensure a successful outcome. Before beginning a DIY tile floor project, homeowners should familiarize themselves with the necessary tools, materials, and techniques involved in the tile installation process.
Images about DIY Laying Tile Floor
DIY Laying Tile Floor
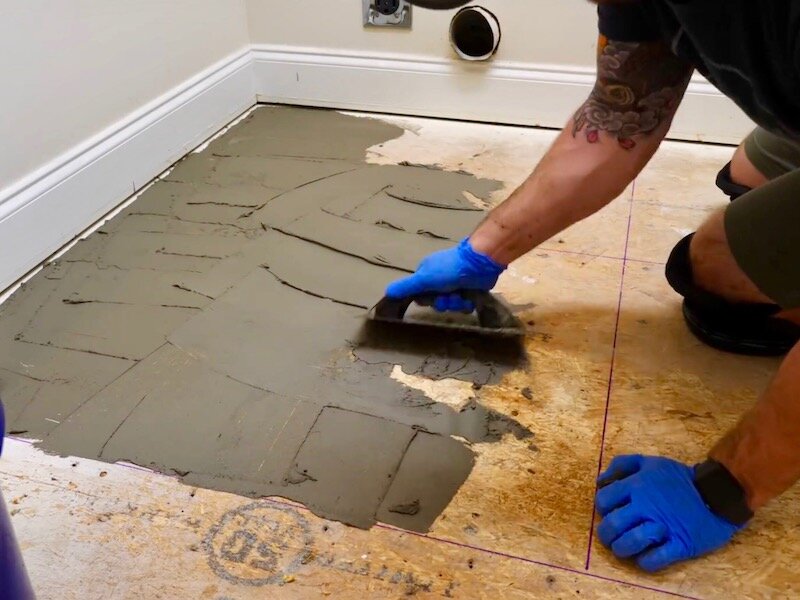
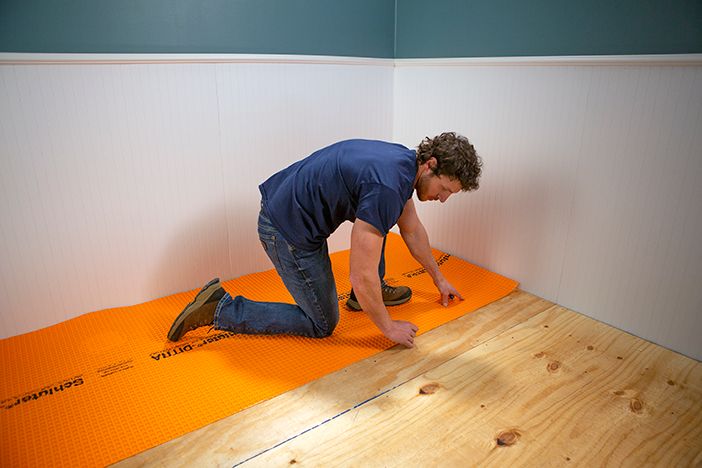
One of the first steps in DIY laying tile floor projects is to prepare the subfloor properly. This involves removing any existing flooring materials, such as carpet, vinyl, or laminate, and thoroughly cleaning and leveling the subfloor surface. It’s essential to ensure that the subfloor is clean, dry, and free of debris, as any imperfections or unevenness can affect the final result of the tile installation. Additionally, homeowners may need to install a backer board or underlayment over the subfloor to provide a stable and level surface for the tile.
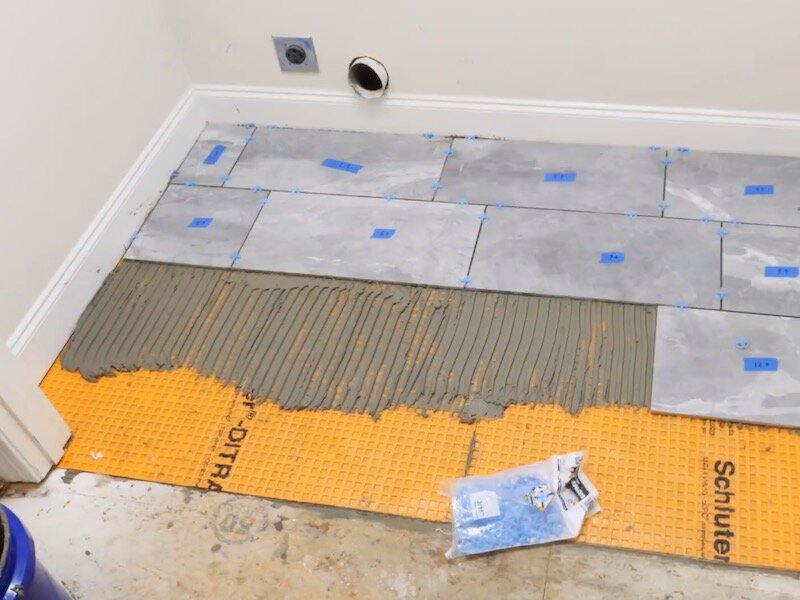
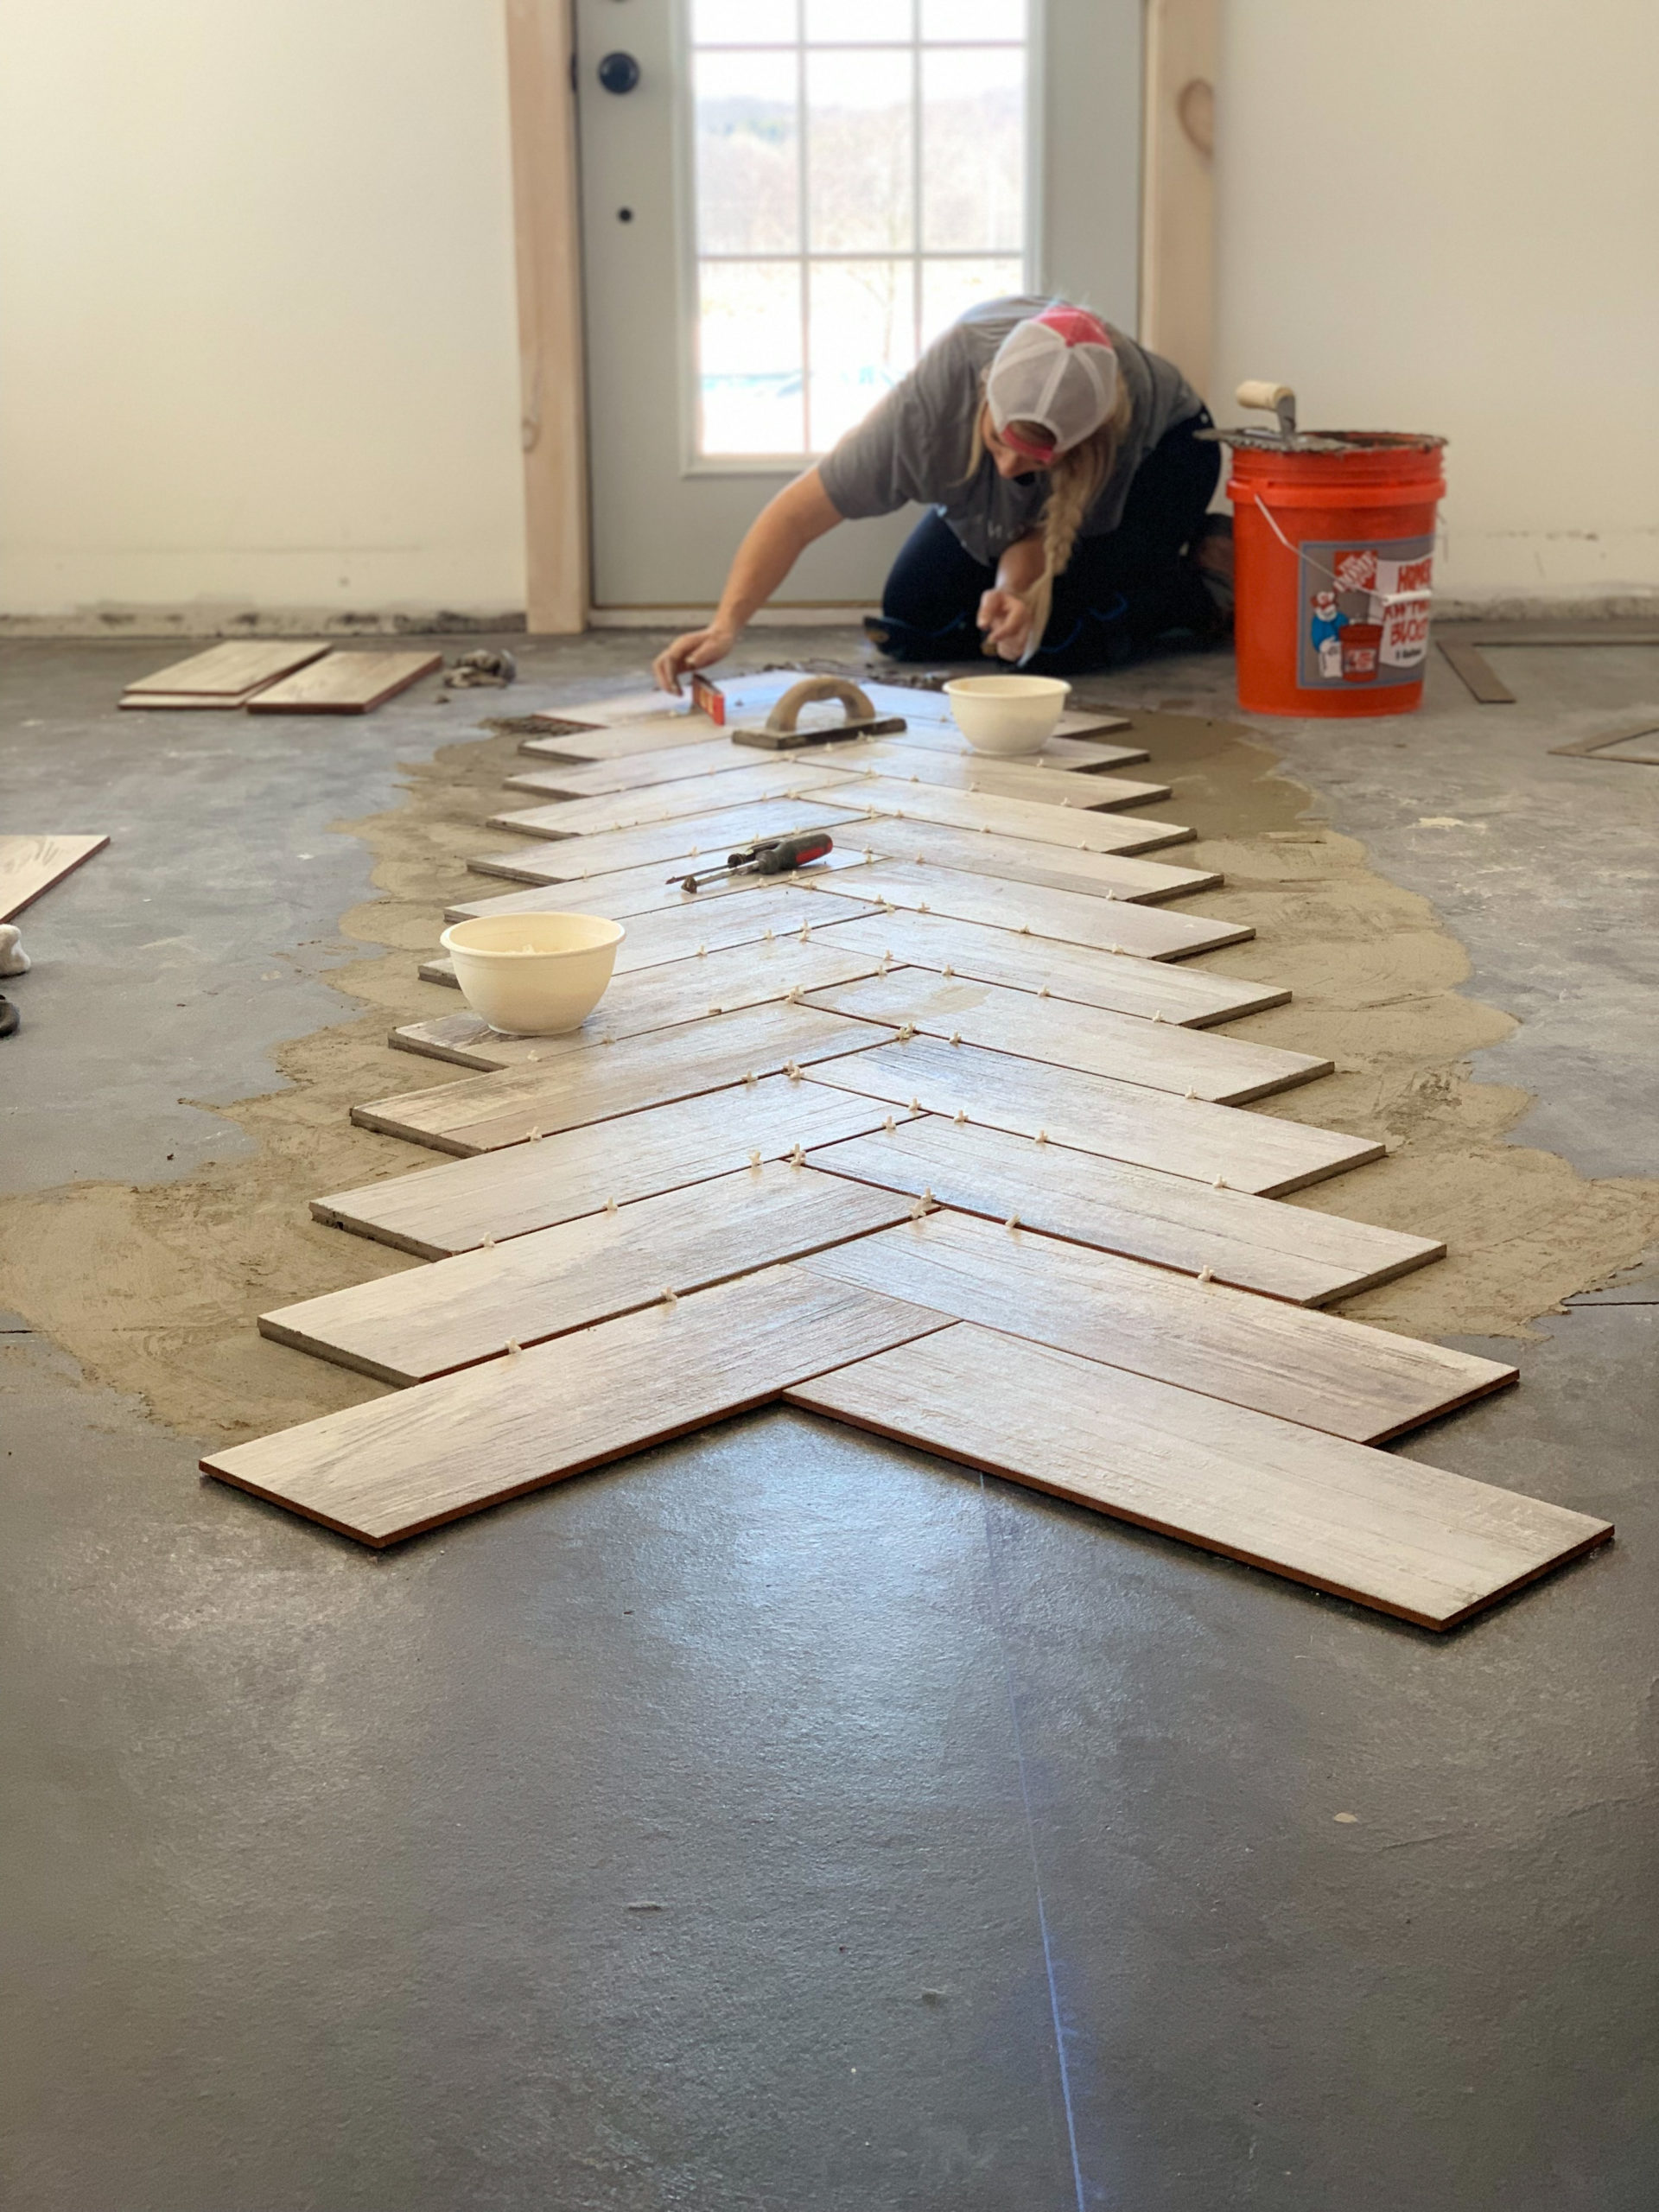
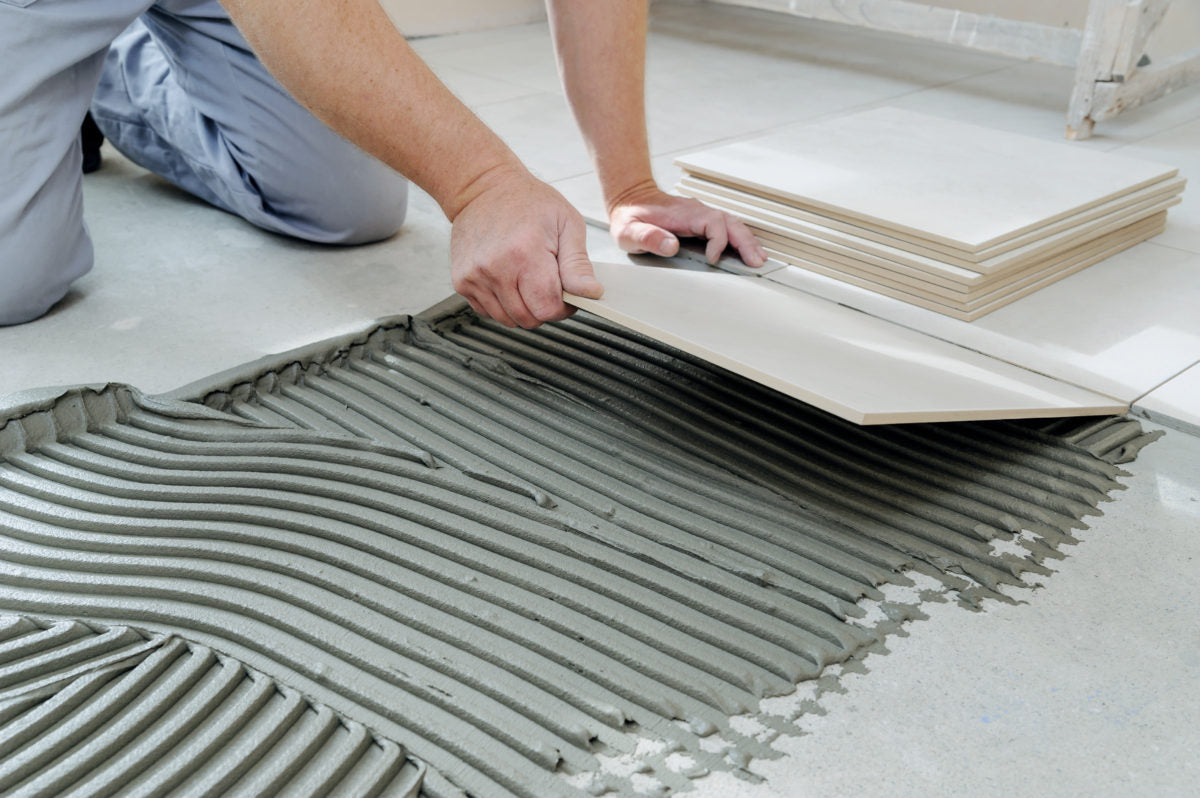
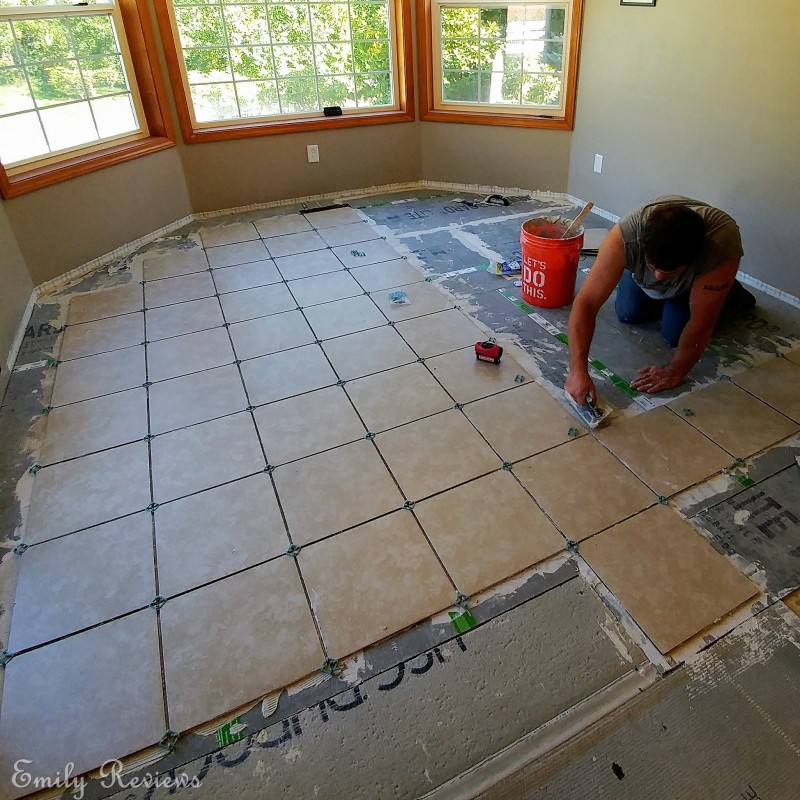
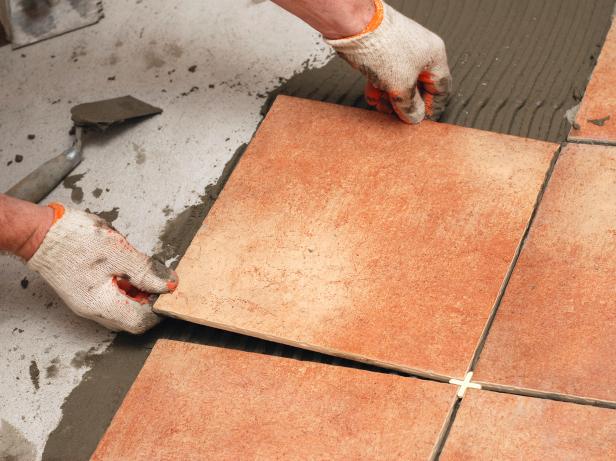
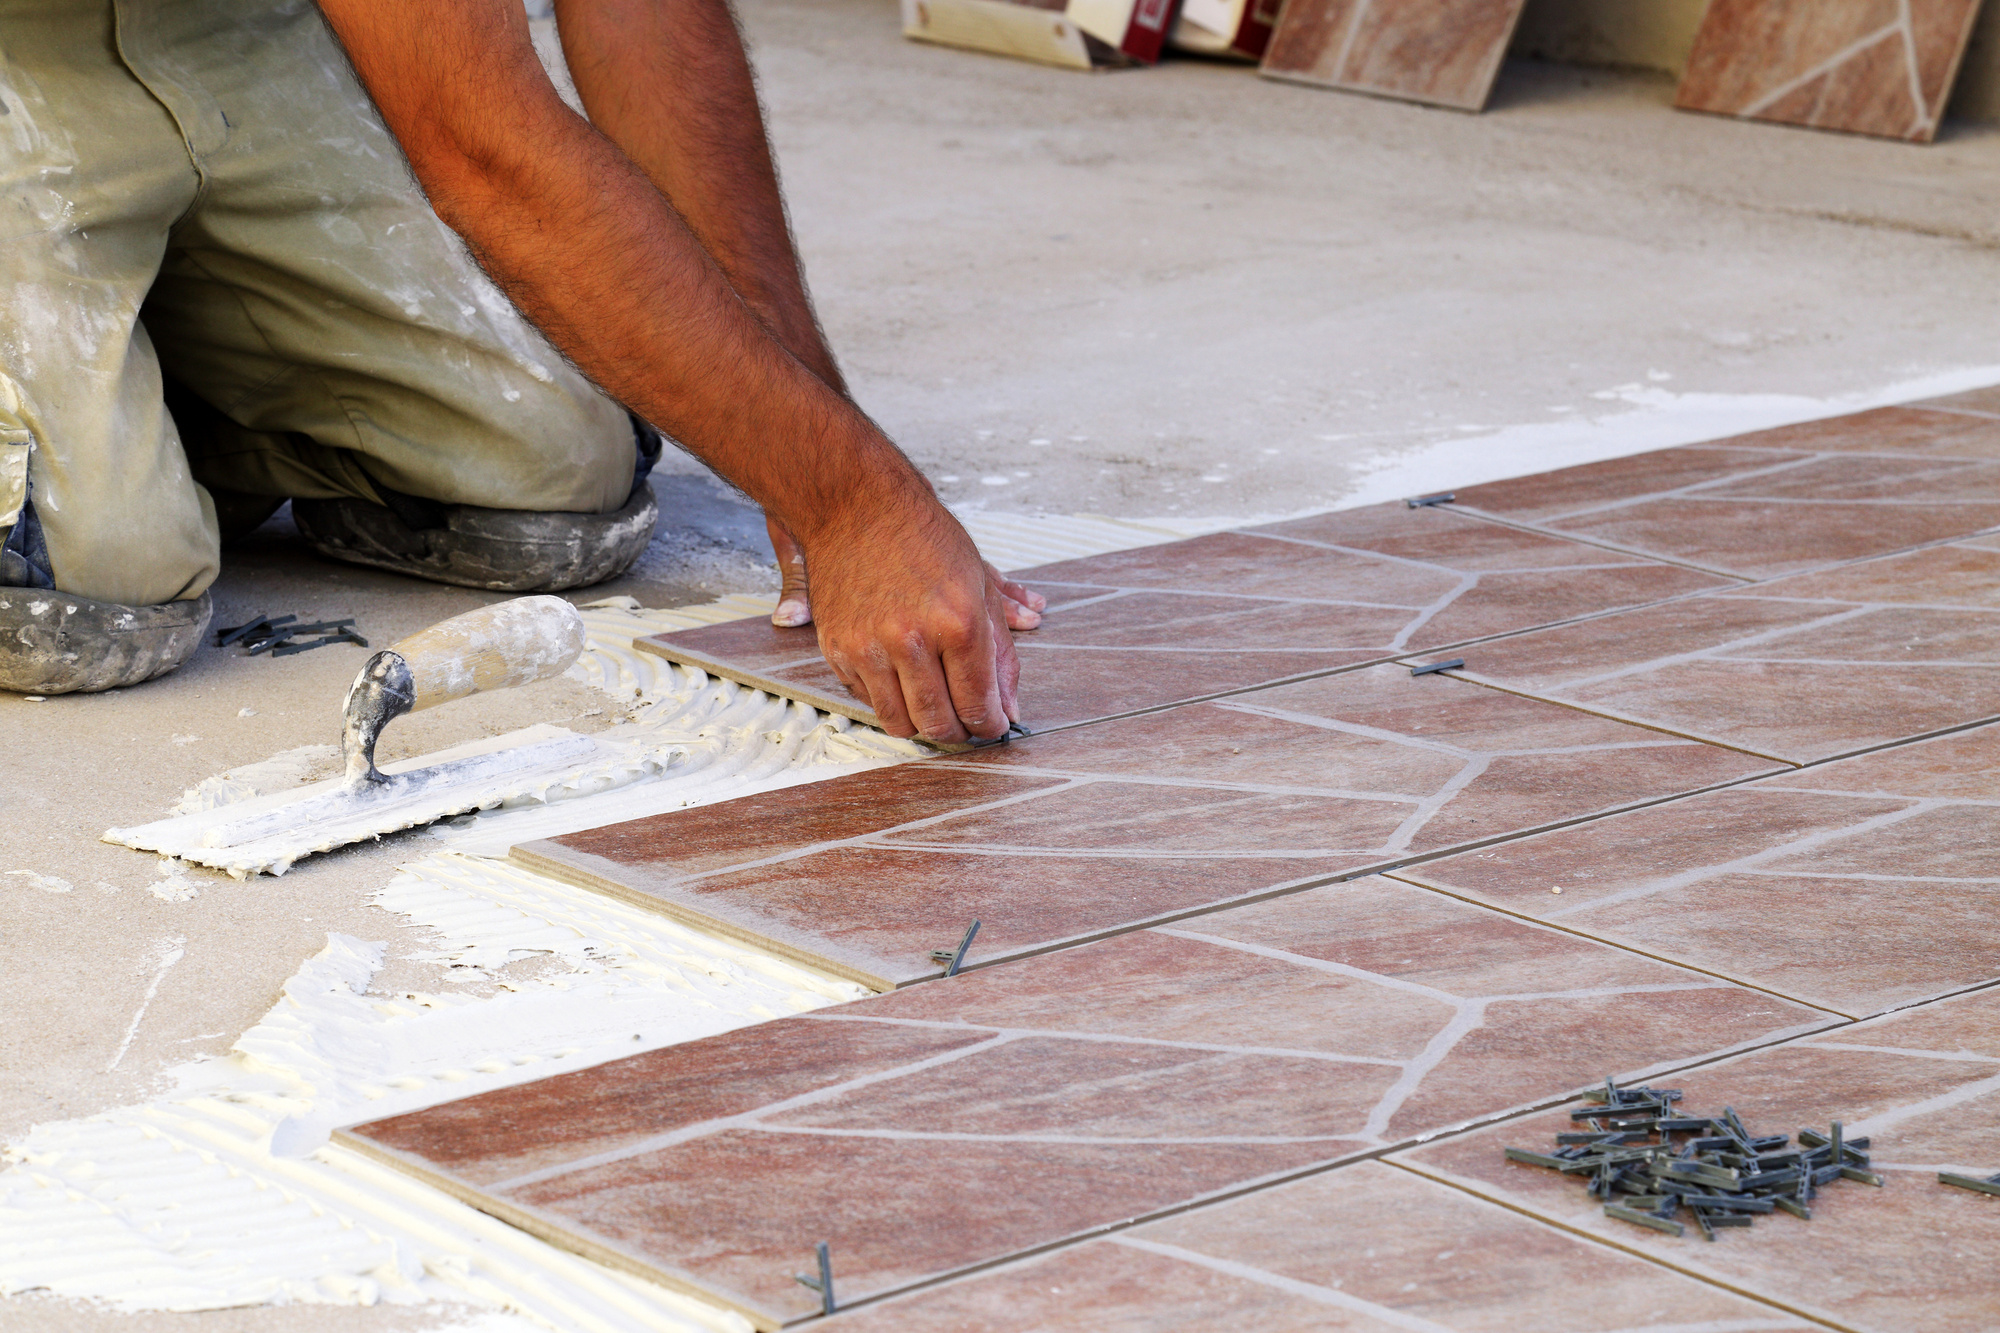
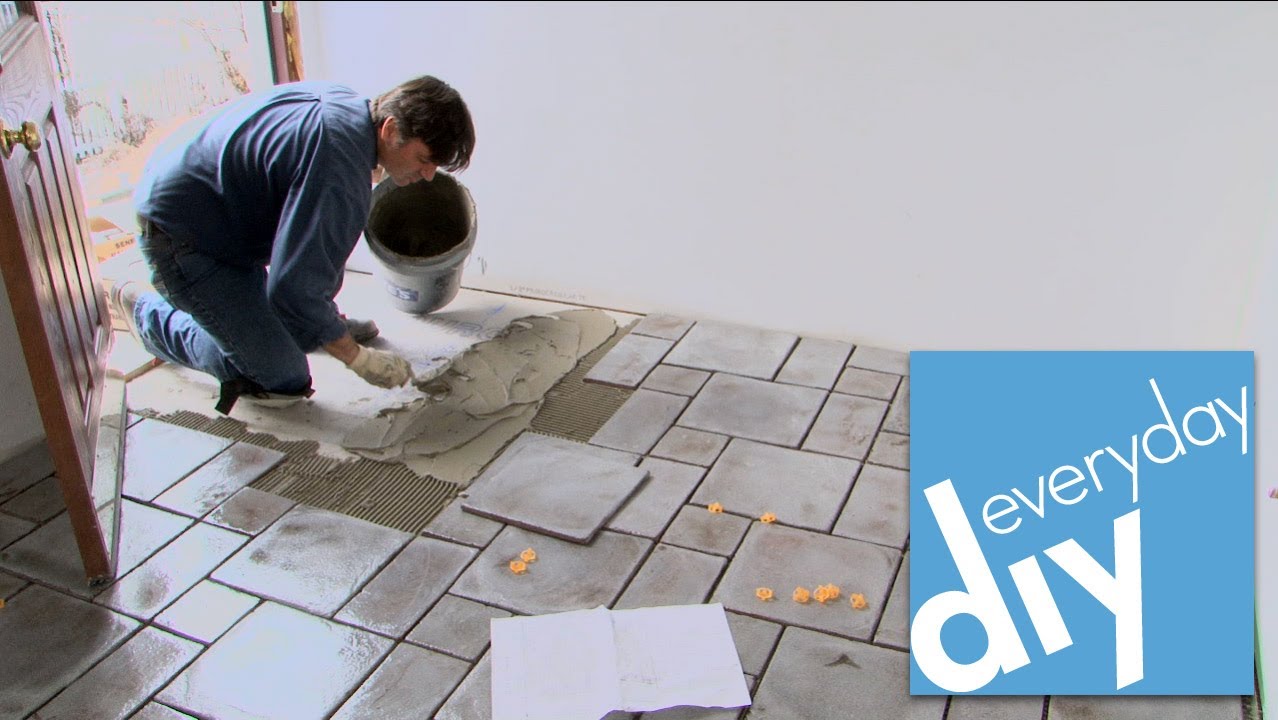
Once the subfloor is prepared, homeowners can begin laying the tile. The first step is to establish a layout plan, which involves determining the starting point and orientation of the tile installation, as well as calculating the number of tiles needed to cover the entire floor area. It’s essential to use tile spacers to maintain consistent spacing between tiles and ensure uniform grout lines. Additionally, homeowners should use a level and straightedge to ensure that the tiles are laid evenly and aligned properly.

After laying the tile, the next step is to apply grout to the joints between the tiles. Grout not only fills in the gaps between tiles but also provides stability and support for the tile installation. It’s crucial to choose the right type of grout for the project, such as sanded or unsanded grout, based on the size and spacing of the tiles. Once the grout is applied, homeowners should use a grout float to press the grout into the joints and remove any excess grout from the surface of the tiles.
Finally, homeowners should allow the grout to dry completely before sealing the tile floor. Sealing the tile helps protect it from stains, moisture, and wear, prolonging its lifespan and maintaining its appearance. It’s essential to choose a high-quality tile sealer and apply it according to the manufacturer’s instructions for best results. With proper planning, preparation, and execution, DIY laying tile floor projects can be successful endeavors that enhance the beauty and functionality of any space in the home.
How to Install Ceramic Tile Flooring

Beginners Guide to Laying Tile How to lay tile

DIY ~ 8 Steps To Laying A New Tile Floor Emily Reviews
How to Install a Tile Floor
Common Mistakes When Installing Tile Floor
Mistakes To Avoid When Installing Tile Floor
How to Install Floor Tile (with Pictures) – wikiHow
How to Lay Tile: DIY Floor Tile Installation Loweu0027s
Related Posts:
- Installing Slate Tile Floor
- Painting Ceramic Tile Floor In Kitchen
- Anti Slip For Tile Floors
- Laminate Tile Flooring
- Marble Tile Floors
- Travertine Tile Flooring
- Modern Kitchen Tile Floor
- Country Style Tile Floors
- White Tile Flooring Ideas
- Herringbone Brick Tile Floor
DIY Laying Tile Floor: A Step-by-Step Guide
The idea of laying tile flooring can be daunting for many homeowners. But with a little knowledge and the right tools, you can achieve a professional-looking result. Read on for a step-by-step guide to help you lay tile flooring like a pro.
Tools and Materials Needed
Before beginning your installation, it’s important to ensure you have the right tools and materials. You’ll need tile, grout, spacers, trowel, tile cutter, notched trowel, level, mixing paddle, rubber float, sponge, and sealer.
Preparing the Subfloor
The first step is to prepare the subfloor, making sure it’s clean and level. Check for any loose or damaged areas and repair them as needed. Then, use a notched trowel to spread thinset mortar over the surface of the subfloor. Allow it to cure according to the manufacturer’s instructions before continuing.
Laying the Tiles
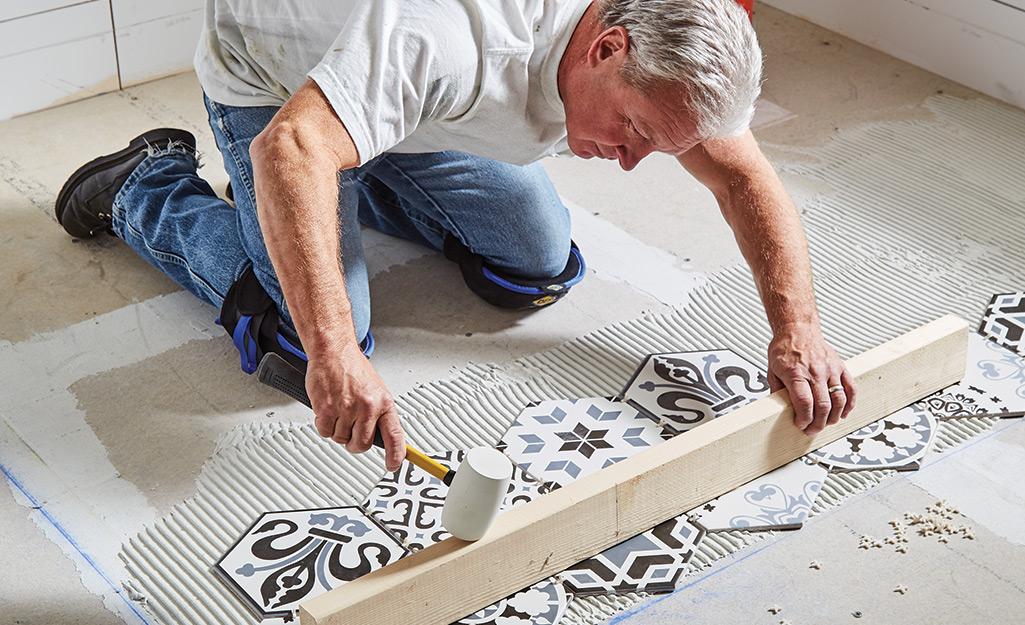
Start in one corner of the room and lay your tiles in a staggered pattern. Use spacers between each tile for consistent spacing. As you go, check for level with a leveler to ensure a smooth finish. When you reach an obstacle like a wall or cabinet, use a tile cutter or wet saw to cut the tiles to fit.
Grouting
Once all the tiles are laid, it’s time to grout. Mix the grout according to the manufacturer’s instructions using a mixing paddle and rubber float. Spread the grout over the entire floor using a rubber float in a circular motion to ensure that all spaces between the tiles are filled. Allow the grout to set according to the manufacturer’s instructions before continuing.
Cleaning
After the grout has been completely set, use a damp sponge to clean off any excess grout from the surface of each tile. Be sure to rinse the sponge regularly as you go. Once all the excess has been removed, allow the tiles to dry completely before applying sealer (optional).
Completing Your Project
Congratulations! You have completed your DIY tile flooring project. With a little patience and attention to detail, you can achieve a beautiful result that will last for years to come.
What type of grout should I use?
The type of grout you choose will depend on your specific project. Generally speaking, sanded grout is recommended for larger joints (1/8 inch or more) while unsanded grout is better suited for smaller joints (less than 1/8 inch).
How do I know when my grout is ready?
When your grout is ready it should be firm but still slightly pliable when pressed with your finger or rubber float. If it feels overly hard or brittle, it’s not ready yet and needs more time to cure.
What type of sealer should I use?
For best results, we recommend using an impregnating sealer designed specifically for tile floors. This will help protect your floor against dirt and staining while also making it easier to clean in the future.