In case you are cost cutting, you might actually want to check out recycled glass tile floor surfaces. It's timeless in baths and kitchens ; and today hearths, dining rooms, hallways, energy rooms and done basements. Their uses vary widely and include exterior facades, fireplaces, wall covering, countertops, and flooring. One of the more traditional flooring ideas to go with is using terracotta tiles.
Images about How To Put In A Heated Tile Floor
How To Put In A Heated Tile Floor

Tiles however are far easier to set up but garage area tile flooring surfaces does come with its own pros positives and negatives as we shall discover going ahead. And then, wipe the slim excess off the tiles and hold on no less than twenty four hours for them to establish. Mosaic tile flooring is one of the most treasured designs because of the high level of creativity you are able to make use of in having them in your house.
How to install a heated tile floor. and also how NOT to install
Lots of people are actually getting away from carpeting because of the dust mites which are able to accumulate in the carpet, hence the possibilities are countless as to where and how you can put in tile flooring. After cleaning you can then start to move the remainder of the furniture of yours in, then take it easy, relax and admire the benefits of the hard work of yours.
How to Install In-Floor Radiant Heat
How to Install In-Floor Radiant Heat
Heated Tile Floor on Slab » Rogue Engineer

Heated Floor Tile Installation
How to Install In-Floor Heating for your Bathroom? (Step-by-Step
How to Install a Heated Tile Floor u0027How-Tou0027 u0026 DIY Blog – PlumbTile

How to Install Heated Floors Under Tile: a Definitive Guide

How we install Radiant in-floor heat
Get the Low Down on Radiant Heated Floors – ACo

Put Some Heat in the Bathroom with Heated Floors Heated floors

How to Install Heated Floors?
Heated Floors u2013 A Way To Make Your Kitchen or Bathroom More
Related Posts:
- Installing Slate Tile Floor
- Painting Ceramic Tile Floor In Kitchen
- Anti Slip For Tile Floors
- Laminate Tile Flooring
- Marble Tile Floors
- Travertine Tile Flooring
- Modern Kitchen Tile Floor
- Country Style Tile Floors
- White Tile Flooring Ideas
- Herringbone Brick Tile Floor
How To Put In A Heated Tile Floor
Installing a heated tile floor can be a great way to make your home more comfortable and energy efficient. Heated tile floors provide a warm, cozy feel to any room, while also providing energy savings. With a few simple steps, you can have a heated tile floor installed in no time.
Planning and Preparing for Installation
The first step to installing a heated tile floor is to plan and prepare for the installation. This includes determining the best location, choosing the right type of tiles, and measuring the area that needs to be covered. It’s important to choose tiles that are compatible with your heating system, so it’s wise to consult with an expert before making your purchase.
Once you’ve chosen the tile and determined the area that needs to be covered, you’ll need to measure and mark off the space accordingly. You should also make sure that the area is clean and free of debris before beginning installation. Additionally, it’s important to check for any wiring or plumbing that may need to be moved or repositioned before laying down the tiles.
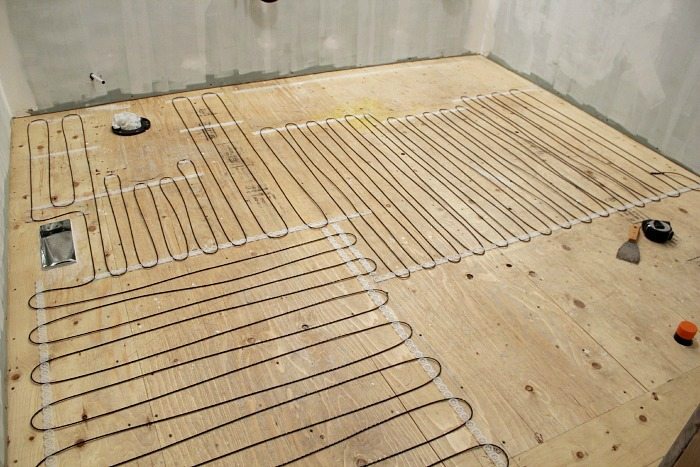
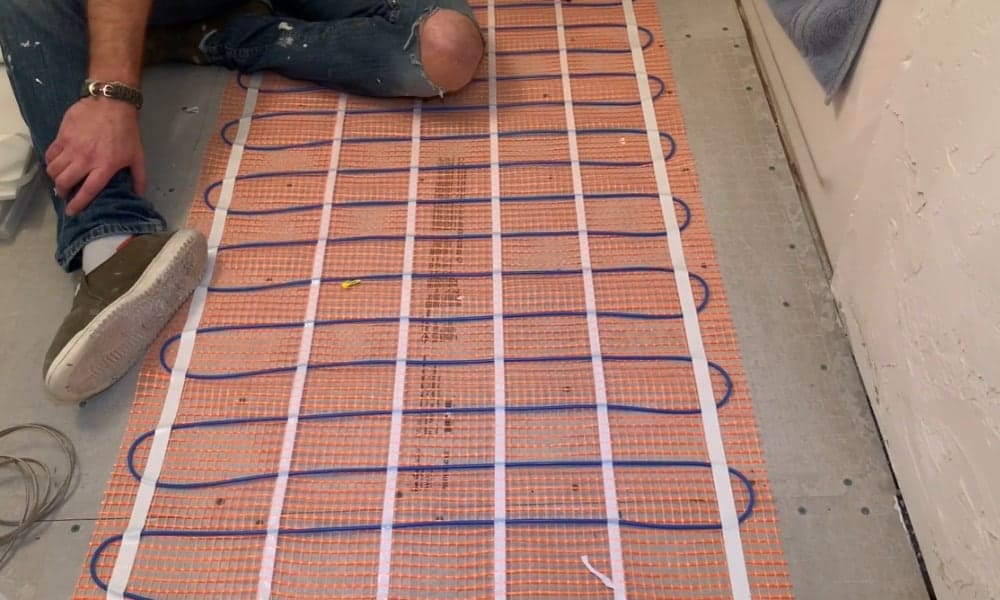
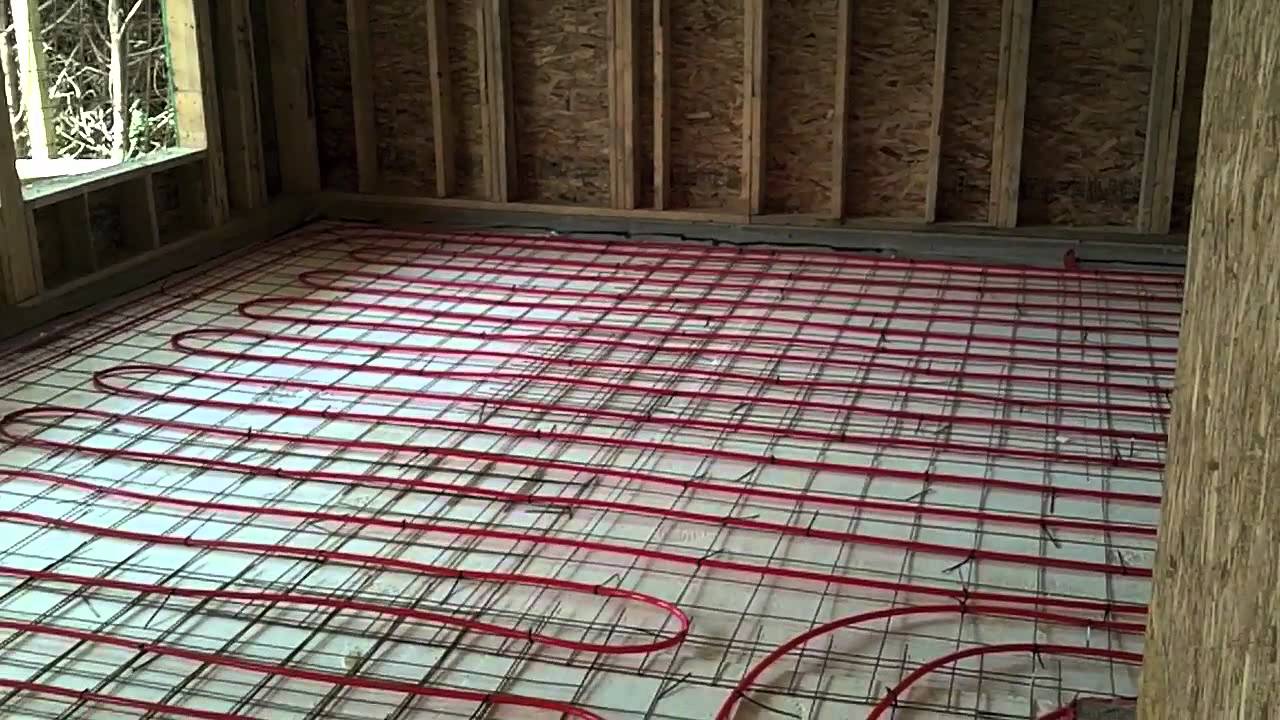
Installing The Heating System
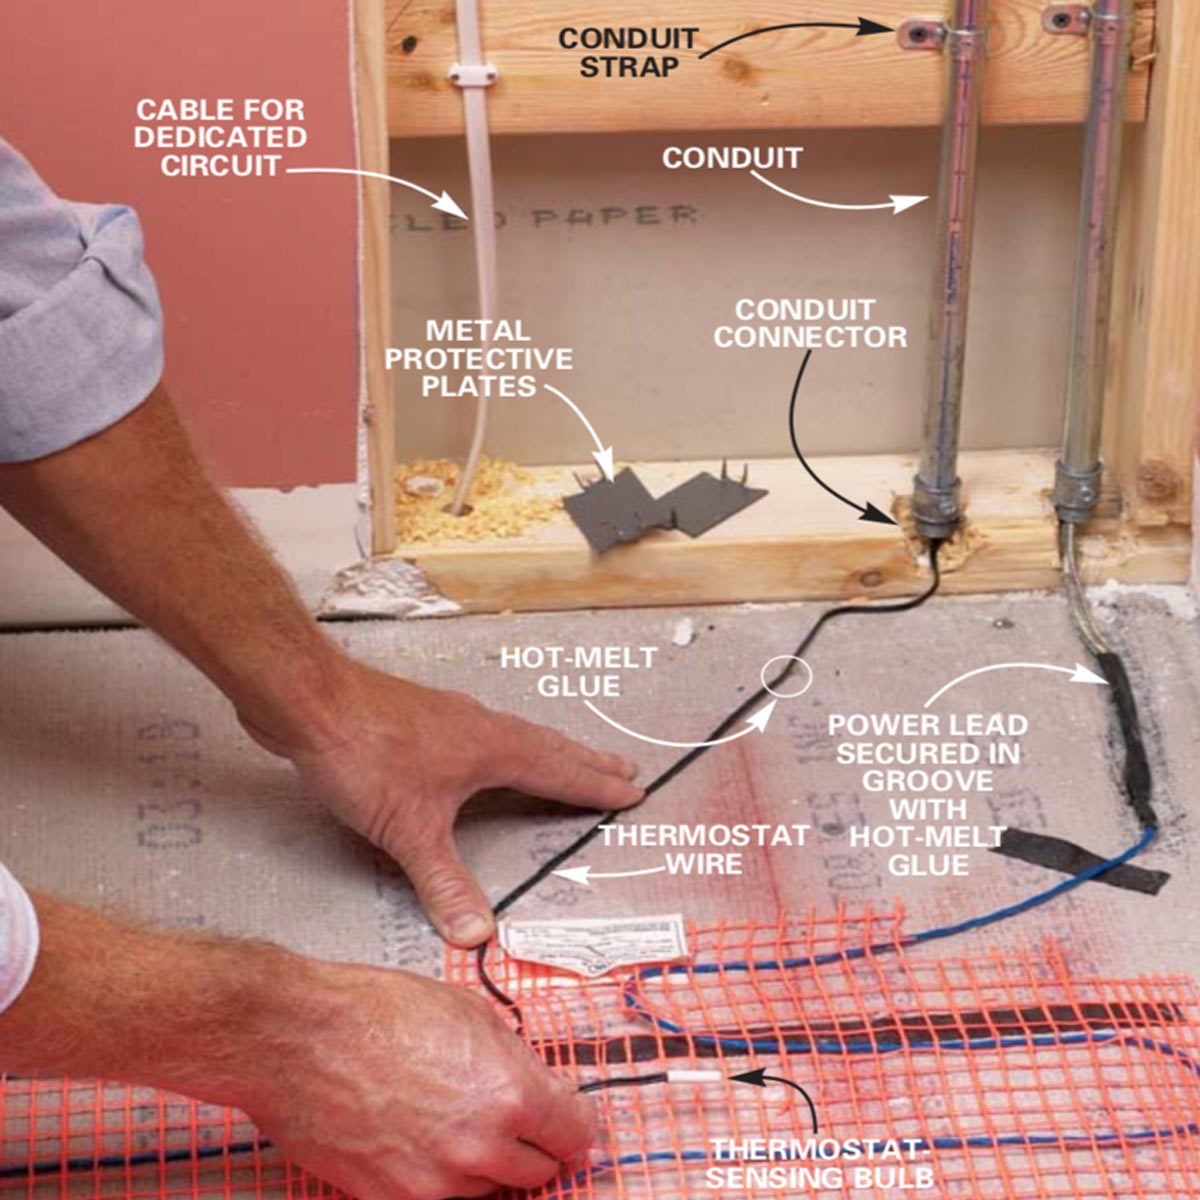
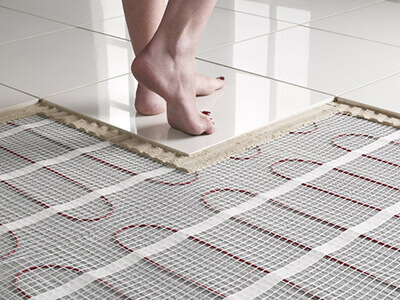
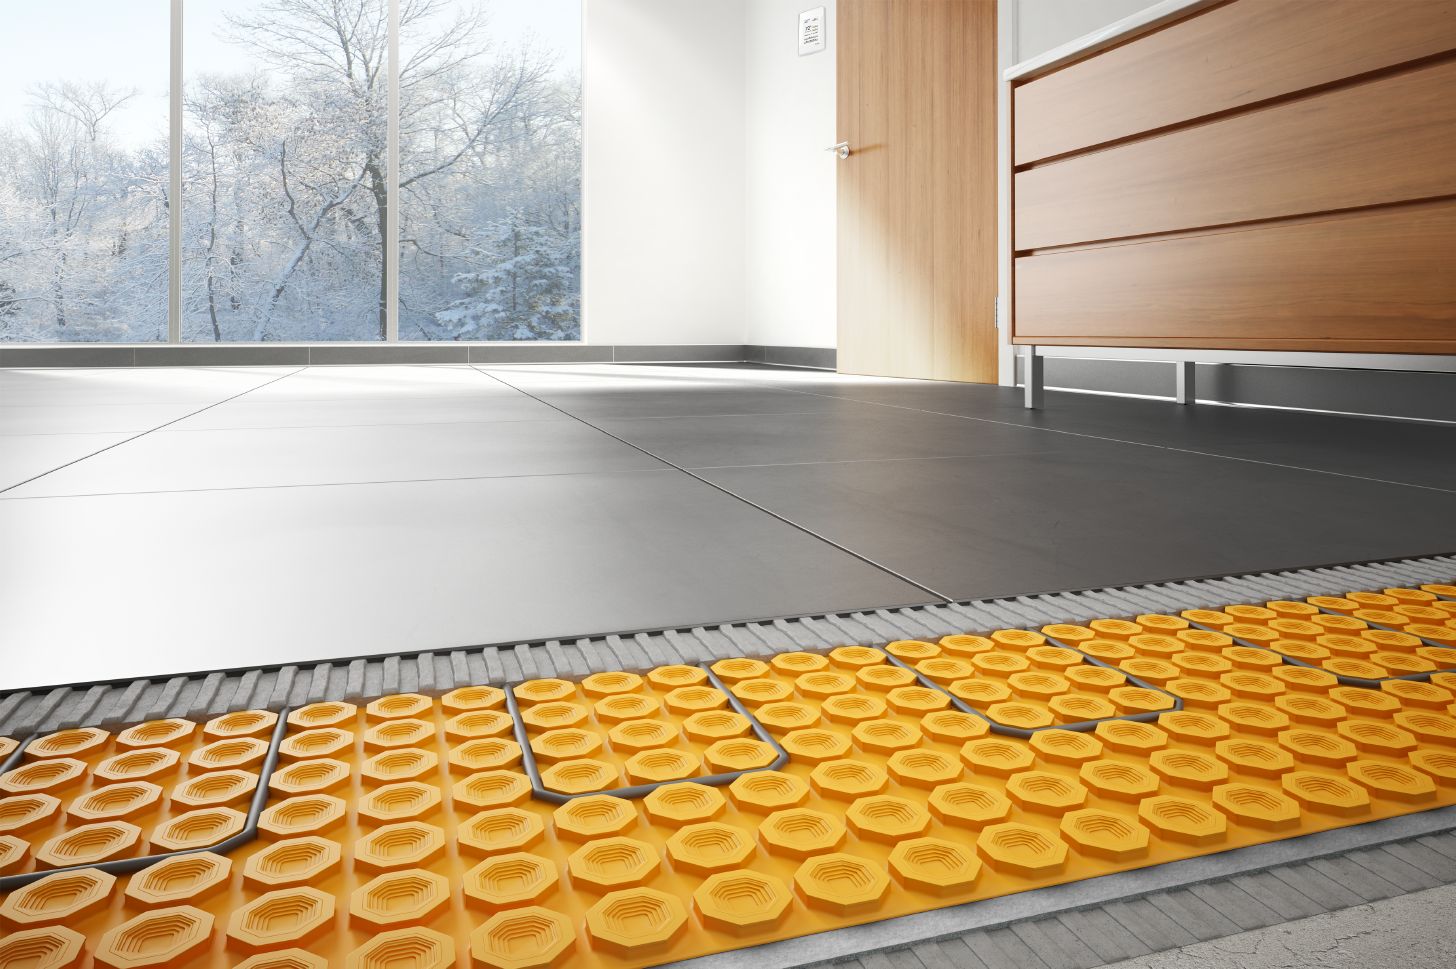
The next step in the process is to install the heating system. Depending on your system, this may involve laying out cables in the space or installing electric mats or mats with pipes beneath them. If you are using an electric mat system, make sure it is connected to a dedicated circuit breaker that is separate from other circuits in your home. Additionally, make sure that all electrical connections are secure and properly grounded according to local codes.
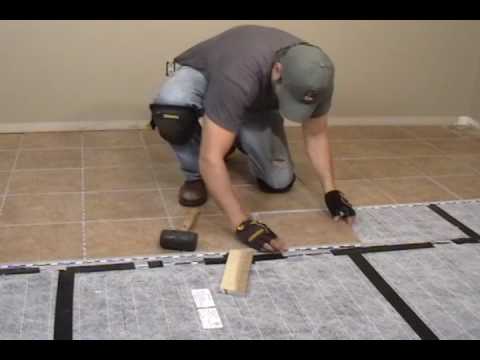
Once the heating system is installed, you can begin laying down the tiles. Start by laying out rows of tiles along one edge of the space and work your way across until all of the tiles are laid down. Before applying adhesive, make sure that all of the tiles are properly aligned and secured in place with spacers or wedges.
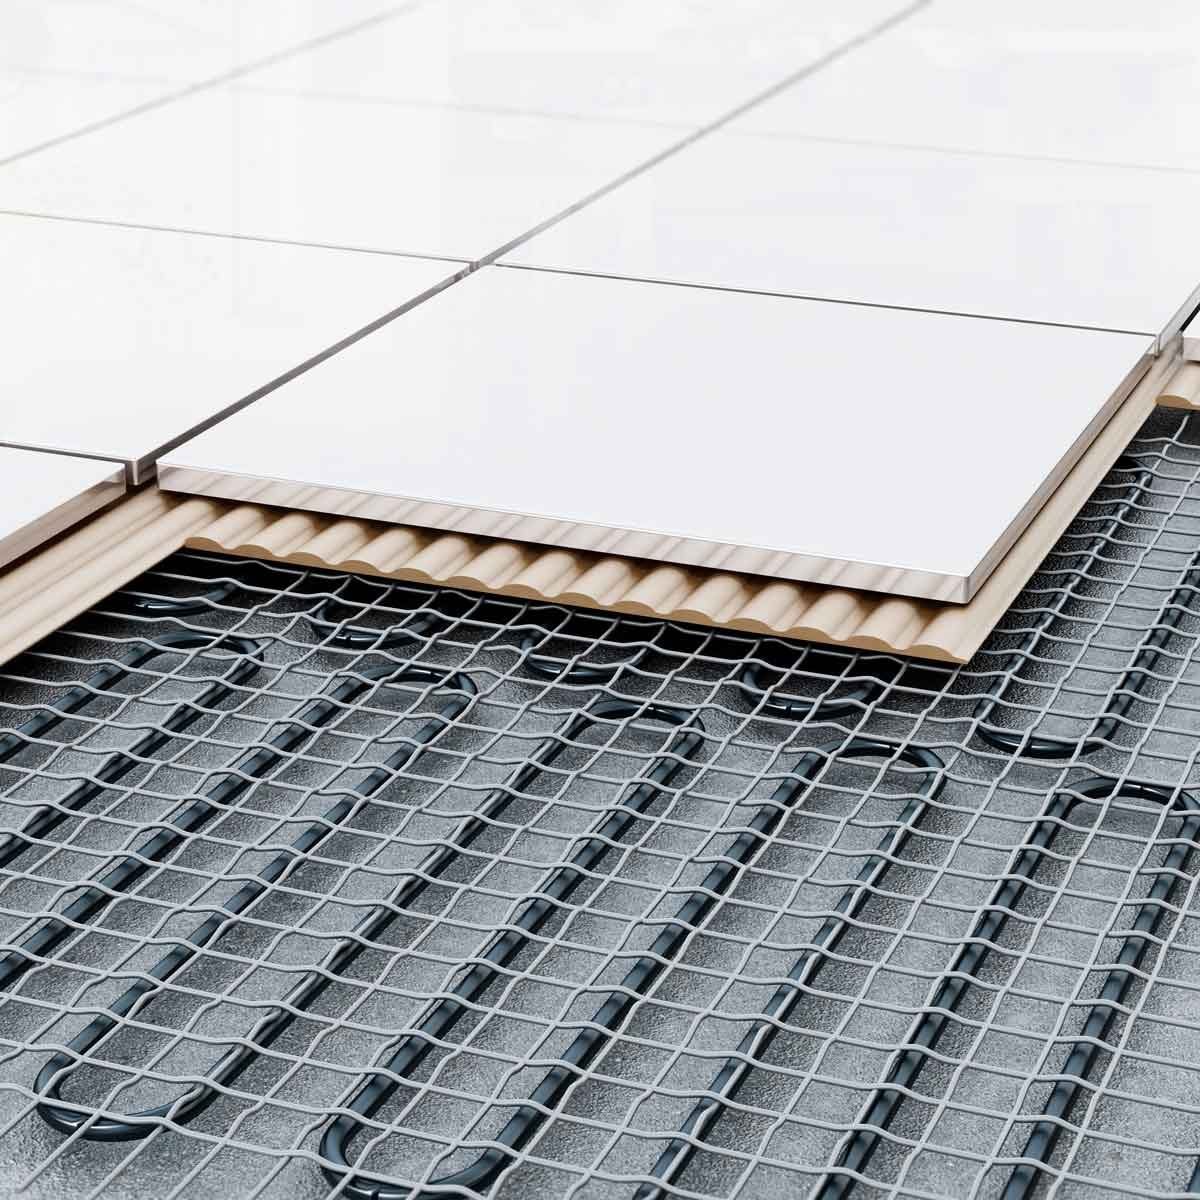
Applying Adhesive and Grouting
Once all of the tiles are laid out, it’s time to apply adhesive and grout. Make sure that you use a trowel that is specifically designed for heated tile floors so that you don’t damage the heating element beneath the tiles. Apply a thin layer of adhesive across the entire surface of the space and then lay down each tile one at a time. Make sure you press each tile firmly into place so that it adheres properly and then use spacers or wedges between each tile to ensure even spacing.
Once all of the tiles are laid down, you can begin grouting them. Start by mixing up a batch of grout according to package directions and then use a rubber trowel to spread it into all of the spaces between each tile. Wipe away any excess grout with a damp sponge and let it dry completely before walking on it.
Finishing The Job
The final step in installing a heated tile floor is to finish off any exposed edges or seams with trim or caulk. This will help keep moisture from seeping beneath the tiles and will give your floor a neat, finished look once it’s installed. If necessary, you can also install edging along any exposed corners or edges to give your floor an even more polished appearance.
Once everything is done, your heated tile floor is ready for use! You can enjoy its warmth throughout the winter months and its energy-saving benefits year round!
FAQs About Installing A Heated Tile Floor
Q: What types of heating systems can I use for my heated tile floor?
A: The type of heating system used will depend on your preferences and budget as well as what type of flooring you have installed in your home already. Electric mats are one option as they provide even heat distribution across the entire space and can be installed relatively easily. Other options include hydronic systems which use hot water circulating beneath them to provide heat as well as radiant heat panels which can be installed beneath hardwood or laminate floors.
Q: Is there anything I need to consider before beginning installation?