Understanding the Importance of Sealing Grout on Ceramic Tile Floors
When it comes to maintaining the longevity and appearance of your ceramic tile floors, sealing the grout is a crucial step that should not be overlooked. Grout is a porous material that can easily absorb spills, stains, and dirt, leading to discoloration and deterioration over time. Let’s discuss the importance of sealing grout on ceramic tile floors and the benefits it brings.
- Protecting Against Stains and Dirt: Sealing the grout on your ceramic tile floors acts as a protective barrier, preventing stains and dirt from penetrating the porous surface. Unsealed grout can easily absorb spills, making it difficult to remove stains and resulting in permanent discoloration. Sealing the grout provides an extra layer of protection, making it easier to clean and maintain the pristine appearance of your floors.
- Preventing Water Damage: Ceramic tile floors are commonly found in areas prone to moisture, such as bathrooms and kitchens. Unsealed grout can absorb water, leading to mold and mildew growth beneath the surface. By sealing the grout, you create a waterproof barrier that prevents water from seeping through, reducing the risk of water damage and ensuring the longevity of your ceramic tile floors.
- Enhancing Durability: Sealing the grout on your ceramic tile floors not only protects against stains and water damage but also enhances its overall durability. Sealed grout is less prone to cracking, chipping, and crumbling, as it is shielded from external factors that can weaken its structure. This, in turn, helps to maintain the integrity of your ceramic tile floors, extending their lifespan.
- Improving Hygiene: Unsealed grout can harbor bacteria, germs, and allergens, posing a risk to your health and well-being. Sealing the grout creates a hygienic surface that is easier to clean and sanitize, reducing the presence of harmful pathogens. This is especially important in areas like bathrooms and kitchens where cleanliness is crucial.
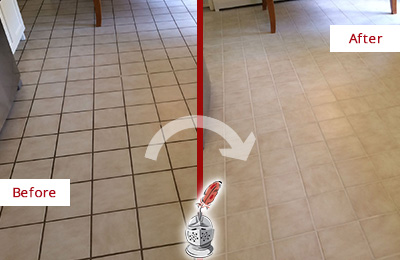
- Enhancing Aesthetics: Sealed grout not only protects your ceramic tile floors but also enhances their overall aesthetics. By sealing the grout, you prevent discoloration and maintain the original color of the grout, ensuring that your floors look clean and well-maintained. This can significantly improve the visual appeal of your living space and increase the value of your home.
How to Prepare Ceramic Tile Floors for Grout Sealing
Before sealing the grout on your ceramic tile floors, proper preparation is essential to ensure a successful and long-lasting seal. Follow this step-by-step guide on how to prepare ceramic tile floors for grout sealing, ensuring optimal results.
Clean the Surface: Start by thoroughly cleaning the ceramic tile floors and the grout lines. Remove any dirt, dust, or debris using a broom or vacuum cleaner. Then, use a mild detergent or grout cleaner specifically designed for ceramic tiles to clean the grout lines. Scrub gently using a grout brush or a soft-bristle toothbrush to remove any stains or residue.
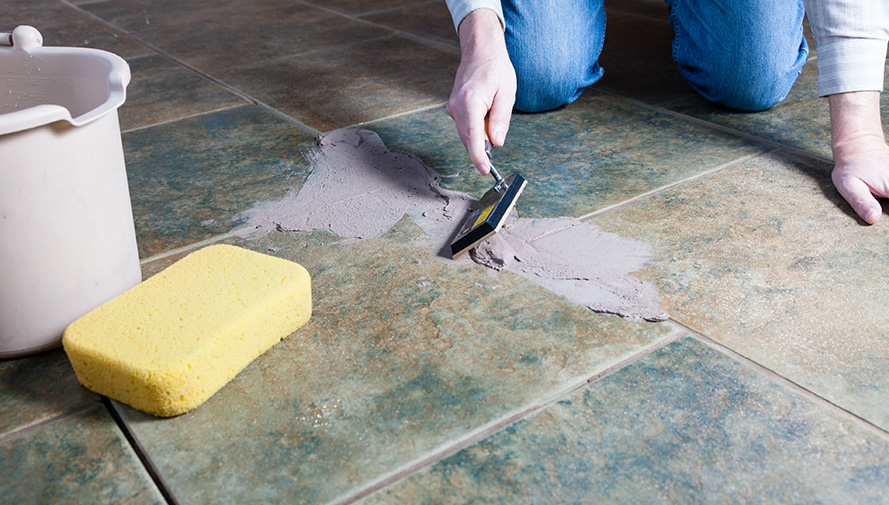
Repair Damaged Grout: Inspect the grout lines for any cracks, chips, or missing grout. If you find any, it’s important to repair them before sealing. Use a grout saw or utility knife to remove the damaged grout, ensuring that the depth matches the surrounding grout lines. Clean the area thoroughly and allow it to dry before proceeding.
Allow Sufficient Drying Time: Before applying the grout sealer, ensure that the ceramic tile floors and grout lines are completely dry. Depending on the humidity and temperature, this may take anywhere from a few hours to a day. It’s crucial to allow sufficient drying time to prevent moisture from being trapped beneath the sealer.
Test the Sealer: Before applying the grout sealer to the entire floor, it’s recommended to perform a small test in an inconspicuous area. Apply a small amount of sealer and allow it to dry according to the manufacturer’s instructions. Check for any discoloration or adverse reactions. If all is well, you can proceed with sealing the entire floor.
Protect Surrounding Surfaces: To prevent the grout sealer from accidentally staining or damaging surrounding surfaces, such as walls or baseboards, it’s important to protect them. Use painter’s tape or plastic sheeting to cover and protect these areas before applying the grout sealer.
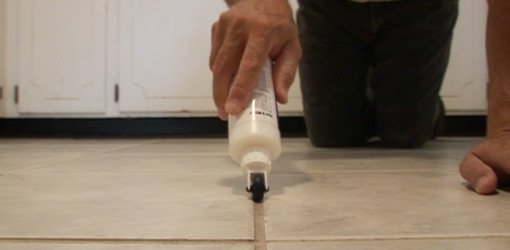
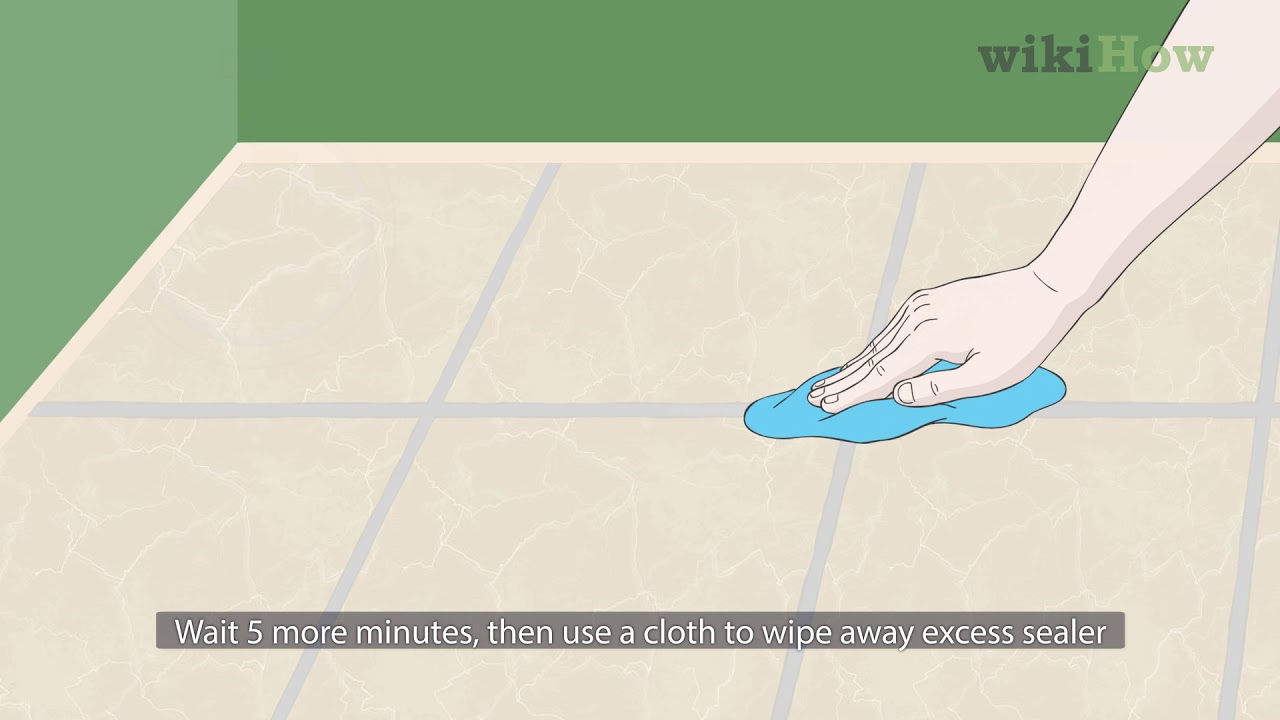
Apply the Grout Sealer: Follow the manufacturer’s instructions for your chosen grout sealer. Apply the sealer evenly to the grout lines using a small foam brush or a grout sealer applicator. Work in small sections, ensuring thorough coverage. Allow the sealer to penetrate the grout for the recommended time, usually around 10-15 minutes, and then wipe off any excess sealer using a clean cloth.
Choosing the Right Sealer for Your Ceramic Tile Floor
Choosing the right grout sealer for your ceramic tile floor is crucial to ensure maximum protection and longevity. With numerous options available on the market, it’s important to understand the different types of sealers and their features. Here is a comprehensive overview to help you make an informed decision when choosing the right sealer for your ceramic tile floor.
Water-Based Sealers: Water-based sealers are popular for their ease of use and low odor. They are non-toxic and environmentally friendly, making them suitable for indoor use. These sealers penetrate the grout, creating a protective barrier against stains and water damage. They are generally fast-drying and offer a natural or matte finish. However, they may require more frequent reapplication compared to other types of sealers.
Solvent-Based Sealers: Solvent-based sealers are known for their durability and long-lasting protection. They provide a high level of stain resistance and are suitable for both indoor and outdoor use. Solvent-based sealers typically have a stronger odor and require proper ventilation during application. They offer a range of finishes, including glossy, satin, or matte. These sealers require less frequent reapplication but may be more challenging to remove if necessary.
Penetrating Sealers: Penetrating sealers are designed to penetrate the grout and create a protective barrier from within. They work by chemically reacting with the grout to form a waterproof barrier that doesn’t alter the appearance of the grout. Penetrating sealers are ideal for natural-looking grout lines and are effective in preventing water damage and stains. However, they may not offer the same level of stain resistance as topical sealers.
Topical Sealers: Topical sealers sit on the surface of the grout and create a protective layer. They provide excellent stain resistance and are available in various finishes, including glossy, satin, or matte. Topical sealers are easy to apply and offer a visible layer of protection. However, they may require more frequent reapplication compared to penetrating sealers, as they can wear off over time.
Enhancing Sealers: Enhancing sealers are designed to darken the color of the grout, enhancing its natural appearance. They provide a wet or “wet-look” finish, intensifying the color and adding depth to the grout lines. Enhancing sealers offer protection against stains and water damage while enhancing the aesthetics of your ceramic tile floor. It’s important to note that the color-enhancing effect may vary depending on the porosity of the grout.
Applying Grout Sealer: Techniques and Tips for a Flawless Finish
Applying grout sealer to your ceramic tile floor is a crucial step in maintaining its beauty and longevity. Proper application techniques and tips can help you achieve a flawless finish and ensure maximum protection. Below we provide techniques and tips for applying grout sealer effectively.
Prepare the Area: Before applying grout sealer, ensure that the ceramic tile floor and grout lines are clean and dry. Remove any dust, dirt, or debris using a broom or vacuum cleaner. Clean the grout lines with a mild detergent or grout cleaner and allow them to dry completely.
Choose the Right Applicator: Select an applicator that is suitable for the size of the grout lines and the type of sealer you are using. Foam brushes or grout sealer applicators are commonly used for small grout lines, while paintbrushes or foam rollers are suitable for larger grout lines. Ensure that the applicator is clean and in good condition.
Apply in Small Sections: Work in small sections to ensure thorough and even coverage. Start at one corner of the room and apply the sealer to the grout lines using the chosen applicator. Apply the sealer in a back-and-forth motion, ensuring that the grout lines are completely saturated.
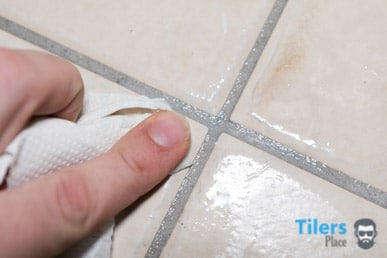
Wipe Off Excess Sealer: After applying the sealer to a section, immediately wipe off any excess sealer from the ceramic tile surface using a clean cloth or sponge. Failure to remove excess sealer may result in a hazy or sticky residue on the tiles.
Allow Sufficient Drying Time: Follow the manufacturer’s instructions regarding the drying time. It’s important to allow the sealer to fully penetrate the grout lines before exposing the floor to foot traffic or moisture. This typically takes around 24-48 hours, but it may vary depending on the type of sealer and environmental conditions.
Apply Multiple Coats if Necessary: Depending on the porosity of the grout and the desired level of protection, multiple coats of sealer may be required. Allow each coat to dry completely before applying an additional coat. Be sure to follow the manufacturer’s instructions regarding the number of recommended coats.

Maintaining and Extending the Lifespan of Your Sealed Grout on Ceramic Tile Floors
Sealing the grout on your ceramic tile floors is a crucial step in protecting against stains, water damage, and deterioration. However, proper maintenance is equally important to ensure the longevity and effectiveness of the grout seal. Here are several tips for maintaining and extending the lifespan of your sealed grout on ceramic tile floors.
Regular Cleaning: Regular cleaning is essential to prevent dirt, grime, and stains from building up on the sealed grout. Use a mild detergent or grout cleaner specifically designed for ceramic tiles to clean the grout lines regularly. Avoid using harsh chemicals or abrasive cleaners that can damage the grout seal.
Promptly Clean Spills: Promptly clean up any spills on your ceramic tile floors to prevent staining. Wipe up spills using a clean cloth or paper towel, and clean the affected area with a mild detergent if necessary. Avoid using abrasive materials or scrub brushes that can damage the grout seal.
Avoid Harsh Cleaning Methods: Avoid using harsh cleaning methods, such as steam cleaners or high-pressure washers, as they can strip away the grout seal and cause damage. Stick to gentle cleaning methods and avoid excessive scrubbing that can wear down the grout seal over time.
Reapply Sealer as Needed: Over time, the grout seal may wear off or become less effective. Monitor the condition of the grout seal and reapply the sealer as needed. Follow the manufacturer’s instructions regarding reapplication frequency and techniques.
Use Mats or Rugs in High-Traffic Areas: Place mats or rugs in high-traffic areas, such as entryways or hallways, to minimize wear and tear on the sealed grout. Mats can help trap dirt and debris, reducing the amount of dirt that comes in contact with the grout and prolonging its lifespan.
Avoid Excessive Moisture: Excessive moisture can weaken the grout seal and lead to water damage. Avoid excessive moisture on your ceramic tile floors by promptly wiping up any water spills and using proper ventilation in areas prone to high humidity, such as bathrooms and kitchens.

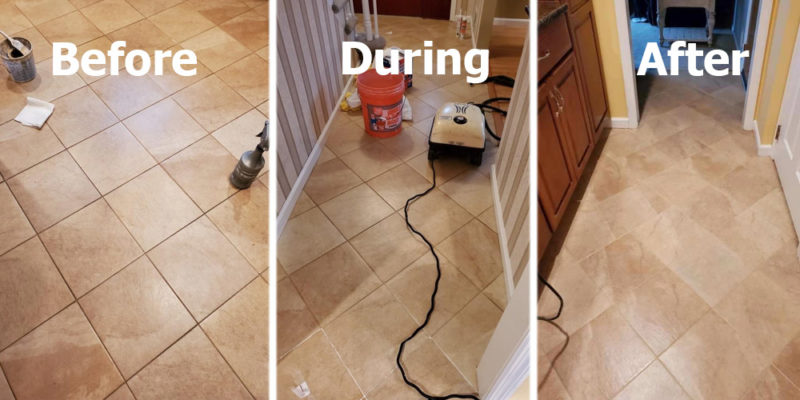
Residential Tile and Grout Cleaning and Sealing – Sir Grout
How to Clean, Refresh, and Seal Your Grout (Easily and Cheaply!)

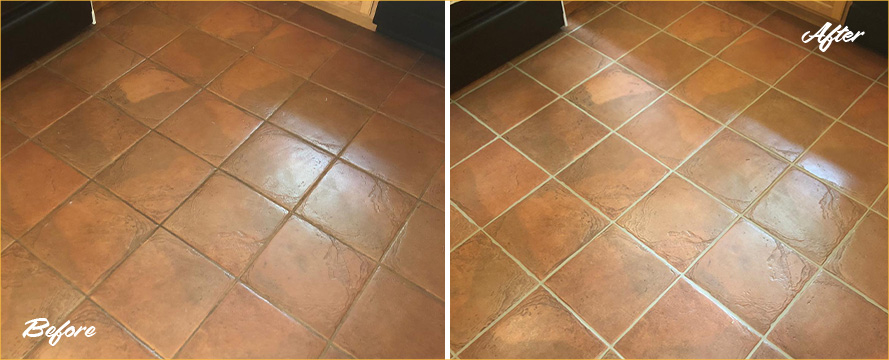
See How Our Grout Sealing Service Gave This Ceramic Tile Floor in
Grout Sealing Services Grout Sealing The Grout Medic
Is Grout Sealing Necessary After Installing New Tile?

How to Seal Grout: 12 Steps (with Pictures) – wikiHow
Georgetown Tile sealing, Tile sealing Georgetown TX

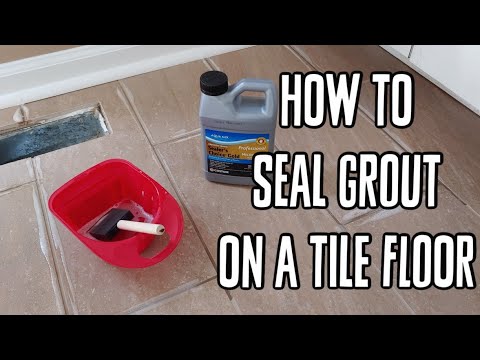
How To Seal Grout on a Tile Floor
Related Posts: