The expression that relates to a selection of decorative concrete flooring solutions which typically end up leaving a concrete surface preferably exposed when the previous final and last floor finishing. For an intensive cleaning, clean the floor with a concrete cleaner and after that follow with a great rinsing. Little bumps and ridges are made on textured concrete floor surfaces for a better traction while walking.
Images about How To Lay Porcelain Tiles On A Concrete Floor
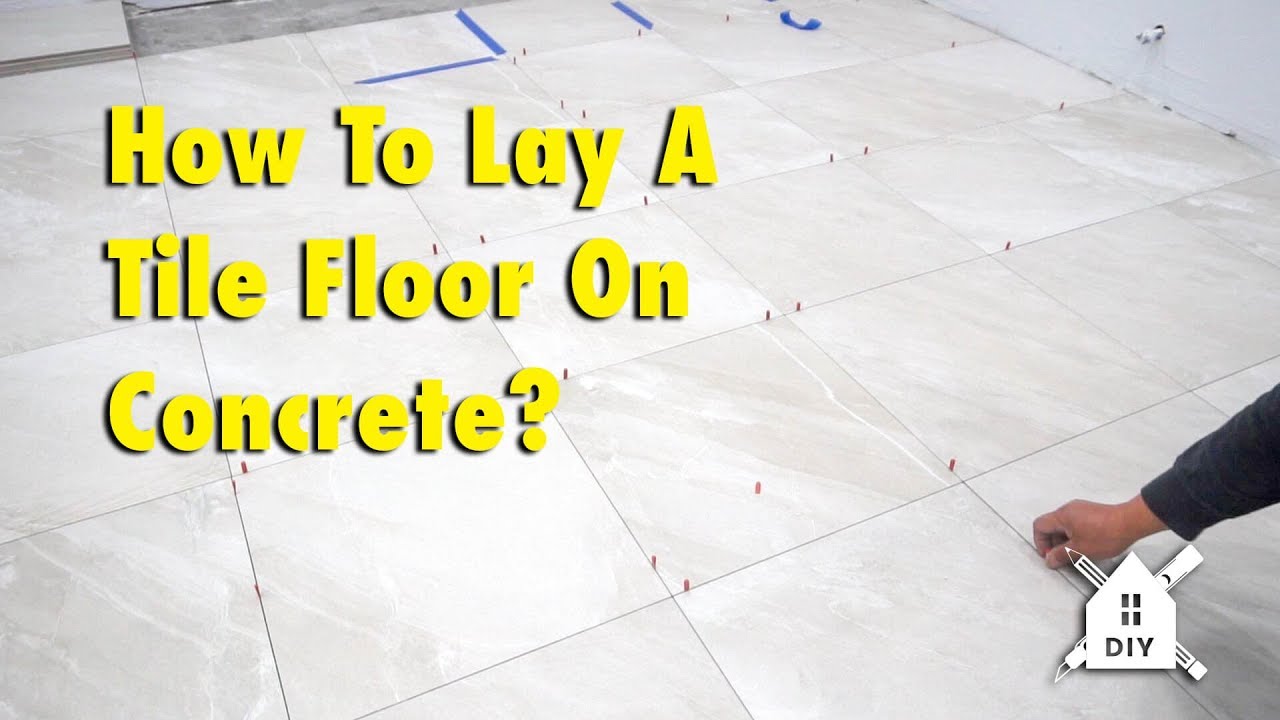
How To Lay Porcelain Tiles On A Concrete Floor
With concrete flooring, once the floors are laid, they are polished to a substantial gloss and remaining on display. Those the majority of enthusiastic about establishing environmentally alternative houses have been among the first to adopt polished concrete floors, and also with valid reason. Warehouses and basements are the perfect applications for polished concrete floors.
How to Install Tile Over Concrete – GreenBuildingAdvisor

Developing with concrete countertops out of doors can also be appealing due to the easy maintenance of theirs and vast style flexibility. Concrete polishing is actually the finish of preference for many owners of new and present concrete floors. Polished concrete is seamless, giving no place for dust mites to gather as well as expose the bacteria which may be trapped between floorboards and tiles.
How to Prepare Concrete for a Tile InstallationLearning Center

How to Prepare for Laying Tile Over a Concrete Floor
Tile Floor 101 Step by Step How to Install Tile for the First Time

How to Install Tile Over Concrete – GreenBuildingAdvisor

Can You Install Tile Over Concrete?
:max_bytes(150000):strip_icc()/can-you-install-tile-directly-on-concrete-1822600-04-458f7bb6c78348c1835cf8054ef36553.jpg)
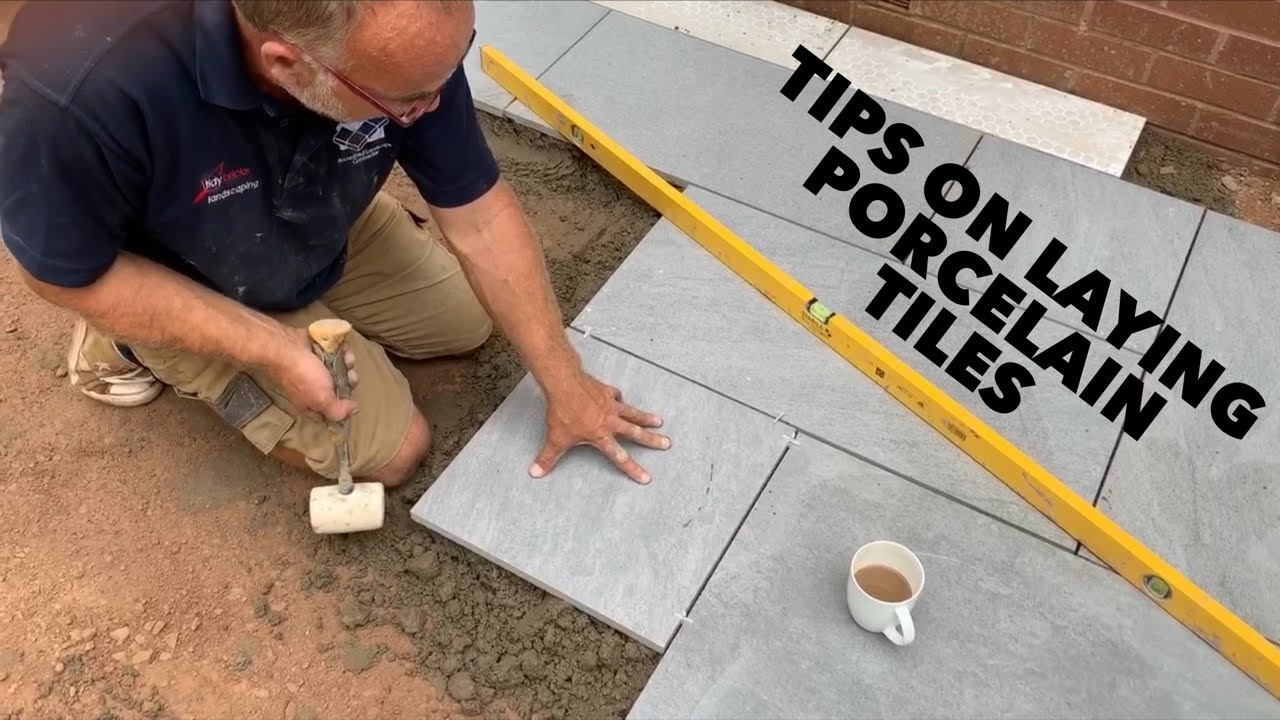
tips on laying porcelain tiles
Can I Lay Tile Over Painted Concrete Floor? – Ready To DIY

Installing Tile on Top of a Concrete Porch Tips
Subfloors and Underlayment for Ceramic Tile Floors
/best-subfloors-to-use-for-laying-tile-1822586-hero-efcfac9422ab457da5d2cbc7f7361df7.jpg)
How to Lay Porcelain Tile Over a Concrete Floor

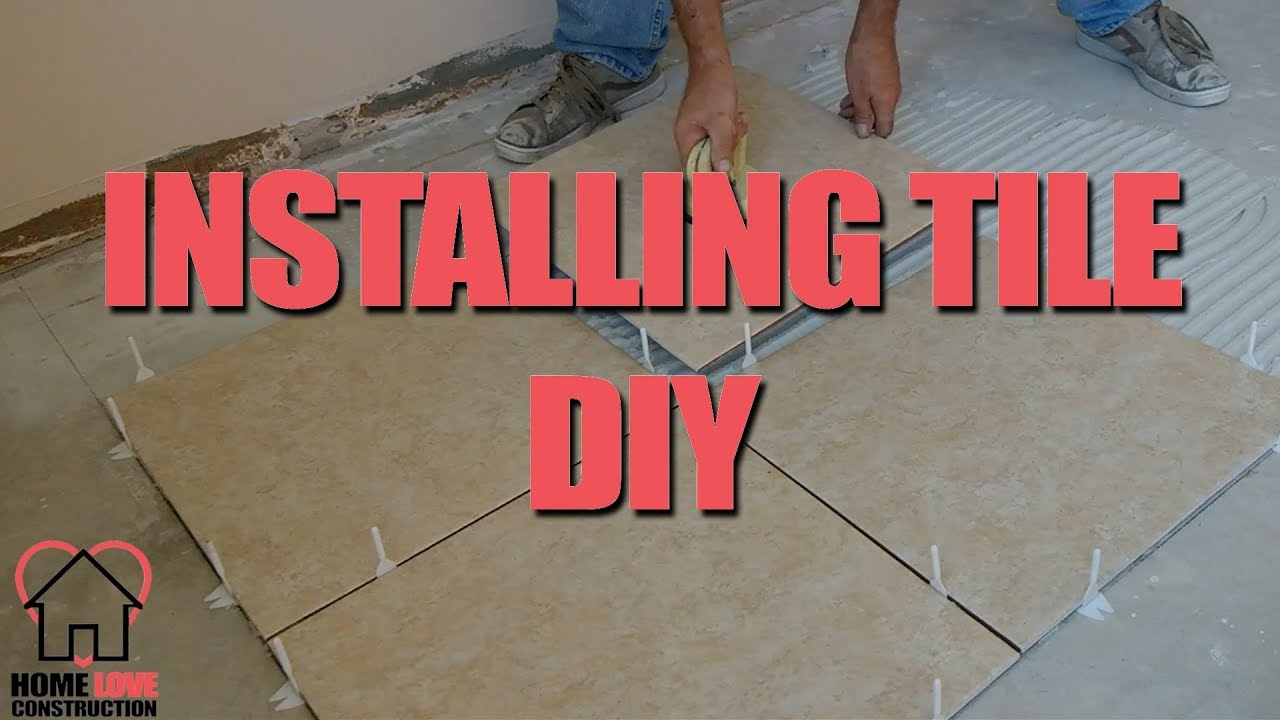
How To Install Ceramic Tile Over A Concrete Slab. Home Love Construction DIY
Can You Install Tile Over Concrete?
/can-you-install-tile-directly-on-concrete-1822600-01-8a89ceab1a274fb8ac81890ab7fc6b1b.jpg)
Related Posts:
- Acid Stain Concrete Floors Yourself
- Resurfacing A Concrete Floor
- Interior Concrete Floor Stain
- Acid Stained Concrete Floors
- Concrete Floor Paint Flakes
- Epoxy Concrete Floor DIY
- Fixing Concrete Floors
- Rustic Stained Concrete Floors
- Painting Concrete Floors Basement
- Concrete Floor Tiles Interior
How To Lay Porcelain Tiles On A Concrete Floor
Laying porcelain tiles on a concrete floor is a relatively straightforward but labor-intensive task. It is important to prepare the floor properly and take your time to ensure that the finished result is to your satisfaction. With careful preparation and attention to detail, you can lay porcelain tiles on a concrete floor in no time.
What You Will Need
Before starting, you will need to gather all the materials and tools necessary for this project. These include porcelain tiles, an electric drill, a tile saw, tile adhesive, grout, spacers, a spirit level, a rubber mallet, and a tile trowel. Ensure that you buy enough tiles to complete the project; you should also purchase a few extra tiles in case of breakages or mistakes.
Preparing the Floor
The first step in laying porcelain tiles on a concrete floor is to prepare the surface. Start by cleaning any dirt or debris from the surface using a broom and dustpan. If there is any paint or adhesive residue on the floor, use a paint scraper and wire brush to remove it. Once the surface is clean and dry, check for any irregularities such as cracks or holes and fill them with concrete repair compound. Allow the compound to dry before continuing with the project.
Dry-Laying The Tiles
Before applying adhesive to the floor, it is important to do a dry run first. This will help you determine how many tiles you need as well as get an idea of how they will look once laid. Start at one corner of the room and lay out your tiles in rows. You can use spacers between each tile for even spacing; this will also make it easier to apply the grout later. Place each tile in position and tap gently with a rubber mallet if needed to ensure that it fits tightly against its neighbor.
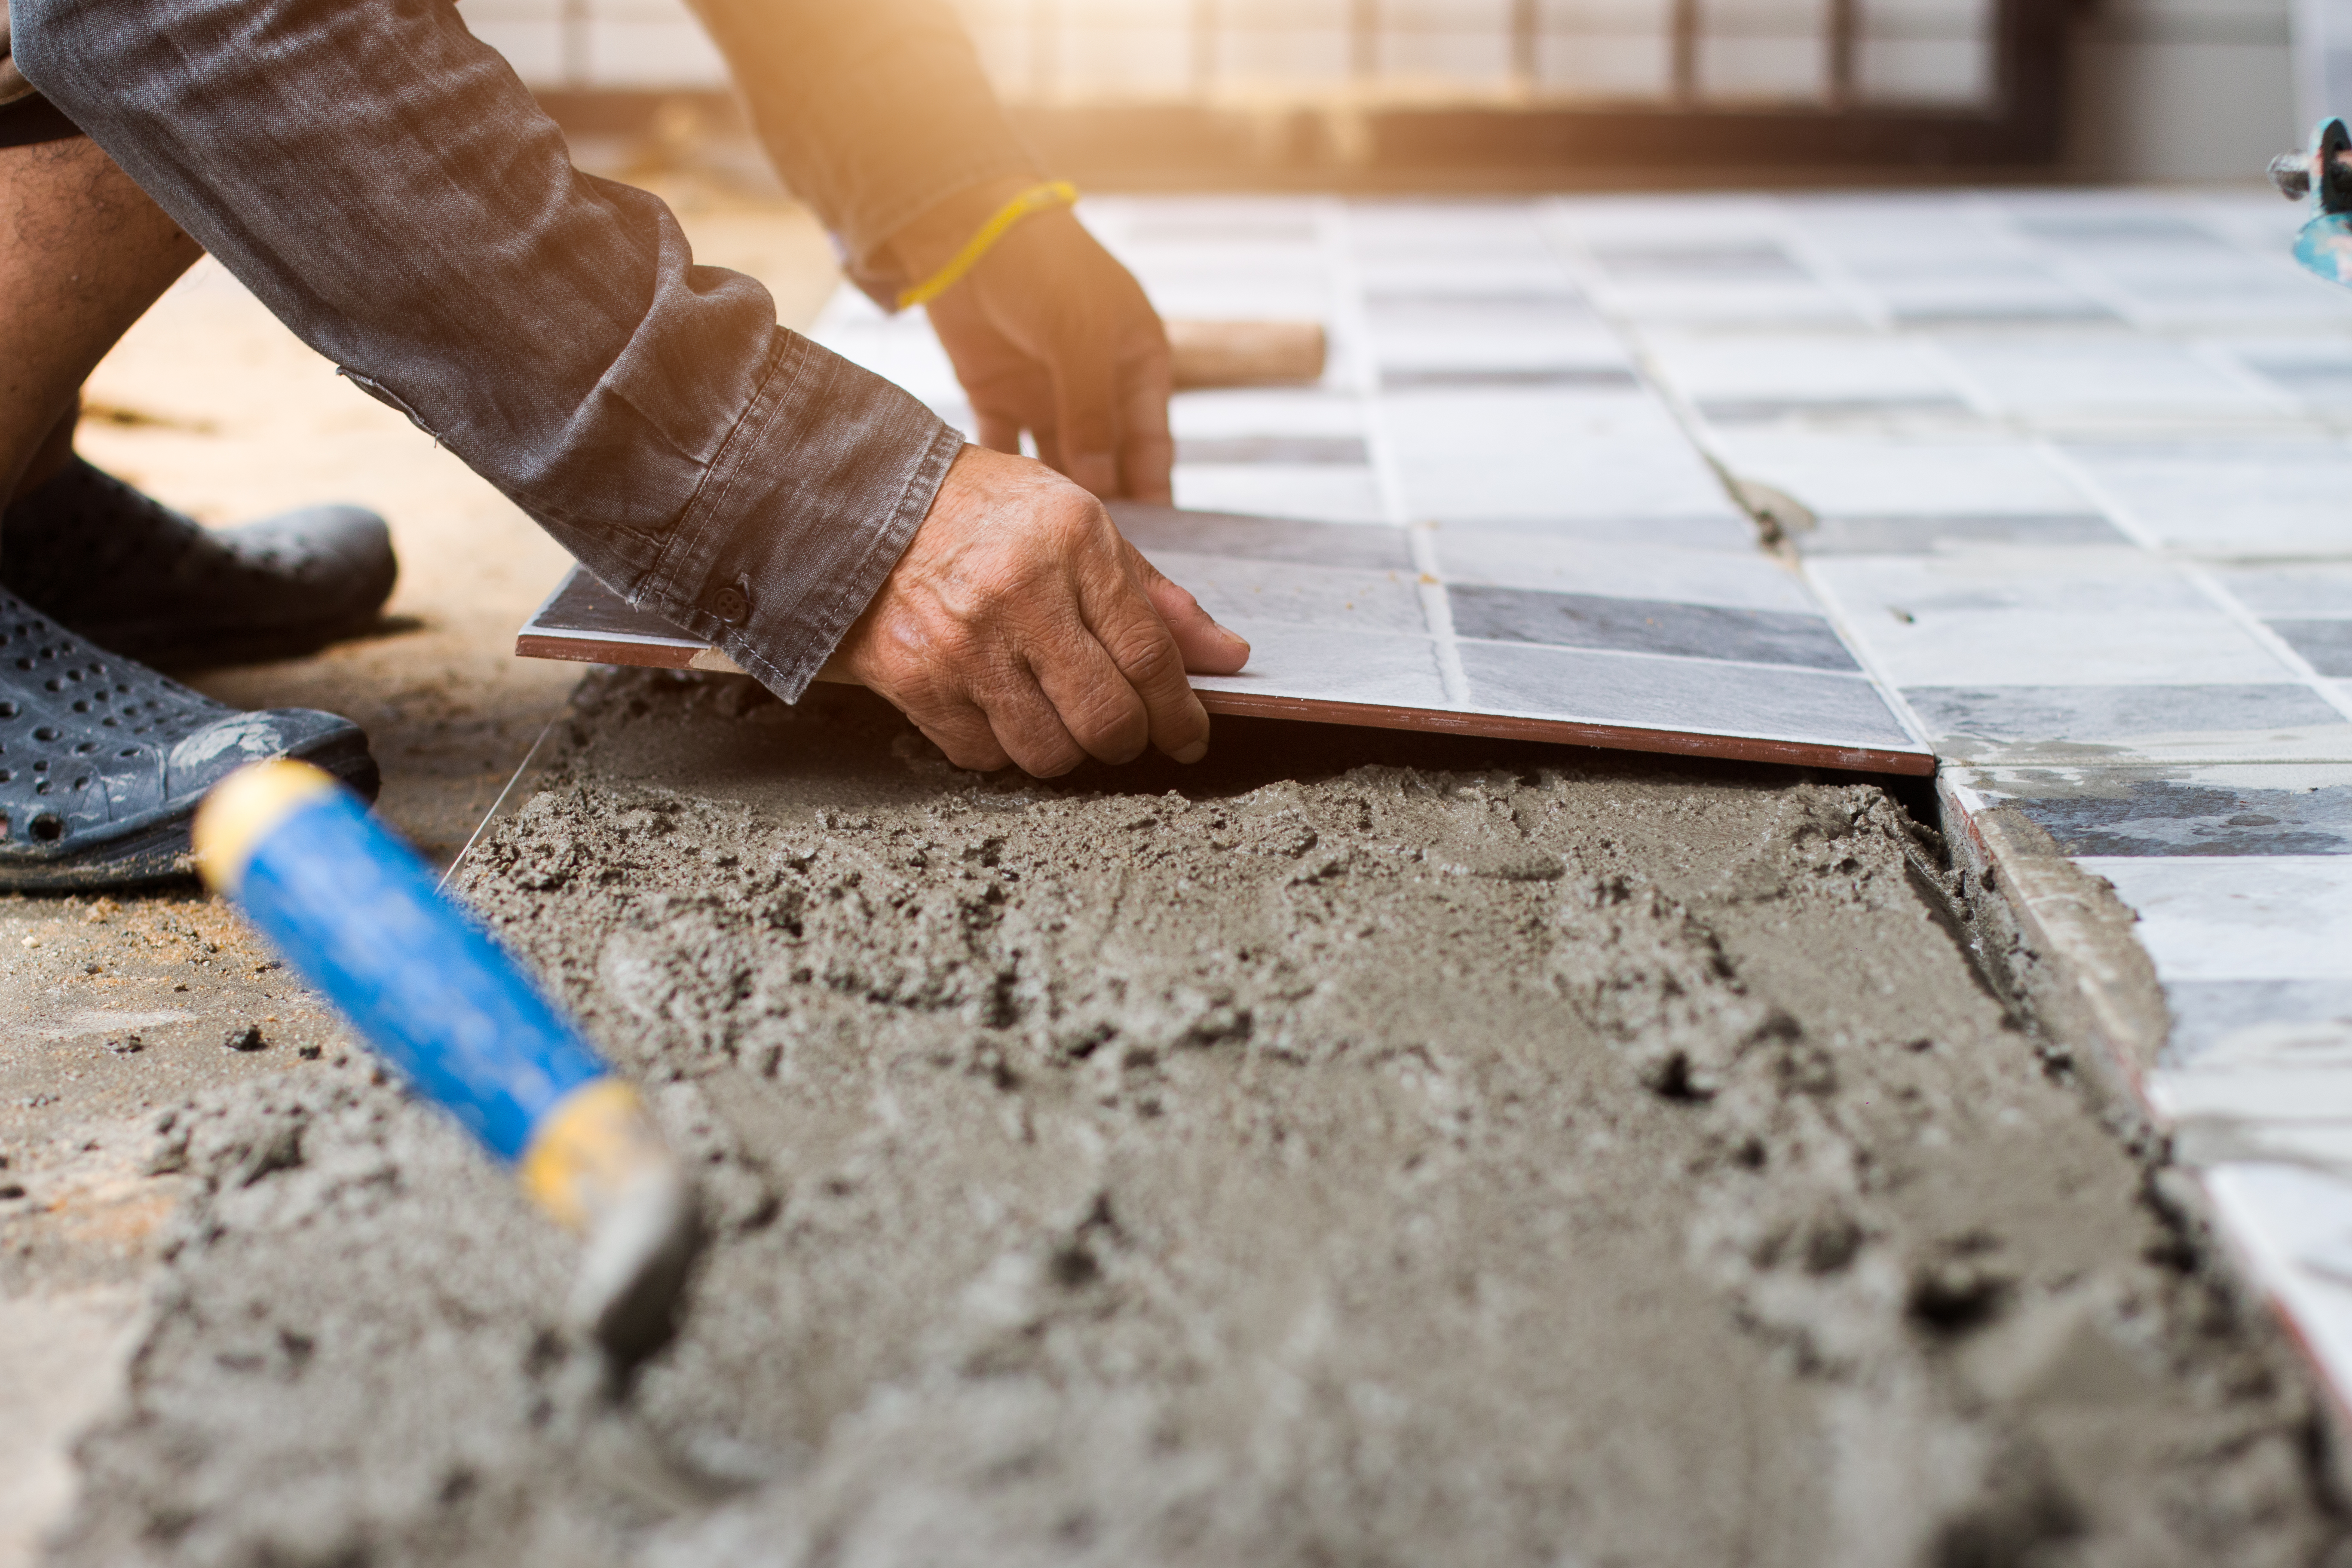
Applying Adhesive
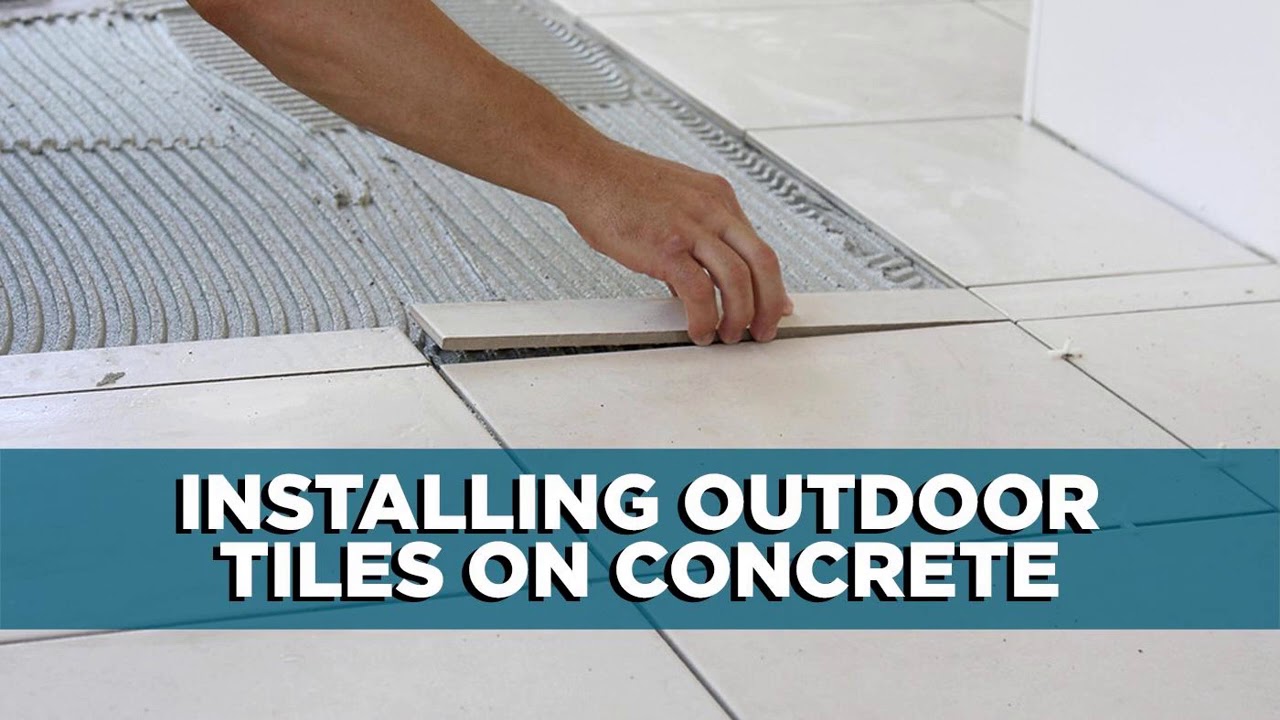
Once you are happy with the dry-laid pattern of your tiles, it’s time to start applying adhesive. Start at one corner of the room and work in small sections of about 1 square meter at a time. Use a trowel to spread adhesive across the section, ensuring that you cover all areas evenly with an even layer of adhesive. Once you have applied adhesive to one section, start laying your tiles in place while taking care not to move them once they are set in place. Repeat this process until all of your tiles are laid.
Grouting The Tiles
Once all of the tiles have been laid, it’s time to grout them. Start by mixing your grout according to manufacturer’s instructions; ensure that it is mixed thoroughly for best results. Once mixed, apply grout between each tile using a rubber float held at an angle of 45 degrees. Work quickly but carefully to ensure that all gaps between tiles are filled completely; also check for any areas where excess grout has been applied as this will need to be wiped away quickly with a damp cloth before it dries. Allow the grout to dry fully before continuing with the project.
Finishing Up
Once the grout has dried, you can finish up by applying sealant around all edges of your tiles as well as applying sealant over the entire surface of your tiles for extra protection. Use an electric drill with an appropriate bit for drilling through porcelain tiles if needed; this step is especially important if you plan on installing any fixtures such as towel rails or shelves on top of your tiles. Finally, use a spirit level to check that all of your tiles are level; if they are not level, use a rubber mallet or tile wedges to adjust them until they are even.
FAQs
Q: Is it necessary to use spacers when laying porcelain tiles?
A: Yes, spacers are essential when laying porcelain tiles as they will ensure that each tile is positioned evenly and correctly relative to its neighbors; they also help prevent adjacent tiles from moving during installation process which could cause misalignment or unevenness in final result.
Q: How