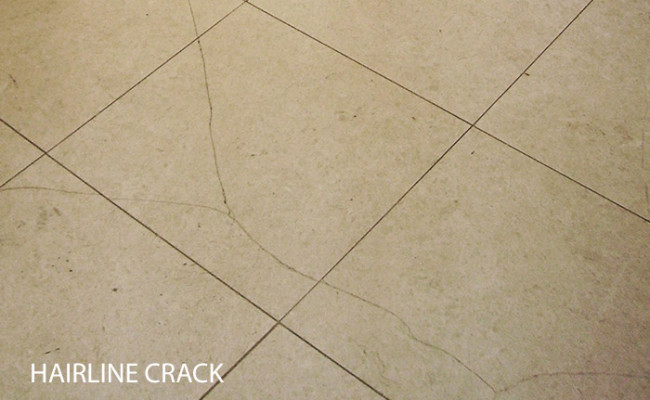
Marble flooring exudes timeless elegance and sophistication, but over time, it may develop cracks, chips, or imperfections that can mar its beauty. That’s where the enchanting solution of marble floor filler comes into play! If you’re looking to restore the allure of your marble floors and make them look as good as new, this article is your ultimate guide to the magical world of marble floor filler.
Discovering the Marvel of Marble Floor Filler
Marble floor filler is a remarkable product specially designed to repair and rejuvenate marble floors. It works wonders in addressing cracks, chips, holes, or any surface blemishes that might have appeared due to wear and tear or other damages. The best part? It seamlessly blends with the natural beauty of your marble flooring, leaving it looking flawless and stunning once again.
Unveiling the Beauty of Seamless Repairs
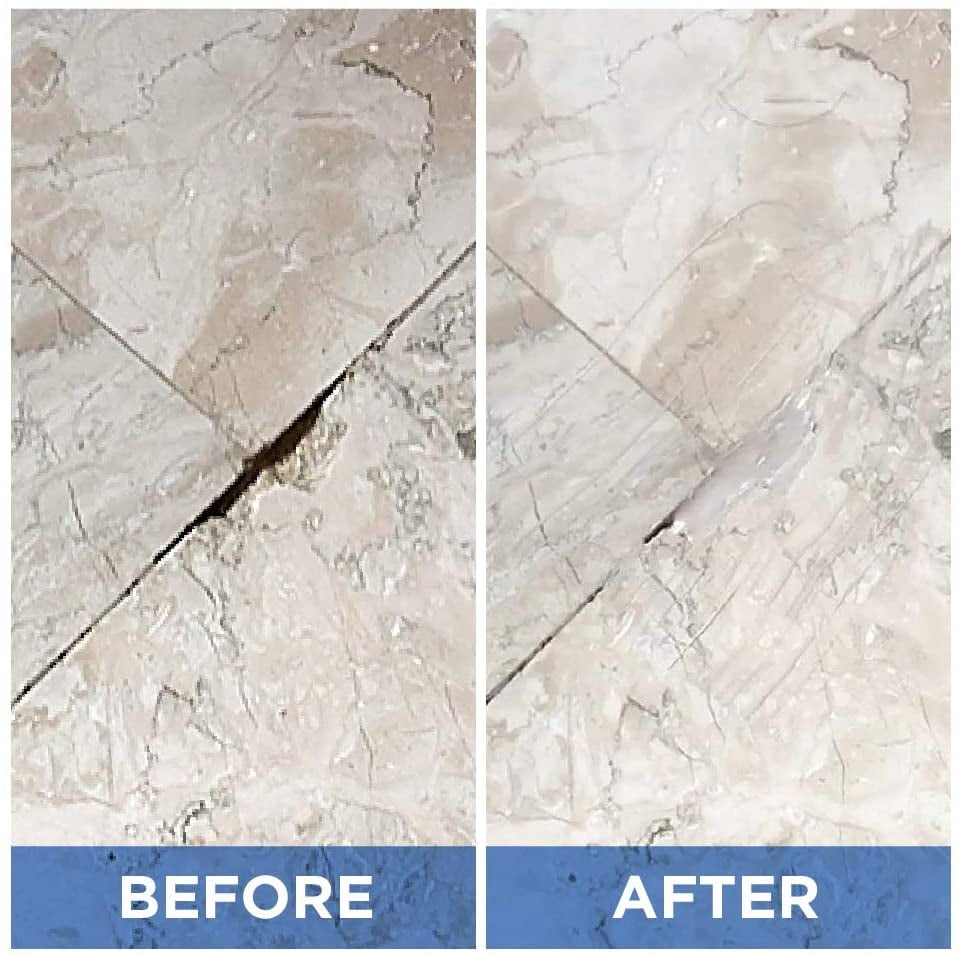
Imagine a marble floor where you can’t tell there was ever a crack or chip! With marble floor filler, that dream becomes a reality. This miraculous filler is expertly formulated to match the unique color and veining of your marble, ensuring that repairs are virtually invisible. It creates a seamless finish that brings back the unblemished charm of your marble floors, leaving you in awe of the impeccable restoration.
A Delightful DIY Journey
The journey to restoring your marble floors with filler is an exciting DIY project that allows you to witness the transformation first-hand. With the right tools and a little patience, you can easily achieve professional-looking results. Not only will you save money on expensive repairs, but you’ll also experience the satisfaction of reviving the allure of your marble flooring yourself.
A Step-by-Step Guide to Flawless Restoration
Let’s walk you through the simple and rewarding process of using marble floor filler:
- Preparation is Key: Begin by thoroughly cleaning your marble floor to ensure a clean and smooth surface for the filler to adhere to. Remove any dirt, dust, or debris using a gentle cleaner and let the floor dry completely before proceeding.
- Selecting the Perfect Filler: Choose a high-quality marble floor filler that matches the color and texture of your marble. You can find fillers in various forms, including paste, powder, or pre-mixed. Opt for a product that offers a natural finish and easy application.
- Applying the Filler: Using a putty knife or spatula, apply the filler to the cracks, chips, or holes in your marble floor. Work carefully and ensure the filler is level with the surrounding surface for a seamless blend.
- Smooth and Polish: Once the filler has been applied, use a damp cloth to smooth and blend the filler into the marble. For a polished finish, use a buffing pad to gently buff the repaired areas.
- Sealing for Longevity: To protect your newly restored marble floor and enhance its durability, consider applying a marble sealer. The sealer acts as a shield against stains and moisture, ensuring your marble floor stays gleaming for years to come.
The Beauty of Restored Elegance
As you stand back and admire your beautifully restored marble floor, you’ll be amazed at how the filler has brought back the floor’s original splendor. The once-visible cracks and chips have vanished, leaving behind a surface that looks as good as the day it was installed. You’ll fall in love with your marble floor all over again, and guests will marvel at the impeccable beauty of your home.
A Lasting Legacy of Beauty
Thanks to marble floor filler, your marble flooring will continue to exude timeless elegance and sophistication for many years to come. The filler’s durable and seamless restoration ensures that your marble floor withstands the test of time, maintaining its pristine appearance and adding a touch of luxury to your living space.
Marble floor filler is a magical solution that breathes new life into your cherished marble floors. Its ability to seamlessly repair cracks and imperfections, combined with the joy of a rewarding DIY project, makes it a must-have for any homeowner seeking to preserve the beauty and elegance of their marble flooring. Embrace the enchantment of marble floor filler and embark on a journey of restoration that will leave your home gleaming with timeless allure
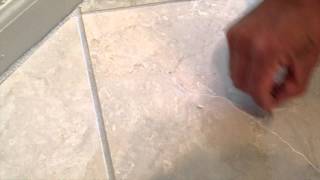
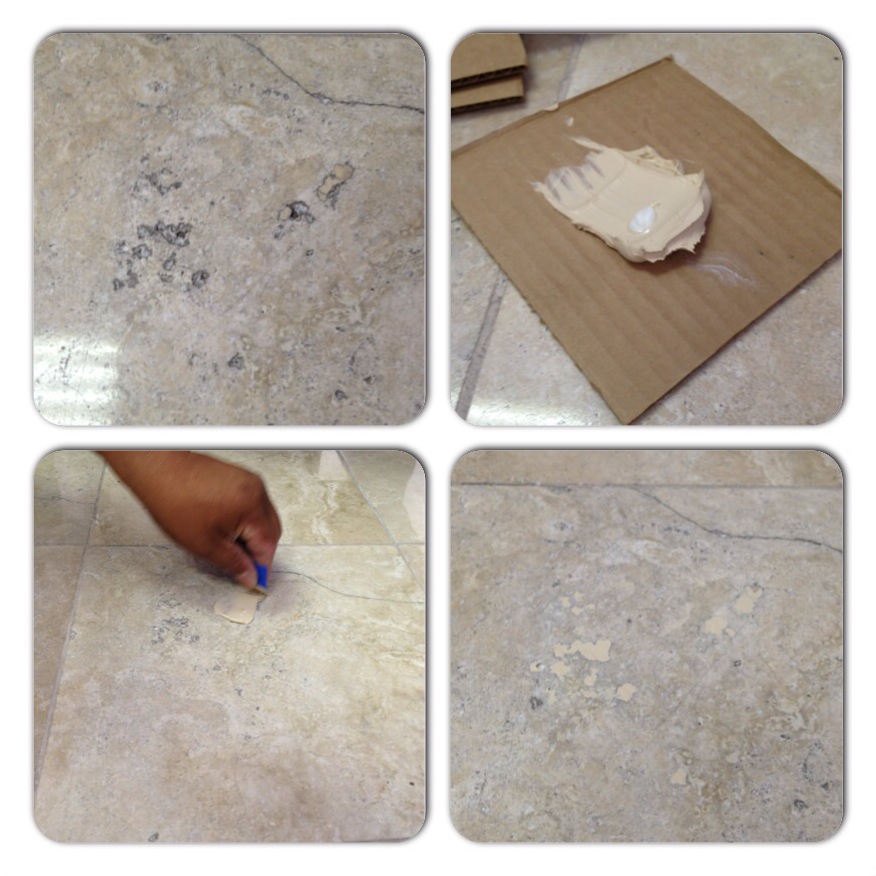
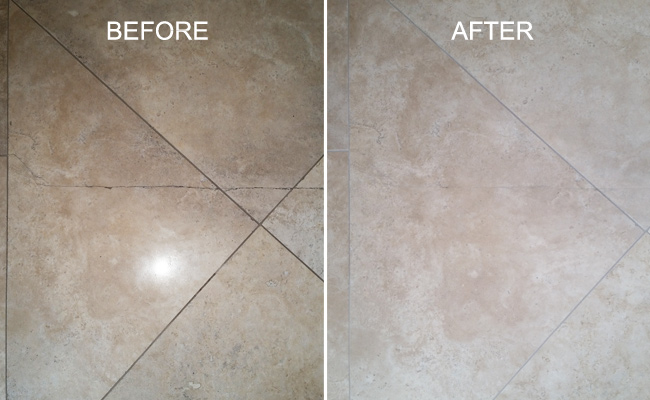
How to fill in gaps between marble floor tiles with epoxy
Marble floor tiles exude opulence and elegance, but over time, gaps may develop between the tiles, diminishing the floor’s seamless charm. The perfect solution to this challenge lies in using epoxy to fill in those gaps and restore the flawless beauty of your marble floor. In this comprehensive guide, we’ll take you through the step-by-step process of filling in gaps between marble floor tiles with epoxy, allowing you to achieve stunning results and revitalize your space.
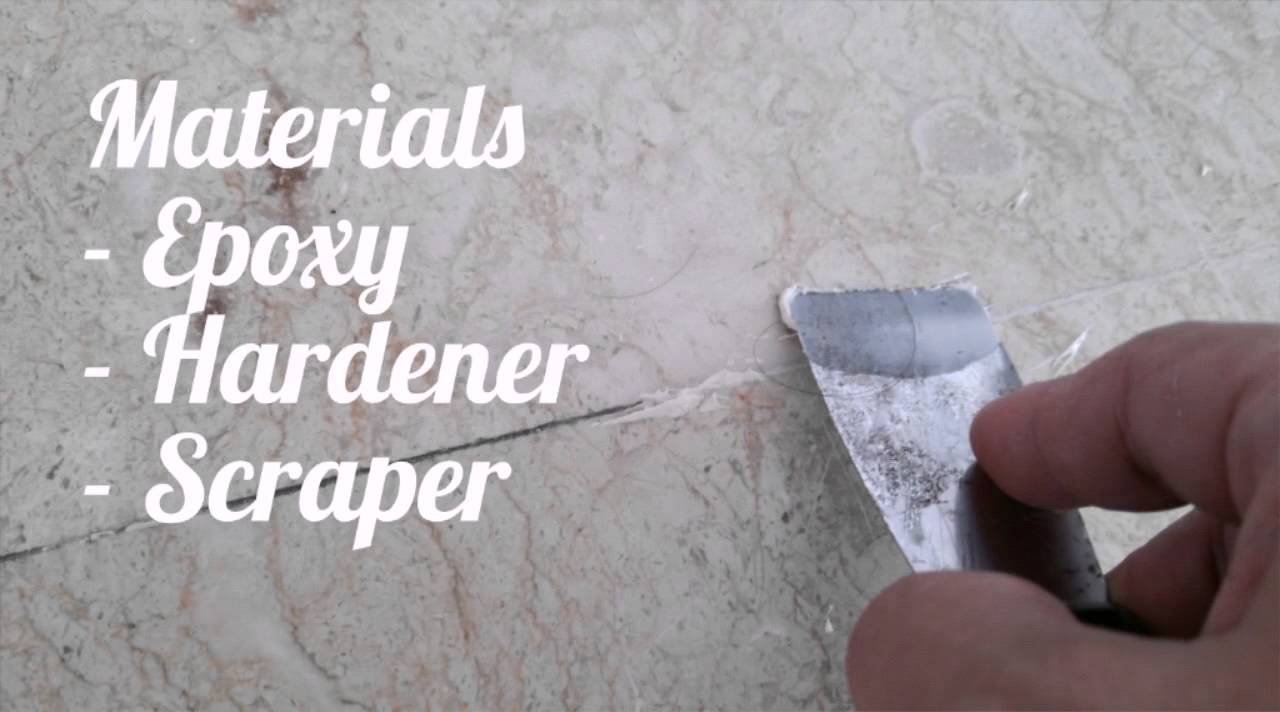
What You’ll Need: Gathering Your Supplies
Before embarking on this transformative journey, gather the necessary supplies to ensure a smooth and successful epoxy application. You’ll need the following:
- High-quality epoxy resin and hardener designed for stone or marble.
- Plastic mixing cups and stir sticks for accurate measurements.
- A putty knife or trowel for precise application.
- A small paintbrush or sponge for cleaning the tiles.
- Painter’s tape to protects the surrounding areas from epoxy spills.
- A clean cloth or rag for wiping away excess epoxy.
Step 1: Preparing the Surface
Begin by thoroughly cleaning the gaps between the marble floor tiles. Remove any dirt, dust, or debris using a damp cloth or sponge. It’s essential to have a clean and dry surface to ensure proper adhesion of the epoxy.
Step 2: Masking Off the Area
To prevent epoxy spills onto the surrounding tiles, apply painter’s tape along the edges of the gaps you intend to fill. This creates a neat boundary and ensures a professional finish.
Step 3: Mixing the Epoxy
Follow the manufacturer’s instructions to mix the epoxy resin and hardener in the plastic mixing cups. Be precise with your measurements to achieve the correct epoxy consistency for easy application.
Step 4: Applying the Epoxy
Using the putty knife or trowel, carefully apply the mixed epoxy into the gaps between the marble floor tiles. Work methodically, ensuring the epoxy fills the gaps completely and evenly.
Step 5: Smoothing the Surface
Once the gaps are filled, use the putty knife or a clean paintbrush to smooth the epoxy surface. This step is crucial for achieving a seamless blend with the surrounding marble tiles.
Step 6: Removing Excess Epoxy
While the epoxy is still in its curing stage, gently remove any excess epoxy that may have spilled onto the marble tiles using a clean cloth or rag. This will leave you with a neat and polished finish.
Step 7: Allowing the Epoxy to Cure
Allow the epoxy to cure according to the manufacturer’s instructions. This may take a few hours or longer, depending on the specific epoxy product used. Be patient, as proper curing ensures the epoxy’s durability and longevity.
Step 8: Finishing Touches
Once the epoxy has fully cured, remove the painter’s tape carefully. Inspect the filled gaps to ensure seamless integration with the marble floor tiles. Admire the transformation, as your once-gapped marble floor now exudes a flawless and elegant appearance.
Tips for Success: Achieving a Professional Result
- Choose an epoxy product that closely matches the color and texture of your marble floor to create a natural and seamless finish.
- Work in small sections to ensure the epoxy doesn’t dry before you have a chance to smooth it out.
- If you accidentally spill epoxy on the marble tiles, clean it up immediately with a damp cloth to avoid permanent staining.
- For larger gaps or voids, consider using a marble dust mix with epoxy to achieve a more solid and stable fill.
Filling in gaps between marble floor tiles with epoxy is a transformative art that breathes new life into your exquisite marble flooring. By following this step-by-step guide and exercising a little patience, you can restore your floor’s flawless charm and maintain its timeless elegance for years to come. Embrace the art of epoxy restoration, and marvel at the radiant beauty of your marble floor once again.
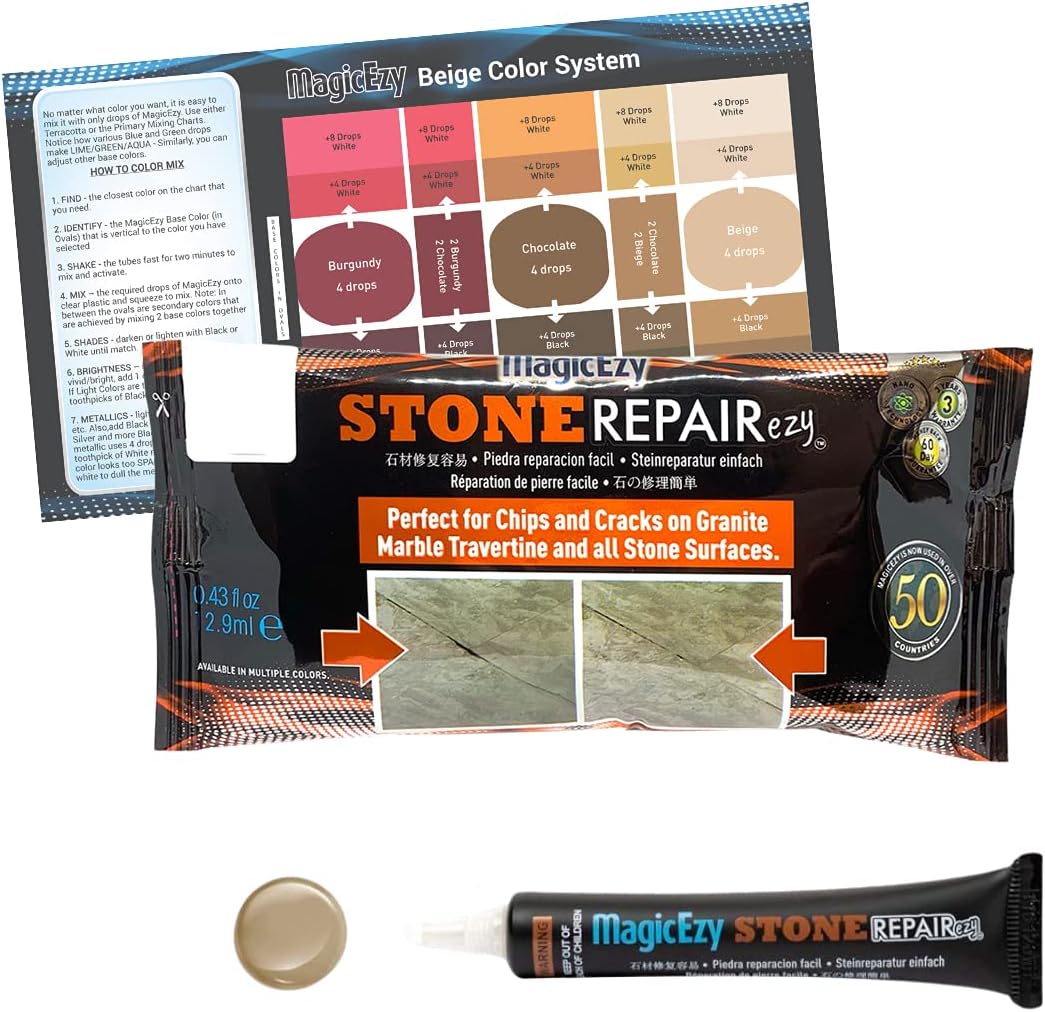
MagicEzy Stone Repairezy (Beige):- Granite, Marble, Travertine
How to easily repair Italian marble cracks and hole must match,
Stone Repair Ezy (Black) Marble, Granite, Quartz Countertop Chip Repair Kit Stone Fix, Laminate, Corian, Travertine Super Strong Seam Filler
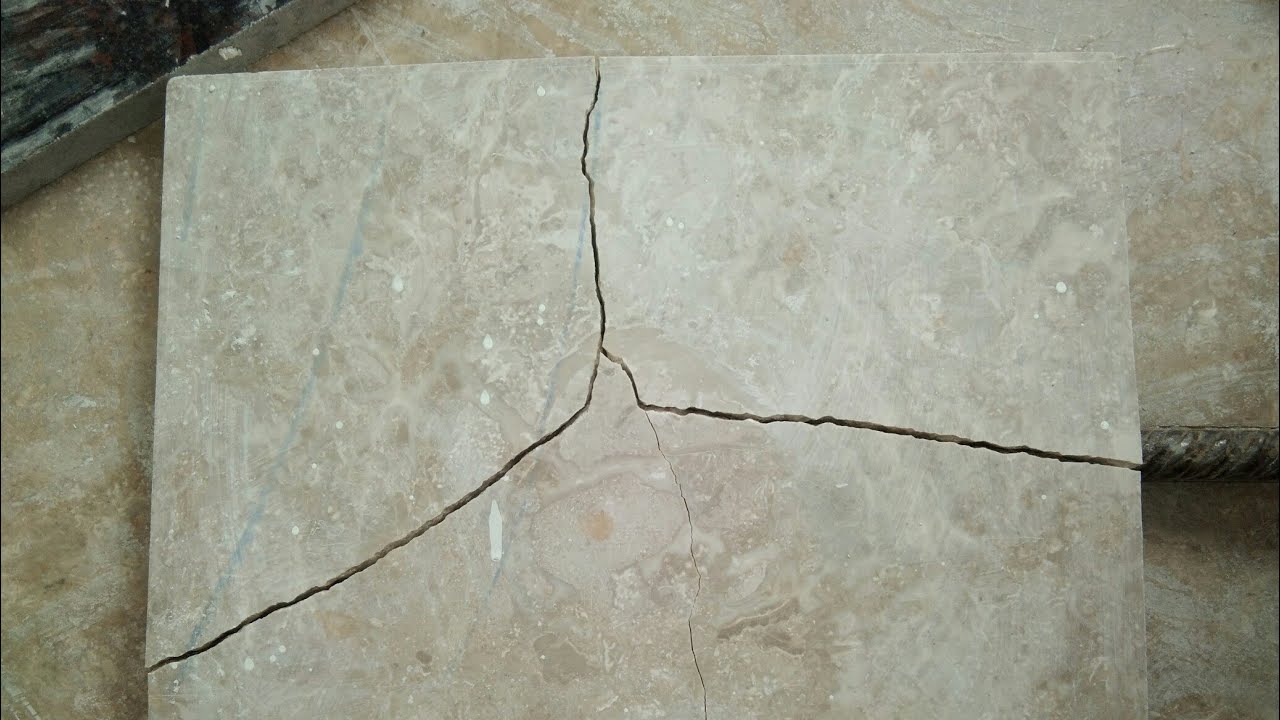
Marble tiles — Repairing of chipped and cracked floor
To repair damaged marble and its renovation TINO Natural Stone

Marble tiles — Repairing of chipped and cracked floor
Marble Floor Crack Repair / NY / NJ / CT Rockland Stone Restoration
Bring Your Floors Back to Life with Affordable Marble Restoration Designing Spaces
How to Maintain the Marble Floor? Shiny Stones

Tile Repair Kit Stone Repair Kit – Porcelain Repair Kit, Marble Repair kit, Tub and Tile Refinishing Kit, Crack Chip Ceramic Floor, Shower Tile Gap

Travertine Floor Crack Repaired – Set In Stone Restoration
Related Posts:
- Marble Flooring Border
- Home Marble Floor Design
- Beige Marble Flooring
- Black White Marble Floor
- White Carrara Marble Floor
- Marble Floor Design Ideas
- How To Clean White Marble Floors
- Marble Floor Entrance
- Yellow Marble Floor Tiles
- Luxury Marble Flooring Design