Transforming Your Concrete Floor: A Step-by-Step Guide to Achieving the Tile Look
So, you’ve decided to give your concrete floor a fresh and stylish makeover by painting it to look like tile. With the right techniques and a little bit of patience, you can achieve a stunning result that will leave your guests in awe. Let me guide you through the step-by-step process of transforming your concrete floor into a beautiful tile-like surface.
- Preparing the Surface: Before diving into the painting process, it is crucial to prepare the concrete surface properly. Start by thoroughly cleaning the floor to remove any dirt, dust, or grease. You can use a concrete cleaner and a scrub brush for this task. Once the floor is clean, inspect it for any cracks or imperfections. Fill in any cracks with a concrete patching compound and smooth it out with a trowel. Sand down any rough spots or uneven areas to ensure a smooth and even surface.
- Priming the Floor: Applying a primer is essential for proper adhesion of the paint and to achieve a long-lasting finish. Choose a high-quality concrete primer that is specifically designed for painting floors. Apply the primer evenly using a roller or brush, following the manufacturer’s instructions. Allow the primer to dry completely before moving on to the next step.
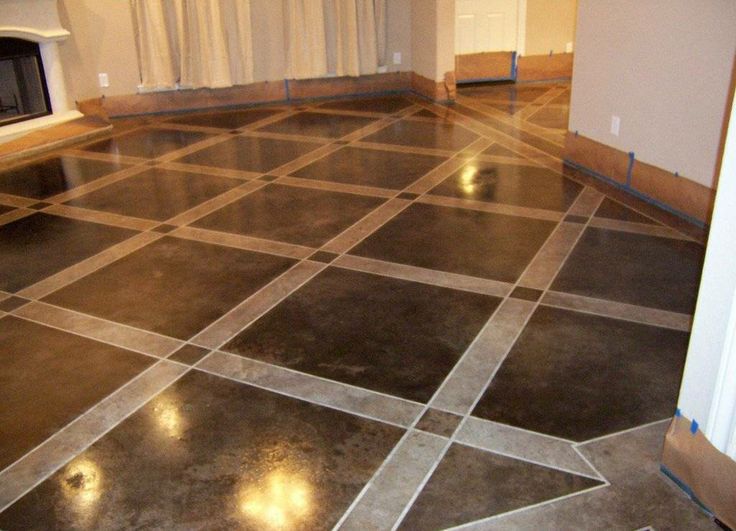
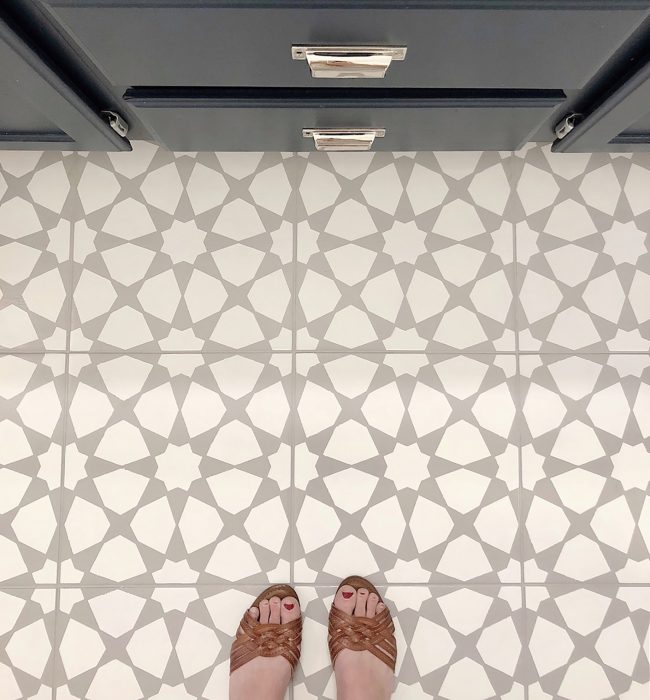
- Creating the Tile Design: Now comes the fun part – creating the tile pattern! Start by marking the center of the floor and use painter’s tape to create the outline of the tiles. You can choose any tile design you like, such as a classic grid pattern, herringbone, or even a Moroccan-inspired design. Be creative and experiment with different layouts to find the one that suits your style. Once the tape is in place, step back and make sure you’re happy with the design before proceeding.
- Painting the Tiles: It’s time to bring your tile design to life with paint. Select a high-quality concrete floor paint in the colors of your choice. Using a small brush or a mini roller, carefully paint each tile section within the taped outlines. Take your time to ensure clean and even lines. For a more realistic tile look, you can add texture by lightly dabbing a sponge or rag onto the wet paint. Allow the first coat to dry completely before applying a second coat for better coverage and durability.
- Removing the Tape: Once the paint has dried, carefully remove the painter’s tape to reveal your beautifully painted tile-like floor. Take your time and peel off the tape slowly to avoid any damage to the painted surface. If any paint bleeds under the tape, use a small brush and some touch-up paint to fix it. Step back and admire your newly transformed floor!
- Sealing and Protecting: To ensure the longevity and durability of your painted concrete floor, it is crucial to apply a sealer. Choose a clear, water-based concrete sealer that is suitable for floors. Apply the sealer evenly using a roller or brush, following the manufacturer’s instructions. The sealer will protect the paint from wear and tear, spills, and stains. Allow the sealer to dry completely before walking on the floor or placing any furniture.

Choosing the Right Paint and Supplies
When it comes to painting your concrete floor to look like tile, choosing the right paint and supplies is essential for a successful and long-lasting result. I will provide you with essential tips to help you make the best choices when it comes to paint and supplies for your project.
Selecting the Right Paint: Not all paints are created equal, and choosing the right one for your concrete floor is crucial. Look for a high-quality concrete floor paint that is specifically designed for painting floors. These paints are formulated to withstand heavy foot traffic, resist stains, and provide excellent adhesion to concrete surfaces. Opt for a paint that offers durability, easy application, and a finish that mimics the look of tiles.
Consider the Finish: When it comes to the finish of your painted concrete floor, you have a few options to choose from. Matte or satin finishes are popular choices as they provide a clean and smooth look, similar to actual tiles. These finishes also tend to hide imperfections better than glossy finishes. However, if you prefer a shiny, reflective look, you can opt for a high-gloss finish. Keep in mind that high-gloss finishes may require more maintenance and can show scratches and wear more easily.
Tools and Supplies: Apart from the paint, you will need a few essential tools and supplies to ensure a smooth painting process. A good quality roller or brush specifically designed for concrete floors is a must-have. A mini roller or brush can be useful for painting the tile patterns. Additionally, you will need painter’s tape to create the outlines of the tiles and protect the surrounding areas from paint splatters. Other supplies include a concrete cleaner, patching compound, sandpaper, and a primer.
Color Selection: Choosing the right colors for your painted tile floor is a personal preference. Consider the overall aesthetic of the room and how the floor will complement the existing decor. You can go for a classic black and white combination for a timeless look, or opt for bold and vibrant colors for a more contemporary feel. Take into account the size of the room and the amount of natural light it receives, as colors can significantly impact the perceived space and ambiance.
Test and Sample: Before committing to a specific paint color and finish, it is advisable to test and sample different options. Purchase small sample cans of the paint colors you are considering and apply them to a small section of your concrete floor. Observe how the colors look under different lighting conditions and how they complement the room’s decor. This will help you make an informed decision and avoid any regrets later on.
Safety First: When working with paints and chemicals, safety should always be a priority. Ensure proper ventilation in the area where you’ll be painting and wear protective clothing, gloves, and eyewear. Follow the manufacturer’s instructions for safe handling and disposal of paints and supplies. Keep in mind that some paints may have specific temperature or humidity requirements, so make sure to read and follow the instructions carefully.
Preparing Your Concrete Surface
Preparing your concrete surface is a crucial step in achieving a smooth and long-lasting finish when painting it to look like tile. Proper preparation ensures better adhesion of the paint, helps to prevent cracks and peeling and allows for a more professional-looking result. In this article, I will guide you through the necessary steps to prepare your concrete surface before painting.
Clean the Surface: Before anything else, it is essential to clean your concrete floor thoroughly. Remove any loose debris, dirt, dust, or grease using a broom or a vacuum cleaner. For stubborn stains or grease spots, you can use a concrete cleaner or degreaser. Follow the manufacturer’s instructions for the cleaner and use a scrub brush to remove any stains. Rinse the floor with clean water and allow it to dry completely.
Inspect for Cracks and Imperfections: Once the floor is clean and dry, carefully inspect it for any cracks, chips, or imperfections. These need to be addressed before painting to ensure a smooth and even surface. Use a concrete patching compound to fill in any cracks or holes. Apply the compound with a trowel, making sure to smooth it out and level it with the surrounding surface. Allow the compound to dry completely before moving on to the next step.
Sanding the Surface: Sanding the concrete surface is essential to remove any rough spots, uneven surfaces, or old paint that may interfere with the adhesion of the new paint. Use a handheld or floor sander with coarse-grit sandpaper to sand the entire surface. Make sure to wear protective eyewear and a dust mask during this step to avoid inhaling dust particles. Once the initial sanding is complete, switch to a finer-grit sandpaper to achieve a smoother finish. After sanding, clean the surface to remove any dust or debris.
Etching the Surface: Etching the concrete surface is an optional but beneficial step that can improve the adhesion of the paint. Etching creates a rough texture on the surface, allowing the paint to penetrate and bond better. You can use an etching solution, which is typically a mix of water and muriatic acid. Follow the manufacturer’s instructions for the proper dilution ratio and safety precautions. Apply the solution evenly using a brush or a sprayer, and scrub the surface with a stiff brush. Rinse the floor thoroughly with clean water to remove any remaining acid residue.
Drying Time: After completing the preparation steps, allow the concrete surface to dry completely before proceeding with painting. The drying time may vary depending on factors such as temperature, humidity, and ventilation. It is crucial to ensure proper drying to prevent any moisture from being trapped under the paint, which can lead to peeling or bubbling. Follow the manufacturer’s instructions for the recommended drying time.
Mastering the Tile Pattern: Techniques for Creating Realistic Tile Designs
When painting your concrete floor to look like tile, mastering the tile pattern is crucial for creating a realistic and visually appealing design. The right tile pattern can transform your concrete floor into a work of art, adding depth and character to the space. Here are some techniques to help you master the tile pattern and create stunning designs on your painted concrete floor.
Planning the Tile Layout: Before you start painting, it’s important to plan the layout of your tile pattern. Consider the size and shape of your floor space and how the tiles will fit within it. You can create a classic grid pattern with square or rectangular tiles, or opt for more intricate designs like herringbone, chevron, or Moroccan-inspired patterns. Use a measuring tape and a pencil to mark the center of the floor and create guidelines for laying out the tiles. This will ensure that the pattern is centered and symmetrical.
Using Painter’s Tape: Painter’s tape is an invaluable tool for creating clean and crisp tile patterns. Once you have planned the layout, use painter’s tape to mark the outlines of the tiles. Apply the tape along the guidelines you have created, ensuring that it is straight and securely adhered to the floor. Take your time and make any necessary adjustments to ensure that the tape lines up perfectly with your desired tile pattern.
Experimenting with Colors and Shapes: One of the advantages of painting your concrete floor to look like tile is the freedom to experiment with different colors and shapes. Consider using a variety of paint colors to mimic different types of tiles, such as ceramic, porcelain, or natural stone. You can also play with different tile shapes, such as squares, rectangles, hexagons, or even irregular shapes for a more eclectic look. By combining different colors and shapes, you can create a visually interesting and dynamic tile pattern.
Adding Depth and Texture: To make your painted tile pattern look more realistic, consider adding depth and texture to the design. This can be achieved by using different shades of the same color or adding subtle variations in the paint application. For example, you can create a shadow effect by using a slightly darker shade of paint around the edges of each tile. Another technique is to use a sponge or rag to dab the wet paint, creating a textured effect that mimics the texture of real tiles. Experiment with different techniques to find the one that best suits your desired look.
Paying Attention to Grout Lines: Grout lines are an essential element of any tile design, as they provide separation and definition between the tiles. When painting your concrete floor to look like tile, make sure to pay attention to the grout lines. You can achieve this by using a small brush or a fine-tip marker to create thin lines between the taped tiles. It’s important to keep the lines consistent in thickness and evenly spaced for a professional finish. You can also consider using a slightly different shade of paint or a contrasting color for the grout lines to make them stand out.
Stepping Back and Evaluating: Once you have completed the painting process and removed the painter’s tape, take a step back and evaluate your tile pattern. Look at it from different angles and distances to ensure that the design is visually appealing and meets your expectations. Make any necessary touch-ups or adjustments to ensure that the lines are clean and the colors are consistent. Don’t be afraid to make changes or try different techniques until you achieve the desired look.

Sealing and Protecting Your Painted Concrete Floor for Durability and Shine
After putting in the time and effort to paint your concrete floor to look like tile, it’s important to apply a sealant to protect your hard work and ensure its durability and shine. Sealing your painted concrete floor provides an extra layer of protection against wear and tear, stains, and moisture. I will guide you through the process of sealing and protecting your painted concrete floor for a long-lasting and beautiful finish.
Choosing the Right Sealer: When it comes to selecting a sealer for your painted concrete floor, there are a few options to consider. Water-based acrylic sealers are popular choices as they provide excellent protection, are easy to apply, and offer a clear, glossy finish. Polyurethane sealers are another option, known for their durability and resistance to chemicals and abrasion. Epoxy sealers provide a high-gloss finish and are ideal for areas that receive heavy foot traffic. Consider your specific needs and preferences when choosing the right sealer for your painted floor.
Preparing the Surface: Before applying the sealer, it’s important to ensure that the painted concrete floor is clean and free of any dust, debris, or contaminants. Sweep or vacuum the floor to remove loose particles. If necessary, you can use a mild detergent and water to clean the surface. Rinse thoroughly and allow the floor to dry completely before proceeding with the sealing process.
Applying the Sealer: Follow the manufacturer’s instructions for the specific sealer you have chosen. Typically, you will need a roller or a brush to apply the sealer evenly across the entire floor. Start at one corner of the room and work your way towards the exit to avoid trapping yourself in a corner. Apply the sealer in thin, even coats, making sure to avoid puddles or excess sealer. Allow each coat to dry according to the manufacturer’s instructions before applying additional coats. Most sealers require at least two or three coats for optimal protection.
Considering a Topcoat: For added protection and shine, you may consider applying a topcoat over the sealed floor. Topcoats are available in various finishes, including matte, satin, or high-gloss. They provide an extra layer of protection against scratches, stains, and UV damage, and can enhance the overall appearance of your painted concrete floor. Apply the topcoat following the manufacturer’s instructions, using a clean roller or brush. Allow the topcoat to dry completely before allowing foot traffic or placing furniture on the floor.
Maintaining the Sealed Floor: Once your painted concrete floor is sealed and protected, it’s important to maintain it properly to ensure its longevity and beauty. Avoid using harsh chemicals or abrasive cleaners that can damage the sealer. Instead, regularly sweep or vacuum the floor to remove dirt and debris. Clean up spills promptly to prevent staining. If necessary, use a mild detergent and water to clean the surface, avoiding any abrasive scrub brushes or pads. It’s also a good idea to periodically reapply a fresh coat of sealer to maintain the protective layer and keep your floor looking its best.

Faux Cement Tile Painted Floors Tile DIY

Backyard Makeover! How to paint concrete to look like oversize

Decorative Concrete Condo Deck Osage Beach MO Acid Stained Faux Tile Flooring Lake Ozark MO
Faux Cement Tile Painted Floors – Bright Green Door

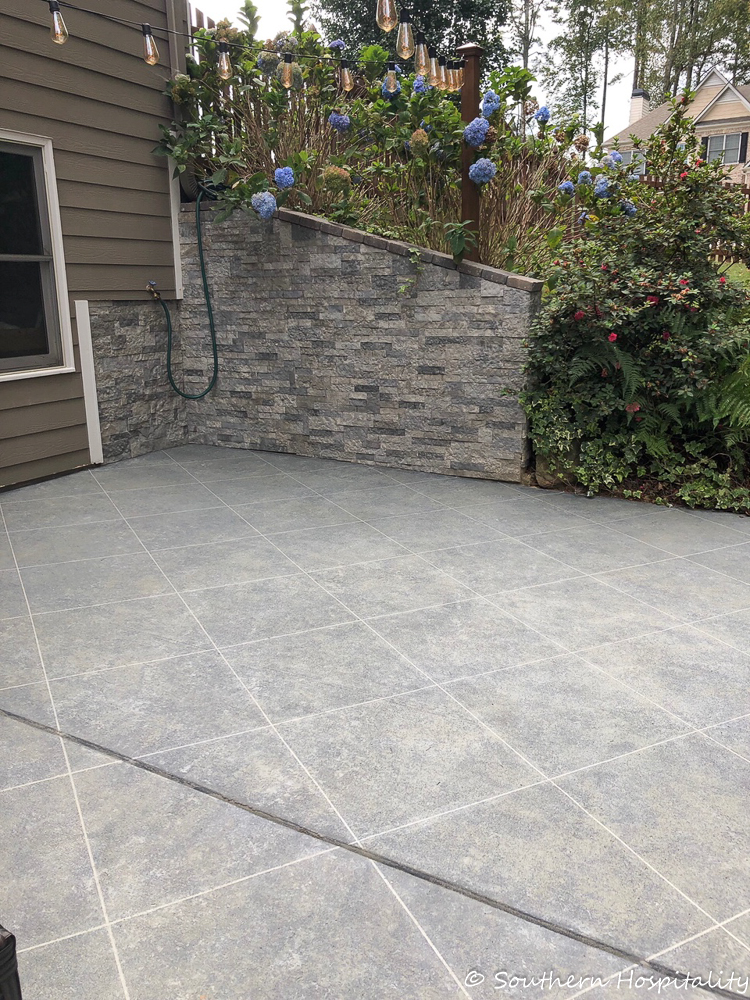
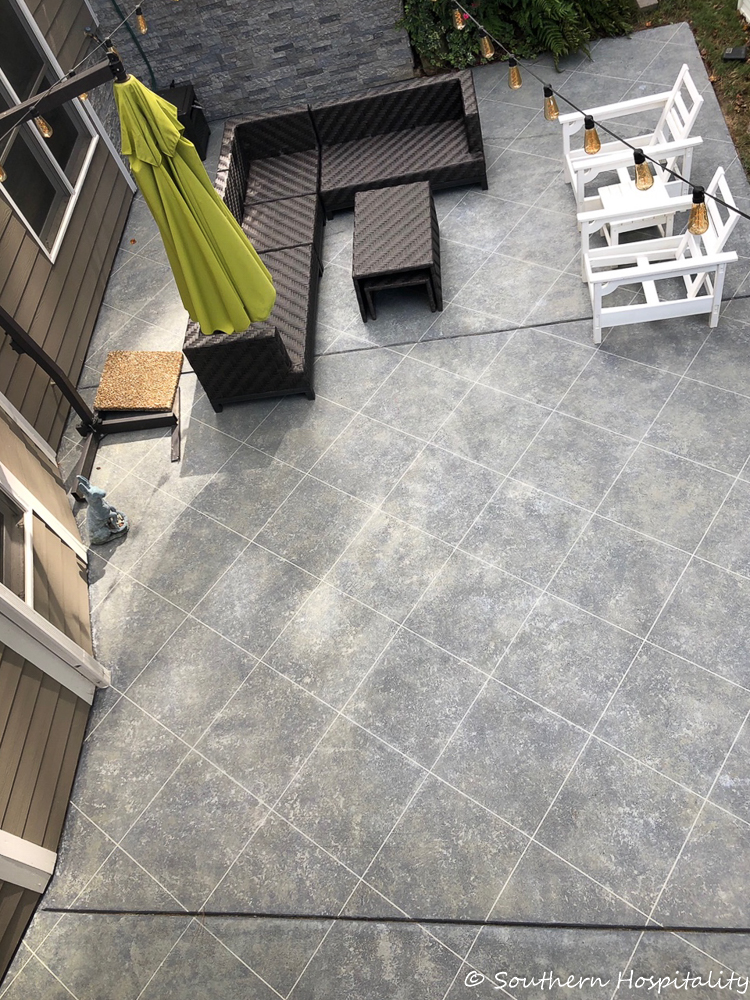
How to Create Faux Tile Look on Concrete Patio – Southern Hospitality
Painted concrete part one u2013 the pantry u2013 Our French DIY u0026 more

Painting Concrete Floors Painted concrete floors, Concrete

How To Paint A Bathroom Floor To Look Like Cement Tile
Related Posts: