Preparing the Concrete Surface
Before you start smoothing your concrete floor, it’s crucial to properly prepare the surface. This step ensures that your concrete is clean, free of debris, and ready for the smoothing process.
- Clean the Surface: Start by removing any dirt, dust, or debris from the concrete surface. Use a broom or vacuum cleaner to sweep away loose particles. For stubborn stains or dirt buildup, you may need to use a pressure washer or a mild detergent solution.
- Repair Cracks and Imperfections: Inspect the concrete surface for any cracks, holes, or imperfections. These need to be repaired before you can proceed with the smoothing process. Use a concrete patching compound to fill in any cracks or holes, and smooth it out with a trowel. Allow the patching compound to dry completely before moving on to the next step.
- Check for Moisture: Moisture can interfere with the concrete smoothing process and affect the final result. Use a moisture meter to check the moisture levels in the concrete. If the moisture levels are too high, you’ll need to take steps to reduce them before proceeding.
- Etching the Surface (Optional): Etching the concrete surface can help improve adhesion and ensure better results when applying the smoothing compound. You can use a chemical etching solution or a mechanical grinder to etch the surface. Follow the manufacturer’s instructions carefully and make sure to wear protective gear.
- Allow the Surface to Dry: Once you’ve cleaned, repaired, and prepared the concrete surface, allow it to dry completely before proceeding with the smoothing process. Depending on the weather conditions and the type of concrete, this may take anywhere from a few hours to a few days.
- Inspect the Surface: Before moving on to the next step, take some time to inspect the concrete surface for any remaining imperfections or issues. Make any necessary repairs or adjustments before proceeding with the smoothing process to ensure the best possible results.
Choosing the Right Tools and Materials
Selecting the right tools and materials is essential for achieving a smooth concrete floor. From smoothing compounds to application tools, each component plays a crucial role in the process.
Smoothing Compound: Choose a high-quality smoothing compound that is suitable for your specific project requirements. Consider factors such as the type of concrete surface, the level of smoothing needed, and any additional features like fast-drying or self-leveling properties.
Application Tools: The tools you use to apply the smoothing compound can significantly impact the final result. Some common tools for applying smoothing compounds include trowels, floats, and squeegees. Make sure to select tools that are appropriate for the size and complexity of your project.
Safety Equipment: Working with smoothing compounds can expose you to various hazards, including fumes and skin irritation. Make sure to wear appropriate safety equipment, such as gloves, goggles, and a mask, to protect yourself during the application process.
Mixing Equipment: Depending on the type of smoothing compound you’re using, you may need mixing equipment such as a drill with a mixing paddle or a mixing bucket. Follow the manufacturer’s instructions carefully when mixing the compound to ensure proper consistency and performance.
Quantity Estimation: Calculate the amount of smoothing compound you’ll need for your project accurately. This will help you avoid running out of material midway through the job or purchasing more than necessary. Refer to the manufacturer’s recommendations and consider factors like the thickness of the application and the square footage of the area to be covered.
Environmental Considerations: Take into account the environmental conditions of your project site when selecting tools and materials. Factors such as temperature, humidity, and ventilation can affect the performance and drying time of the smoothing compound. Choose tools and materials that are suitable for the specific conditions of your project to ensure the best possible results.
Applying the Concrete Smoothing Technique
Once you’ve prepared the concrete surface and gathered the necessary tools and materials, it’s time to start applying the smoothing technique. Follow these steps carefully to achieve a smooth and even finish.
Prime the Surface (Optional): Depending on the type of smoothing compound you’re using, you may need to apply a primer to the concrete surface before proceeding. The primer helps improve adhesion and ensures better results. Follow the manufacturer’s instructions for the primer application and allow it to dry completely before moving on to the next step.
Mix the Smoothing Compound: Prepare the smoothing compound according to the manufacturer’s instructions. Use mixing equipment such as a drill with a mixing paddle or a mixing bucket to achieve a smooth and consistent mixture. Make sure to mix the compound thoroughly to ensure proper performance.
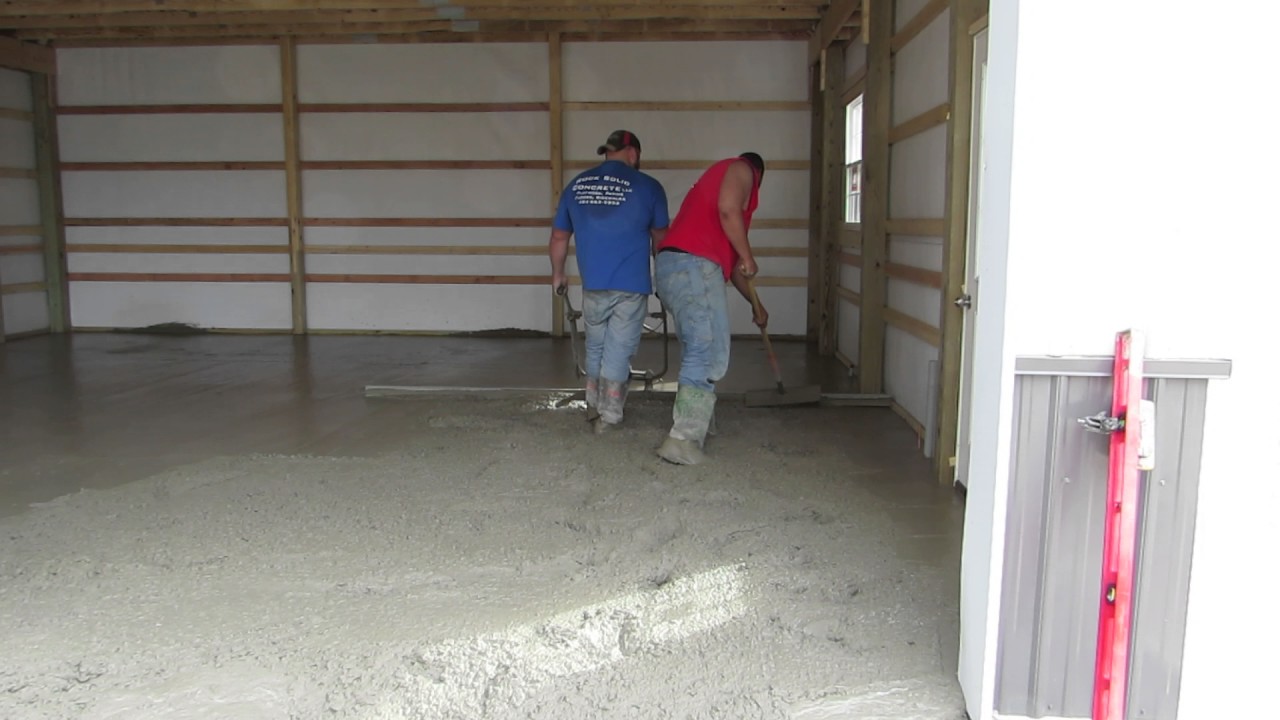
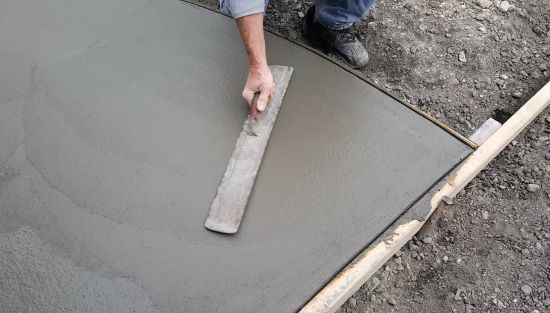
Apply the Compound: Start by pouring the smoothing compound onto the prepared concrete surface in small sections. Use a trowel, float, or squeegee to spread the compound evenly across the surface. Work quickly but carefully to ensure a smooth and even application.
Level the Surface: Once you’ve applied the smoothing compound, use a leveling tool such as a straightedge or a screed to level the surface. Move the tool back and forth across the compound to remove any excess material and achieve a flat and even finish. Pay special attention to areas with uneven spots or ridges.
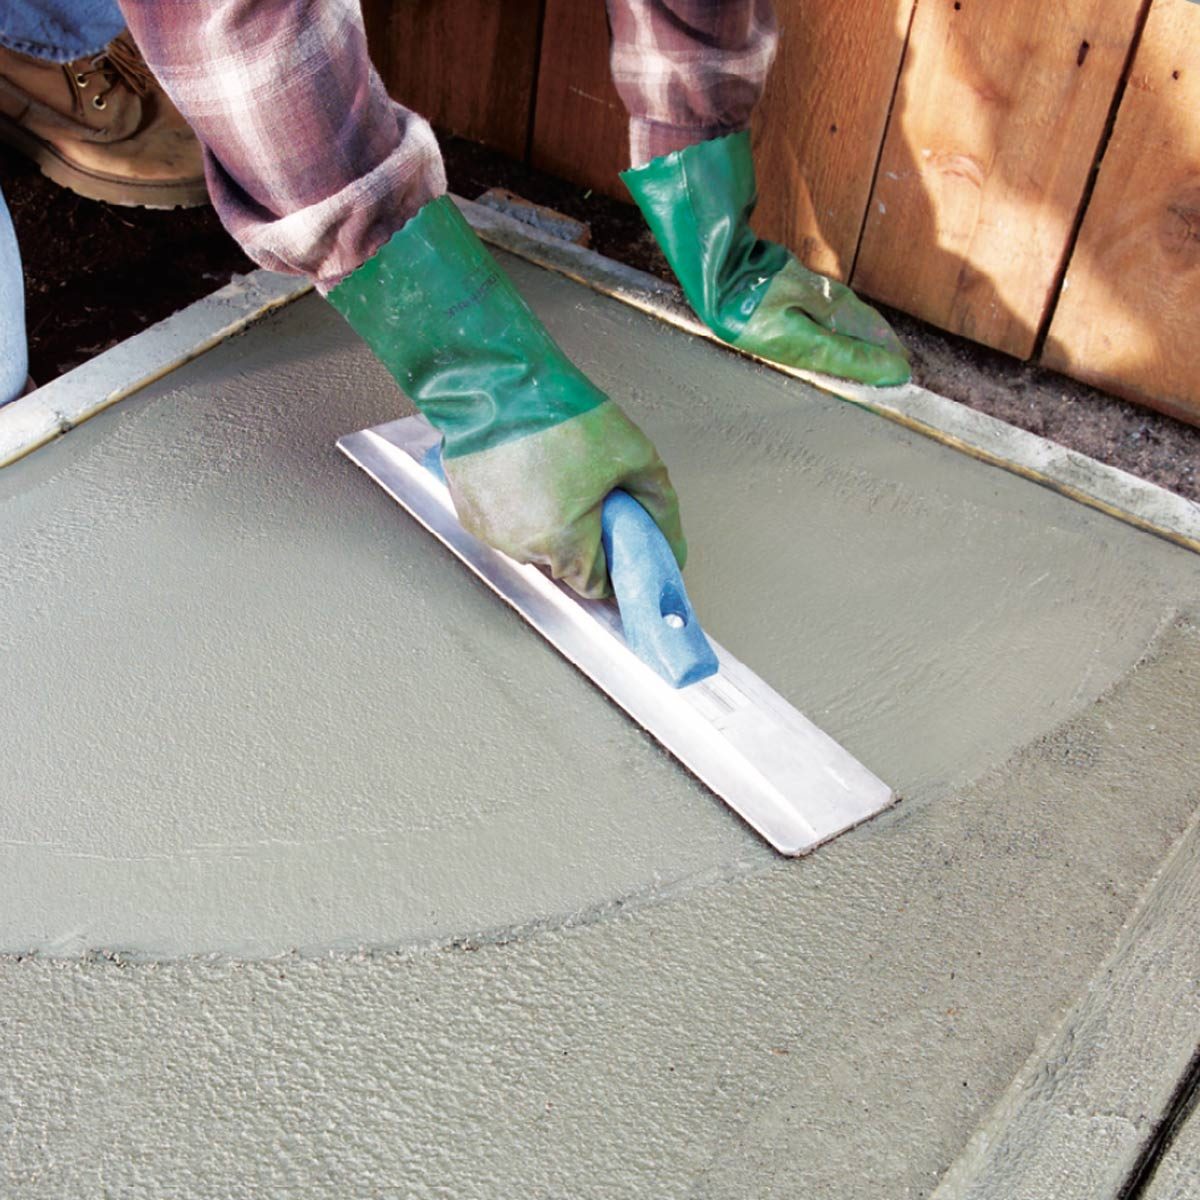
Smooth and Finish: After leveling the surface, use a finishing tool such as a trowel or a float to smooth out any remaining imperfections and create a uniform finish. Work in small circular motions to blend the compound and achieve the desired smoothness. Continue smoothing and finishing until the entire surface is even and smooth.
Allow the Compound to Cure: Once you’ve finished applying the smoothing compound, allow it to cure according to the manufacturer’s instructions. This typically involves allowing the compound to dry for a specific period, during which time it will harden and set. Avoid walking or placing heavy objects on the surface until the compound has fully cured to prevent damage.

Curing and Finishing Touches
Curing is a critical step in the concrete smoothing process that ensures the compound achieves its full strength and durability. Additionally, applying finishing touches can enhance the appearance and performance of your smooth concrete floor.
Curing Process: Proper curing is essential for the long-term durability and performance of your smooth concrete floor. Follow the manufacturer’s recommendations for curing the smoothing compound, which may involve covering the surface with a curing compound, plastic sheeting, or wet curing methods. Allow the compound to cure fully before subjecting it to heavy use or traffic.
Sealing (Optional): Applying a sealer to your smooth concrete floor can enhance its appearance and protect it from stains, water damage, and wear. Choose a high-quality concrete sealer that is suitable for your specific project requirements. Follow the manufacturer’s instructions carefully for proper application and allow the sealer to dry completely before using the floor.
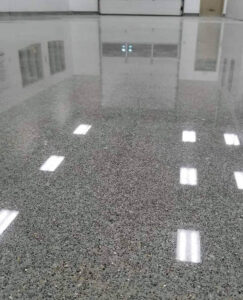
Polishing (Optional): If you’re looking to achieve a polished finish for your smooth concrete floor, you can consider polishing the surface. This process involves using a series of progressively finer grit abrasives to grind and polish the concrete surface to a smooth and glossy finish. Follow the manufacturer’s recommendations for polishing equipment and techniques to achieve the desired results.
Adding Decorative Elements (Optional): To further enhance the appearance of your smooth concrete floor, you can consider adding decorative elements such as colorants, stains, or patterns. These can add visual interest and personalization to your floor, making it a unique and stylish feature of your space. Consult with a professional concrete contractor or designer for guidance on incorporating decorative elements into your project.
Final Inspection: Once you’ve completed the curing and finishing touches, take some time to inspect the smooth concrete floor for any remaining imperfections or issues. Make any necessary repairs or adjustments to ensure the floor meets your expectations in terms of appearance and performance. This final inspection ensures that your smooth concrete floor is ready for use and enjoyment.
Maintenance Planning: Before putting your smooth concrete floor into regular use, it’s essential to develop a maintenance plan to keep it looking its best for years to come. Consider factors such as regular cleaning, periodic resealing, and preventive maintenance to protect your investment and preserve the beauty of your smooth concrete floor.

Maintenance Tips for Keeping Your Concrete Floor Smooth
Once you’ve achieved a smooth concrete floor, it’s essential to implement a maintenance routine to keep it looking its best. Follow these tips to ensure your floor remains smooth and durable for years to come.
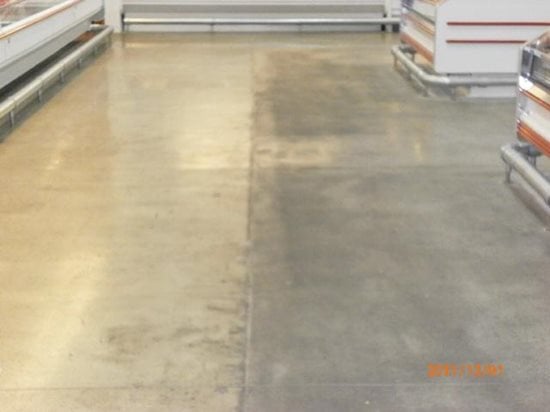
Regular Cleaning: Sweep or vacuum your smooth concrete floor regularly to remove dirt, dust, and debris that can scratch or dull the surface. For deeper cleaning, use a mild detergent solution and a mop to remove stains and spills. Avoid using harsh chemicals or abrasive cleaners that can damage the surface.
Preventive Maintenance: Take proactive measures to prevent damage to your smooth concrete floor. Place furniture pads or coasters under heavy furniture to protect the surface from scratches and dents. Use mats or rugs in high-traffic areas to reduce wear and tear on the floor.
Periodic Resealing: Depending on the type of sealer used on your smooth concrete floor, you may need to reseal it periodically to maintain its protective properties. Follow the manufacturer’s recommendations for resealing frequency and use a high-quality concrete sealer for best results.
Repair Minor Damage: Inspect your smooth concrete floor regularly for any signs of damage, such as cracks, chips, or stains. Repair minor damage promptly using appropriate concrete repair products to prevent further deterioration and maintain the integrity of the floor.
Avoid Harsh Chemicals: Avoid using harsh chemicals or abrasive cleaners on your smooth concrete floor, as these can damage the surface and compromise its appearance. Stick to mild detergents and cleaners specifically formulated for use on concrete surfaces to keep your floor looking its best.
Professional Maintenance: Consider hiring a professional concrete contractor for periodic maintenance and upkeep of your smooth concrete floor. They can provide specialized services such as deep cleaning, resealing, and minor repairs to ensure your floor remains smooth and beautiful for years to come. Schedule regular maintenance appointments to keep your floor in top condition and address any issues before they worsen.

Smooth Finish Concrete Floor – NewPoleBarn.com
Smooth Concrete Floor
How To Finish Concrete Smooth By Using A Steel Trowel – Tips u0026 Tricks
Smooth uneven floors with FLOOR-TOP STG Concrete Floor Topper

How to Finish Concrete : 4 Steps – Instructables

Fixing Concrete Floors – How to Fix Concrete Floors
Liquid epoxy resin floor covering – WATCO FLOWTOP® GREY

Related Posts: