Reclaimed woods are steeped in historical past. With hardwood floors not much has transformed since the 70s to enhance it’s tolerance of normal living circumstances. With ease of maintenance and a wide array of shopping venues, having an engineered wood floor has never ever been easier. Darker colors are also perfect for bedrooms and office rooms, however, the wood should be stronger since these rooms contain heavy furniture that’s likely to be moved regularly.
Images about DIY Engineered Wood Flooring
DIY Engineered Wood Flooring
/cdn.vox-cdn.com/uploads/chorus_image/image/65891794/wood_floors_toutxlbanner.0.jpg)
You are able to put up engineered wood flooring that’s equally as gorgeous and lasts just provided that a good wood floor without the excessive price and the high maintenance tough wood flooring is able to require. Today’s laminate floors are created working with a photographic image of wood, marble, or tile which is bonded to fiberboard, backed with melamine plastic as well as coated with light weight aluminum oxide.
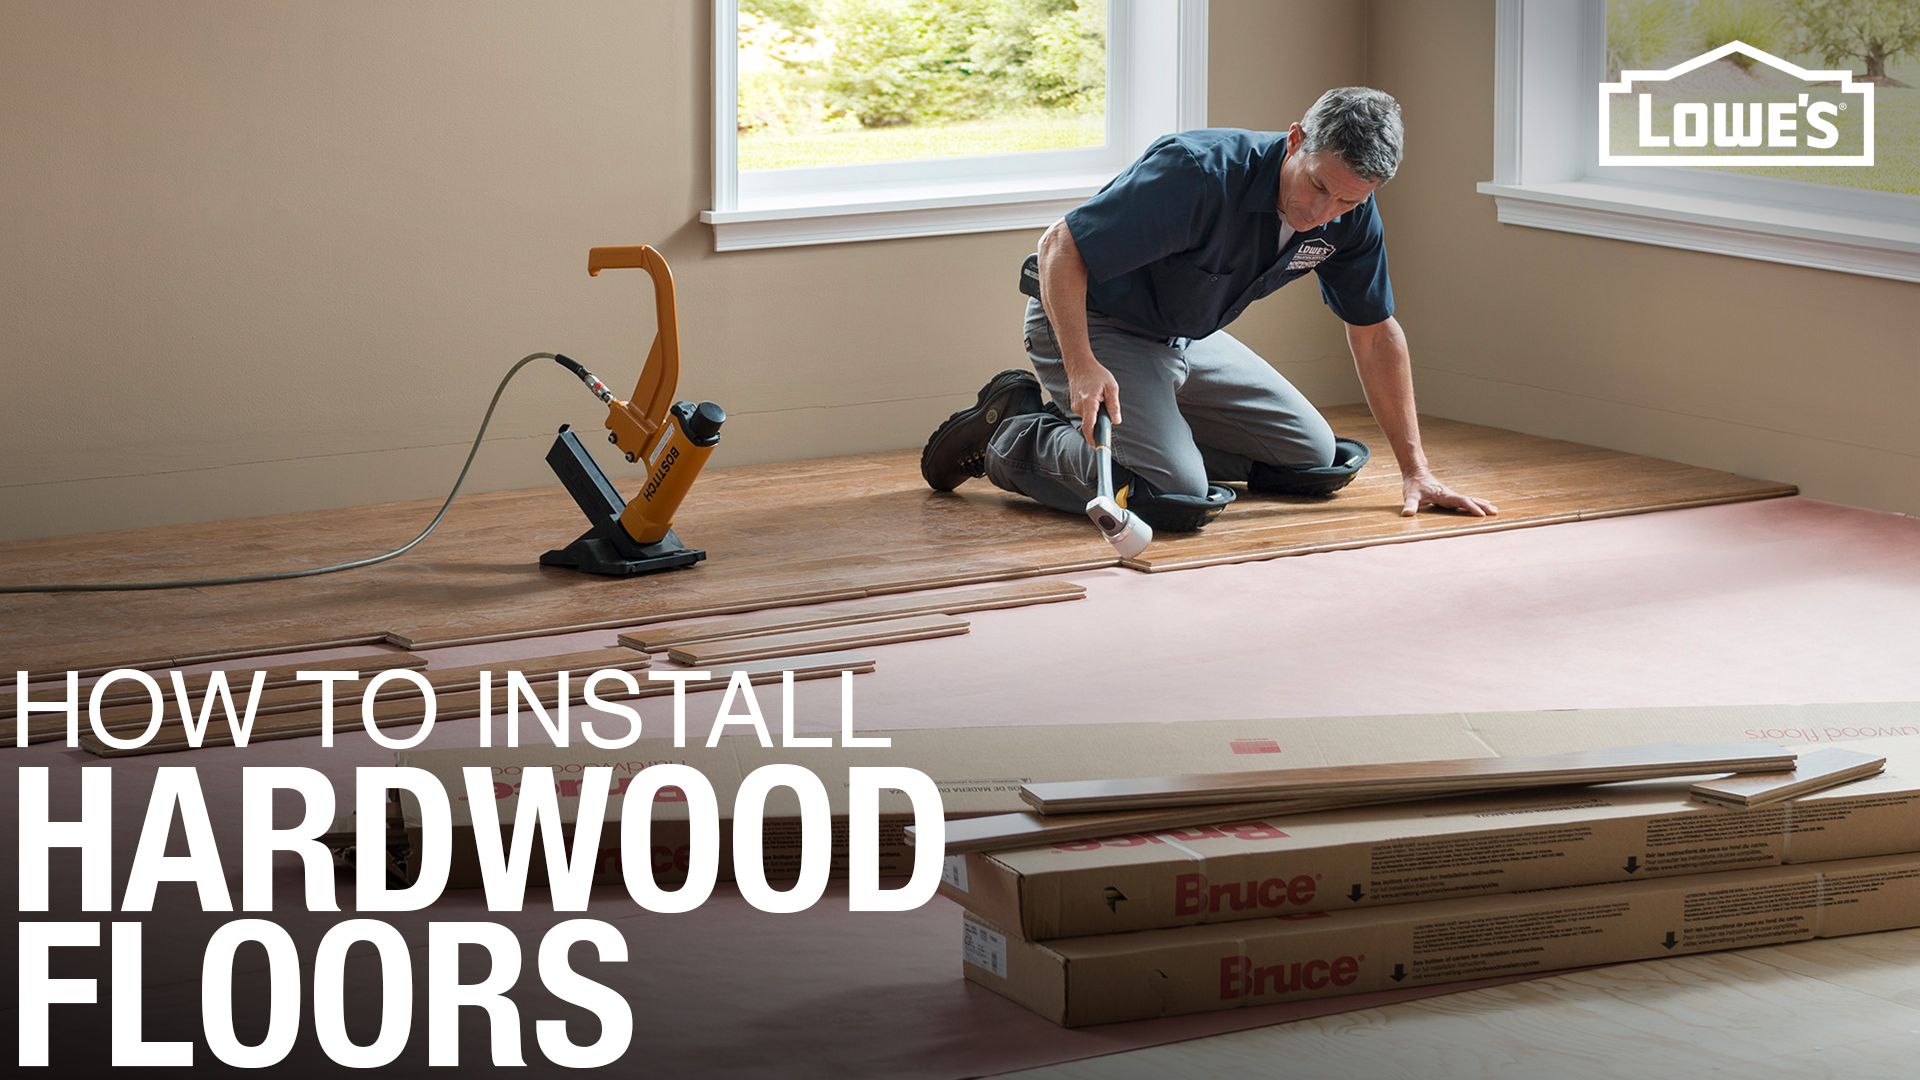
How To Install Engineered Hardwood Flooring
Someone came up with the idea that maybe right now there was a better use for this particular timber – and were they ever correct! Suppliers take this particular old wood, repair it, mill it, after which they make wood flooring in which they market it to home owners as wood floors in brand new and existing homes. Very likely you will not pay any additional because of this reclaimed wood flooring than you would for quite similar species new wood flooring.
How To Lay Engineered Wood Flooring A DIY Guide For Everyone

How To Install Click Lock Engineered Hardwood Flooring
Engineered Flooring Installation: PRO or DIY? BuildDirect

DIY Wood Flooring Installation Guide – Wood and Beyond Blog

How to Install DIY glue-down engineered hardwood flooring
Floating Wood Floor: Install One in 8 Steps – This Old House
/cdn.vox-cdn.com/uploads/chorus_asset/file/19493784/howto_tilefloor_04.jpg)
A Hardwood Floor Installation Guide for Both Engineered and Non
How To Install Click Lock Engineered Hardwood Flooring
How to Install an Engineered Hardwood Floor
Guide: How to Install Engineered Hardwood Floors
Installing Hardwood Floors on a Budget Budget Dumpster
How to Install an Engineered Hardwood Floor
Related Posts:
- Dark Wood Floor Pattern
- Wood Floor White Stain
- Dark Wood Floors Master Bedroom
- Grey Faux Wood Flooring
- Walnut Solid Wood Flooring
- Extra Wide Wood Flooring
- Cherry Wood Floor Bedroom
- White Oak Wood Tile Flooring
- Oak Solid Wood Flooring
- Dark Wood Floor Dining Room
DIY Engineered Wood Flooring: A Comprehensive Guide
Engineered wood flooring is an increasingly popular choice for homeowners looking to give their floors a makeover. These floors are made from layers of real wood and are designed to be both durable and aesthetically pleasing. With a wide range of colors and styles available, engineered wood flooring can be used to create a unique look in any room. Additionally, DIY engineered wood flooring is becoming more popular as homeowners realize the cost savings associated with installing the flooring themselves. In this article, we’ll explore what makes DIY engineered wood flooring such a great choice, the materials needed for installation, and tips and tricks for successfully completing the project.
What Is DIY Engineered Wood Flooring?
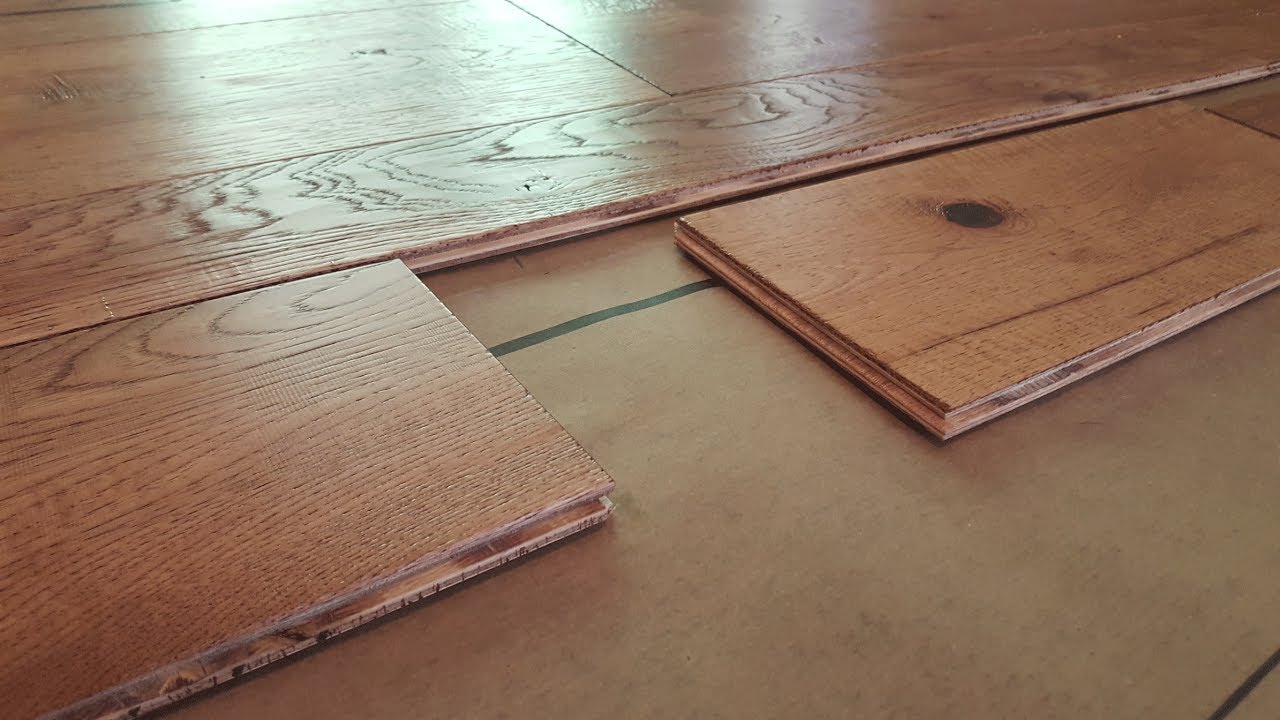
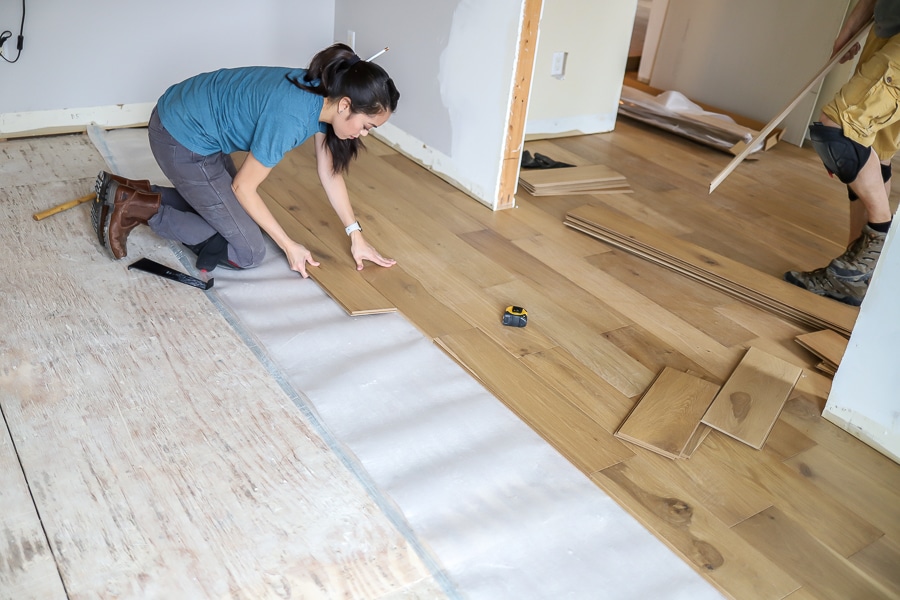
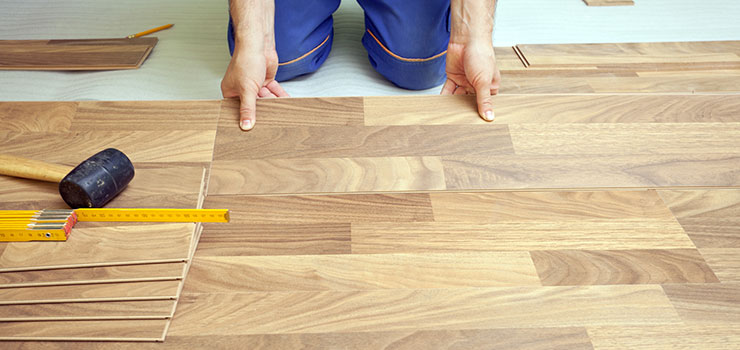
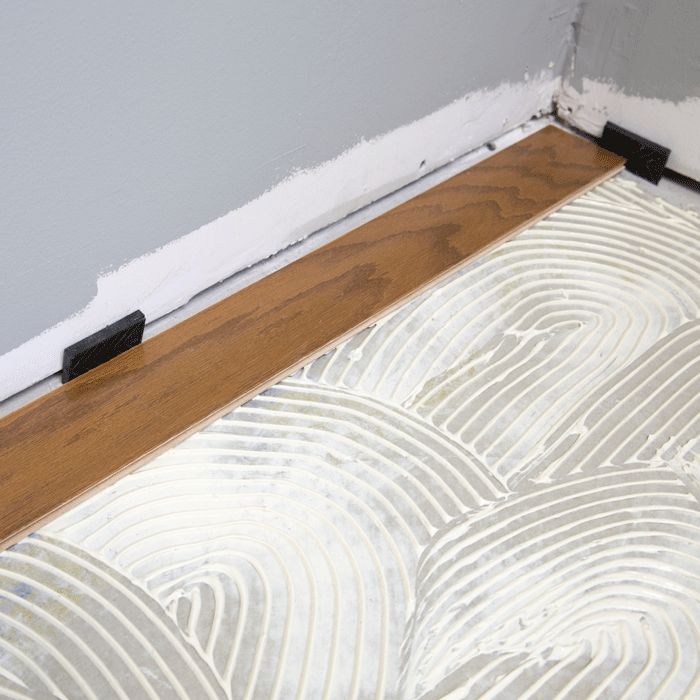
DIY engineered wood flooring is a type of hardwood flooring that consists of several layers of real wood that have been bonded together using heat and pressure. The top layer is usually made from a hardwood species such as oak or maple, while the bottom layers are typically composed of softer woods or plywood. This type of flooring is often referred to as “floating” because it does not need to be nailed down like traditional hardwood floors. Instead, the planks are simply laid in place and held together by an adhesive or “click-lock” system. This makes DIY engineered wood flooring an ideal choice for homeowners looking for an easy installation process.
Benefits of DIY Engineered Wood Flooring
There are many benefits to choosing DIY engineered wood flooring for your home. One of the biggest advantages is the cost savings associated with installing it yourself. Because you don’t have to pay for professional labor, you can save hundreds (or even thousands) of dollars on your project. Additionally, DIY engineered wood flooring is extremely durable and can last up to 25 years or more if properly cared for. It is also less susceptible to damage caused by moisture and temperature changes than traditional hardwood floors. Finally, DIY engineered wood flooring comes in a variety of styles and colors, so you can easily find something that fits your home’s interior design scheme.
Materials Needed for Installation
Before beginning the installation process, it’s important to make sure you have all the necessary materials on hand. These include the actual planks of engineered wood flooring, an adhesive or click-lock system (if needed), trowels, spacers, saws (if needed), and other tools such as a level and hammer. You also need to make sure you have enough supplies to finish the job – including extra adhesive/click-lock material in case of mistakes or shortages – as well as safety equipment such as goggles, gloves, dust masks, etc.
Installation Process
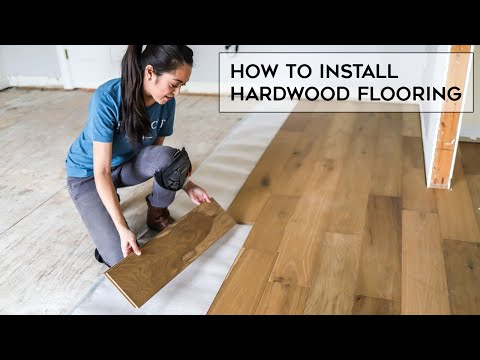
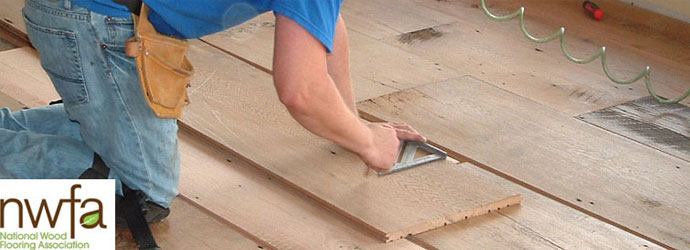
Installing DIY engineered wood flooring is relatively straightforward but requires some careful preparation beforehand. Begin by measuring the room where the floor will be installed and then calculate how many planks you’ll need in order to cover the area (plus 10% extra). Next, if you’re using an adhesive system, apply it evenly across the subfloor. Then, lay down the first row of planks along one wall and use spacers between each plank to ensure a consistent gap between them. Continue laying down additional rows until the entire room is covered. Once all the planks are in place, use a saw to cut around door frames or other obstacles as needed. Finally, secure any loose boards with nails or screws and enjoy your new DIY engineered wood floor!
Tips & Tricks for Successful Installation
Before embarking on any project involving DIY engineered wood flooring, it’s important to remember a few key tips and tricks that can help ensure a successful outcome:
•Always measure twice before cutting – this will help you avoid having to buy extra materials due to mistakes.
•Ensure that your subfloor is completely clean before applying any adhesive or click-lock systems – this will help ensure that your new floors stay put without any problems.
•Allow plenty of time for your project – rushing through any part of the process can result in costly mistakes or damage to your new floors.
•Be sure to wear protective gear when sawing – this will help keep you safe from any potential accidents during installation.
•Finally,