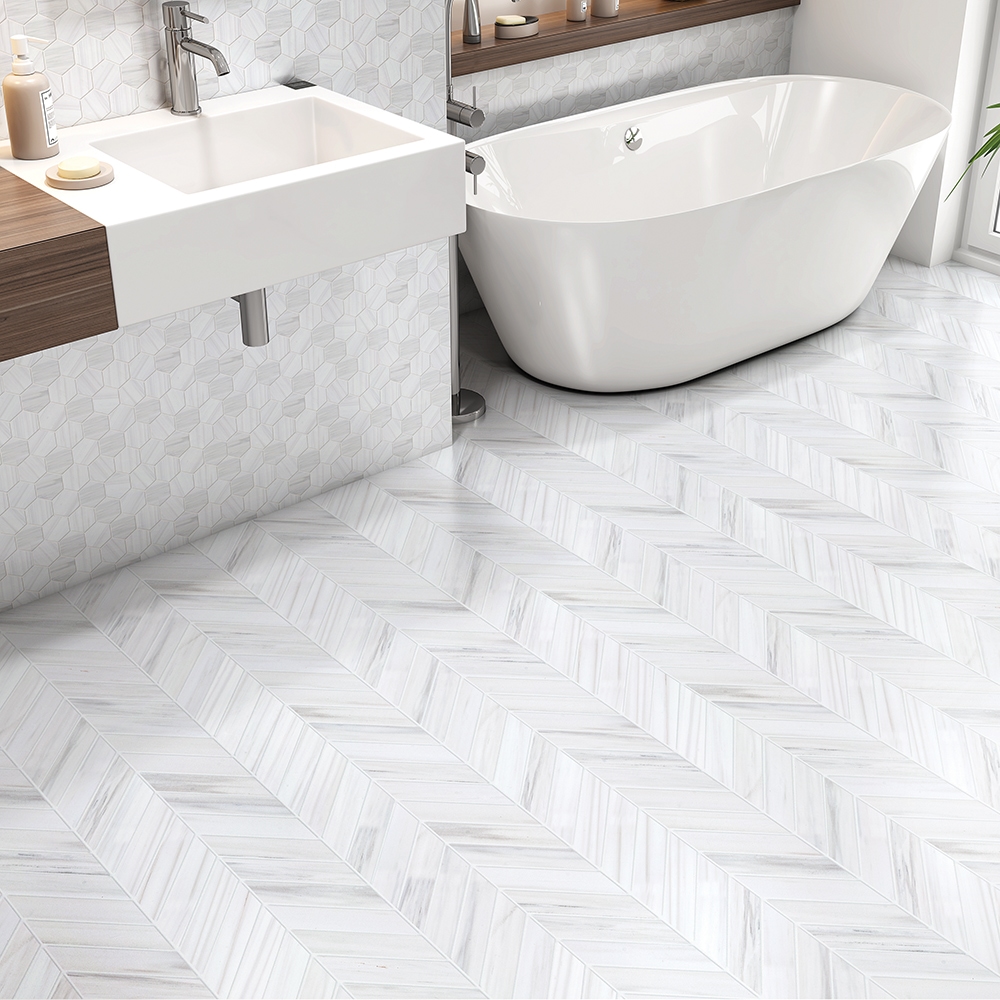
My foyer renovation took an unexpected turn when I discovered chevron marble floor tiles during a visit to a high-end stone supplier. The distinctive V-shaped pattern immediately caught my attention, offering a sophisticated alternative to traditional straight-lay installations that would transform my entrance into a stunning focal point. This comprehensive guide chronicles my journey from concept to completion, sharing the challenges, triumphs, and lessons learned while creating a luxurious chevron marble floor.
Understanding Chevron Pattern Fundamentals
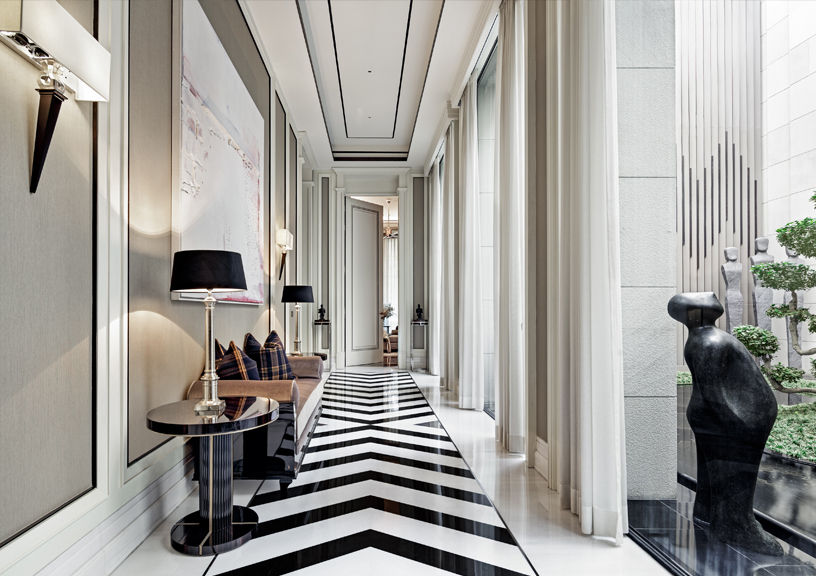
Chevron patterns create dynamic visual movement through precisely cut rectangular tiles arranged in continuous zigzag formations across the floor surface. I learned that true chevron requires tiles cut at specific angles, typically 45 degrees, creating pointed ends that fit together seamlessly without gaps. This differs from herringbone patterns, where rectangular tiles meet at right angles, producing a distinctly different aesthetic effect.
The geometric precision required for chevron installations demands exceptional measuring and cutting accuracy throughout the entire process. I discovered that even minor variations in tile cutting or placement create noticeable pattern disruptions that compromise the overall appearance. Professional diamond blade saws and experienced stone fabricators became essential for achieving the precise angles necessary for seamless chevron pattern execution.
Pattern flow considerations significantly impact the visual success of chevron marble installations. I spent considerable time planning the pattern layout to ensure balanced visual weight and proper alignment with room geometry. Starting points, ending transitions, and centerline establishment prove critical for creating harmonious patterns that enhance rather than fight the architectural features of the space.
Selecting Premium Marble Varieties
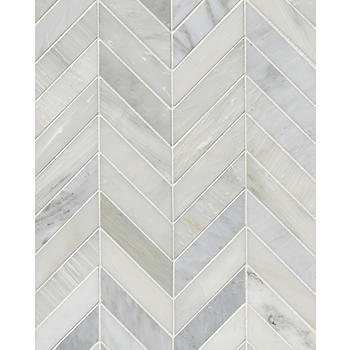
Carrara marble emerged as my preferred choice for chevron installations due to its classic white background with subtle gray veining that complements the pattern’s geometric nature. The consistent coloring and moderate veining intensity prevent visual competition between the natural stone characteristics and the bold chevron geometry. I found that heavily veined marbles can overwhelm the pattern, while solid colors lack the natural beauty that makes marble desirable.
Calacatta marble offered a more dramatic option with bolder veining patterns and whiter backgrounds that create a striking contrast within chevron arrangements. I considered this premium option for smaller areas where the higher cost per square foot becomes more manageable. The pronounced veining requires careful pattern planning to ensure balanced distribution of natural markings across the chevron field.
Emperador marble provided rich brown tones that create warm, sophisticated chevron patterns perfect for traditional and transitional interior designs. I appreciated how the natural color variations within individual tiles add depth and interest to the geometric pattern without overwhelming the overall composition. The darker color palette also offers practical advantages in high-traffic areas where lighter marbles show wear more readily.

Advanced Layout and Planning Techniques
Center point establishment became crucial for achieving balanced chevron patterns that appear intentional rather than accidental. I created detailed floor plans showing exact tile placement, starting points, and transition areas before ordering materials. This planning phase prevented costly mistakes and material waste while ensuring the pattern flowed naturally throughout the installation area.
Border treatments require special consideration when transitioning from chevron fields to walls, doorways, and other flooring materials. I designed custom border solutions using complementary marble pieces that frame the chevron pattern elegantly. These borders provide visual completion while accommodating the angular cuts required where chevron patterns meet architectural elements.
Template creation simplified the cutting process and ensured consistent tile dimensions throughout the installation. I worked with my stone fabricator to create precise cutting templates that eliminated measuring errors and produced uniform tile shapes. This upfront investment in accuracy paid dividends during installation when every piece fit perfectly without field modifications.
Professional Installation Requirements
Substrate preparation for marble installations requires exceptional attention to levelness and stability that exceeds standard ceramic tile requirements. I ensured my subfloor met stringent flatness tolerances within 1/8 inch over 10 feet, using self-leveling compounds where necessary. Marble’s weight and rigidity amplify substrate imperfections, making thorough preparation essential for long-term performance.
Adhesive selection became critical for supporting marble’s weight while allowing for natural stone movement and settling. I used premium modified thinset specifically formulated for natural stone that provides superior bond strength without staining marble surfaces. The adhesive must also accommodate the thermal expansion characteristics of natural stone materials.
Installation sequencing required careful planning to maintain pattern integrity while working around obstacles and room geometry. I started from predetermined center points and worked outward systematically, checking pattern alignment frequently. The precision required for chevron patterns leaves little room for error correction once tiles are set in adhesive.
Cutting and Fabrication Challenges
Precision cutting requirements for chevron patterns demand professional fabrication equipment and expertise that exceed typical DIY capabilities. I partnered with an experienced stone fabricator who specialized in geometric patterns and possessed the diamond blade saws necessary for achieving accurate angle cuts. The investment in professional fabrication ensured consistent results impossible to achieve with standard tile cutting tools.
Waste calculation becomes more complex with chevron patterns due to the angled cuts and pattern matching requirements. I ordered 15-20% additional material beyond basic square footage calculations to account for cutting waste and potential breakage during fabrication. Natural stone’s brittleness makes breakage during cutting inevitable, requiring adequate material reserves.
Quality control during fabrication prevented installation problems and pattern disruptions that could compromise the entire project. I inspected each cut tile for dimensional accuracy, surface quality, and edge condition before accepting delivery. Rejecting substandard pieces at fabrication rather than during installation saved time and maintained pattern integrity throughout the process.
Maintenance and Long-Term Care
Sealing requirements for marble floors become more complex with chevron patterns due to increased surface area and grout line exposure. I applied penetrating sealers specifically formulated for marble that protect against staining while maintaining the stone’s natural appearance. The geometric pattern creates more edges and joints that require careful sealer application for complete protection.
Daily maintenance routines for chevron marble floors require gentle cleaning products that won’t damage natural stone surfaces or compromise sealer effectiveness. I use pH-neutral cleaners and microfiber mops that clean effectively without scratching marble surfaces. The pattern’s visual complexity helps disguise minor wear while highlighting the floor’s geometric beauty.
Professional restoration services become valuable for maintaining chevron marble floors’ appearance over time through periodic polishing and resealing. I schedule professional maintenance every 2-3 years to address minor scratches, restore surface luster, and renew protective sealers. This preventive approach maintains the floor’s luxury appearance while protecting my substantial investment in premium materials.
What’s the cost difference between chevron and standard marble tile installations?
Chevron marble installations typically cost 40-60% more than standard layouts due to precision cutting requirements and increased material waste. My 200-square-foot foyer cost approximately $25 per square foot installed compared to $15 for standard marble layouts. Professional fabrication, specialized installation techniques, and higher material waste contribute to increased costs. However, the dramatic visual impact and luxury appeal justify the premium for high-visibility areas where design impact matters most.
Can I install chevron marble tiles myself or do I need professional help?
Chevron marble requires professional installation due to precision cutting, heavy material handling, and specialized techniques necessary for pattern success. I attempted initial layout myself but quickly realized the complexity exceeded DIY capabilities. Professional installers possess the tools, experience, and skills necessary for achieving seamless patterns. The investment in professional installation protects expensive marble materials and ensures long-term performance that justifies the labor costs.

How do I maintain the chevron pattern’s appearance over time?
Regular sealing every 12-18 months protects marble from staining while maintaining natural stone appearance and pattern clarity. I use penetrating sealers applied according to manufacturer instructions, paying special attention to grout lines and tile edges. Daily cleaning with pH-neutral products and immediate spill cleanup prevents permanent staining. Professional polishing every few years restores surface luster and removes minor scratches that can dull the pattern’s visual impact over time.
What marble varieties work best for chevron pattern installations?
Carrara marble offers ideal balance of subtle veining and consistent coloring that complements chevron geometry without visual competition. I chose Carrara for its classic appearance and moderate cost compared to premium varieties. Calacatta provides more dramatic veining for smaller areas, while Emperador offers warm brown tones for traditional designs. Avoid heavily veined marbles that can overwhelm the geometric pattern or solid colors that lack natural stone character.
![]()
How do I plan transitions between chevron marble and other flooring materials?
Border strips using complementary marble or contrasting materials provide elegant transitions between chevron fields and adjacent flooring. I designed custom borders that frame the chevron pattern while accommodating height differences and material changes. Transition planning must consider pattern flow, visual weight, and practical requirements like moisture barriers. Professional design consultation helps create seamless transitions that enhance rather than interrupt the overall floor design.
What are the main challenges with chevron marble floor installations?
Precision cutting requirements demand professional fabrication equipment and expertise that exceed standard tile installation capabilities. Pattern alignment becomes critical throughout installation, requiring careful planning and skilled execution. Material waste increases due to angled cuts and pattern matching needs. Substrate preparation must meet stringent flatness requirements. The complexity requires experienced installers familiar with geometric pattern challenges. Despite difficulties, proper planning and professional execution create stunning results that justify the effort.
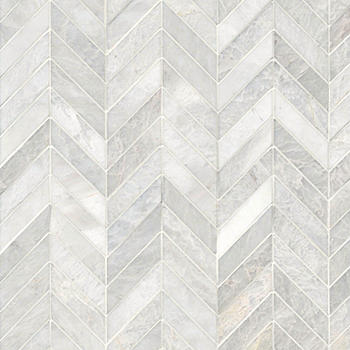
White and Gray Marble Chevron Bath Floor Tiles

Six Must-Haves Needed to Seduce Buyers – The New York Times

Related Posts: